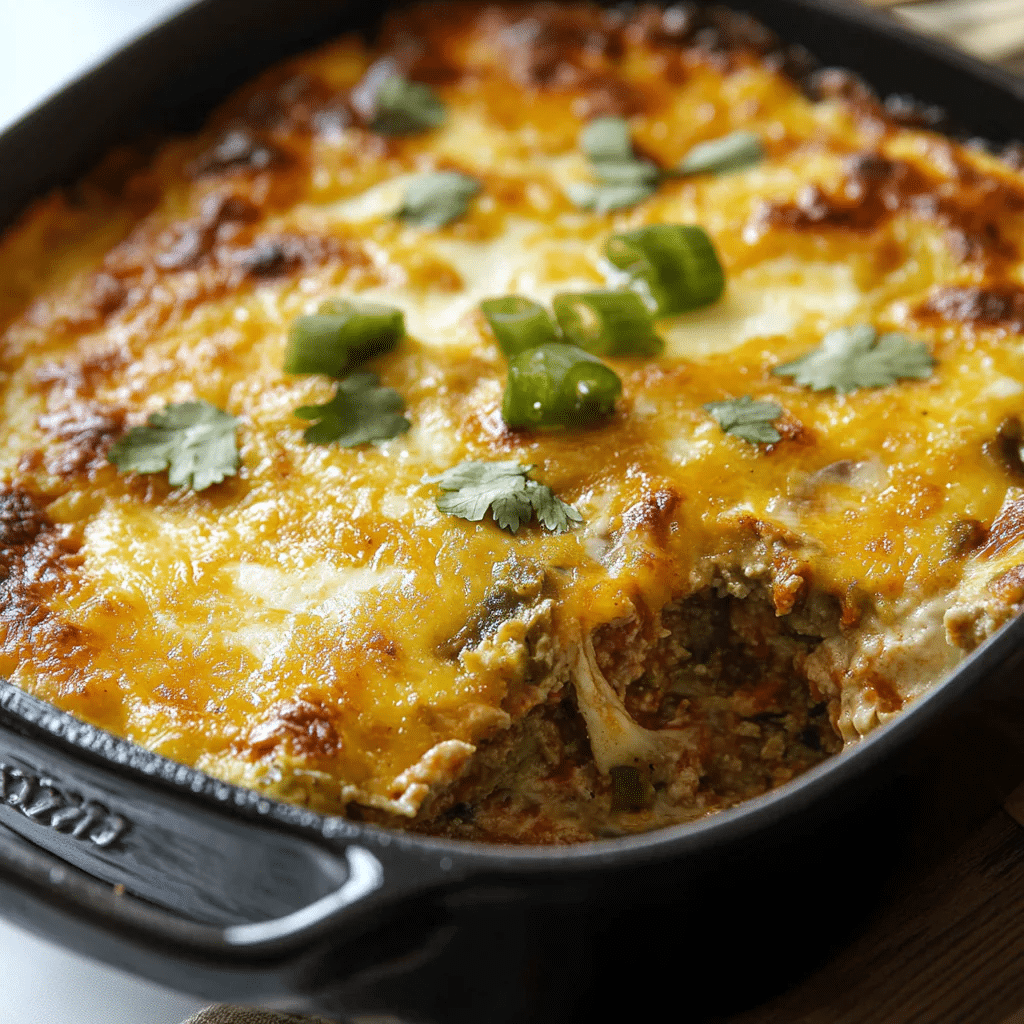
This Easy Chile Relleno Casserole is the kind of dish that makes weeknight cooking feel like a celebration. Inspired by the classic Mexican chile relleno but simplified into a no-fuss, layered casserole, it delivers all the cheesy, mildly spicy, savory goodness—without the deep frying or complicated prep. With roasted green chiles, gooey cheese, and a light, fluffy egg batter baked to golden perfection, this recipe is pure comfort in a dish and ready to impress with minimal effort.
Why You’ll Love This Recipe
- Fast and fuss-free: No need to char and peel chiles or stand over hot oil frying. Just layer, bake, and enjoy.
- Flavor-packed: The smoky flavor of roasted chiles, melty cheese, and a light, savory egg base create an irresistible combination.
- Great for all occasions: Whether it’s brunch, a weeknight dinner, or something to bring to a potluck, this casserole is always a hit.
- Kid and crowd-friendly: Mild enough for picky eaters, but with enough flavor to satisfy everyone at the table.
Ingredients You’ll Need

Here’s what makes this chile relleno casserole so special—and so easy:
- Roasted green chiles: These are the heart of the dish. Use canned whole green chiles for ease, and be sure to pat them dry so the casserole doesn’t get watery.
- Monterey Jack or cheddar cheese: Melts beautifully and adds richness. Mix the two if you like extra cheesiness.
- Eggs: Create the fluffy, slightly custardy texture that holds the casserole together.
- Milk: Combines with the eggs for a soft, tender base. Whole milk works best for creaminess.
- All-purpose flour: Helps the egg mixture set properly and gives it a bit of structure.
- Baking powder: Adds a slight lift and keeps the texture light and airy.
- Salt and pepper: Just a pinch to balance the flavors and enhance everything else.
Variations
Want to change it up? Here are a few fun twists:
- Add meat: Browned ground beef, cooked chorizo, or shredded chicken can be layered between the chiles and cheese.
- Spicy version: Use hot green chiles or add a chopped jalapeño or two to the egg mixture for some extra kick.
- More veggies: Diced onions, corn, or sautéed mushrooms can easily be folded in for a veggie-packed version.
- Cheese swap: Try pepper jack for heat, or use a blend of Mexican cheeses for more depth.
How to Make Easy Chile Relleno Casserole
Step 1: Prep the Oven and Dish
Preheat your oven to 350°F. Lightly grease a baking dish (8×8 or 9×9 works well) to keep everything from sticking.
Step 2: Layer the Chiles and Cheese
Lay half of the green chiles flat on the bottom of the dish. Top with a generous layer of cheese. Repeat with another layer of chiles and more cheese on top.
Step 3: Mix the Egg Batter
In a mixing bowl, whisk together the eggs, milk, flour, baking powder, salt, and pepper until smooth. The batter should be pourable and lump-free.
Step 4: Pour and Bake
Pour the egg mixture evenly over the chile and cheese layers. Use a spatula to gently press the top to make sure everything is covered. Bake uncovered for about 40–45 minutes, or until puffed, golden, and set in the center.
Step 5: Cool Slightly and Serve
Let the casserole rest for 5–10 minutes to firm up before slicing. This helps the layers stay intact and makes serving a breeze.
Pro Tips for Making the Recipe
- Drain the chiles well: Extra moisture can make the casserole soggy, so blot them with paper towels if needed.
- Use room temperature eggs and milk: This helps the batter mix more evenly and bake more consistently.
- Don’t overbake: You want the center just set—overbaking can dry it out. Look for a golden top and slight jiggle in the middle.
- Let it rest: This makes slicing cleaner and improves the texture. Trust the process!
How to Serve
This casserole is super versatile and pairs beautifully with a variety of sides:
Breakfast or Brunch:
Serve it with hash browns, breakfast potatoes, or a simple fruit salad.
Lunch or Dinner:
Pair with Spanish rice, refried beans, or a crisp green salad with a zesty lime vinaigrette.
Toppings:
Add sour cream, avocado slices, chopped cilantro, or a drizzle of salsa verde for extra flair and flavor.
Make Ahead and Storage
Storing Leftovers
Leftovers can be kept in an airtight container in the refrigerator for up to 4 days. The flavors actually deepen a bit over time!
Freezing
This casserole freezes well. Let it cool completely, then wrap tightly and freeze for up to 2 months. Thaw in the fridge overnight before reheating.
Reheating
Reheat slices in the microwave, or pop the whole casserole back in the oven at 350°F until warmed through (cover with foil if needed to avoid overbrowning).
FAQs
Can I use fresh chiles instead of canned?
Yes! If you have time, roast and peel fresh Anaheim or poblano chiles. It adds extra depth of flavor, but the canned version works wonderfully for ease.
Is this recipe gluten-free?
As written, no—because of the flour. But you can easily substitute with a gluten-free flour blend and it turns out just as delicious.
Can I make this dairy-free?
Yes, though the texture may change slightly. Use your favorite non-dairy milk and a good melting dairy-free cheese.
Can I double the recipe?
Absolutely. Just use a larger baking dish (like a 9×13) and extend the baking time slightly, checking for doneness in the center.
Final Thoughts
This Easy Chile Relleno Casserole is everything we love about the classic dish, minus the hassle. It’s simple, flavorful, and endlessly adaptable—just the kind of recipe you’ll want to keep in regular rotation. Whether it’s for a cozy dinner or a lazy Sunday brunch, this one’s sure to win hearts at the table. Give it a try and see just how easy delicious can be!
Print
Easy Chile Relleno Casserole Recipe
- Prep Time: 10 minutes
- Cook Time: 45 minutes
- Total Time: 55 minutes
- Yield: 6 servings
- Category: Main Dish
- Method: Baking
- Cuisine: Mexican
- Diet: Vegetarian
Description
An easy and cheesy Chile Relleno Casserole that brings all the flavor of traditional chile rellenos without the hassle of frying. Perfect for a weeknight dinner or brunch.
Ingredients
- 2 cans (7 oz each) whole green chiles, drained
- 2 cups shredded Monterey Jack cheese
- 2 cups shredded cheddar cheese
- 4 large eggs
- 1/2 cup all-purpose flour
- 1 1/2 cups milk
- 1/2 teaspoon baking powder
- 1/2 teaspoon salt
- 1/4 teaspoon black pepper
Instructions
- Preheat the oven to 350°F (175°C). Lightly grease a 9×13 inch baking dish.
- Layer half of the green chiles in the bottom of the dish.
- Sprinkle half of the Monterey Jack and cheddar cheeses over the chiles.
- Repeat with remaining chiles and cheeses to form a second layer.
- In a medium bowl, whisk together the eggs, flour, milk, baking powder, salt, and pepper until smooth.
- Pour the egg mixture evenly over the layered chiles and cheese.
- Bake in the preheated oven for 40–45 minutes, or until the top is golden and the casserole is set in the center.
- Let it cool for 5–10 minutes before slicing and serving.
Notes
- You can add cooked ground beef or chorizo between layers for a meatier version.
- Serve with salsa, sour cream, or fresh avocado for added flavor.
- This dish reheats well and makes great leftovers.