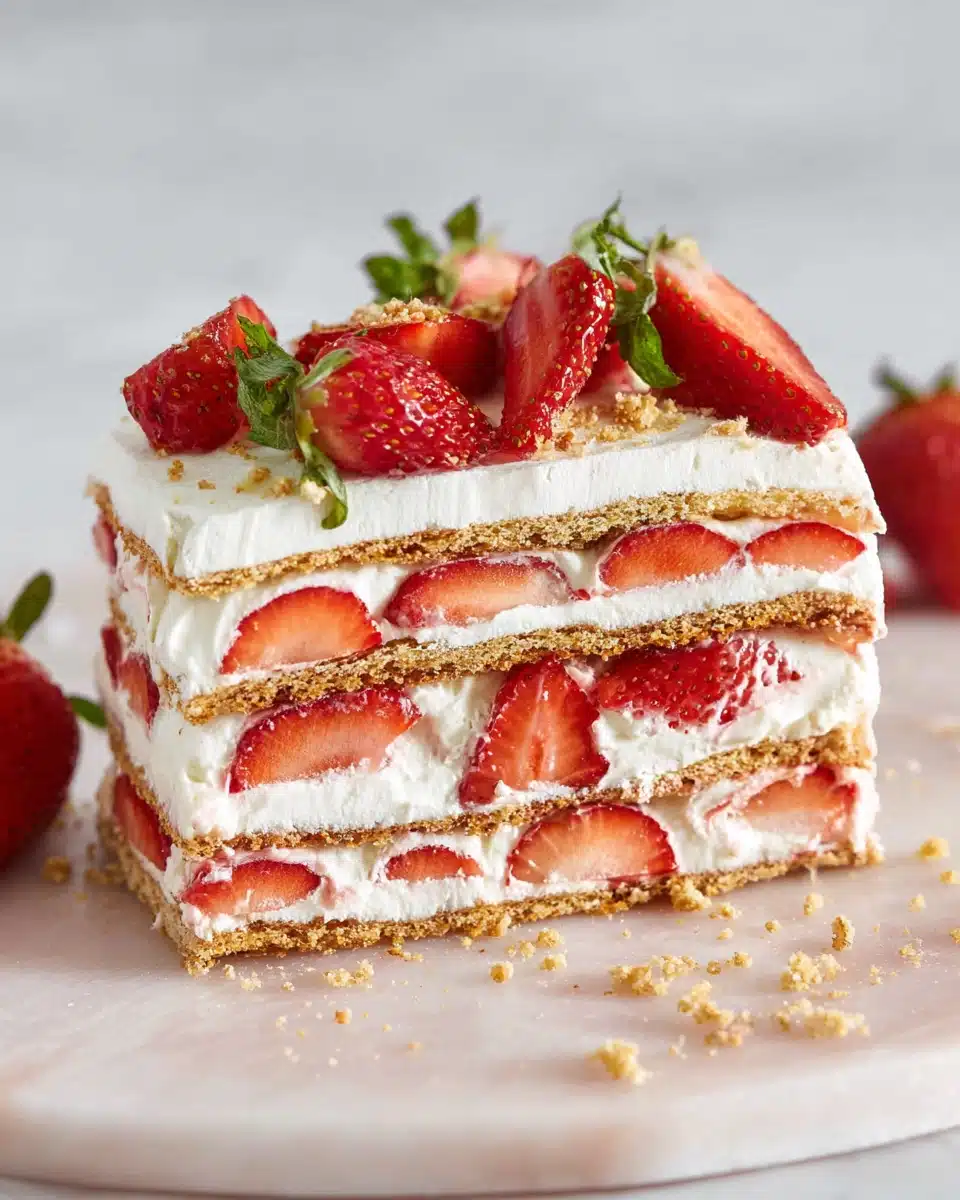
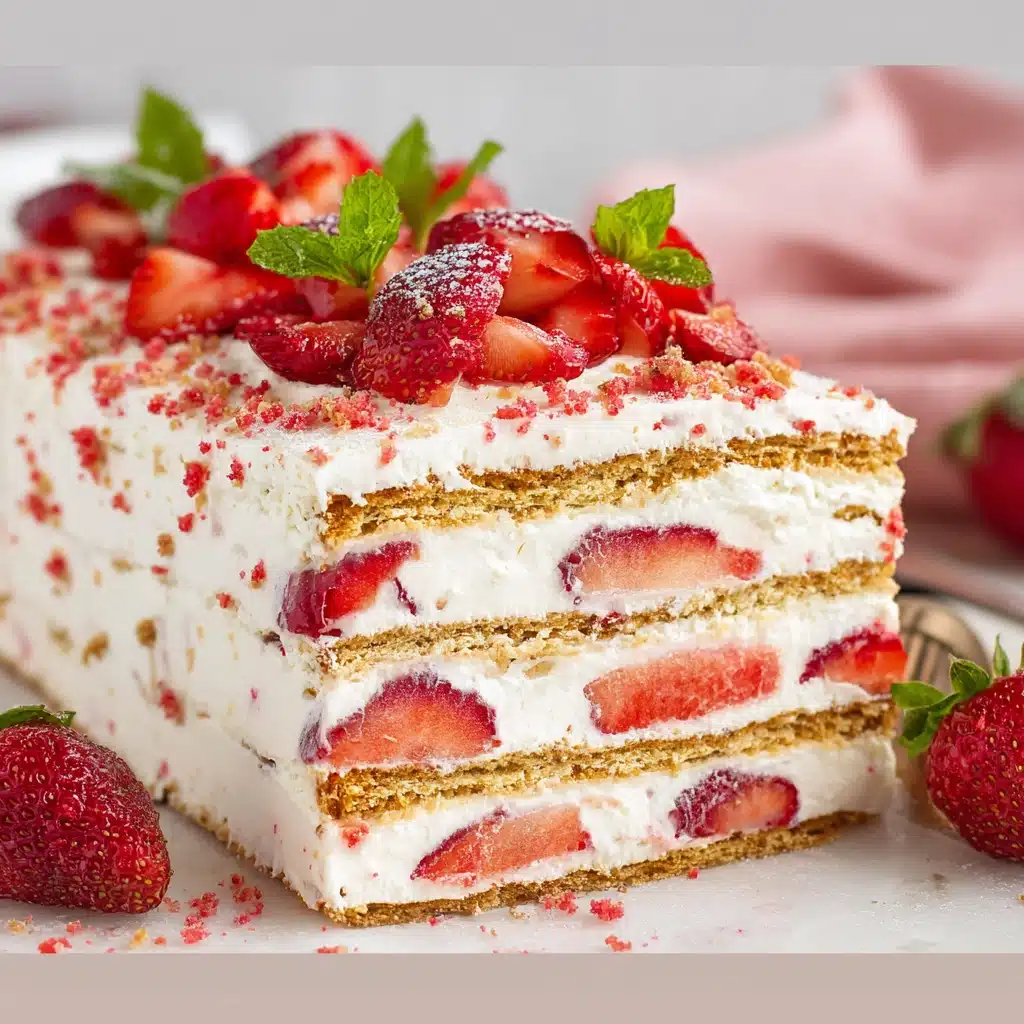
If there’s a single dessert that radiates summer and joy with every forkful, it has to be Strawberry Icebox Cake. Luscious layers of ripe strawberries, pillowy whipped cream, and tender graham crackers meld together into a chilled, no-bake treat that is as easy to make as it is impressive to serve. This classic dessert is a celebration of simple, fresh ingredients that magically transform into a creamy, refreshing slice of nostalgia. Whether you’re hosting a backyard barbecue or just craving something sweet on a weeknight, Strawberry Icebox Cake never fails to delight both kids and adults alike.
Ingredients You’ll Need
The beauty of Strawberry Icebox Cake lies in its simplicity – every ingredient has a starring role, bringing freshness, comfort, and vibrant flavor. Each component is thoughtfully chosen, making this dessert more than the sum of its parts.
- Fresh Strawberries: Juicy, ripe strawberries provide the luscious sweetness and beautiful pop of color that define this cake. Slice them thin for easy layering.
- Graham Crackers: These absorb the moisture from the cream and strawberries, softening to create the perfect “cake” texture with a hint of honey flavor.
- Heavy Whipping Cream: Whipped to soft peaks, this gives the cake its dreamy, cloud-like texture.
- Powdered Sugar: Sweetens the whipped cream just enough without making it heavy.
- Vanilla Extract: A splash brings depth and warmth to the whipped cream, enhancing the overall flavor.
- Salt: Just a pinch balances the sweetness and makes every flavor pop.
How to Make Strawberry Icebox Cake
Step 1: Whip the Cream
Start by pouring the cold heavy whipping cream into a large mixing bowl. Add the powdered sugar, vanilla extract, and a pinch of salt, then whip everything together with an electric mixer on medium-high until soft, fluffy peaks form. This homemade whipped cream is what sets Strawberry Icebox Cake apart from anything store-bought – don’t skimp on the whipping time!
Step 2: Prep the Strawberries
Wash, hull, and slice your strawberries thinly. Try to keep the slices even, so each bite is packed with sweet berry flavor and the layers look neat and tidy. Set a handful aside if you’d like to decorate the top for a finishing flourish.
Step 3: Layer the Goodness
Grab a 9×13 inch pan (glass or ceramic both work!), and start by spreading a thin layer of whipped cream on the bottom. Next, line the pan with graham crackers, breaking them if needed to fit snugly. Add a generous layer of whipped cream, then a single layer of sliced strawberries. Repeat this process – graham crackers, cream, strawberries – until you reach the top of the pan, finishing with a final layer of whipped cream and a pretty arrangement of reserved strawberries.
Step 4: Chill to Perfection
Cover your assembled cake tightly with plastic wrap and slide it into the fridge for at least 4 hours, though overnight is even better. During this time, the graham crackers absorb moisture from the cream and berries, softening up into a perfectly cake-like texture. Patience really pays off here for the dreamiest Strawberry Icebox Cake experience!
Step 5: Slice and Serve
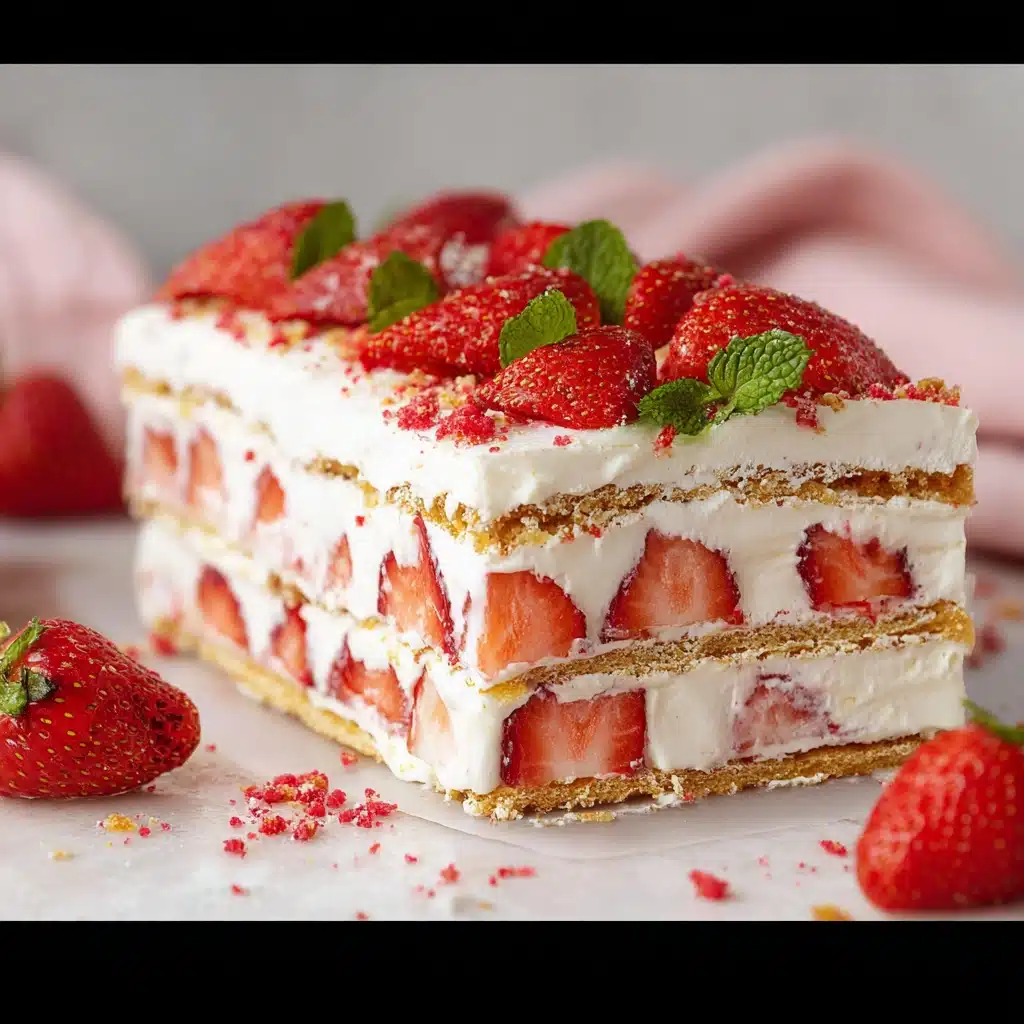
When you’re ready to share, grab a sharp knife and cut generous squares. The Strawberry Icebox Cake will slice beautifully if allowed to chill long enough, revealing those gorgeous, summery layers. Wipe your knife between cuts for the cleanest presentation, and get ready for a chorus of happy sighs around the table.
How to Serve Strawberry Icebox Cake
Garnishes
Give each slice a restaurant-worthy finishing touch by topping with a handful of chopped fresh strawberries, a few sprigs of mint, or even a light dusting of powdered sugar. For an extra pop of flavor and color, a drizzle of strawberry syrup or a sprinkle of lemon zest works wonders, elevating this humble treat to showstopper status.
Side Dishes
While Strawberry Icebox Cake is a superstar on its own, it pairs beautifully with other summer delights. Try serving it alongside a sparkling glass of lemonade, fresh iced tea, or a scoop of vanilla gelato. For more festive occasions, a platter of assorted fresh berries or a crisp fruit salad offers a cheerful, colorful companion.
Creative Ways to Present
Serve up single portions in elegant glass jars or parfait glasses for a stunning, portable dessert perfect for picnics or parties. Or, go mini by assembling Strawberry Icebox Cake in cupcake liners for easy, hands-free treats at showers and gatherings. Don’t be afraid to play with the pattern of your layers for an eye-catching visual effect when you slice in – stripes and swirls are both welcome!
Make Ahead and Storage
Storing Leftovers
Cover any leftovers tightly with plastic wrap or transfer individual pieces to airtight containers. Store the Strawberry Icebox Cake in the refrigerator, where it will stay fresh and delicious for up to 3 days. You might even find that the flavors get better as they sit and mingle!
Freezing
Believe it or not, Strawberry Icebox Cake freezes well! Just wrap the cake securely with both plastic wrap and aluminum foil, or place portions in freezer-safe containers. Thaw it in the fridge overnight before serving. It’s a fantastic option for prepping dessert well in advance.
Reheating
This is one dessert you want to keep cold, not warm! If frozen, allow it to thaw in the refrigerator rather than reheating. The creamy layers and softened graham crackers are best enjoyed chilled straight from the fridge.
FAQs
Can I make Strawberry Icebox Cake with frozen strawberries?
Fresh strawberries yield the best flavor and texture, but you can use frozen strawberries in a pinch. Thaw and drain them well to avoid excess moisture, and pat dry before layering.
What if I don’t have graham crackers?
No worries! You can substitute vanilla wafer cookies, digestive biscuits, or shortbread for a similar flavor and structure. Choose a crisp, sturdy cookie that will soften nicely as it chills.
Can I add other fruits?
Absolutely! This recipe is versatile – try adding blueberries, raspberries, or sliced peaches for a delicious twist and a burst of color alongside the classic strawberry layers.
How far ahead can I assemble it?
For the best texture, assemble the cake at least 4 hours ahead or up to 24 hours in advance. Overnight chilling allows the layers to meld into a perfect, sliceable cake.
Can I make Strawberry Icebox Cake dairy-free?
Yes! Use a dairy-free whipped topping and ensure your cookies are plant-based. The result is just as creamy and satisfying, making this dessert accessible to everyone.
Final Thoughts
Few desserts are as charming or as rewarding as Strawberry Icebox Cake. It’s cool, creamy, and bursting with berry freshness in every forkful – the perfect centerpiece for any warm-weather gathering or casual family dinner. Give it a try, and let this simple, nostalgic treat become a new favorite in your home!
Print
Strawberry Icebox Cake Recipe
- Prep Time: 15 minutes
- Cook Time: undefined
- Total Time: 4 hours 15 minutes
- Yield: 12–16 servings
- Category: Dessert
- Method: No-Bake / Chilled
- Cuisine: American
- Diet: Vegetarian
Description
A chilled, no-bake delight featuring layers of sweet strawberries, pillowy whipped cream, and tender graham crackers—perfectly nostalgic, easy to prepare, and bursting with summer flavor.
Ingredients
- 4 cups fresh strawberries, hulled and thinly sliced
- 2 cups heavy whipping cream
- 1/3 cup powdered sugar
- 1 tsp vanilla extract
- Pinch of salt
- 12–14 whole graham crackers
- Optional garnishes: extra berries, mint, powdered sugar, lemon zest
Instructions
- Whip the cream: In a chilled bowl, beat together heavy cream, powdered sugar, vanilla, and salt until soft peaks form.
- Prep strawberries: Wash, hull, and slice strawberries evenly. Reserve a few for topping.
- Layer the cake: Spread a thin layer of whipped cream in a 9×13 pan. Arrange a single layer of graham crackers over it.
- Add cream and berries: Spread 1/3 of remaining whipped cream over crackers, then top with 1/3 of the strawberries. Repeat two more times, ending with whipped cream and reserved strawberries on top.
- Chill: Cover tightly and refrigerate at least 4 hours or overnight for best texture.
- Serve: Slice into squares, wiping the knife clean between cuts. Garnish if desired.
Notes
- Fresh strawberries work best—if using frozen, thaw and drain well before layering.
- Substitute graham crackers with vanilla wafers, digestive biscuits, or shortbread if needed.
- Add other fruits like blueberries or raspberries for variation.
- Make dairy-free by using a plant-based whipped topping and vegan cookies.
- Assemble up to 24 hours ahead; cake softens and flavors meld beautifully.

