
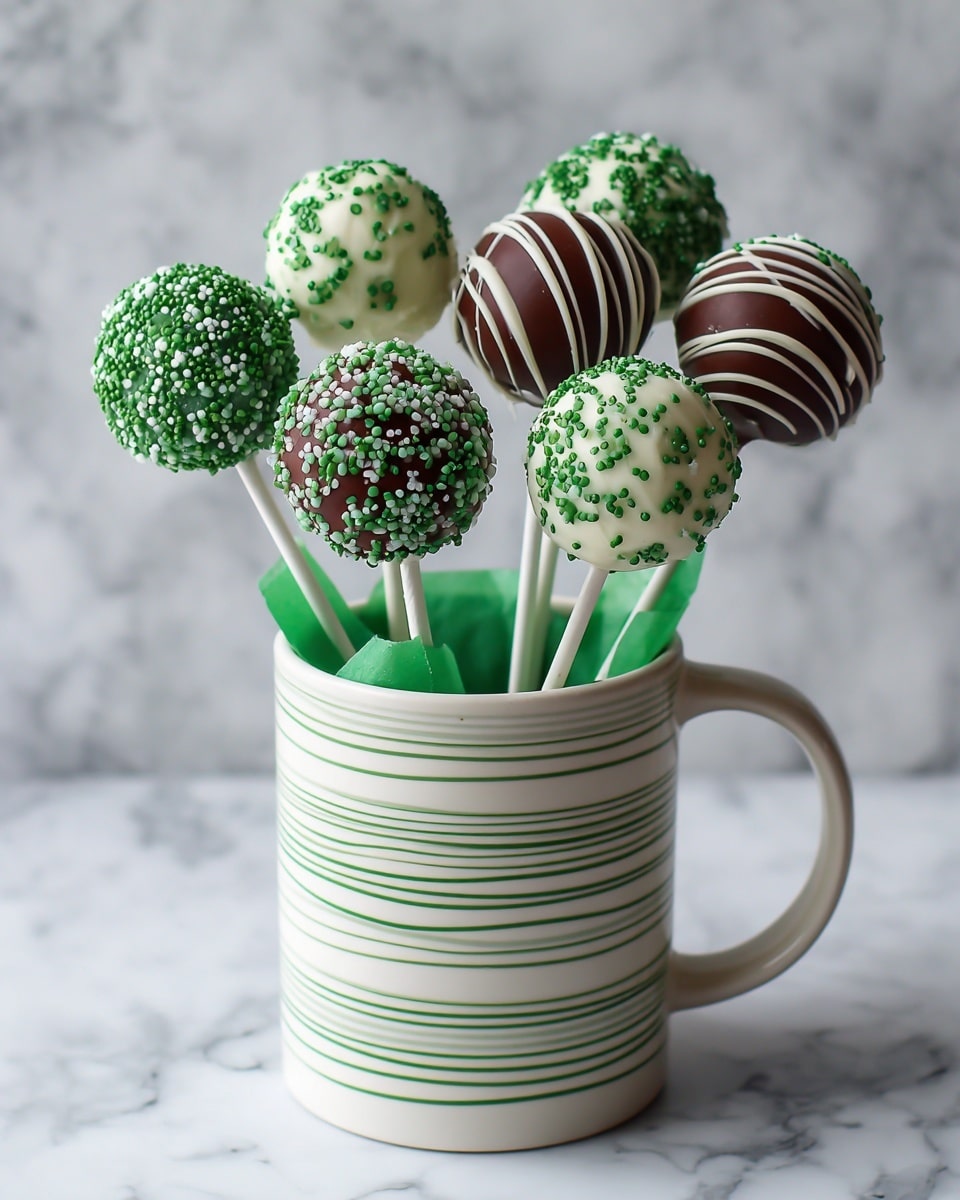
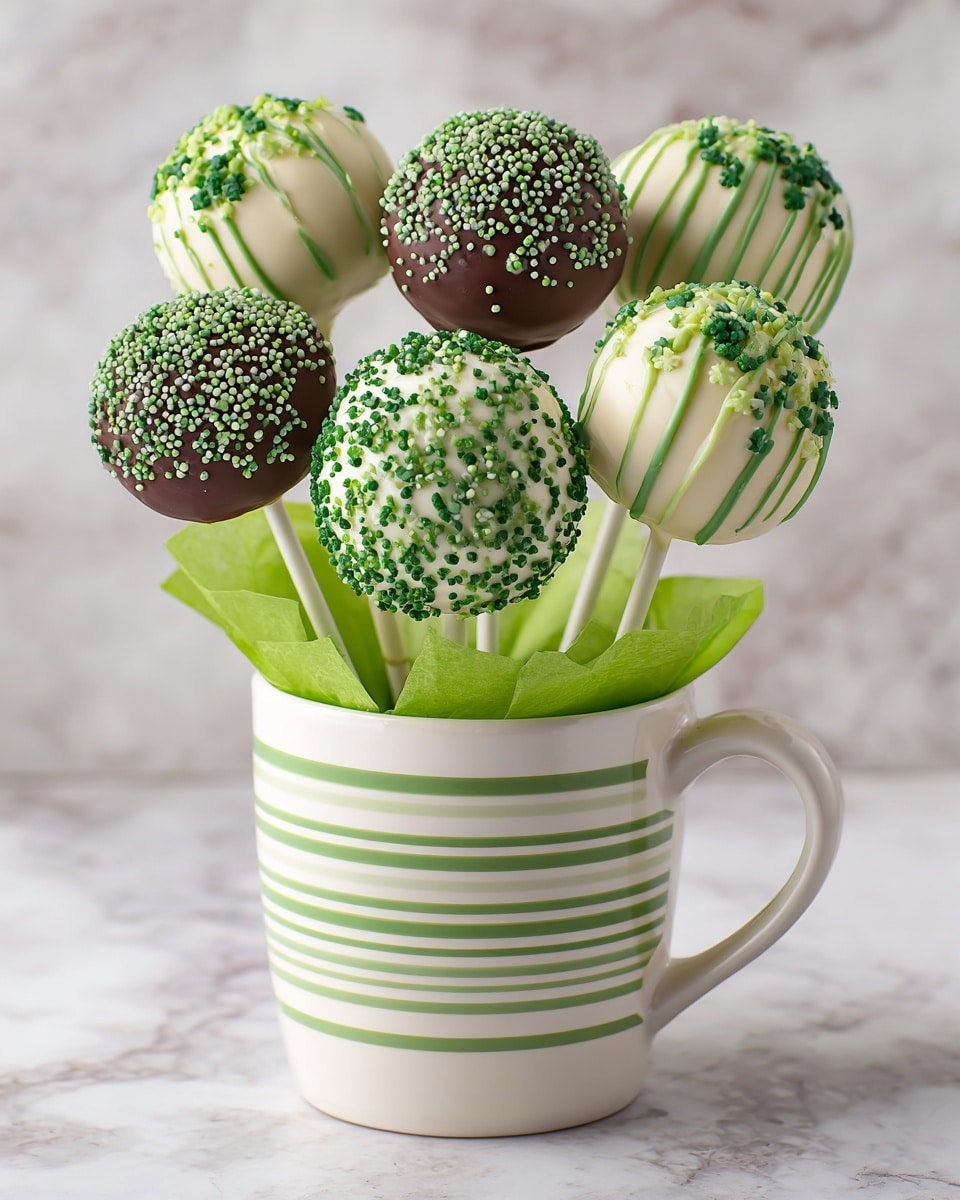
Get ready to celebrate in the most delicious way with this St. Patrick’s Day Cake Pops Recipe! These festive, bite-sized delights combine moist cake crumbs with creamy frosting, shaped into charming little balls, then dipped in vibrant green candy coating. Topped with a sprinkle of gold dust or cute shamrock shapes, these cake pops bring both whimsy and flavor to your St. Paddy’s Day festivities. Whether you’re hosting a party or gifting them as edible favors, they’re guaranteed to bring smiles and a touch of Irish cheer to everyone lucky enough to enjoy them.

Ingredients You’ll Need
This St. Patrick’s Day Cake Pops Recipe calls for simple but essential ingredients that come together beautifully to create the perfect balance of taste, texture, and color. Each component plays a vital role, whether adding sweetness, moisture, or that festive green hue.
- 1 box white or vanilla cake mix: Provides the fluffy, tender base that crumbles easily for forming cake pops.
- Ingredients listed on the cake box: Follow the package for perfect cake texture every time.
- ½ cup vanilla or cream cheese frosting: Acts as the glue that binds cake crumbs and adds rich flavor.
- 12 oz green candy melts or white chocolate with green food coloring: Creates a smooth, colorful coating that hardens beautifully around each pop.
- Assorted green, gold, or shamrock-shaped sprinkles: Give each cake pop a fun, festive finishing touch.
- Lollipop sticks: Make the cake pops easy to hold and enjoy without mess.
- Optional edible gold dust or glitter: Adds a magical shimmer perfect for St. Patrick’s Day celebrations.
How to Make St. Patrick’s Day Cake Pops Recipe
Step 1: Bake and Crumble the Cake
Start by baking your cake according to the package instructions, then let it cool completely. Cooling is key because warm cake won’t hold its shape well. Once cooled, crumble the cake into fine, even crumbs using your hands or a fork, which sets the foundation for perfectly shaped cake pops.
Step 2: Mix in the Frosting
Add the frosting gradually to the crumbled cake, stirring a few tablespoons at a time until the mixture comes together like dough. You want it moist enough to hold its shape but not too sticky, so be patient and adjust the frosting amount as needed.
Step 3: Shape and Chill the Cake Balls
Roll the cake mixture into 1-inch balls and place them on a parchment-lined baking sheet. Pop the tray into the freezer for about 20 minutes; this chilling step helps the balls firm up, making them easier to dip later without falling apart.
Step 4: Prepare and Insert the Sticks
Melt the green candy melts according to package instructions until silky smooth. Dip one end of each lollipop stick into the melted candy, then immediately insert it about halfway into a chilled cake ball. This glue-like step secures the stick inside, so the pops stay intact. Return the assembled pops to the freezer for 5 more minutes to set.
Step 5: Dip and Decorate
Now for the fun part! Dip each cake pop into the melted candy coating, swirling to fully cover and gently tapping off excess to keep it neat. While the coating is still wet, lavish your pops with festive sprinkles, edible glitter, or gold dust. Then, place them upright in a styrofoam block or cake pop stand and let them fully set.
How to Serve St. Patrick’s Day Cake Pops Recipe
Garnishes
The finishing touches are what make this St. Patrick’s Day Cake Pops Recipe truly shine. Use shimmering edible gold dust or delicate shamrock-shaped sprinkles to amp up the festive vibe. These small details not only add sparkle but also make each pop feel special and celebratory.
Side Dishes
Serve these delightful cake pops alongside refreshing mint lemonade or a creamy Irish Cream-flavored coffee for an irresistible sweet and tangy contrast. They also pair perfectly with classic green treats like spinach dip or kale salad to balance the sweet with something savory.
Creative Ways to Present
Instead of a traditional cake pop stand, try sticking your pops into a small pot filled with green-tinted rice or shamrock confetti for a playful, colorful display. Wrapping each pop in a clear cellophane bag tied with a green ribbon makes them fantastic party favors or gift items. Let your imagination run as wild as an Irish jig!
Make Ahead and Storage
Storing Leftovers
If you have any cake pops left over, store them in an airtight container at room temperature for up to three days. Keeping them covered helps maintain their moist texture and prevents the candy coating from becoming chalky.
Freezing
To preserve your cake pops longer, freezing is a solid option. Arrange them in a single layer on a tray to freeze individually, then transfer to an airtight container or freezer bag. They will keep well for up to one month. Thaw them in the fridge overnight before serving to retain their shape and flavor.
Reheating
Reheating these cake pops is not usually necessary, but if you prefer them slightly warmer, allow them to sit at room temperature for about 15 minutes. Avoid microwaving, as this can melt the candy coating and ruin their perfect pop shape.
FAQs
Can I use homemade cake instead of a boxed mix?
Absolutely! Homemade cake works wonderfully for this recipe. Just be sure it’s fully cooled and not too moist, so the cake and frosting mixture holds together well when shaping the pops.
What if I don’t have green candy melts?
No worries! You can melt white chocolate and add a few drops of oil-based green food coloring to get that vibrant green coating. Avoid water-based colors because they might seize your chocolate.
Can I add flavors to the cake or coating?
Yes! Adding a drop of mint or almond extract to your cake batter or candy coating can give an exciting twist that complements the festive theme perfectly.
How long will the cake pops stay fresh?
When stored properly in an airtight container, cake pops last up to 3 days at room temperature and up to one week in the fridge. Just be sure they’re protected from moisture to keep the coating crisp.
Is this recipe suitable for beginners?
Definitely! The steps are straightforward and forgiving, making this St. Patrick’s Day Cake Pops Recipe ideal for bakers of all skill levels to create a cute and tasty celebration treat.
Final Thoughts
There is something truly magical about making and sharing St. Patrick’s Day Cake Pops Recipe. Not only do they brighten up any holiday table with their cheerful color and festive decorations, but they also bring people together over a bite-sized moment of joy. So grab your ingredients, roll up your sleeves, and give this delightful dessert a try — your St. Paddy’s Day celebration will thank you!
Print
St. Patrick’s Day Cake Pops Recipe
- Prep Time: 45 minutes
- Cook Time: 30 minutes
- Total Time: 1 hour 15 minutes (plus chilling time)
- Yield: 24 cake pops
- Category: Dessert
- Method: No-Cook
- Cuisine: American
- Diet: Vegetarian
Description
St. Patrick’s Day Cake Pops are festive, bite-sized treats made by combining crumbled vanilla cake with creamy frosting, then forming them into balls and dipping in vibrant green candy coating. Decorated with thematic sprinkles, edible gold dust, or shamrock shapes, these delightful cake pops are perfect for celebrating St. Paddy’s Day or gifting as charming holiday favors.
Ingredients
Cake Base
- 1 box white or vanilla cake mix (plus ingredients listed on the box)
Frosting
- ½ cup vanilla or cream cheese frosting
Coating and Decoration
- 12 oz green candy melts or white chocolate with green food coloring
- Assorted green, gold, or shamrock-shaped sprinkles
- Lollipop sticks
- Optional: edible gold dust or glitter
Instructions
- Bake the Cake: Prepare and bake the cake according to the package instructions. Allow the cake to cool completely to ensure it crumbles easily for the next step.
- Prepare Cake Mixture: Once cooled, crumble the cake into fine crumbs within a large bowl. Gradually add the frosting, a few tablespoons at a time, mixing thoroughly until the mixture holds together like a dough.
- Shape Cake Pops: Roll the mixture into 1-inch balls and arrange them on a parchment-lined baking sheet. Place the tray in the freezer and chill for 20 minutes to firm up the balls.
- Prepare for Dipping: Melt the candy melts according to package instructions until smooth and fully melted. Dip one end of each lollipop stick into the melted coating, then insert the stick into each cake ball. Return the cake pops to the freezer for 5 minutes to set.
- Dip and Decorate: Dip each cake pop into the melted candy coating, gently tapping off any excess. While the coating is still wet, decorate with sprinkles or edible glitter. Stand the pops upright in a styrofoam block or cake pop stand until the coating is fully set.
- Storage: Store the finished cake pops in an airtight container at room temperature for up to 3 days, or refrigerate for up to one week.
Notes
- Add a drop of mint or almond extract to the cake batter or coating for a festive flavor twist.
- If candy melts are unavailable, use white chocolate dyed with oil-based green food coloring as an alternative coating.
- For extra decoration, drizzle melted white chocolate over the cake pops or top with edible shamrocks.


