Imagine a dessert that’s as playful as it is decadent—a showstopper at any spooky gathering or anytime you’re craving a dramatic finale. The Spiderweb Cheesecake is everything you want in a classic cheesecake: lusciously creamy, with a buttery cookie crust and just the right hint of chocolate, but with an eccentric cocoa-spun design that’s bound to spark conversation. Whether you’re prepping for Halloween or just want to add a whimsical touch to your dessert table, this clever creation delivers bold flavor and unforgettable style in every slice.
Ingredients You’ll Need
One thing I absolutely love about this recipe is how each ingredient does its part to perfect the flavor and give the Spiderweb Cheesecake its signature look. Every component has a job, from creating that smooth, dreamy filling to painting those iconic chocolate webs up top.
- Chocolate sandwich cookies: These make a deeply flavored, crunchy base that’s impossible to resist.
- Unsalted butter: Melted butter brings the crust together while adding a subtle richness.
- Cream cheese: Full-fat cream cheese gives the cheesecake its classic, ultra-creamy texture.
- Granulated sugar: Sweetens the filling to luscious perfection and balances the tang of the cream cheese.
- Large eggs: Eggs bind the filling, ensuring everything bakes up silky smooth.
- Sour cream: This adds a lovely tang and keeps the filling moist and tender.
- Vanilla extract: A generous splash infuses the batter with warmth and depth.
- Semisweet chocolate chips: Melted for the spiderweb design, their rich flavor contrasts beautifully with the creamy filling.
- Heavy cream: Thins out the chocolate for piping so you can create those perfect webs!
- A pinch of salt: Just enough to amplify all the flavors and keep everything from tasting too sweet.
How to Make Spiderweb Cheesecake
Step 1: Prepare the Cookie Crust
Start by blitzing your chocolate sandwich cookies into fine crumbs—this step is oddly satisfying and sets the stage for everything else. Mix the crumbs with melted butter, making sure every speck gets coated, and then press the mixture into the base of a springform pan. Bake for a few minutes until it’s set and wonderfully fragrant. This sturdy, slightly salty-sweet crust is the unsung hero of the Spiderweb Cheesecake!
Step 2: Mix the Creamy Cheesecake Filling
While your crust cools, beat the cream cheese and sugar together until the mixture is satiny and completely lump-free; trust me, patience here pays off in texture later. Blend in the eggs one at a time, followed by the sour cream, vanilla, and a pinch of salt. Scrape down the sides—no streaks allowed!—so your filling stays impossibly smooth.
Step 3: Assemble and Bake
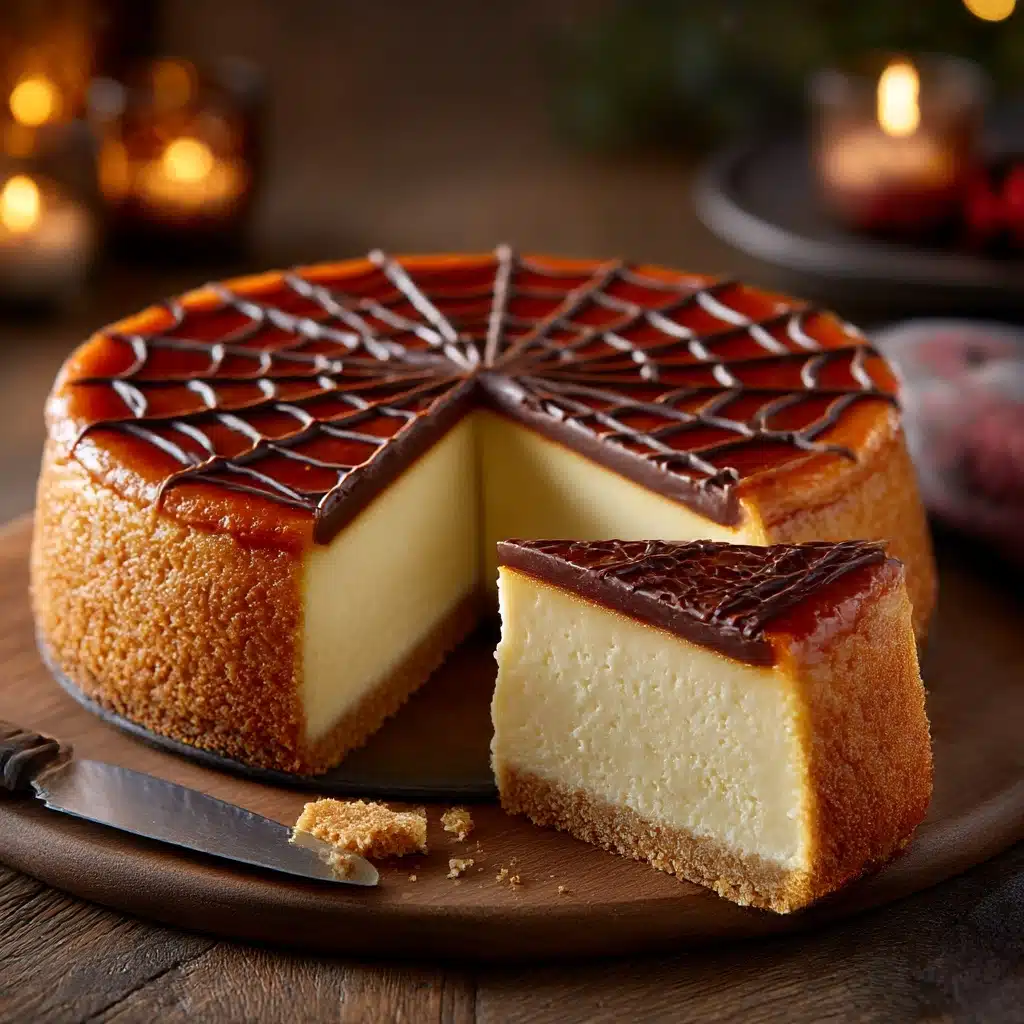
Pour the dreamy cheesecake filling onto your cooled crust, smoothing out the top with a spatula. Bake low and slow until the center just barely wobbles. Once it’s done, let the cake cool gradually and then chill it for several hours or overnight—this step is the secret to those perfect, clean slices.
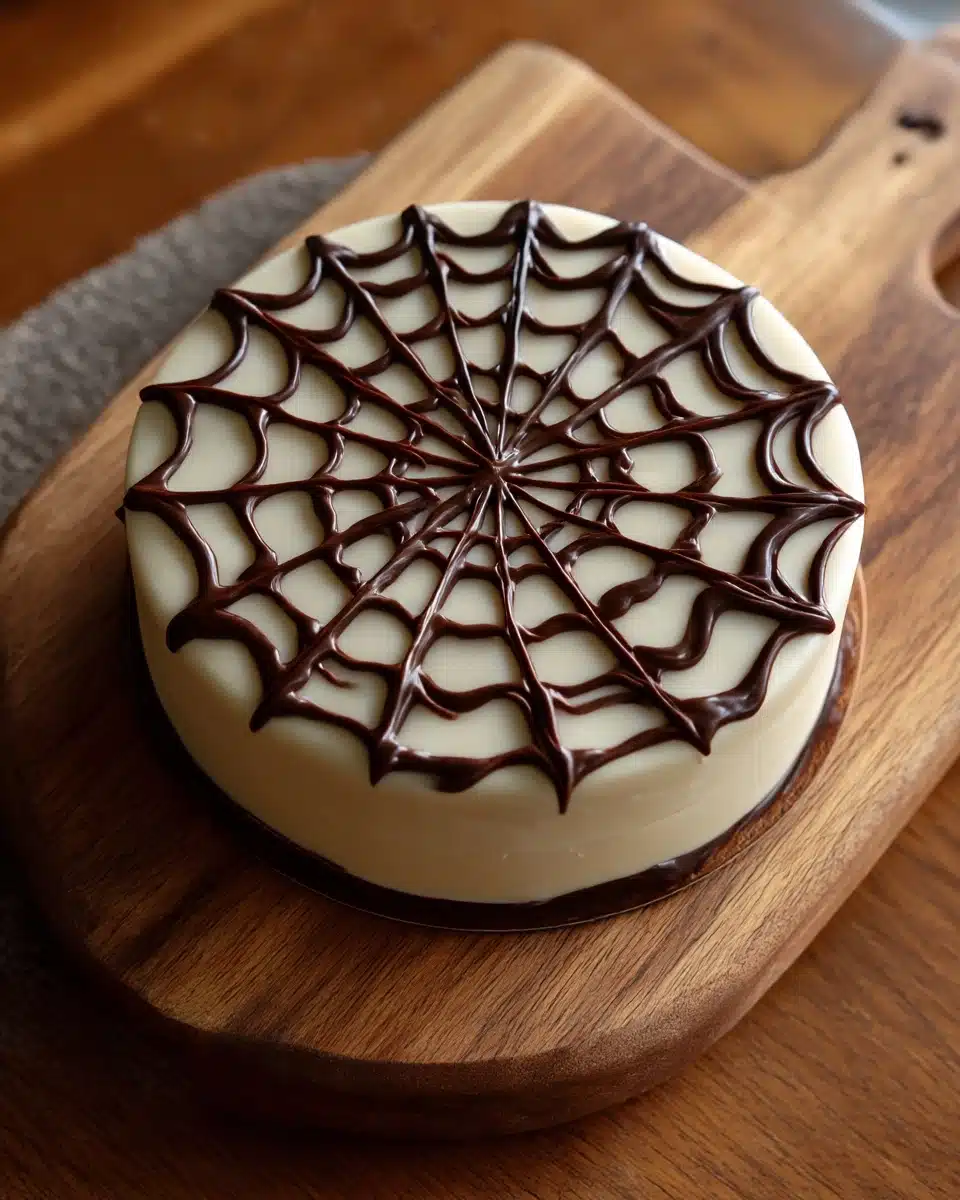
Step 4: Create the Spiderweb Cheesecake Design
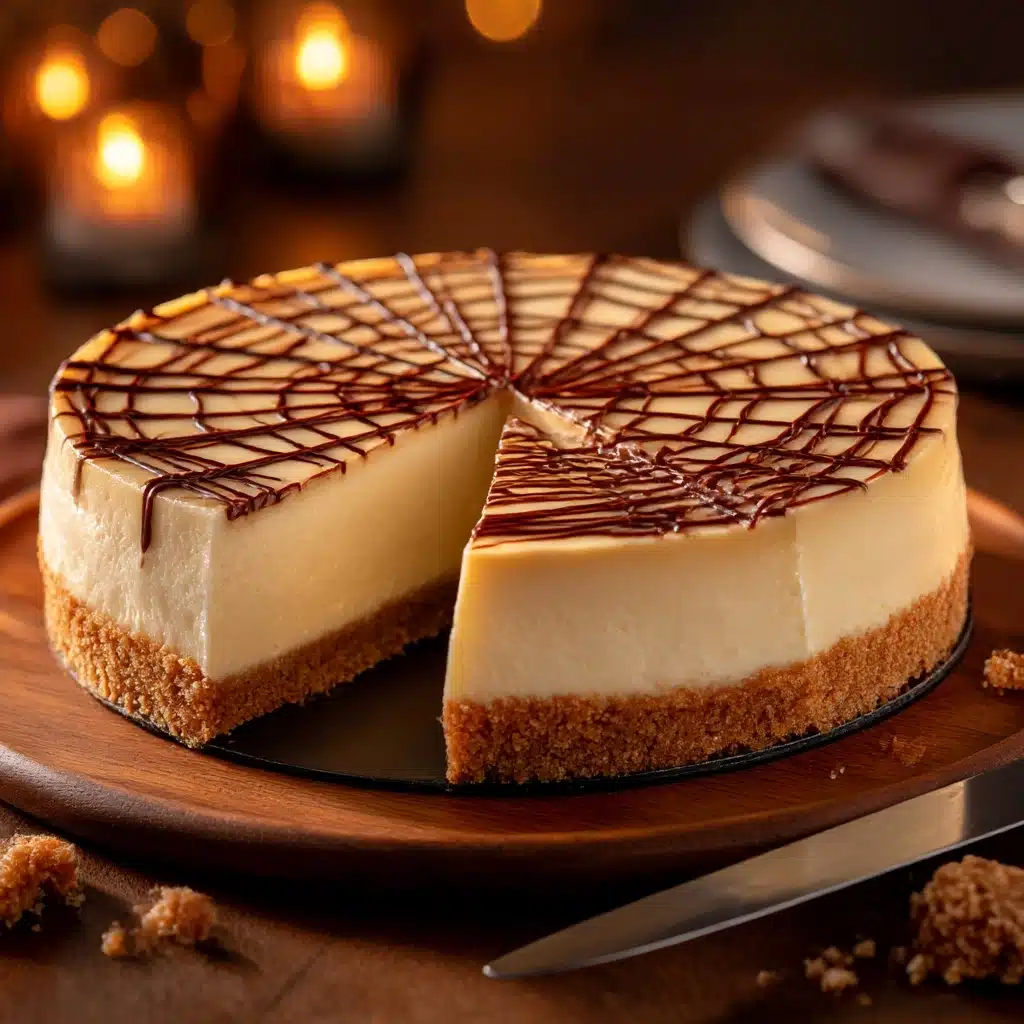
Here’s where the fun really starts. Melt chocolate chips together with a splash of heavy cream to make a smooth ganache. Transfer to a piping bag or a zip-top bag with the tiniest corner snipped off. Beginning at the center, pipe concentric circles on the chilled cheesecake, then drag a toothpick from the middle outwards at intervals to form a striking spiderweb pattern. Each pull reveals the magic of your Spiderweb Cheesecake design!
Step 5: Chill and Serve
Give your masterpiece one last chill to set the chocolate, then carefully release it from the pan and move it to a serving platter. The result is nothing short of spectacular, with crisp chocolate lines over a cloud-like filling—plus that irresistible cookie crust.
How to Serve Spiderweb Cheesecake
Garnishes
To keep that showstopping spiderweb front and center, I like to garnish with a few chocolate curls or a dusting of cocoa powder around the edge. For Halloween, tiny edible sugar spiders or chocolate spiders make a playful addition. Just remember, less is more—you want that brilliant design to shine.
Side Dishes
Pair your Spiderweb Cheesecake with fresh berries or a tangy berry coulis for a fruity contrast. If you’re hosting a fall-inspired feast, spiced apple slices or a caramel drizzle complement its rich flavors without overpowering the showpiece itself.
Creative Ways to Present
Serve your creation on a black or dark platter to amp up the gothic aesthetic, or arrange slices on individual plates with a swirl of chocolate sauce for extra drama. For a true party atmosphere, cluster mini cheesecakes with their own spiderwebs on a tiered stand. However you display it, Spiderweb Cheesecake brings a touch of whimsy and lots of “wow.”
Make Ahead and Storage
Storing Leftovers
Place leftover Spiderweb Cheesecake in an airtight container and refrigerate for up to 4 days. The chilled environment keeps it firm and delicious, allowing all the flavors to meld even more over time!
Freezing
You can easily freeze the whole cheesecake or individual slices. Wrap tightly in plastic wrap and foil, then freeze for up to 2 months. Thaw in the fridge overnight when that cheesecake craving strikes or you have surprise guests.
Reheating
No real reheating needed—this dessert is best enjoyed chilled! If you prefer a slightly softer texture, let a slice sit at room temperature for 15–20 minutes before serving. That’s all it takes for the filling to regain its creamy richness.
FAQs
Can I use a different type of crust for Spiderweb Cheesecake?
Absolutely! Graham crackers, shortbread, or even ginger snaps are all tasty twists. Just substitute your cookie of choice and enjoy a fresh spin on the classic base.
What if I don’t have a piping bag for the spiderweb?
No problem at all. Use a small zip-top bag, fill it with your melted chocolate, and snip just the tiniest bit off one corner. Instant piping bag, perfect for drawing that magical web.
Can I make the cheesecake gluten-free?
Yes! Opt for gluten-free chocolate sandwich cookies for the crust and check your other ingredients to make sure they’re safe. You’ll still get all the flavor and visual appeal.
How do I prevent cracks in my cheesecake?
Cracks are usually caused by sudden temperature changes or overbaking. Bake your cheesecake in a water bath and let it cool gradually with the oven door cracked open before refrigerating. The result: a silky-smooth surface, perfect for that spiderweb design.
Can I add other flavors to the filling?
Definitely! A swirl of salted caramel, espresso, or orange zest in the batter adds a creative touch without stealing the show from the signature look of Spiderweb Cheesecake.
Final Thoughts
There’s something undeniably special about making and sharing a Spiderweb Cheesecake. It’s a dessert that’s every bit as delicious as it is memorable, and the web design always brings a smile (or happy squeal!). Don’t wait for a special occasion—gather your tools, let your creativity shine, and treat yourself and your loved ones to a slice of edible artistry.
Print
Spiderweb Cheesecake Recipe
- Prep Time: 20 minutes
- Cook Time: 60 minutes
- Total Time: 6 hours
- Yield: 12 servings
- Category: Dessert
- Method: Baked
- Cuisine: American
- Diet: Vegetarian
Description
A show-stopping, creamy cheesecake with a buttery cookie crust and dramatic chocolate-spun spiderweb design—perfect for Halloween or anytime you want a whimsical, decadent dessert.
Ingredients
- 1½ cups chocolate sandwich cookie crumbs
- ½ cup unsalted butter, melted
- 24 oz full-fat cream cheese, room temperature
- ¾ cup granulated sugar
- 3 large eggs
- ½ cup sour cream
- 2 tsp vanilla extract
- Pinch of salt
- ½ cup semisweet chocolate chips
- 2 tbsp heavy cream
Instructions
- Preheat oven to 325°F (160°C). Line the bottom of a 9″ springform pan with parchment paper.
- Mix cookie crumbs with melted butter and press into the pan. Bake for 8–10 minutes and cool.
- Beat cream cheese and sugar until smooth. Add eggs one at a time, then mix in sour cream, vanilla, and salt until well combined.
- Pour filling onto crust and bake for 50–60 minutes until the edges are set and the center slightly jiggles. Cool gradually, then chill for at least 4 hours.
- Melt chocolate chips with cream. Transfer to a piping bag or zip-top bag with a small corner snipped.
- Pipe concentric circles on the chilled cheesecake and drag a toothpick from the center outwards to create a spiderweb pattern.
- Chill again to set the chocolate, then slice and serve.
Notes
- Use a zip-top bag as a piping bag substitute for the spiderweb design.
- To prevent cracks, bake in a water bath and cool slowly.
- Graham crackers or ginger snaps can be used instead of chocolate sandwich cookies.
- Cheesecake can be frozen for up to 2 months if wrapped tightly.

