Making a homemade Sourdough Starter is nothing short of kitchen magic—watching simple flour and water transform into a bubbling, living culture is deeply satisfying and yields endless possibilities for delicious breads, pancakes, pizza crusts, and more. This easy method will set you up with a reliable, tangy, and robust starter that you’ll find yourself passing along to friends and returning to again and again. Whether you’re a first-timer or an old pro, a Sourdough Starter is the start of every great sourdough adventure!
Ingredients You’ll Need
Ingredients You’ll Need
The beauty of a Sourdough Starter lies in its simplicity! With just two core ingredients, you’re setting the stage for natural fermentation that unlocks flavor, chew, and crustiness in every bake. Here’s a closer look at what you’ll need and what each brings to the mix.
- Whole Wheat or Unbleached All-Purpose Flour: The flour supplies wild yeast and bacteria—whole wheat gets the process off to a strong start, but unbleached white flour works perfectly too.
- Filtered or Dechlorinated Water (room temperature): Clean, chlorine-free water is crucial for not suppressing the natural yeast activity, so use filtered or let tap water sit out overnight before using.
How to Make Sourdough Starter
Step 1: Mix Your First Batch
On Day 1, grab a glass jar or non-reactive container and stir together 1 cup (120g) flour and 1/2 cup (120ml) filtered water. Make sure every bit of flour is hydrated—no dry spots left behind! Scrape down the sides to keep things neat, then loosely cover the jar with a lid or a cloth secured with a rubber band. Place the jar somewhere cozy (about 70–75°F), and let it rest undisturbed for the next 24 hours.
Step 2: Feed and Encourage Fermentation
By Day 2, you may spot a few tiny bubbles—exciting! Now, it’s time to discard half your Sourdough Starter, which leaves room for new wild yeast growth. Add in 1/2 cup (60g) flour and 1/4 cup (60ml) water, stir it well, scrape down the sides, and recover. This process wakes up the wild microbes even more. Return the jar to its warm resting spot.
Step 3: Consistent Daily Feedings
From Days 3 through 6, you’ll fall into a rhythm: once every 24 hours, discard half your starter and feed it fresh, equal parts flour and water (by weight if possible for best results). Each day you’ll likely notice more bubbles, a stronger tangy aroma, and maybe some rising action—your Sourdough Starter is coming to life!
Step 4: Assess for Readiness
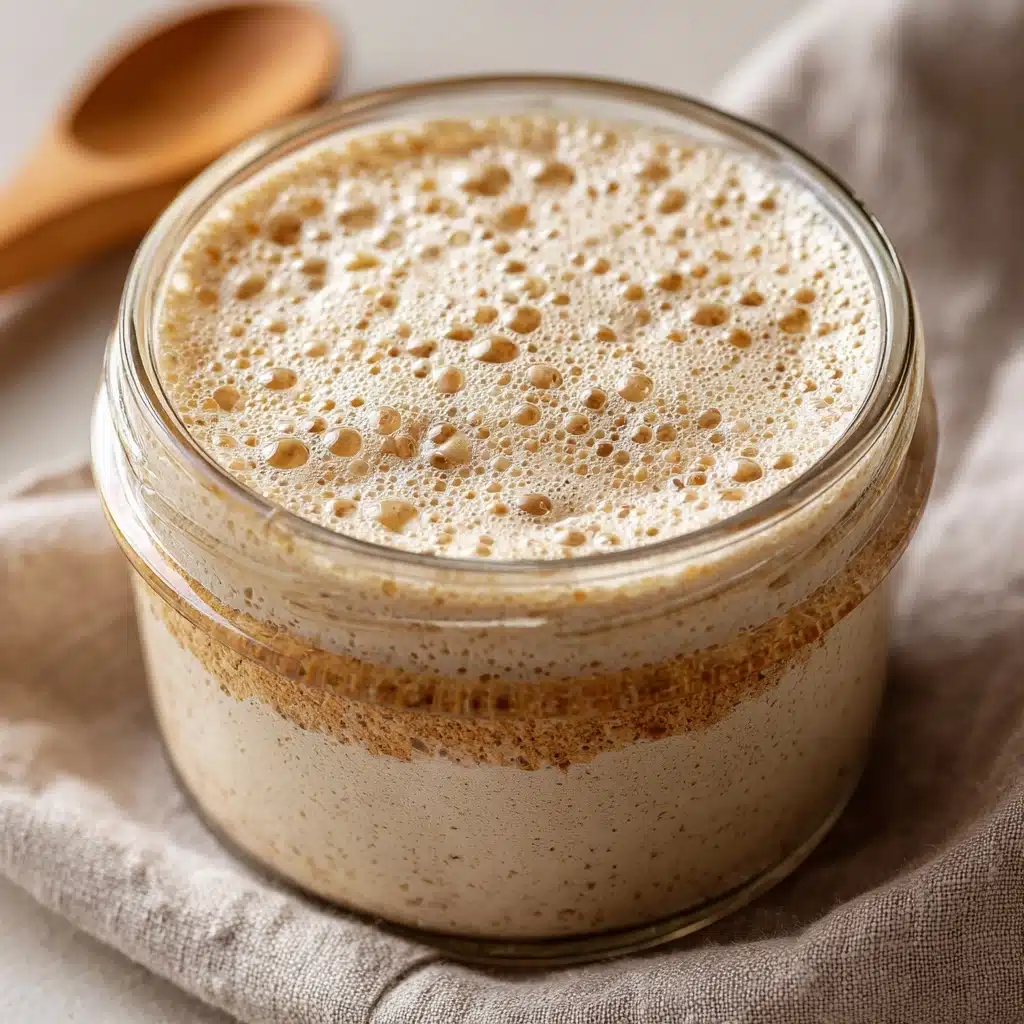
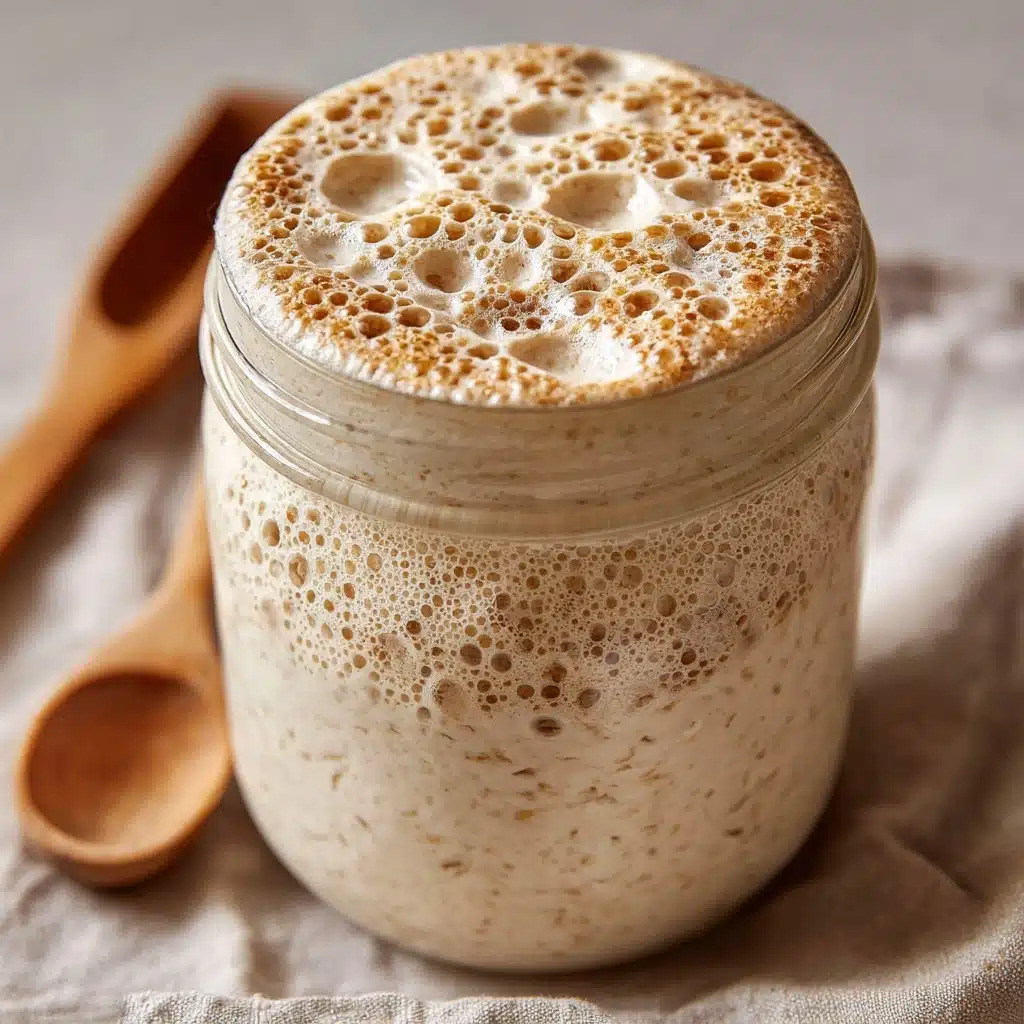
By Day 7, your Sourdough Starter should be showcasing some serious bubbly enthusiasm. After each feeding, it should double in size within 4 to 6 hours, smell pleasantly sour (not off or unpleasant), and sport a surface covered in eager bubbles. If you see these signs, your Sourdough Starter is ready to unleash its baking power! If not quite there, keep feeding daily until you reach this stage.
Step 5: Maintenance and Storage
To keep your Sourdough Starter happy, continue with daily feedings if it lives at room temperature, or store it in the fridge and feed it once a week. Always use filtered or dechlorinated water and equal parts flour and water by weight. Whole wheat flour can give the starter an initial boost, but all-purpose flour works seamlessly for ongoing care.
How to Serve Sourdough Starter
Garnishes
While you won’t garnish the Sourdough Starter itself, once you use it in baking, consider garnishing your breads with crunchy seeds, herbs, or a shower of flaky salt. It’s a lovely nod to the robust flavors that starter brings to the table!
Side Dishes
The baked goods you make from Sourdough Starter beg to be served alongside vibrant sides—think hearty soups, cheeses, roasted vegetables, or even a slab of ripe avocado. Fresh bread and simple fare are always a dreamy duo.
Creative Ways to Present
Surprise your friends and family with fresh loaves, tangy pancakes, or fluffy focaccia made from your own Sourdough Starter. Label a mason jar and gift some excess starter to fellow home bakers. It’s an irresistible conversation starter (pun intended!) and an edible gift from the heart.
Make Ahead and Storage
Storing Leftovers
If you have extra Sourdough Starter, don’t toss it! Transfer any leftovers to a clean jar, cover loosely, and stow it in the refrigerator. Feed it weekly to keep those wild yeasts and lactic acid bacteria happy and vigorous—just discard and feed as usual whenever you’re ready to bake.
Freezing
Yes, you can freeze Sourdough Starter! Spread a thin layer of active starter on parchment, let it dry completely, then crumble and freeze the flakes in a zip-top bag. To revive, dissolve the flakes in warm water and resume regular feedings until bubbly and strong.
Reheating
There’s no need to reheat Sourdough Starter itself, but after a stint in the fridge, it’ll need a couple of room-temperature feedings to perk back up before baking again. Let it come to room temperature and feed as you would after a normal discard, and you’re ready to roll.
FAQs
Why is filtered water important for Sourdough Starter?
Filtered or dechlorinated water prevents any chemicals from interfering with the growth of the beneficial yeasts and bacteria in your Sourdough Starter. Chlorine, in particular, can hinder the natural fermentation process that makes your starter strong.
Can I use all-purpose flour instead of whole wheat?
Absolutely! Whole wheat flour gives your Sourdough Starter a head start, but once it’s lively, you can switch to unbleached all-purpose flour for regular feedings. Your starter will still perform beautifully in recipes.
How do I know when my Sourdough Starter is ready to use?
Your Sourdough Starter is ready when it doubles in size within 4 to 6 hours of feeding, produces a network of bubbles, and smells pleasantly tangy (not overly sharp or unpleasant). If you’re unsure, try the “float test”—a spoonful should float in room temperature water.
What should I do if there is liquid on top?
A layer of liquid, also called “hooch,” is normal and just means your Sourdough Starter is hungry. Pour it off or stir it back in before the next feeding—either approach is fine. If you notice any pink or orange tinge, start fresh to be cautious.
Why do I need to discard part of the starter every day?
Discarding keeps your Sourdough Starter manageable and maintains the right balance between yeasts and bacteria. If you skipped discarding, your starter would quickly outgrow your jar and run out of food, leading to sluggish fermentation and off flavors.
Final Thoughts
There’s something endlessly rewarding about nurturing your own Sourdough Starter, watching it bloom from humble beginnings into the backbone of countless home-baked creations. Give it a try—you might just discover your new favorite kitchen project and a world of bread-baking joy!
Print
Sourdough Starter Recipe
- Prep Time: 10 minutes per day
- Cook Time: 0 minutes
- Total Time: 7 days to maturity
- Yield: 1 cup active starter
- Category: Basics
- Method: Fermentation
- Cuisine: Global
- Diet: Vegan
Description
Learn how to make your own sourdough starter from scratch with just flour and water. This step-by-step guide will help you create a lively, natural yeast culture for all your sourdough baking needs.
Ingredients
Day 1:
- 1 cup (120g) whole wheat flour or unbleached all-purpose flour
- 1/2 cup (120ml) filtered or dechlorinated water (room temperature)
Instructions
- Day 1: In a glass jar or non-reactive container, mix the flour and water until no dry flour remains. Scrape down the sides, cover loosely, and let sit at room temperature for 24 hours.
- Day 2: Discard half the starter, feed with flour and water, mix well, and cover.
- Days 3–6: Repeat feeding daily, discarding half and feeding with equal parts flour and water.
- Day 7 and Beyond: Starter should be active, doubling in size within hours, ready to use daily or refrigerate and feed weekly.
Notes
- Use filtered or dechlorinated water to avoid hindering fermentation.
- Whole wheat flour can be switched to all-purpose flour after starter is active.
- Always feed with equal parts flour and water by weight.






Your email address will not be published. Required fields are marked *