
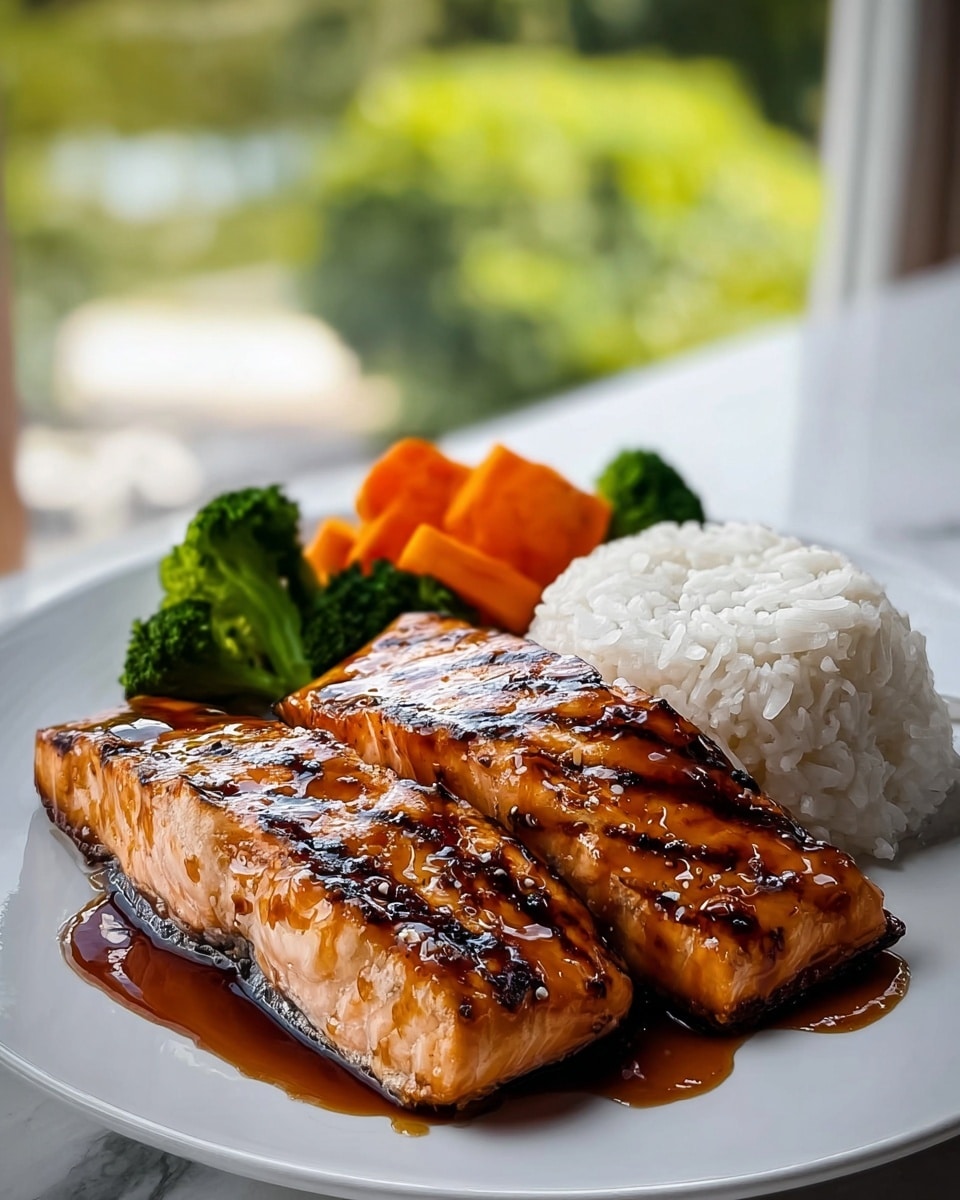
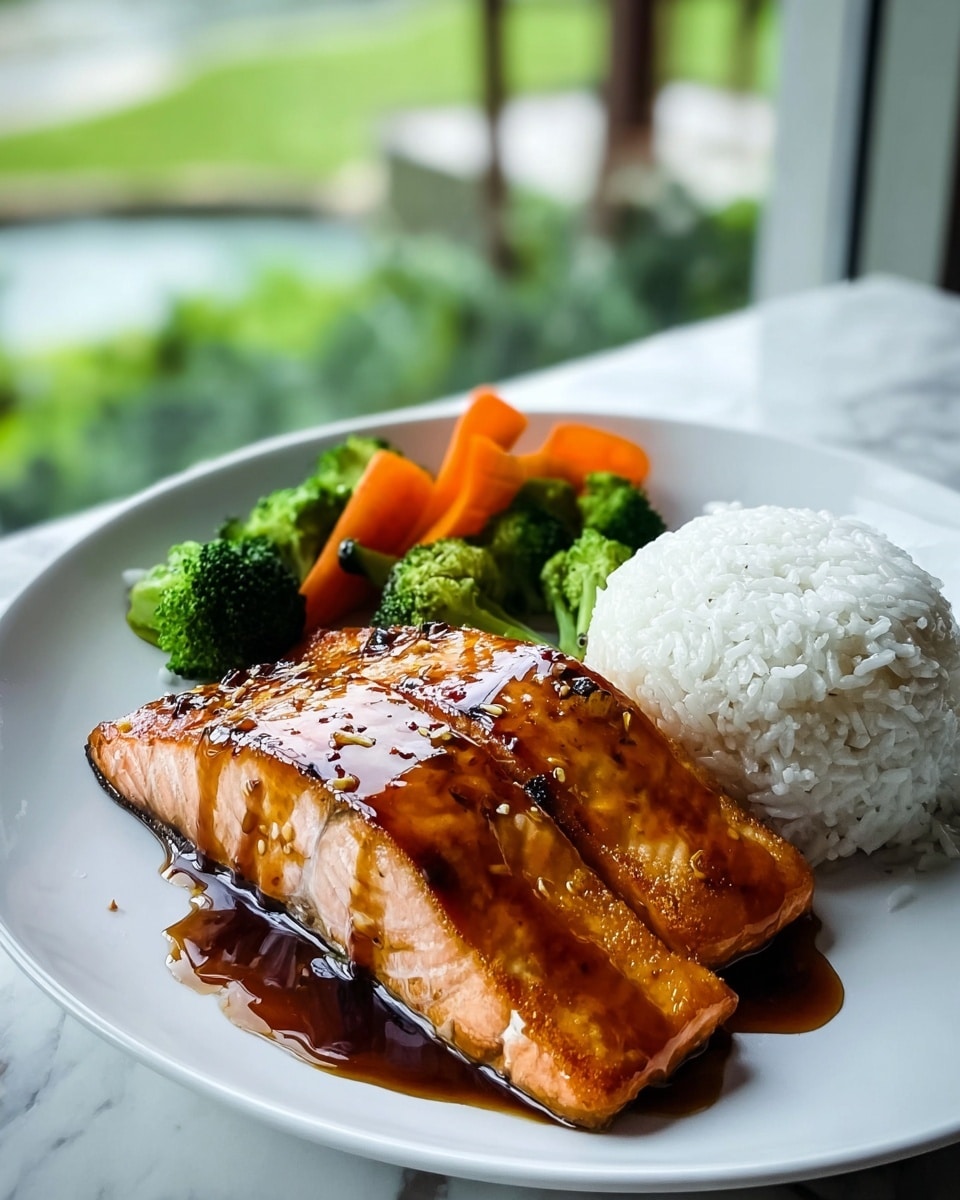
If you are craving a dish that perfectly balances rich flavor with comforting simplicity, look no further than the Salmon Teriyaki with Steamed Rice Recipe. This delightful meal brings together tender, succulent salmon glazed with a glossy teriyaki sauce, paired with fluffy steamed rice that soaks up every bit of savory goodness. It’s a dish that feels both nourishing and indulgent, making it an absolute favorite to whip up any day of the week.

Ingredients You’ll Need
The beauty of this Salmon Teriyaki with Steamed Rice Recipe lies in its straightforward, accessible ingredients that each play a crucial role in delivering that signature sweet-savory flavor and perfect texture. Every item on this list enhances the dish’s harmony and keeps things simple yet exciting.
- Salmon fillets: Fresh and firm for the best texture and flavor that holds up during cooking.
- Soy sauce: The salty base of the teriyaki glaze that adds depth and umami.
- Mirin (sweet rice wine): Brings sweetness and helps to mellow out the soy sauce’s saltiness.
- Sugar or honey: To balance savory flavors with a touch of sweet brilliance.
- Garlic and ginger: Freshly minced to add warmth and aromatic complexity.
- Vegetable oil: For searing the salmon to a beautiful crisp on the edges.
- Rice vinegar: A splash to brighten and balance the teriyaki sauce.
- Steamed rice: Plain, fluffy, and perfect for soaking up that delicious sauce.
- Green onions or sesame seeds (optional): For garnish, adding color and a subtle crunch.
How to Make Salmon Teriyaki with Steamed Rice Recipe
Step 1: Prepare the Teriyaki Sauce
Start by whisking together soy sauce, mirin, sugar or honey, freshly minced garlic, ginger, and a splash of rice vinegar in a small bowl. This mixture forms the heart of the glaze, offering this delightful balance of sweet, savory, and tangy notes that make teriyaki sauce so irresistible.
Step 2: Cook the Steamed Rice
Rinse your rice under cold water until the water runs clear. This step removes excess starch and ensures your steamed rice is light and fluffy. Cook the rice according to package instructions or your preferred method. While the rice steams beautifully, your salmon will get its time to shine.
Step 3: Sear the Salmon
Heat vegetable oil in a non-stick skillet over medium-high heat. Place salmon fillets skin-side down (if the skin is on) and cook each side until golden brown and cooked through, about 4-5 minutes per side depending on thickness. The seared exterior locks in juices and creates beautiful texture.
Step 4: Glaze the Salmon
Lower the heat to medium and pour the teriyaki sauce over the salmon in the pan. Gently spoon the sauce over the fillets as it thickens and becomes glossy—this will take around 2-3 minutes. The salmon will soak up the sauce, creating that signature sticky, flavorful coating.
Step 5: Plate and Prepare to Serve
Fluff the steamed rice with a fork and divide it onto your plates. Place the glazed salmon on top or alongside and drizzle a bit more of that luscious teriyaki sauce from the pan over the rice for that extra burst of flavor.
How to Serve Salmon Teriyaki with Steamed Rice Recipe
Garnishes
A sprinkling of thinly sliced green onions or toasted sesame seeds will add a fresh crunch and nutty aroma that beautifully complements the sweet and savory salmon. These simple garnishes elevate the dish’s appearance and build layers of texture.
Side Dishes
To round out this meal, consider serving steamed or stir-fried vegetables such as broccoli, snap peas, or bok choy. Their crispness and slight bitterness provide a wonderful counterpoint to the rich teriyaki glaze. A light cucumber salad with a citrus dressing would also refresh the palate.
Creative Ways to Present
Try serving the salmon teriyaki over a bed of mixed greens or alongside a scoop of sticky sushi rice for a playful twist. Alternatively, build a bowl with rice, salmon, vegetables, and a drizzle of extra sauce for a balanced, one-bowl meal that’s both beautiful and satisfying.
Make Ahead and Storage
Storing Leftovers
Cooked salmon teriyaki and steamed rice can be stored separately in airtight containers in the refrigerator for up to 2 days. Keeping them separate helps maintain the best textures—no soggy rice or salmon.
Freezing
While steaming rice fresh is best, salmon teriyaki freezes well. Wrap portions tightly in plastic wrap and place in freezer-safe containers or bags for up to 2 months. Thaw overnight in the refrigerator before reheating to preserve flavor and texture.
Reheating
Reheat the salmon gently in a non-stick pan over low heat to avoid overcooking, adding a splash of water or extra teriyaki sauce if needed to keep it moist. Warm the rice separately in the microwave or steamer until hot and fluffy again.
FAQs
Can I use frozen salmon for this recipe?
Absolutely! Just be sure to thaw it completely before cooking to ensure even searing and glazing. Pat it dry to avoid excess moisture which can prevent a nice crust from forming.
Is it possible to make this dish gluten-free?
Yes! Simply swap regular soy sauce with tamari or a gluten-free soy sauce alternative. Mirin and other ingredients are generally gluten-free, but always double-check labels for anything packaged.
What type of rice works best for this recipe?
Japanese short or medium grain rice works wonderfully because it’s sticky and soft, perfect for absorbing the teriyaki sauce. Jasmine rice or basmati can also be used if you prefer a less sticky texture.
Can I bake the salmon instead of pan-searing?
Definitely. Baking at 400°F (200°C) for about 12-15 minutes works well. Pour the teriyaki sauce over halfway through cooking to let it thicken and glaze nicely.
How sweet should the teriyaki sauce be?
The sweetness should balance the saltiness of the soy sauce without overpowering it. Adjust sugar or honey gradually and taste as you go to find your perfect sweet-savory harmony.
Final Thoughts
If you’ve been searching for a meal that’s both packed with flavor and comforting enough for any night of the week, this Salmon Teriyaki with Steamed Rice Recipe is a must-try. It’s incredibly satisfying, easy to prepare, and brings that restaurant-worthy taste right into your kitchen. Treat yourself and your loved ones to this lovely dish—you won’t regret it!
Print
Salmon Teriyaki with Steamed Rice Recipe
- Prep Time: 10 minutes
- Cook Time: 10 minutes
- Total Time: 2 hours 20 minutes
- Yield: 16 bars
- Category: Snack
- Method: No-Cook
- Cuisine: International
- Diet: Gluten Free
Description
A delicious and healthy homemade chocolate-pistachio granola bar recipe featuring layers of finely chopped pistachios, melted dark chocolate, and a sweet coconut-honey topping. These bars are easy to prepare, require no baking, and are perfect for a nutritious snack or dessert.
Ingredients
Nut and Chocolate Layer
- 1 cup shelled pistachios
- 1 cup dark chocolate chips
Coconut Topping
- 1/2 cup shredded coconut
- 1/4 cup honey
- 1/4 cup coconut oil
- 1/2 tsp vanilla extract
- Pinch of salt
Instructions
- Chop the Pistachios: In a food processor, pulse the pistachios until they are finely chopped, creating a nutty base for the bars.
- Melt the Chocolate: In a saucepan over low heat, gently melt the dark chocolate chips until smooth and fluid, taking care not to burn the chocolate.
- Combine Chocolate and Pistachios: Mix the melted chocolate with the chopped pistachios thoroughly, then press this mixture evenly into a lined baking dish to form the bottom layer.
- Prepare the Coconut Mixture: Using the same saucepan, melt the coconut oil and honey together over low heat. Stir in the shredded coconut, vanilla extract, and a pinch of salt until well combined, creating a sweet, aromatic topping.
- Assemble the Bars: Pour the coconut mixture evenly over the chocolate-pistachio base and spread it out to cover the entire surface.
- Set the Bars: Place the baking dish in the refrigerator and chill for at least 2 hours to allow the bars to set firmly.
- Cut and Serve: Once fully set, remove from the fridge and cut into 16 bars. Enjoy these tasty and healthy snacks any time!
Notes
- Be sure to pulse the pistachios finely but not into a powder to maintain some texture.
- Melt chocolate and coconut oil mixtures on low heat to avoid burning.
- For a vegan option, use vegan dark chocolate chips and substitute honey with maple syrup.
- Bars can be stored in an airtight container in the refrigerator for up to a week.
- Feel free to add other nuts or seeds for variety.


