
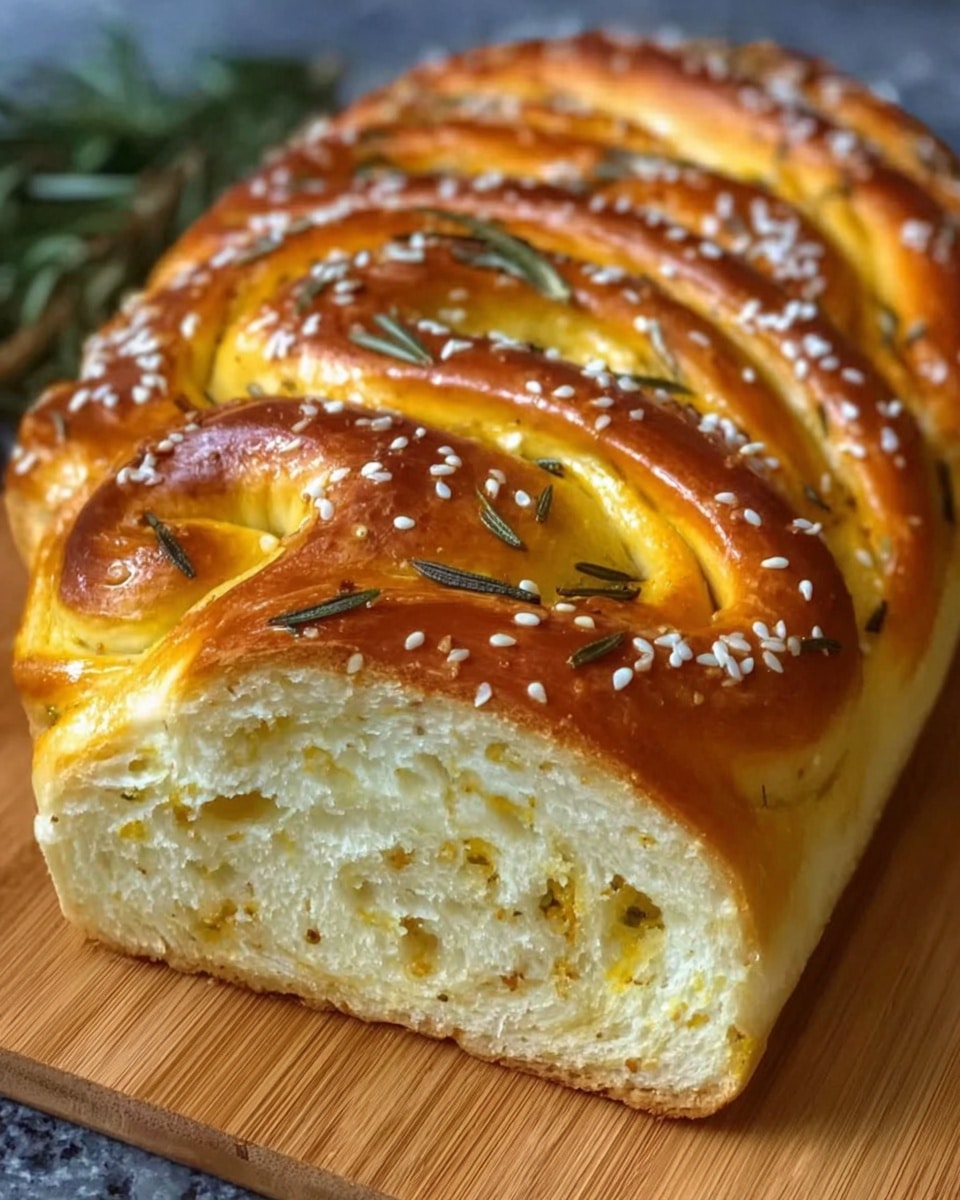
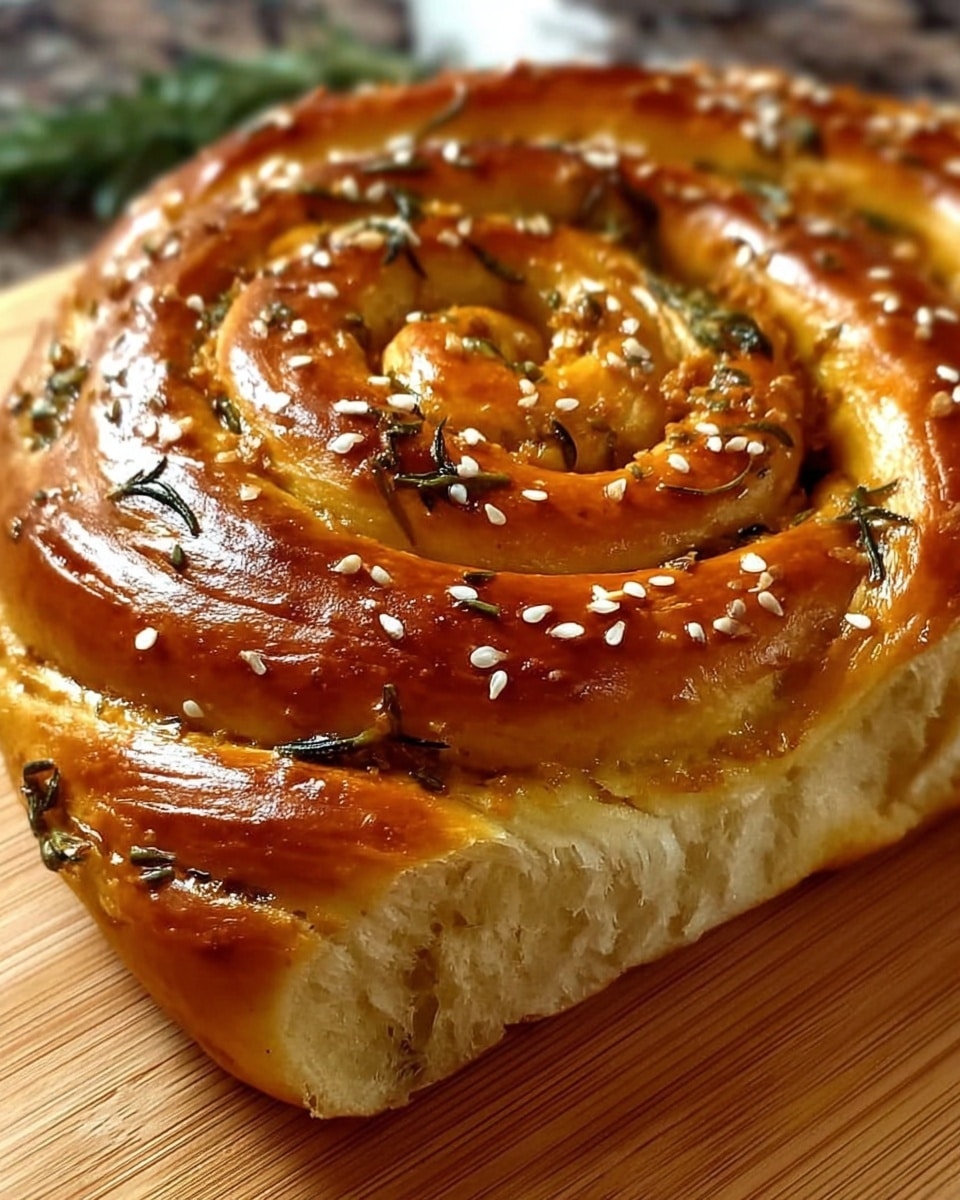
If you have been searching for a bread recipe that feels like a warm hug from the oven, let me introduce you to the Rustic No Knead Rosemary Garlic Bread Recipe. This loaf is a beautiful union of fragrant rosemary and savory garlic, baked into a crusty, golden-brown masterpiece that somehow comes together effortlessly without any kneading. It’s the kind of bread that fills your kitchen with tantalizing aromas and promises a tender, chewy crumb inside. Whether you’re a seasoned baker or giving homemade bread a first try, this recipe is wonderfully forgiving and incredibly satisfying.

Ingredients You’ll Need
The beauty of this Rustic No Knead Rosemary Garlic Bread Recipe lies in its simplicity, with every ingredient playing a crucial role in the final loaf’s taste and texture. You don’t need anything fancy here, just staples that work harmoniously to create that rustic, aromatic bread everyone will crave.
- 3 cups all-purpose flour: Provides the perfect structure for a tender yet sturdy loaf.
- 3 cloves garlic, minced: Fresh garlic infuses the bread with a robust, irresistible flavor.
- 1 tablespoon finely chopped fresh rosemary: Adds an earthy, piney aroma that makes this bread stand out.
- 1 ¼ teaspoons kosher salt: Enhances all the flavors while controlling yeast activity for a balanced rise.
- ¾ teaspoon freshly ground black pepper: Brings a subtle spicy warmth to complement the rosemary and garlic.
- ½ teaspoon instant yeast: The magic agent that makes this no knead bread rise beautifully with minimal effort.
- 1 ½ cups water, at room temperature: Hydrates the flour perfectly, creating that wet, sticky dough essential for the rustic texture.
- 2 tablespoons cornmeal: Prevents sticking and adds a lovely texture to the base when baking in the skillet.
How to Make Rustic No Knead Rosemary Garlic Bread Recipe
Step 1: Prepare the Dough
Start by gathering a large bowl and combining the all-purpose flour, minced garlic, fresh rosemary, kosher salt, ground black pepper, and instant yeast. This dry mix lays the foundation for flavor and structure, and since everything blends before adding water, you get an even taste throughout the loaf.
Step 2: Mix in Water Until Dough Forms
Pour the room temperature water into the bowl and stir everything together using a wooden spoon or your hand. The dough will be wet and sticky, which is exactly what you want for that rustic crumb. No kneading needed here; just a gentle mix to bring it all together in about 30 seconds.
Step 3: Let the Dough Rise
Cover the bowl tightly with plastic wrap and leave it to rest at room temperature for 18 to 24 hours. During this time, the yeast works its magic, bubbles form on the surface, and the flavors deepen beautifully. This long fermentation is what makes the bread’s texture so special and complex.
Step 4: Prepare the Baking Skillet
Once your dough has risen and bubbled, lightly oil a 10-inch cast iron skillet or use nonstick spray, then sprinkle the cornmeal evenly inside. This step ensures your bread won’t stick and adds a pleasant texture to the crust’s base.
Step 5: Shape the Dough Gently
Transfer the dough onto a lightly floured surface and shape it into a rough round with care—no heavy hands here to maintain the dough’s lovely air pockets.
Step 6: Proof the Dough in the Skillet
Place your shaped dough into the prepared skillet, cover it with a clean dish towel, and let it stand at room temperature until it doubles in size and gently springs back when poked. This usually takes about 2 hours and gives the loaf its perfect rise before baking.
Step 7: Preheat the Oven
While the dough proofs, preheat your oven to 450 degrees Fahrenheit. Starting with a hot oven is key to achieving that golden-brown crust everyone dreams of.
Step 8: Bake the Bread
Place the cast iron skillet into the oven and bake your bread for 30 to 40 minutes, or until the crust is deeply golden and crisp. The aroma will be irresistible—rosemary, garlic, and fresh-baked bread all mingled together.
How to Serve Rustic No Knead Rosemary Garlic Bread Recipe
Garnishes
The Rustic No Knead Rosemary Garlic Bread Recipe shines on its own, but you can elevate it by brushing the crust with a little melted butter infused with extra minced garlic or a sprinkle of flaky sea salt just before serving. Fresh rosemary sprigs placed beside your bread also add a lovely touch and hint at the flavors inside.
Side Dishes
This bread pairs beautifully with almost any meal. Try it alongside a hearty bowl of tomato soup, creamy risottos, or as the perfect companion to a cheese and charcuterie board. Its rustic nature holds up well whether dipped in olive oil or used to mop up sauces from your favorite pasta dishes.
Creative Ways to Present
For a crowd-pleasing touch, slice your bread thickly and arrange it in a basket lined with a charming tea towel. You could even hollow out the center for a bread bowl to serve warm dips or stews, making every bite a cozy, delicious experience.
Make Ahead and Storage
Storing Leftovers
Once cooled completely, stash your leftover Rustic No Knead Rosemary Garlic Bread Recipe in a paper bag or loosely wrapped in a kitchen towel to keep the crust crisp. Stored this way, it should stay fresh for up to two days, though trust me—this bread rarely lasts that long.
Freezing
If you want to save bread for longer, slice and freeze it in an airtight bag. This method preserves freshness and lets you toast slices straight from the freezer whenever a craving hits. Just be sure to press out as much air as possible before sealing.
Reheating
To bring your bread back to life, warm it in a preheated oven at 350 degrees Fahrenheit for about 10 minutes. This revives the crispy crust and soft crumb, rekindling all the wonderful flavors from your Rustic No Knead Rosemary Garlic Bread Recipe.
FAQs
Can I use dried rosemary instead of fresh?
Absolutely! While fresh rosemary offers the most vibrant flavor, you can substitute dried rosemary at about one-third the amount. Just be sure to crush it slightly to release its oils before mixing.
Do I really need to wait 18 to 24 hours for the dough to rise?
Yes, the long fermentation is key to developing that mouthwatering flavor and rustic texture. If you’re short on time, you can shorten it, but your bread won’t be quite as flavorful or airy.
Is a cast iron skillet necessary for baking?
Cast iron is ideal because it retains heat and creates a nice crust, but if you don’t have one, a heavy-duty oven-safe pan or Dutch oven will also work well.
Can I add other herbs or spices?
Definitely! Feel free to experiment with thyme, oregano, or even a pinch of red pepper flakes to customize the bread to your taste.
Why is the dough so wet and sticky?
The wet dough helps create that open crumb and chewy texture typical of rustic bread. It might seem odd at first, but trust the recipe—it will bake into something wonderful.
Final Thoughts
This Rustic No Knead Rosemary Garlic Bread Recipe is a game changer for anyone who loves the idea of homemade bread without the fuss. Simple ingredients, minimal effort, and maximum flavor come together to create a loaf that’s perfect for sharing or savoring all by yourself. Give it a try, and I promise your kitchen will be filled with warmth, comfort, and the kind of bread that makes life a little sweeter.
Print
Rustic No Knead Rosemary Garlic Bread Recipe
- Prep Time: 10 minutes
- Cook Time: 40 minutes
- Total Time: 20 hours 50 minutes
- Yield: 8 servings
- Category: Bread
- Method: Baking
- Cuisine: American
- Diet: Vegetarian
Description
A simple and rustic no-knead rosemary garlic bread recipe that yields a flavorful, crusty loaf with minimal effort. Perfect for those who love artisan-style bread with fragrant herbs and garlic, baked in a cast iron skillet for a beautifully crisp crust.
Ingredients
Dry Ingredients
- 3 cups all-purpose flour
- 3 cloves garlic, minced
- 1 tablespoon finely chopped fresh rosemary (or more, to taste)
- 1 ¼ teaspoons kosher salt
- ¾ teaspoon freshly ground black pepper
- ½ teaspoon instant yeast
Wet Ingredients
- 1 ½ cups water, at room temperature
For Preparation
- 2 tablespoons cornmeal
Instructions
- Prepare the Dough: In a large bowl, combine all-purpose flour, minced garlic, freshly chopped rosemary, kosher salt, black pepper, and instant yeast. Mix the dry ingredients thoroughly to ensure even distribution of the herbs and seasoning.
- Mix in Water: Using a wooden spoon or your hand, add the room temperature water to the dry mixture and stir until a wet, sticky dough forms, which should take about 30 seconds. The dough will be loose and shaggy, which is typical for no-knead bread.
- First Rise: Cover the bowl tightly with plastic wrap and leave it to stand at room temperature until the surface of the dough is dotted with bubbles, indicating fermentation, which will take about 18 to 24 hours.
- Prepare the Skillet: Lightly oil a 10-inch cast iron skillet or coat it with nonstick spray. Then sprinkle the inside with cornmeal to prevent sticking and to add a nice texture to the crust.
- Shape the Dough: On a lightly floured surface, gently turn out the dough and shape it into a round loaf without kneading to retain the air bubbles from fermentation.
- Second Proof: Place the shaped dough into the prepared skillet. Cover it with a clean dishtowel and let it stand at room temperature until it doubles in size and doesn’t quickly spring back when poked, about 2 hours.
- Preheat the Oven: While the dough is proofing, preheat your oven to 450 degrees Fahrenheit to ensure it’s hot enough to create a crispy crust.
- Bake the Bread: Place the skillet with the dough into the preheated oven. Bake for 30 to 40 minutes until the bread is golden brown with a deeply caramelized crust.
Notes
- For best results, use a heavy-duty cast iron skillet to achieve optimal heat retention and crust formation.
- The long fermentation time develops complex flavors and a chewy crumb without kneading.
- Feel free to adjust the amount of rosemary according to your taste preference.
- If you don’t have a cast iron skillet, a heavy oven-safe Dutch oven can be used instead.
- Allow the bread to cool completely before slicing to maintain the structure and texture.


