
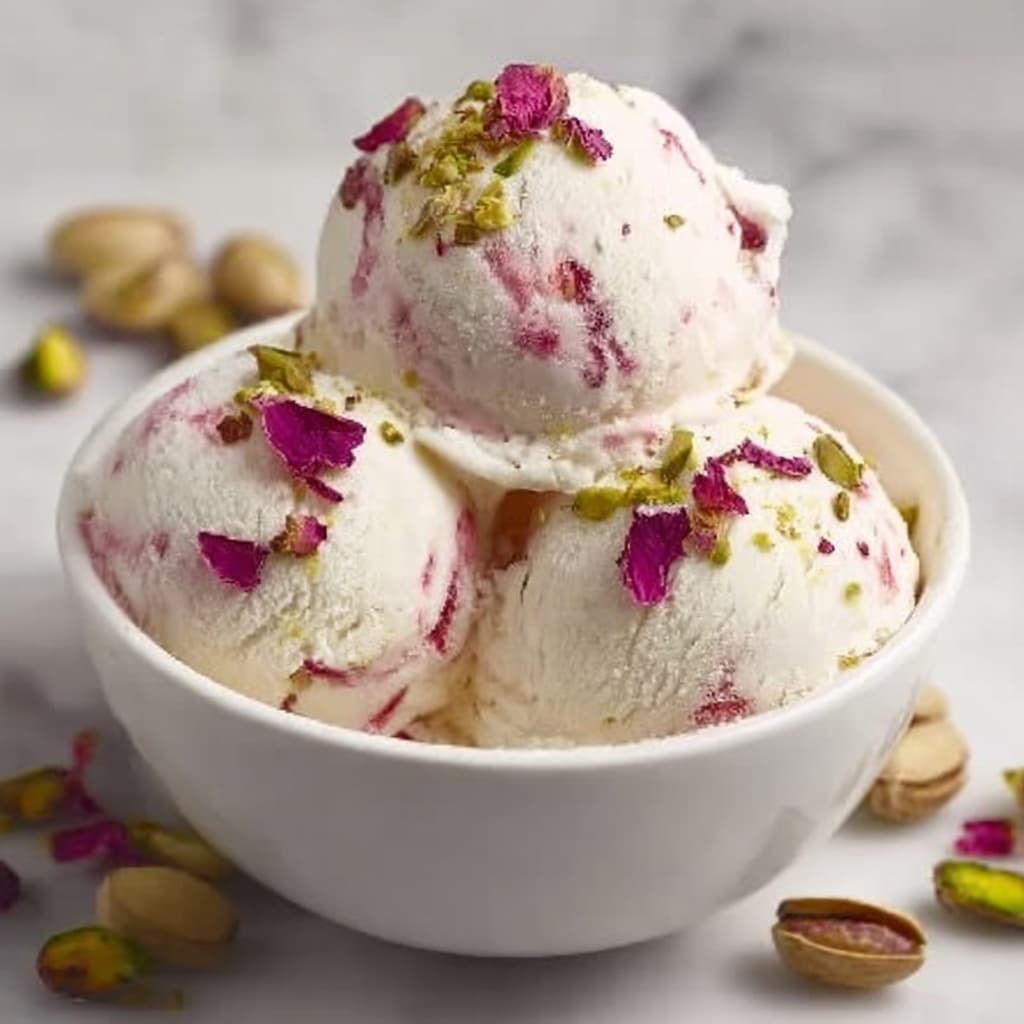
There is something truly magical about the delicate blend of floral rose and crunchy pistachios in a frozen treat, which is why I am absolutely thrilled to share this Rose Pistachio Ice Cream Recipe with you. This charming dessert combines the creaminess of homemade ice cream with the fragrant aroma of rose water and the satisfying texture of roasted pistachios. It’s a perfect way to surprise your taste buds, impress your friends, or simply indulge in a scoop of something unforgettable on a warm day.

Ingredients You’ll Need
Getting this Rose Pistachio Ice Cream Recipe just right relies on a handful of simple, high-quality ingredients that each bring their own magic. From rich dairy to fragrant rose water, every element plays a vital role to create that perfect balance of flavor, texture, and aroma.
- 2 cups heavy cream: This provides the luscious, velvety base that makes the ice cream decadent and smooth.
- 1 cup whole milk: Adds creaminess while keeping the ice cream light and airy.
- 3/4 cup sugar: Sweetens the custard just enough to highlight the rose and pistachio without overpowering them.
- 5 large egg yolks: Essential for that rich custard texture and helps thicken the ice cream base.
- 2 tsp rose water: The star flavor—adds an enchanting floral note that elevates this ice cream above the ordinary.
- 1/2 cup chopped roasted pistachios (unsalted): Adds delightful crunch and a subtly nutty contrast to the creamy ice cream.
- 1/8 tsp salt: Enhances all the other flavors, making them pop in every bite.
How to Make Rose Pistachio Ice Cream Recipe
Step 1: Warm the Milk and Cream
Start by combining the whole milk and heavy cream in a medium saucepan. Warm this mixture over medium heat until it’s just warm to the touch but not boiling. This gentle warming process prepares the dairy to infuse beautifully with the eggs without cooking them too quickly.
Step 2: Whisk Egg Yolks and Sugar
While your milk and cream are warming, whisk together the egg yolks and sugar in a separate mixing bowl. Keep whisking until the mixture lightens in color and thickens slightly—this step is key for achieving a luscious, creamy texture in your final ice cream.
Step 3: Temper the Eggs
Slowly pour the warm milk mixture into the egg yolks while whisking constantly. This careful tempering prevents the eggs from scrambling and helps create a smooth custard base, setting the stage for perfectly creamy ice cream.
Step 4: Cook the Custard
Return the combined mixture to the saucepan and cook over low heat, stirring continuously. Watch for the mixture to thicken slightly, coating the back of a spoon—this signals that your custard is ready. Patience here rewards you with beautiful texture.
Step 5: Add Rose Water and Salt
Remove the custard from heat and gently stir in your rose water and a pinch of salt. These two simple additions bring depth and aromatic charm to the ice cream, making it stand out with that signature rose pistachio flavor.
Step 6: Chill the Custard
Allow your custard to cool to room temperature. Then cover it with plastic wrap, pressing the wrap directly onto the surface to prevent a skin from forming, and refrigerate it for at least 2 hours. This chilling step is crucial for the perfect creamy consistency.
Step 7: Churn and Add Pistachios
Pour the chilled custard into your ice cream maker and churn following the manufacturer’s instructions. During the last few minutes of churning, sprinkle in the chopped roasted pistachios so they get evenly distributed without sinking to the bottom.
Step 8: Freeze Until Firm
Finally, transfer your freshly churned ice cream to a freezer-safe container and freeze for at least 4 hours to let it set to the perfect scoopable texture. Then, get ready to enjoy the delightful marriage of rose and pistachio in every bite!
How to Serve Rose Pistachio Ice Cream Recipe

Garnishes
To elevate your serving, sprinkle a few extra chopped pistachios on top for added crunch and color. A light drizzle of rose syrup or a fresh edible rose petal can also add a stunning, elegant finish that matches the ice cream’s floral essence.
Side Dishes
Rose Pistachio Ice Cream pairs wonderfully with light desserts like almond biscotti, delicate shortbread cookies, or even fresh berries. These sides complement the ice cream’s creamy texture and floral notes without overpowering its unique flavor.
Creative Ways to Present
For a wow-worthy presentation, serve the ice cream in vintage glass bowls or pretty dessert glasses layered with crushed pistachios and a sprinkle of dried rose petals. You can also try folding it into slices of warm pistachio cake or serving it atop a flaky, buttery pastry for an indulgent treat.
Make Ahead and Storage
Storing Leftovers
When you have leftover Rose Pistachio Ice Cream, store it in an airtight container in the coldest part of your freezer. This preserves the creamy texture and distinct flavors for up to two weeks, so you can enjoy that floral goodness anytime.
Freezing
If you plan to make this recipe in advance, complete the churning step and transfer the ice cream to a freezer-safe dish right away. Freeze it for at least 4 hours or overnight to ensure it’s firm and scoopable, maintaining the integrity of the delicate rose and crunchy pistachio mix-ins.
Reheating
Ice cream isn’t one for reheating, but if it becomes too hard when stored, simply let it sit at room temperature for 5 to 10 minutes before scooping. This brief wait softens the texture just enough without sacrificing that divine Rose Pistachio Ice Cream flavor.
FAQs
Can I use a different kind of nut instead of pistachios?
Absolutely! While pistachios are a classic pairing for rose, chopped almonds or cashews can work nicely too. Just be sure to roast them lightly to enhance their flavor and crunch.
What is the role of rose water in this recipe?
Rose water adds a fragrant, floral note that defines the unique character of Rose Pistachio Ice Cream Recipe. It provides an elegant aroma and subtle flavor that pairs beautifully with the toasted nuts and creamy custard.
Is there a non-dairy version of this ice cream?
Yes! You can substitute the heavy cream and whole milk with full-fat coconut milk or almond milk, but keep in mind the texture may be slightly less creamy. You might also want to experiment with a non-dairy egg substitute or use a simpler base like coconut cream with cornstarch for thickening.
How do I know when the custard is thick enough?
The custard is ready when it coats the back of a spoon lightly and a finger drawn across the back leaves a clear line. If it’s too runny, continue stirring over low heat carefully so it thickens without scrambling the eggs.
Can I make this ice cream without an ice cream maker?
You can! After chilling the custard, place it in a shallow container and freeze. Stir vigorously every 30 minutes for a few hours to break up ice crystals. Although the texture won’t be quite as smooth as with a machine, the flavor will still shine.
Final Thoughts
I genuinely hope you give this Rose Pistachio Ice Cream Recipe a try—it’s a delightful treat that will transport your taste buds to a whole new world of floral sweetness and nutty richness. Whether you’re making it for a special occasion or simply to brighten your day, this ice cream is sure to become a fast favorite you’ll want to make again and again.
Print
Rose Pistachio Ice Cream Recipe
- Prep Time: 20 minutes
- Cook Time: 15 minutes
- Total Time: 4 hours 35 minutes
- Yield: 4 servings
- Category: Dessert
- Method: Churning
- Cuisine: Middle Eastern
- Diet: Gluten Free
Description
This Rose Pistachio Ice Cream is a luxurious, creamy dessert featuring the fragrant floral notes of rose water and the crunchy texture of roasted pistachios. Made from a custard base of rich heavy cream, whole milk, and egg yolks, it offers a smooth and indulgent frozen treat perfect for warm days or elegant occasions.
Ingredients
Ice Cream Base
- 2 cups heavy cream
- 1 cup whole milk
- 3/4 cup sugar
- 5 large egg yolks
- 1/8 tsp salt
Flavorings and Mix-ins
- 2 tsp rose water
- 1/2 cup chopped roasted unsalted pistachios
Instructions
- Warm Dairy: In a medium saucepan, combine the milk and heavy cream. Warm the mixture over medium heat until it is warm to the touch but not boiling, which prepares the base for the custard without curdling the eggs.
- Whisk Egg Yolks and Sugar: Meanwhile, in a mixing bowl, whisk together the egg yolks and sugar until the mixture becomes pale and thickened, ensuring the eggs will provide a rich, creamy texture.
- Temper Eggs: Slowly pour the warm milk and cream mixture into the egg yolks while whisking constantly. This gradual process prevents the eggs from scrambling and allows for a smooth custard.
- Cook Custard: Return the combined mixture to the saucepan and cook over low heat, stirring continuously until the custard thickens slightly and coats the back of a spoon, indicating it’s ready to set the ice cream base.
- Add Flavorings: Remove the custard from heat and stir in the rose water and a pinch of salt, adding the signature floral aroma and enhancing overall flavor balance.
- Chill Custard: Allow the custard to cool to room temperature, then cover it with plastic wrap and refrigerate for at least 2 hours to fully chill, which is essential for proper churning.
- Churn Ice Cream: Pour the chilled custard into your ice cream maker and churn according to the manufacturer’s instructions. Add the chopped roasted pistachios in the last few minutes of churning to evenly distribute the nuts without losing their crunch.
- Freeze to Firm: Transfer the churned ice cream to a freezer-safe container and freeze for at least 4 hours or until firm, allowing the ice cream to fully set and develop its creamy texture.
Notes
- Ensure the custard does not boil to avoid curdling the eggs.
- Use unsalted roasted pistachios to control saltiness and preserve the nutty flavor.
- Chilling the custard thoroughly before churning is crucial for a smooth texture.
- Add pistachios at the end of churning to maintain their crunch.
- Use a clean plastic wrap pressed directly onto the custard to prevent a skin from forming during chilling.


