

“`html
If you’re ready to fall in love with a cookie that’s as delightful to look at as it is delicious to eat, you’ve got to try this Red Velvet Cookies with White Chocolate Recipe. These cookies bring together the rich, velvety cocoa-infused dough with bursts of creamy white chocolate, all wrapped in a gorgeous red hue that makes every bite feel like a special occasion. They’re soft, slightly chewy, and perfectly balanced between sweet and tangy, making them an instant favorite whether you’re baking for a cozy night in or a festive gathering.

Ingredients You’ll Need
The magic behind these Red Velvet Cookies with White Chocolate Recipe lies in a perfect mix of simple, pantry-friendly ingredients. Each one plays an essential role—from the tender crumb provided by all-purpose flour to the signature red color from gel dye, and the luscious white chocolate pieces that add a creamy surprise in every bite.
- 2 1/2 cups All-purpose flour: This forms the cookie’s structure and ensures a soft, chewy texture.
- 1/4 cup Unsweetened cocoa powder: Adds just the right hint of chocolate depth without overpowering the red velvet vibe.
- 1 tsp Baking soda: Helps the cookies rise and spread just enough to be perfectly tender.
- 1 tsp Salt: Balances the sweetness and enhances all the flavors.
- 1 cup Unsalted butter (melted and cooled): Provides richness and a buttery crumb that melts in your mouth.
- 3/4 cup Brown sugar (packed light or dark): Adds moisture and a subtle caramel note to the dough.
- 3/4 cup White granulated sugar: Sweetens without overshadowing the other flavors.
- 2 Large eggs (room temperature): Bind the dough and contribute to the cookie’s tender chew.
- 1 tsp Pure vanilla extract: Brings warmth and depth to the flavor profile.
- 1 tsp Red velvet dye (gel preferred): Gives that iconic, eye-catching red color that makes these cookies special.
- 1 1/2 cups Chopped white chocolate: Creamy pockets of joy scattered throughout each cookie.
- Red decorating sugar: Adds sparkle and a slight crunch coating the cookie dough before baking.
How to Make Red Velvet Cookies with White Chocolate Recipe
Step 1: Prepare the Dry Ingredients
Start by sifting together the flour, cocoa powder, baking soda, and salt in a medium bowl. This ensures everything is evenly combined and will make for a tender cookie crumb. Set this mixture aside while you move on to the wet ingredients. Also, chop your white chocolate into medium pieces if you’re using bars instead of chips—it makes each bite perfectly creamy and melty.
Step 2: Cream the Sugars and Butter
In a mixer bowl, beat the melted and cooled butter together with both the brown and white sugars on high speed for about 2 minutes. The color will lighten and the mixture will become fluffy, which is key for that soft texture in your cookies. Cooling the butter first keeps the eggs from cooking when added, preserving a smooth batter.
Step 3: Add Eggs, Vanilla, and Red Dye
Mix in the eggs one at a time, followed by vanilla extract and red velvet gel dye, blending just until everything is combined. This step infuses the batter with flavor and brings out the vibrant red that makes these cookies so festive and fun.
Step 4: Combine Wet and Dry Ingredients
Gradually add the dry ingredients to the wet mixture on low speed, mixing until just blended. Overmixing can lead to dense cookies, so once the flour is incorporated, stop. Fold in the chopped white chocolate gently to distribute those creamy chunks evenly without breaking them down.
Step 5: Chill and Preheat
Before baking, let the dough rest for about 10 to 15 minutes while you preheat the oven to 350°F. This resting time helps prevent the cookies from spreading too much, giving them that perfectly round, thick shape and chewy texture.
Step 6: Scoop, Coat, and Bake
Using a large cookie scoop (about 3 tablespoons or 2 ounces), shape the cookie dough into balls. Roll each one generously in red decorating sugar to add sparkle and a delightful crunch on the outside. Place six dough balls on each lined baking sheet, then bake each sheet separately for 13 to 15 minutes until they’re set but still soft in the center. For an extra indulgent touch, add a few white chocolate chips on top as soon as they come out of the oven.
Step 7: Cool and Enjoy
Allow the cookies to cool on the baking sheets for about 5 minutes before transferring them to a wire rack. This rest time helps them firm up just enough to handle without losing that tender, chewy center that makes these Red Velvet Cookies with White Chocolate Recipe so irresistible.
How to Serve Red Velvet Cookies with White Chocolate Recipe
Garnishes
For an extra festive presentation, sprinkle additional red decorating sugar or even white chocolate shavings on top. A light dusting of powdered sugar can also add a snowy effect that’s perfect for holiday occasions or a romantic treat.
Side Dishes
These cookies pair wonderfully with classic accompaniments like a cold glass of milk, creamy hot cocoa, or even a cup of rich coffee to balance the sweetness. If you want to turn them into a dessert plate, serve alongside a scoop of vanilla bean ice cream or a dollop of whipped cream for a dreamy treat.
Creative Ways to Present
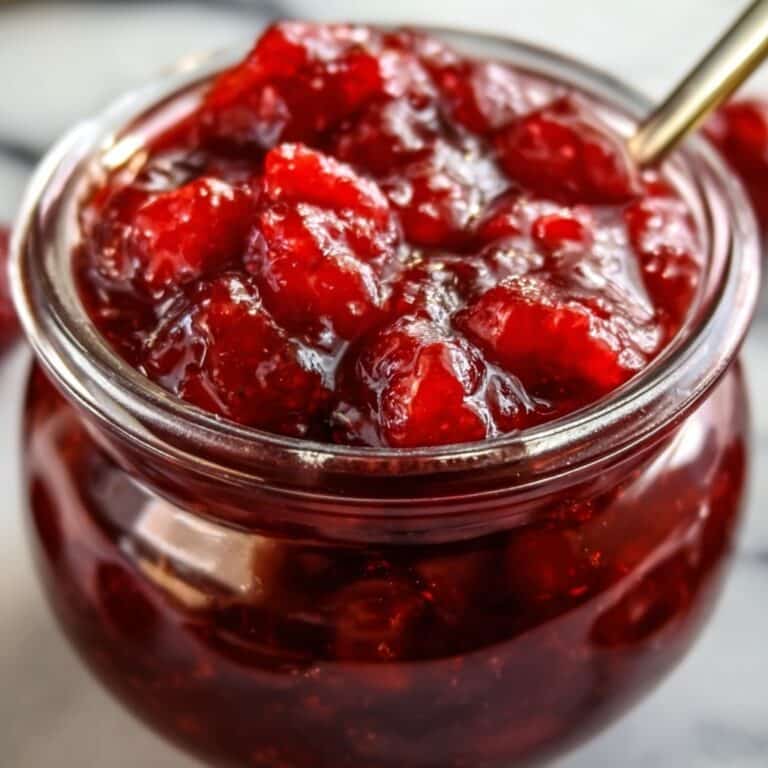
Place these cookies in a decorative jar tied with a bright ribbon for gift-giving, or stack them on a pretty cake stand for gatherings. You can also sandwich two cookies around cream cheese frosting or strawberry jam to make decadent red velvet cookie sandwiches that will wow your friends and family.
Make Ahead and Storage
Storing Leftovers
Keep your Red Velvet Cookies with White Chocolate Recipe fresh by storing them in an airtight container at room temperature. They should stay soft and flavorful for up to 5 days. Adding a slice of bread to the container can help maintain moisture.
Freezing
If you want to make these ahead of time or save leftovers for later, these cookies freeze beautifully. Place them in a freezer-safe bag or container with parchment paper between layers to prevent sticking, and freeze for up to 3 months. Just thaw at room temperature before enjoying.
Reheating
To revive that just-baked softness, warm your cookies in the microwave for about 10 to 15 seconds or place them in a preheated 300°F oven for a few minutes. This brings back that mouthwatering melt-in-your-mouth quality that makes this cookie so special.
FAQs
Can I use regular food coloring instead of gel dye?
You can, but gel dye is recommended because it provides a deeper, richer red color without adding extra liquid to your dough. Regular liquid food coloring can sometimes thin the dough and affect texture.
Is it possible to substitute the white chocolate?
Absolutely! You can use white chocolate chips, chopped white chocolate bars, or even mix in some cream cheese chunks to complement the red velvet flavor. Just keep an eye on melting behavior during baking.
Can I make the dough ahead and bake later?
Yes! The dough can be refrigerated for up to 24 hours or frozen for longer storage. Just remember to bring it back to room temperature before scooping and baking for best results.
Why should the butter be melted and cooled?
Melting the butter makes it easier to mix with the sugars and creates a chewier cookie texture. Cooling it prevents cooking the eggs when they’re added, ensuring a smooth, well-blended dough.
How do I prevent the cookies from spreading too much?
Letting the dough rest while the oven preheats helps. Also, be sure to scoop large, uniform dough balls and chill them if your kitchen is warm. Rolling in decorating sugar adds a slight barrier that slows the spread as well.
Final Thoughts
There’s something truly special about sharing a batch of freshly baked cookies, and this Red Velvet Cookies with White Chocolate Recipe is one that never fails to impress and bring smiles. With its striking color, soft chewiness, and pockets of creamy white chocolate, it’s a recipe you’ll want to return to again and again. So go ahead—grab your mixing bowl and start your own delicious batch today. Your taste buds will thank you!
“`
Print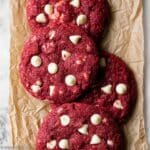
Red Velvet Cookies with White Chocolate Recipe
- Prep Time: 15 minutes
- Cook Time: 15 minutes
- Total Time: 34 minutes
- Yield: 14 cookies
- Category: Dessert
- Method: Baking
- Cuisine: American
Description
These Red Velvet Cookies are soft, chewy, and packed with rich white chocolate chunks. Featuring a vibrant red hue thanks to gel dye and a mix of cocoa powder for that signature red velvet flavor, these cookies are perfectly sweetened with both brown and granulated sugars. Rolled in red decorating sugar for a festive touch and baked to perfection, they make a delightful treat for holidays or any occasion.
Ingredients
Dry Ingredients
- 2 1/2 cups All-purpose flour
- 1/4 cup Unsweetened cocoa powder
- 1 tsp Baking soda
- 1 tsp Salt
Wet Ingredients
- 1 cup Unsalted butter (melted and cooled)
- 3/4 cup Brown sugar (packed, light or dark)
- 3/4 cup White granulated sugar
- 2 Large eggs (room temperature)
- 1 tsp Pure vanilla extract
- 1 tsp Red velvet gel dye (Americolor super red recommended)
Add-ins and Toppings
- 1 1/2 cups Chopped white chocolate (or white chocolate chips)
- Red decorating sugar (for rolling the cookies)
Instructions
- Mix Dry Ingredients: In a medium bowl, sift together the all-purpose flour, unsweetened cocoa powder, baking soda, and salt. Set aside. Chop the white chocolate into medium chunks if not using chips.
- Beat Sugars with Butter: Using a mixer, beat the melted and cooled unsalted butter with brown sugar and white granulated sugar on high speed for 2 minutes until the mixture lightens in color.
- Add Wet Ingredients: Mix in the eggs, pure vanilla extract, and red velvet gel dye until fully combined.
- Combine Dry and Wet: Slowly pour in the sifted dry ingredients and mix on low speed until just incorporated. Remove the bowl from the mixer and gently fold in the chopped white chocolate.
- Preheat Oven and Rest Dough: Preheat your oven to 350°F (175°C). Line two baking sheets with parchment paper. Let the cookie dough rest for 10-15 minutes while the oven heats to help reduce spreading.
- Scoop and Roll: Pour red decorating sugar into a shallow bowl. Using a large cookie scoop (about 3 tablespoons or 2 ounces), scoop dough balls, then roll each ball in the red sugar. Place 6 dough balls on each cookie sheet.
- Bake: Bake one cookie sheet at a time in the preheated oven for 13-15 minutes until the edges are set but the centers remain soft.
- Add Topping: Optionally, immediately after baking, place a few white chocolate chips on top of each cookie to melt slightly.
- Cool Cookies: Let the cookies rest on the baking sheet for 5 minutes to firm up, then transfer them to a wire cooling rack until completely cool.
Notes
- Allowing the dough to rest before baking helps prevent excessive spreading and maintains the cookie’s shape.
- Using gel food coloring ensures a vibrant, rich red color without altering the dough consistency.
- For best texture, use room temperature eggs so they incorporate evenly.
- White chocolate chunks add an indulgent creaminess; substitute with chips if desired.
- Cookies can be stored in an airtight container at room temperature for up to 5 days.


