Description
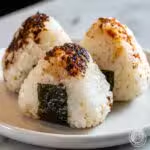
Onigiri, or Japanese rice balls, are a simple and versatile snack made with seasoned sushi rice and a variety of fillings. This recipe guides you through making perfectly cooked rice, seasoning it with a sweet and tangy vinegar mix, then shaping and filling the onigiri for a delicious, portable treat wrapped in nori seaweed.
Ingredients
Rice and Seasoning
- 2 cups sushi rice
- 2 1/2 cups water
- 1/4 cup rice vinegar
- 2 tablespoons sugar
- 1 teaspoon salt
Additional
- 1 sheet nori (seaweed), cut into strips
- Fillings of choice (e.g., pickled plum, tuna, salmon, or vegetables)
Instructions
- Rinse Rice: Rinse the sushi rice under cold water until the water runs clear to remove excess starch, ensuring the rice cooks to a perfect sticky texture.
- Cook Rice: Combine the rinsed rice and 2 1/2 cups water in a rice cooker and cook according to the manufacturer’s instructions. This ensures evenly cooked fluffy rice essential for onigiri.
- Prepare Vinegar Mixture: In a small bowl, mix 1/4 cup rice vinegar, 2 tablespoons sugar, and 1 teaspoon salt until fully dissolved to create the classic sushi rice seasoning.
- Season Rice: Once the rice is cooked, transfer it to a large bowl and gently fold in the vinegar mixture with a spatula or wooden spoon. This adds a tangy and slightly sweet flavor while cooling the rice.
- Cool Rice: Allow the rice to cool slightly until it can be handled comfortably, which is important to keep your hands from burning and to maintain proper texture.
- Shape Rice: Wet your hands with water to prevent sticking, take a handful of rice, and flatten it in your palm to prepare for filling.
- Add Filling and Form: Place your desired filling (such as pickled plum, tuna, salmon, or vegetables) in the center of the rice and mold the rice around it to form a triangle or ball shape, sealing the filling inside.
- Wrap with Nori: Wrap the onigiri with a strip of nori seaweed. This adds flavor and provides a handy way to hold the rice ball without it sticking to your fingers.
Notes
- Use sushi rice or short-grain rice for best texture; long-grain rice is too dry and will not hold shape.
- Keep hands wet while shaping onigiri to prevent sticking.
- Fillings can be customized to your preference—try cooked salmon flakes, seasoned tuna mayo, or pickled vegetables.
- Onigiri is best eaten fresh but can be stored in the refrigerator and gently reheated covered with a damp paper towel to retain moisture.
- Be careful to not over-mix rice with vinegar to avoid mushy texture.
