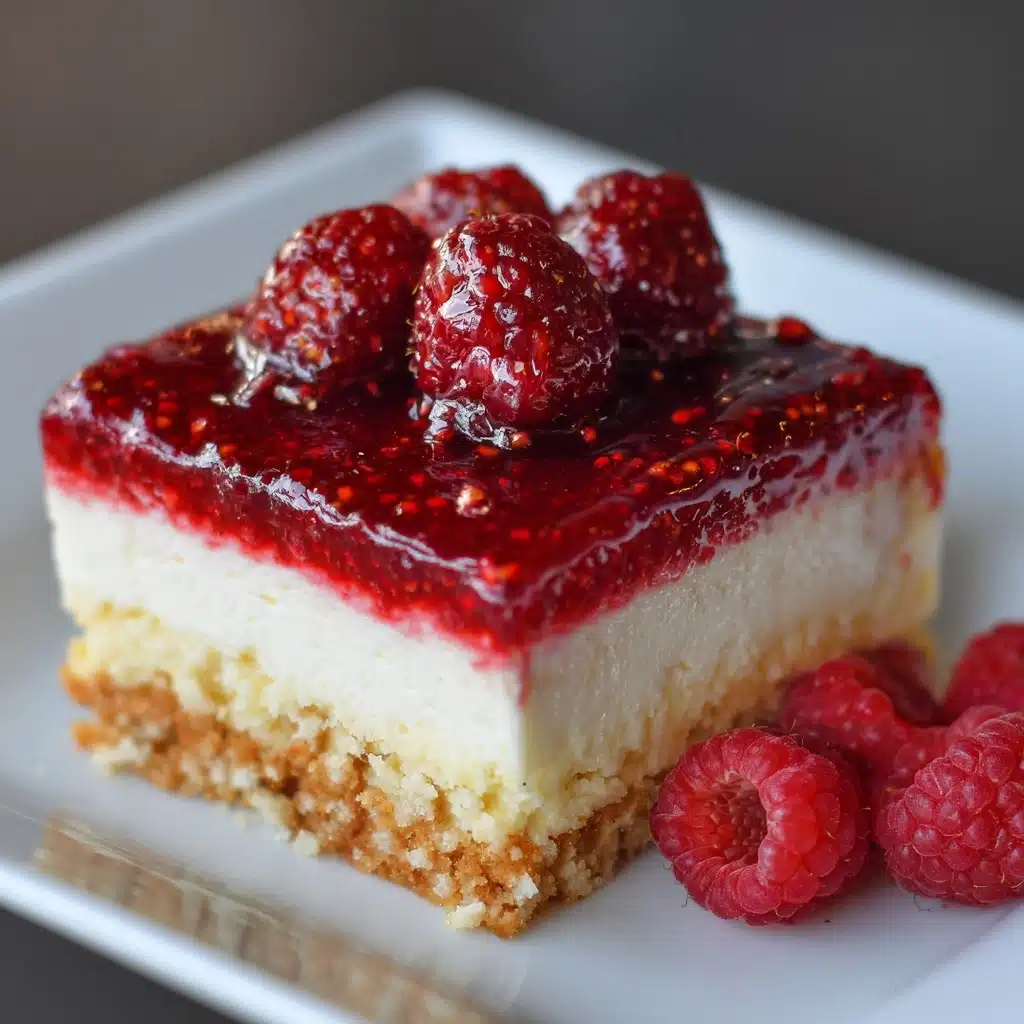
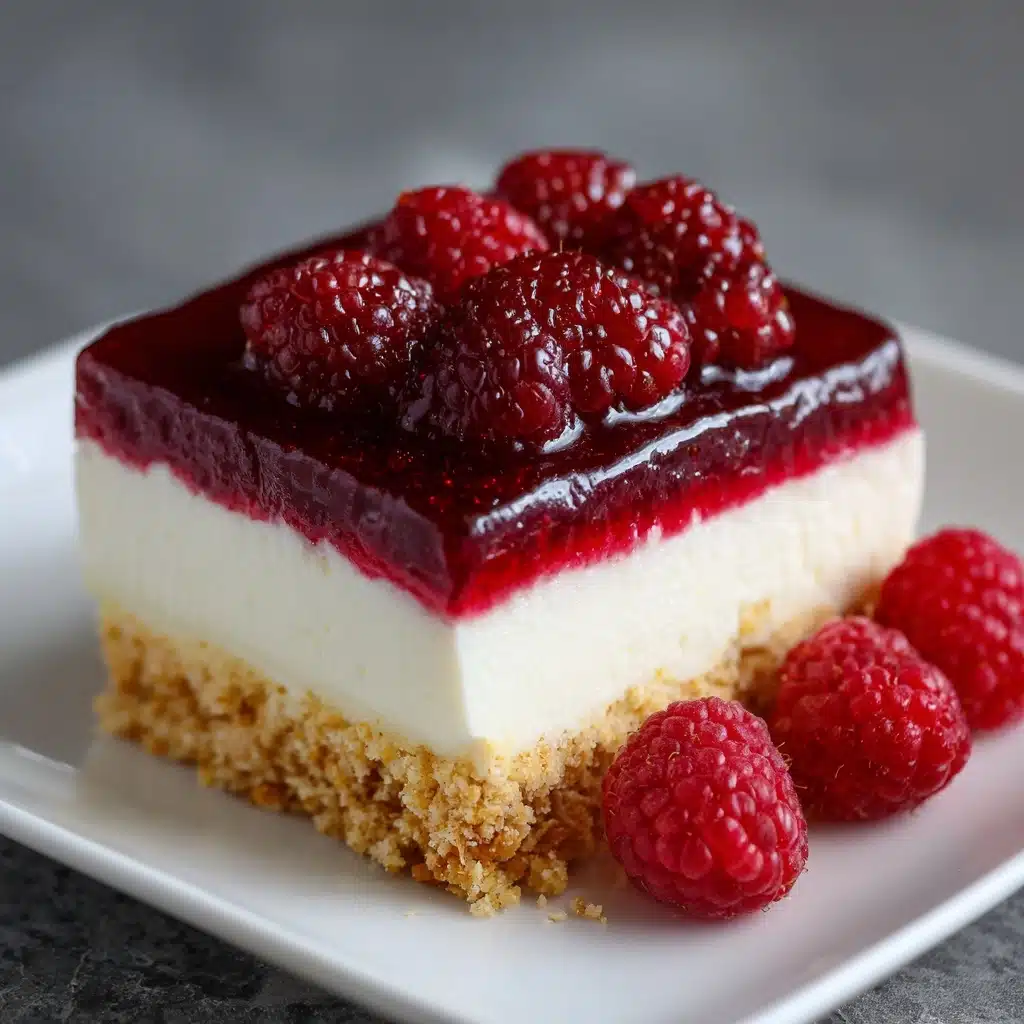
If you’re searching for a crowd-pleasing dessert that’s as easy as it is stunning, look no further than No-Bake Raspberry Cheesecake Bars. These creamy, dreamy bars boast a buttery graham cracker crust, a velvety cheesecake center, and a vibrant raspberry topping. With no oven required, they’re the ultimate treat for warm days, celebrations, or whenever you crave a sweet burst of fresh berries paired with luscious cream cheese.
Ingredients You’ll Need
The beauty of No-Bake Raspberry Cheesecake Bars is in their naturally simple ingredient list—each element plays an essential role in achieving the perfect balance of flavor, texture, and eye-popping color. Let’s break down what you’ll need, along with a little tip for each:
- Graham cracker crumbs: Form the crisp, buttery base—use a food processor for the best texture!
- Granulated sugar: Adds just the right sweetness to the crust, helping it caramelize ever-so-slightly even without baking.
- Unsalted butter, melted: Binds those crumbs together for a sliceable, rich foundation.
- Cream cheese, softened: Essential for that tangy, creamy filling—let it come to room temp for easy mixing.
- Powdered sugar: Dissolves smoothly into the filling, delivering sweetness without grittiness.
- Vanilla extract: Adds aromatic warmth and rounds out the cheesecake flavor.
- Heavy whipping cream: Whipped to peaks, this lightens the filling for a mousse-like texture.
- Fresh or frozen raspberries: The star of the show—fresh is best, but frozen works beautifully too.
- Sugar (for raspberry layer): Helps balance the raspberries’ natural tartness.
- Lemon juice: Brightens the berry flavor and enhances the vibrant color.
- Cornstarch mixed with water: Thickens the raspberry layer into a glossy, spreadable topping.
How to Make No-Bake Raspberry Cheesecake Bars
Step 1: Prepare the Pan
Start by lining an 8×8-inch baking pan with parchment paper, leaving enough over the sides that you can easily lift out your finished bars. This trick will make slicing—and serving—a breeze, and it helps keep the crust perfectly intact.
Step 2: Make the Graham Cracker Crust
In a medium bowl, combine the graham cracker crumbs, granulated sugar, and melted butter. Stir until everything looks evenly moistened, then tip the mixture into your prepared pan. Use the bottom of a measuring cup or glass to press the crumbs down firmly and evenly—think of this as the strong support for the creamy layers to come! Pop the crust into the fridge to chill while you work on the filling.
Step 3: Mix the Cheesecake Filling
Place your softened cream cheese in a large bowl. Add powdered sugar and vanilla extract, then beat until smooth and lump-free—taking care with this step makes all the difference in final texture. In a separate bowl, whip the heavy cream until you see stiff peaks (this takes just a few minutes with an electric mixer). Gently fold the whipped cream into the cream cheese mixture, using a spatula and a light touch to keep things pillowy.
Step 4: Assemble the Cheesecake Layer
Once your filling is ready, spread it evenly over the chilled graham cracker crust. Smooth the top with an offset spatula or the back of a spoon. This is the heart of the No-Bake Raspberry Cheesecake Bars—the layer that brings richness and a bit of tang to every bite. Return the pan to the fridge while you whip up the raspberry crown.
Step 5: Cook the Raspberry Topping
In a small saucepan, toss in your raspberries (fresh or frozen both work!), sugar, and lemon juice. Cook over medium heat, stirring now and then, until the berries begin to break down and the mixture gets juicy—about 5 to 7 minutes. Stir in the cornstarch slurry, and cook for another minute or two, until the topping thickens and turns glossy. Take it off the heat and let it cool slightly, so it’s warm but not hot when you spread it over the cheesecake layer.
Step 6: Layer and Chill
Gently pour and spread the cooled raspberry topping over the cheesecake layer. Aim for an even, generous coating, making sure every bite gets a pop of berry flavor. Now, the hardest part: Chill the bars for at least 4 hours or overnight. This time in the fridge helps every layer set perfectly for slicing and serving.
How to Serve No-Bake Raspberry Cheesecake Bars
Garnishes
For an extra flourish, top your bars with a few whole fresh raspberries, a light dusting of powdered sugar, or even delicate sprigs of mint. These finishing touches add a hint of elegance and make your No-Bake Raspberry Cheesecake Bars look absolutely irresistible on the plate.
Side Dishes
Pair these cheesecake bars with a cup of hot coffee, a fruity iced tea, or a sparkling lemonade for a refreshing balance. If you’re entertaining, consider a platter of fresh fruit or a scoop of vanilla ice cream to round out a dreamy summer dessert spread.
Creative Ways to Present
No-Bake Raspberry Cheesecake Bars shine at any party! Try cutting them into bite-sized cubes for a dessert buffet, serving them in cupcake wrappers for easy grab-and-go treats, or layering them in small jars for a cute, portable parfait presentation.
Make Ahead and Storage
Storing Leftovers
Keep any leftover bars tightly covered in the refrigerator. They’ll stay delectably fresh for up to 3 days—though you may notice the raspberry topping’s color deepen as it sits (don’t worry, it still tastes amazing!).
Freezing
You can freeze No-Bake Raspberry Cheesecake Bars for longer storage. Arrange the sliced bars in a single layer on a baking sheet, freeze until firm, then transfer to an airtight container or freezer bag. Let them thaw in the fridge before serving—just note the texture may be slightly softer after freezing, but the flavors stay fantastic.
Reheating
Good news: No reheating required! These cheesecake bars are meant to be enjoyed cold, right from the fridge (or after a quick thaw if frozen). If you’re in a warm climate or serving outdoors, keep bars chilled until just before serving for best results.
FAQs
Can I use a different type Dessert
Absolutely! Blueberries, blackberries, or even strawberries all work beautifully in this recipe. Just adjust the sugar and lemon juice as needed to match the fruit’s natural sweetness and tartness.
How can I make these No-Bake Raspberry Cheesecake Bars gluten-free?
Simply swap the regular graham crackers for a gluten-free version—most grocery stores carry them. The rest of the recipe is naturally gluten-free!
Can I make this recipe ahead of time?
Yes, these bars are actually even better when made a day ahead. The flavors meld and set up perfectly, so you can slice and serve with zero stress.
My raspberry layer looks lumpy—what happened?
Sometimes raspberry seeds or undissolved cornstarch can create a less-than-smooth texture. If you’d like a silkier topping, just strain the cooked raspberries before spreading over the cheesecake layer.
Can I double the recipe for a crowd?
Definitely! Just double all ingredients and use a 9×13-inch pan. The chilling time may need a slight increase to ensure everything sets nicely.
Final Thoughts
There’s something magical about sharing No-Bake Raspberry Cheesecake Bars—every slice is rich, creamy, tangy, and bright with raspberry flavor. Whether you’re hosting a special gathering or treating yourself on a sunny afternoon, these bars are guaranteed to draw smiles and seconds. Give them a try, and let this easy, fresh dessert become a new favorite in your kitchen!
Print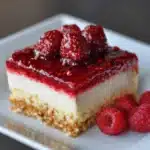
No-Bake Raspberry Cheesecake Bars Recipe
- Prep Time: 25 minutes
- Cook Time: 5 minutes (for topping)
- Total Time: 30 minutes (plus 4 hours chilling)
- Yield: 9 bars
- Category: Dessert
- Method: No-Bake
- Cuisine: American
- Diet: Non-Vegetarian
Description
Indulge in the creamy and fruity delight of these No-Bake Raspberry Cheesecake Bars. A luscious cream cheese filling sits atop a buttery graham cracker crust, finished with a vibrant raspberry layer. This easy and refreshing dessert is perfect for any occasion, especially during the summer months.
Ingredients
For the crust:
- 1 1/2 cups graham cracker crumbs
- 1/4 cup granulated sugar
- 6 tbsp unsalted butter, melted
For the filling:
- 16 oz cream cheese, softened
- 1/2 cup powdered sugar
- 1 tsp vanilla extract
- 1 cup heavy whipping cream
For the raspberry layer:
- 1 1/2 cups fresh or frozen raspberries
- 2 tbsp sugar
- 1 tbsp lemon juice
- 1 tbsp cornstarch mixed with 1 tbsp water
Instructions
- Prepare the crust: Line an 8×8-inch baking pan with parchment paper. Mix graham cracker crumbs, sugar, and melted butter. Press into pan and chill.
- Make the filling: Beat cream cheese, powdered sugar, and vanilla. Whip cream until stiff peaks form. Fold cream into cream cheese mixture. Spread over crust.
- Create raspberry layer: Cook raspberries, sugar, and lemon juice. Add cornstarch slurry. Cool slightly and spread over filling.
- Chill and serve: Refrigerate for at least 4 hours. Slice and serve chilled.
Notes
- You can strain the raspberry topping for a smoother texture.
- Use gluten-free graham crackers for a GF option.
- These bars can be made a day ahead and stored in the fridge.

