
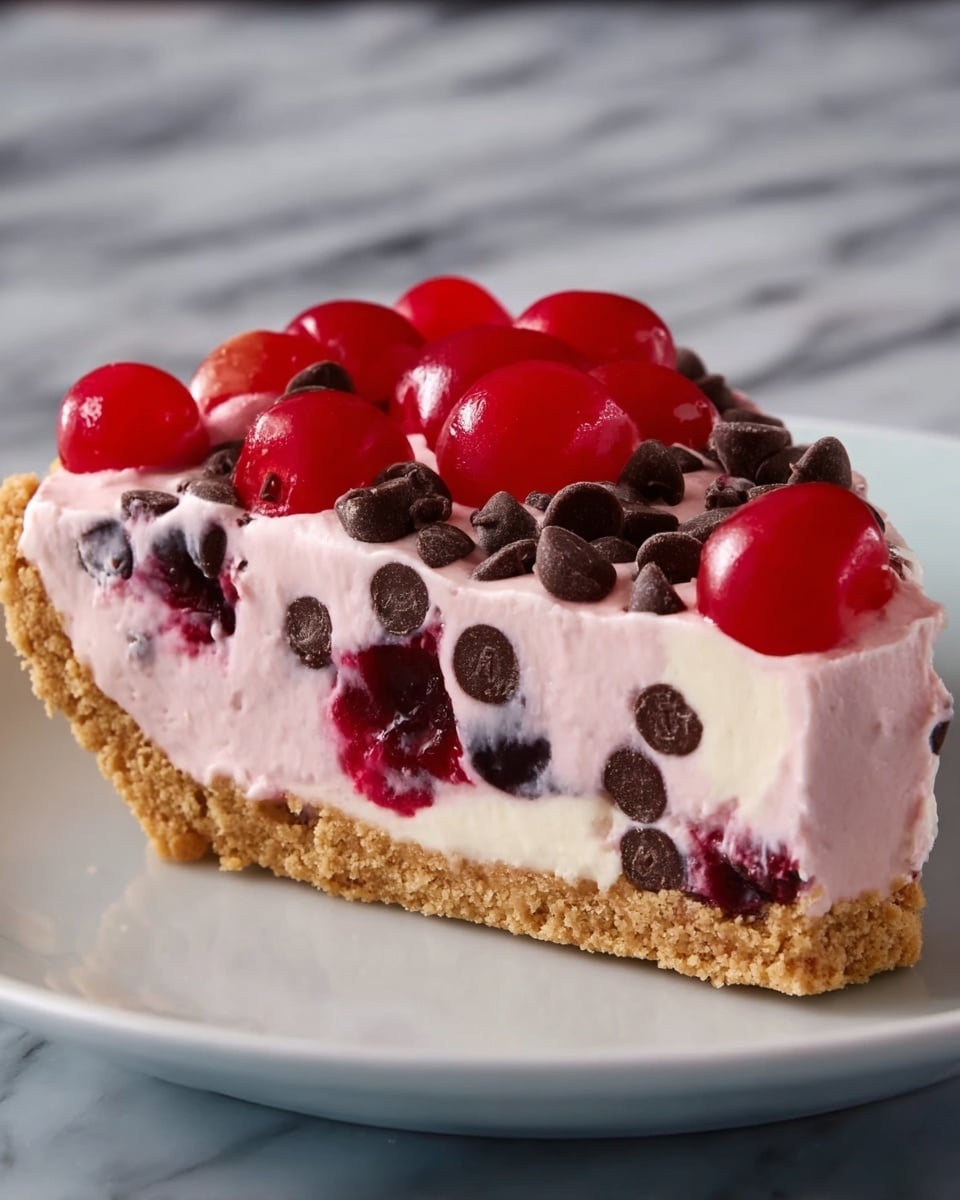
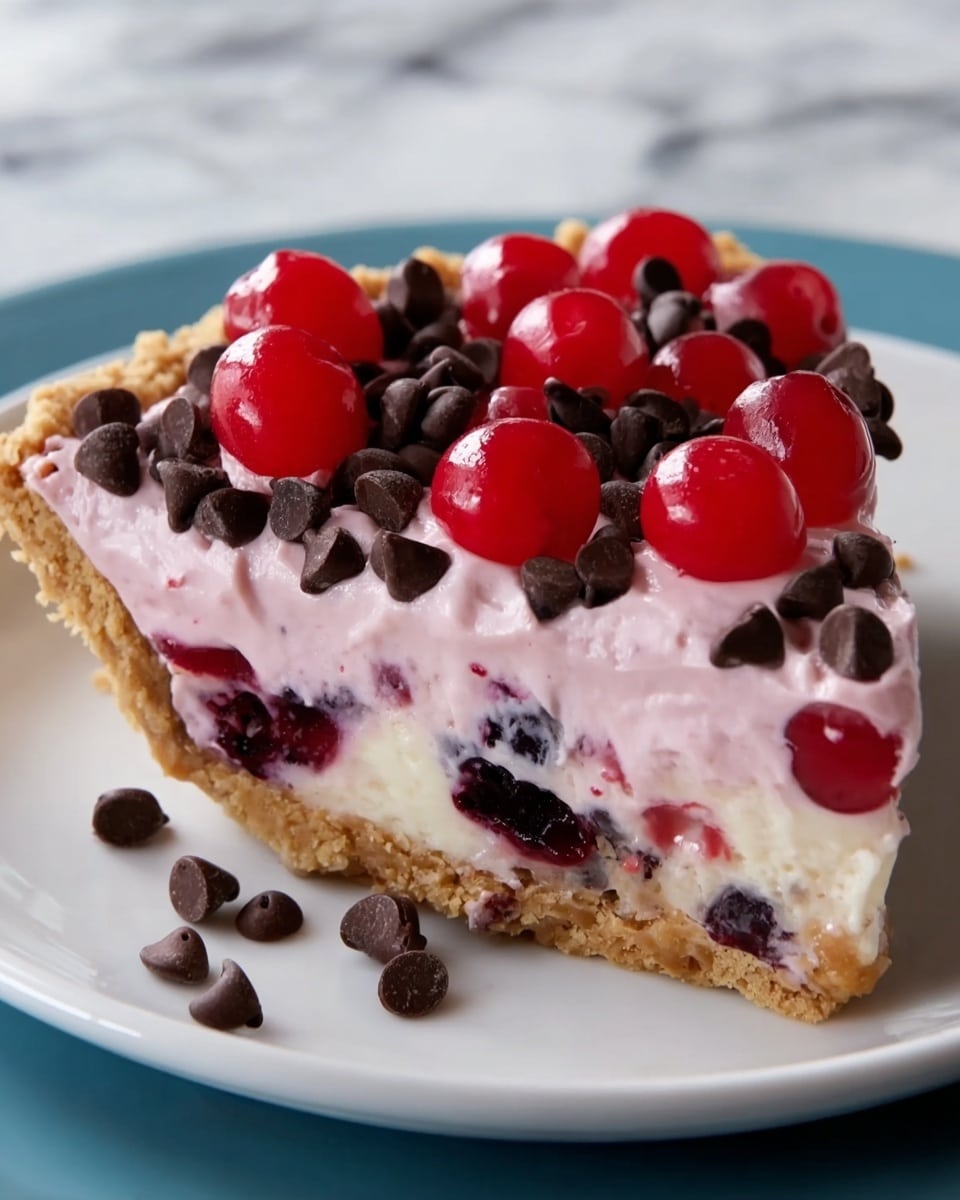
If you adore quick desserts that feel indulgent but require minimal effort, then you are going to fall head over heels for this No-Bake Easy Cherry Chocolate Chip Pie Recipe. It combines a buttery graham cracker crust with a luscious cream cheese filling studded with mini chocolate chips, all layered beneath a sweet, tangy cherry pie topping. Each bite delivers a dreamy blend of creamy, fruity, and chocolatey flavors without ever turning on the oven. This pie is perfect for those moments when you want impressive dessert vibes without the fuss, and it’s sure to become your go-to for gatherings or a cozy treat at home.

Ingredients You’ll Need
This recipe calls for a handful of pantry staples and fresh ingredients, each playing a vital role in building layers of fantastic taste and texture. The buttery crust forms a crunchy base, creamy sweet filling melts in your mouth, and cherries add that pop of summery brightness, while chocolate chips introduce delightful bursts of richness.
- Graham cracker crumbs: These create the foundation of the crust, giving a sweet and crunchy texture.
- Melted unsalted butter: Helps bind the crust ingredients together for that perfect firm base.
- Granulated sugar: Adds just the right amount of sweetness to the crust.
- Cream cheese, softened: The star of the filling providing a smooth and tangy creaminess.
- Powdered sugar: Sweetens the filling evenly without grit.
- Vanilla extract: Intensifies the flavors with a warm aromatic touch.
- Heavy whipping cream: Whipped to stiff peaks to give the filling a light, airy texture.
- Mini chocolate chips: Scattered through the filling for bursts of melty chocolate in every bite.
- Cherry pie filling: Brings a luscious, fruity layer full of bright cherries to balance the richness.
- Extra mini chocolate chips: For garnish, adding a pretty finish on top.
- Whipped cream (optional): A delightful topping to add creaminess and elegance to each slice.
How to Make No-Bake Easy Cherry Chocolate Chip Pie Recipe
Step 1: Prepare the Crust
Start by mixing together your graham cracker crumbs, melted butter, and granulated sugar in a medium bowl. This combination will create a rich, crunchy crust that holds everything together without baking. Press this buttery crumb mix firmly into the bottom and up the sides of a 9-inch pie pan, creating a uniform layer to cradle the filling.
Step 2: Chill the Crust
Pop the crust into your fridge for 15 to 20 minutes. This step lets it firm up so it stays solid when you add the luscious filling later. While the crust chills, it’s the perfect time to get started on the creamy filling.
Step 3: Make the Cream Cheese Filling
In a large bowl, beat softened cream cheese until it’s smooth and free of lumps. Next, blend in powdered sugar and vanilla extract for sweetness and depth. Then gently fold in the whipped heavy cream; this makes the filling incredibly airy and light, a lovely contrast to the dense crust.
Step 4: Add the Chocolate Chips
Now it’s time for the mini chocolate chips! Stir them into the cream cheese mixture so that every bite has little chocolate surprises. This simple addition elevates the filling with pockets of chocolatey joy.
Step 5: Assemble the Layers
Spread half of the cream cheese filling evenly over your chilled crust. Next, spoon a generous layer of cherry pie filling right on top, making sure you spread it out smoothly. Reserve a few cherries for garnish if you want an extra special touch later.
Step 6: Finish with Remaining Filling and Chill
Top the cherry layer with the remaining cream cheese mixture, smoothing it out nicely for a neat finish. Then, refrigerate the entire pie for 3 to 4 hours or until everything is nicely set and firm. This no-bake magic means your effort is minimal but the results are spectacular.
Step 7: Garnish and Serve
Before digging in, sprinkle extra mini chocolate chips on top for sparkle and texture, and add a dollop of whipped cream with a few reserved cherries for a show-stopping presentation. Slice and enjoy every creamy, fruity, and chocolatey mouthful!
How to Serve No-Bake Easy Cherry Chocolate Chip Pie Recipe
Garnishes
Garnishing is where you can get playful. Fresh cherries not only add color but also introduce an inviting juiciness, while extra mini chocolate chips offer a delightful crunch. A swirl of whipped cream adds that perfect cloud-like softness that makes each slice feel like a little celebration.
Side Dishes
This pie stands out beautifully on its own or paired with a simple cup of coffee or tea. If you want to extend the dessert experience, consider serving it alongside fresh berries or a light fruit salad to complement the creamy richness with refreshing brightness.
Creative Ways to Present
If you’re serving this No-Bake Easy Cherry Chocolate Chip Pie Recipe at a gathering, try slicing it into mini tartlets using a muffin tin crust at the start. Individual servings not only look charming but make it easy for guests to grab and go. You can also sprinkle edible gold dust on the cherries for an elegant touch that will wow everyone.
Make Ahead and Storage
Storing Leftovers
Any leftovers should be covered tightly and stored in the refrigerator where the pie stays fresh and flavorful for up to 3 days. This means you can confidently make it ahead of time without losing the creamy texture or cherry goodness.
Freezing
Although this pie is best enjoyed fresh, you can freeze it if needed. Wrap it securely in plastic wrap and aluminum foil, and freeze for up to one month. Thaw overnight in the fridge before serving to maintain the best texture and flavor.
Reheating
Since this is a no-bake, chilled dessert, reheating isn’t necessary or recommended. It’s designed to be served cold to showcase its creamy and fruity layers in all their glory. Just take it straight from the fridge and slice to serve!
FAQs
Can I use a different type of crust for this pie?
Absolutely! While a graham cracker crust is classic and provides great texture, you can experiment with cookie crumbs like chocolate wafer or ginger snaps for a different flavor profile.
Is there a substitute for cream cheese in this recipe?
You could try mascarpone or ricotta cheese for a milder taste, but be mindful it will change the texture and tanginess somewhat. Cream cheese gives that signature rich and smooth filling.
Can I make this pie vegan or dairy-free?
For a vegan version, look for dairy-free cream cheese and a non-dairy whipped topping. Just ensure your crust ingredients are also free from animal products. The texture may vary slightly but will still be delicious.
How long does this pie keep in the fridge?
Stored properly, it stays fresh for about 3 days. After that, the crust can start to soften and the filling might lose some of its fluffy texture.
Can I use fresh cherries instead of canned cherry pie filling?
Yes, fresh cherries can be a fantastic alternative! Just cook them down slightly with sugar and a splash of lemon juice to create a thick, jammy topping that mimics the pie filling’s consistency.
Final Thoughts
There is something truly special about a dessert that tastes like it took hours but actually comes together in a snap. This No-Bake Easy Cherry Chocolate Chip Pie Recipe is one of those gems that delivers on flavor, texture, and wow-factor without any oven time. Whether you’re a busy parent, a last-minute host, or just someone who loves a delicious dessert, this pie will win your heart and your taste buds every time. I hope you give it a try and make it your new favorite crowd-pleaser!
Print
No-Bake Easy Cherry Chocolate Chip Pie Recipe
- Prep Time: 30 minutes
- Cook Time: 0 minutes
- Total Time: 3 hours 30 minutes
- Yield: 8 servings
- Category: Dessert
- Method: No-Cook
- Cuisine: American
- Diet: Vegetarian
Description
This No-Bake Easy Cherry Chocolate Chip Pie is a deliciously creamy dessert combining a buttery graham cracker crust with a smooth chocolate chip cream cheese filling and a sweet cherry topping. Perfect for warm days or when you want a quick and impressive dessert without turning on the oven, it’s an ideal treat for cherry and chocolate lovers alike.
Ingredients
Crust
- 1 1/2 cups graham cracker crumbs
- 1/2 cup melted unsalted butter
- 1/4 cup granulated sugar
Filling
- 8 oz cream cheese, softened
- 1/2 cup powdered sugar
- 1 tsp vanilla extract
- 1 1/2 cups heavy whipping cream, whipped to stiff peaks
- 1 cup mini chocolate chips
Topping and Garnish
- 1 can (21 oz) cherry pie filling
- Extra mini chocolate chips for garnish
- Whipped cream for serving (optional)
- Reserved cherries from cherry pie filling (optional)
Instructions
- Prepare the Crust: Combine the graham cracker crumbs, melted unsalted butter, and granulated sugar in a medium bowl until the mixture is evenly moistened and crumbly.
- Shape the Crust: Press the crumb mixture firmly into the bottom and up the sides of a 9-inch pie pan to create an even crust layer.
- Chill the Crust: Place the prepared crust in the refrigerator for 15-20 minutes to firm up while you prepare the filling.
- Beat the Cream Cheese: In a large mixing bowl, beat the softened cream cheese until it becomes smooth and creamy without lumps.
- Add Sweeteners and Flavoring: Mix in the powdered sugar and vanilla extract until fully incorporated and smooth.
- Fold in Whipped Cream: Gently fold the whipped heavy cream into the cream cheese mixture until the filling is light, airy, and fluffy.
- Add Chocolate Chips: Stir in the mini chocolate chips evenly throughout the creamy filling.
- First Layer of Filling: Spoon half of the cream cheese and chocolate chip mixture into the chilled crust, spreading it evenly to cover the crust base.
- Add Cherry Layer: Spread a layer of cherry pie filling over the cream cheese layer, saving a few cherries for garnish if you’d like.
- Top with Remaining Filling: Add the remaining cream cheese mixture on top of the cherries and spread it out smoothly.
- Refrigerate the Pie: Cover the pie and refrigerate for at least 3-4 hours, or until the filling is fully set and firm.
- Garnish: Just before serving, sprinkle extra mini chocolate chips on top, add a dollop of whipped cream, and decorate with the reserved cherries for an attractive presentation.
- Serve and Enjoy: Slice the pie into 8 pieces and enjoy this creamy, cherry-chocolate delight!
Notes
- Ensure the cream cheese is softened to room temperature for a smooth filling.
- Whip the heavy cream to stiff peaks for the best texture in the filling.
- You can substitute mini chocolate chips with regular chocolate chips chopped finely if desired.
- To speed up setting time, you can chill the pie in the freezer for about 1-2 hours instead of the fridge.
- This pie is best served within 2 days but can be stored refrigerated for up to 3 days.
- For a crunchy topping, add some toasted nuts on top with the chocolate chips and cherries.


