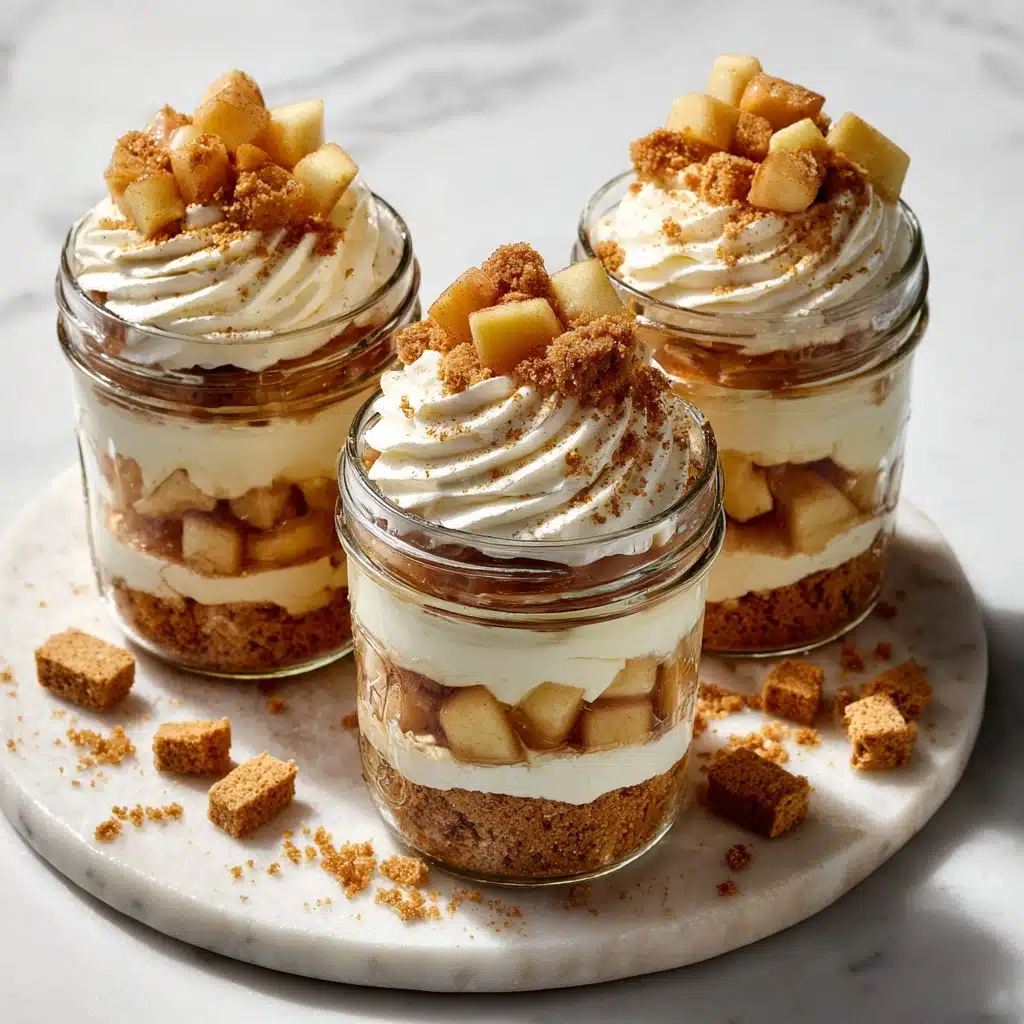
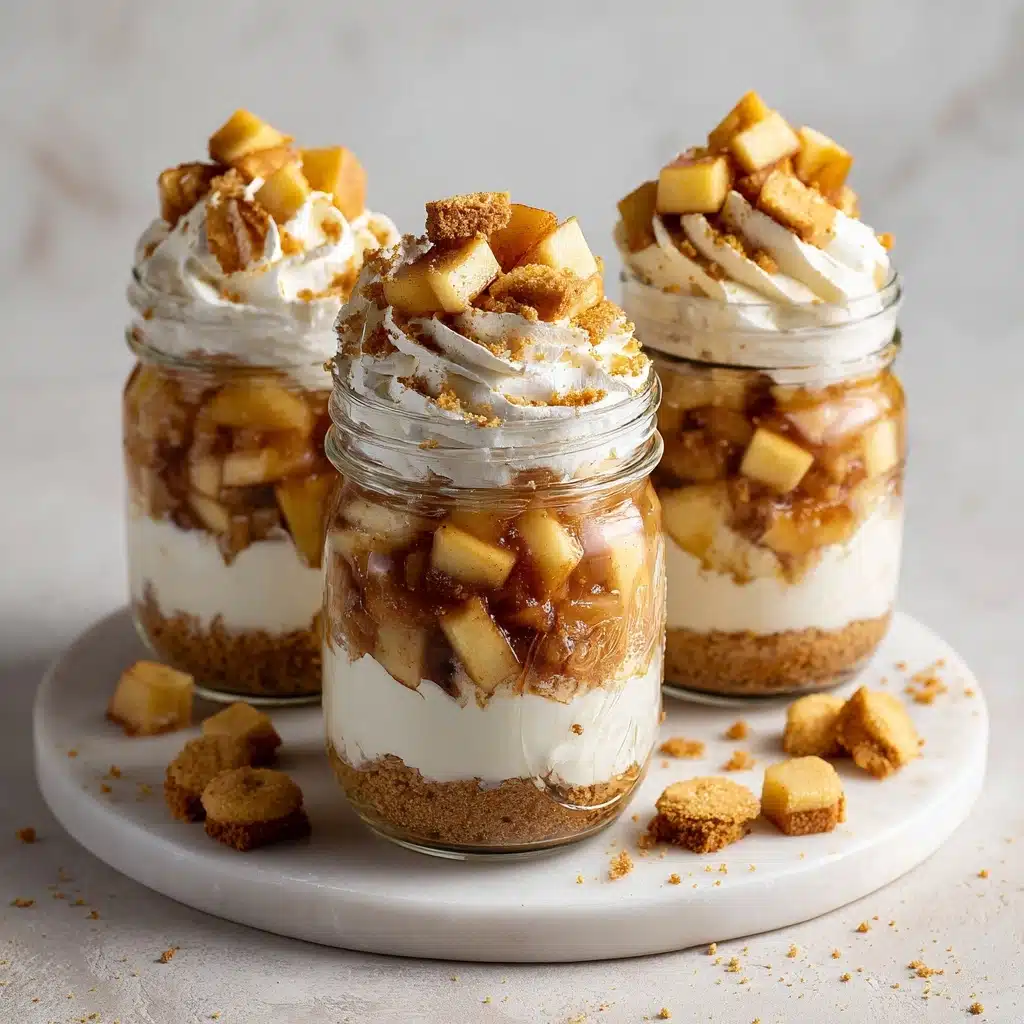
If there’s one dessert I could make every week and never get tired of, it’s these No-Bake Apple Cheesecake Jars. They’re sweet, tangy, and full of cozy fall flavors with cinnamon-kissed apples, a lush and pillowy cheesecake layer, and a buttery crumb crust—all individually portioned for extra fun. Whether you’re serving friends at a backyard get-together or looking to satisfy a late-night craving without turning on the oven, you’ll love how simple these are to make and share. These No-Bake Apple Cheesecake Jars will easily become a family favorite you find yourself craving over and over again.
Ingredients You’ll Need
Each ingredient in these jars plays its own delicious part, building flavor and texture into every bite. Here’s what you’ll need, along with tips on how each one makes the No-Bake Apple Cheesecake Jars extra special.
- Graham cracker crumbs: These create the classic cheesecake base and add a lovely crunch and toasty flavor.
- Melted butter: It binds the crumbs and gives the crust that irresistible richness.
- Granulated sugar: Adds a little sweetness and helps hold the crust together.
- Cream cheese (softened): The heart of the filling—make sure it’s soft for the smoothest, creamiest texture.
- Powdered sugar: Blends seamlessly into the cream cheese for a silky, sweet filling.
- Vanilla extract: Delivers a fragrant, comforting note to every spoonful.
- Heavy whipping cream: When whipped and folded in, it makes the filling light yet decadent.
- Peeled and diced apples: Choose your favorite apple varieties for bright color and juicy bites in the topping.
- Brown sugar: Brings a warm, caramel-like sweetness to the apples.
- Ground cinnamon: Infuses the apple topping with irresistible, cozy spice.
- Lemon juice: Adds brightness and keeps the apples from browning.
- Pinch of salt: Enhances all the flavors and balances the sweetness perfectly.
How to Make No-Bake Apple Cheesecake Jars
Step 1: Prepare the Graham Cracker Crust
Grab a small bowl and stir together the graham cracker crumbs, melted butter, and granulated sugar until the mixture looks like wet sand. This buttery, crunchy layer will become the irresistible foundation of your No-Bake Apple Cheesecake Jars. Set the crust aside while you prepare the other layers.
Step 2: Cook the Apple Topping
In a medium saucepan over medium heat, combine the diced apples, brown sugar, cinnamon, lemon juice, and just a pinch of salt. Let everything cook together for 5 to 7 minutes, stirring occasionally, until the apples are tender and syrupy. Your kitchen will start to smell incredible! Once the apples have softened beautifully, set them aside to cool before layering.
Step 3: Whip the Cheesecake Filling
Using a hand mixer or stand mixer, beat the cream cheese, powdered sugar, and vanilla extract together until the mixture becomes smooth and creamy. In another mixing bowl, whip the heavy cream until you see stiff peaks forming. This step is what makes the filling so delightfully light yet creamy—and it’s so much easier than baking a cheesecake!
Step 4: Combine and Layer
Gently fold the whipped cream into your cream cheese mixture, taking care not to deflate all that airy volume. To assemble, spoon a generous layer of your graham cracker crust into the bottom of each jar. Add a thick layer of cheesecake filling, then top with a spoonful (or two) of the cooled apple topping. If your jars are tall enough, feel free to repeat the layers so every bite is truly loaded.
Step 5: Chill and Serve
Once all the jars are assembled, pop them in the refrigerator for at least 1 hour. This allows the flavors to mingle and the cheesecake layer to set perfectly. When you’re ready, grab a spoon and dig in—or share with friends for instant smiles!
How to Serve No-Bake Apple Cheesecake Jars
Garnishes
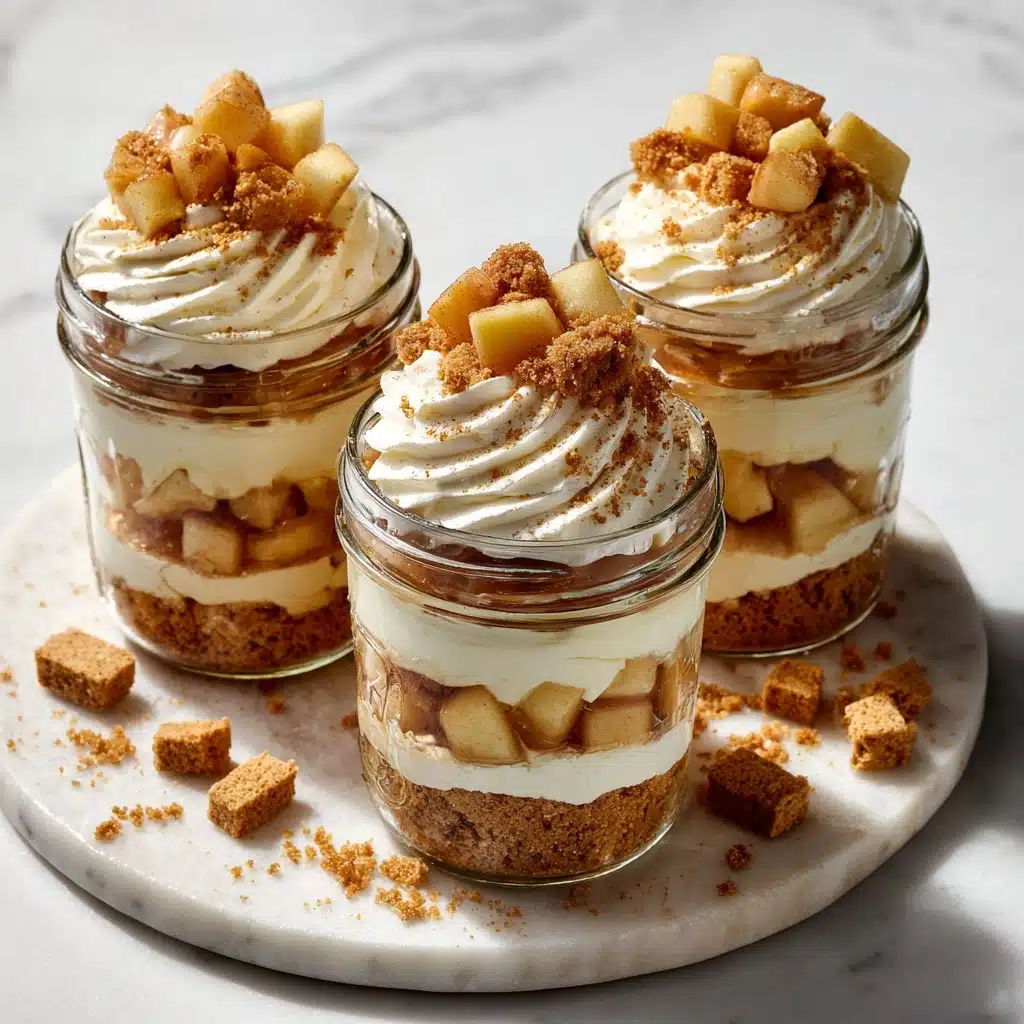
For a finishing touch, you can sprinkle a little extra cinnamon, add a few graham cracker crumbs, or swirl on a dollop of whipped cream. Chopped toasted pecans or walnuts are also lovely if you want a bit more crunch. These little details make every No-Bake Apple Cheesecake Jar feel bakery-worthy.
Side Dishes
Since these jars are on the decadent side, serve them alongside a mug of hot coffee, chai tea, or a scoop of vanilla ice cream for a creamy counterpoint. For fall gatherings, offer fresh apple slices or crisp pears so guests can keep their flavors light and seasonal.
Creative Ways to Present
Don’t be afraid to dress up your No-Bake Apple Cheesecake Jars for the occasion! Use mason jars, parfait glasses, or even tiny tumblers for a more elegant look. Tie a ribbon around each jar for the holidays, or set out a build-your-own cheesecake bar so guests can layer their own creations—it’s interactive and so much fun!
Make Ahead and Storage
Storing Leftovers
No-Bake Apple Cheesecake Jars keep beautifully in the fridge for up to 2 days. Just cover them tightly with lids or plastic wrap to keep the layers fresh and prevent the apples from drying out. The flavors meld even more as they rest, making leftovers a treat!
Freezing
While you can freeze these jars, the texture of the whipped cream layer may change a bit once thawed. If you plan to freeze, assemble without the apple topping, wrap tightly, and add the apples after defrosting for best results. Thaw overnight in the fridge before enjoying.
Reheating
Luckily, you don’t need to reheat these No-Bake Apple Cheesecake Jars at all—just pull them from the fridge and savor them chilled. If you prefer your apple topping warm, gently reheat it in the microwave and spoon it over the jars just before serving for a comforting twist.
FAQs
Can I use apple pie filling instead of making my own apple topping?
Absolutely! Using store-bought apple pie filling is a great shortcut when you need dessert in a hurry. It’ll be a little sweeter, but your No-Bake Apple Cheesecake Jars will still taste amazing and save you a few minutes.
What kind of apples work best for this recipe?
Tart apples like Granny Smith hold their shape and add a nice tang, while sweeter varieties like Honeycrisp or Fuji bring lots of natural sweetness. Mix and match for a more complex flavor!
Can I make these jars gluten-free?
Yes, just swap out the graham crackers for your favorite gluten-free variety. The rest of the ingredients are naturally gluten-free, making these a great option for guests with dietary restrictions.
How far ahead can I make No-Bake Apple Cheesecake Jars?
These are ideal for making 1 – 2 days ahead of time. Just keep them chilled until you’re ready to serve, and they’ll be perfectly set and flavorful.
Can I double or halve the recipe?
Definitely! Double the ingredients for a bigger crowd, or halve them for a smaller gathering. The assembly process stays exactly the same, so it’s easy to scale up or down as needed.
Final Thoughts
I can’t recommend these No-Bake Apple Cheesecake Jars enough for anyone craving something sweet, cozy, and easy to share. They bring together the best parts of apple pie and creamy cheesecake in a single charming little jar. Don’t wait for a special occasion—treat yourself and someone you love this week!
Print
No-Bake Apple Cheesecake Jars Recipe
- Prep Time: 20 minutes
- Cook Time: 7 minutes
- Total Time: 27 minutes (plus chilling)
- Yield: 6 jars
- Category: Dessert
- Method: No-Bake
- Cuisine: American
- Diet: Non-Vegetarian
Description
These No-Bake Apple Cheesecake Jars are a delightful dessert perfect for any occasion. Layers of graham cracker crust, creamy cheesecake filling, and spiced apple topping create a delicious treat that’s easy to make and even easier to enjoy.
Ingredients
Graham Cracker Crust:
- 1 cup graham cracker crumbs
- 3 tablespoons melted butter
- 2 tablespoons granulated sugar
Cheesecake Filling:
- 8 oz cream cheese (softened)
- 1/2 cup powdered sugar
- 1 teaspoon vanilla extract
- 1 cup heavy whipping cream
Apple Topping:
- 2 cups peeled and diced apples
- 2 tablespoons brown sugar
- 1/2 teaspoon ground cinnamon
- 1 tablespoon lemon juice
- pinch of salt
Instructions
- Graham Cracker Crust: In a small bowl, combine graham cracker crumbs, melted butter, and granulated sugar. Stir well and set aside.
- Apple Topping: In a saucepan, cook diced apples, brown sugar, cinnamon, lemon juice, and salt until tender and syrupy. Let cool.
- Cheesecake Filling: Beat cream cheese, powdered sugar, and vanilla until smooth. Whip heavy cream until stiff peaks form. Fold whipped cream into cream cheese mixture.
- Assemble: Layer graham cracker crust, cheesecake filling, and apple topping in jars. Repeat layers if desired. Chill for at least 1 hour before serving.
Notes
- Use store-bought apple pie filling to save time.
- These jars are perfect for parties or make-ahead desserts and can be made up to 2 days in advance.

