

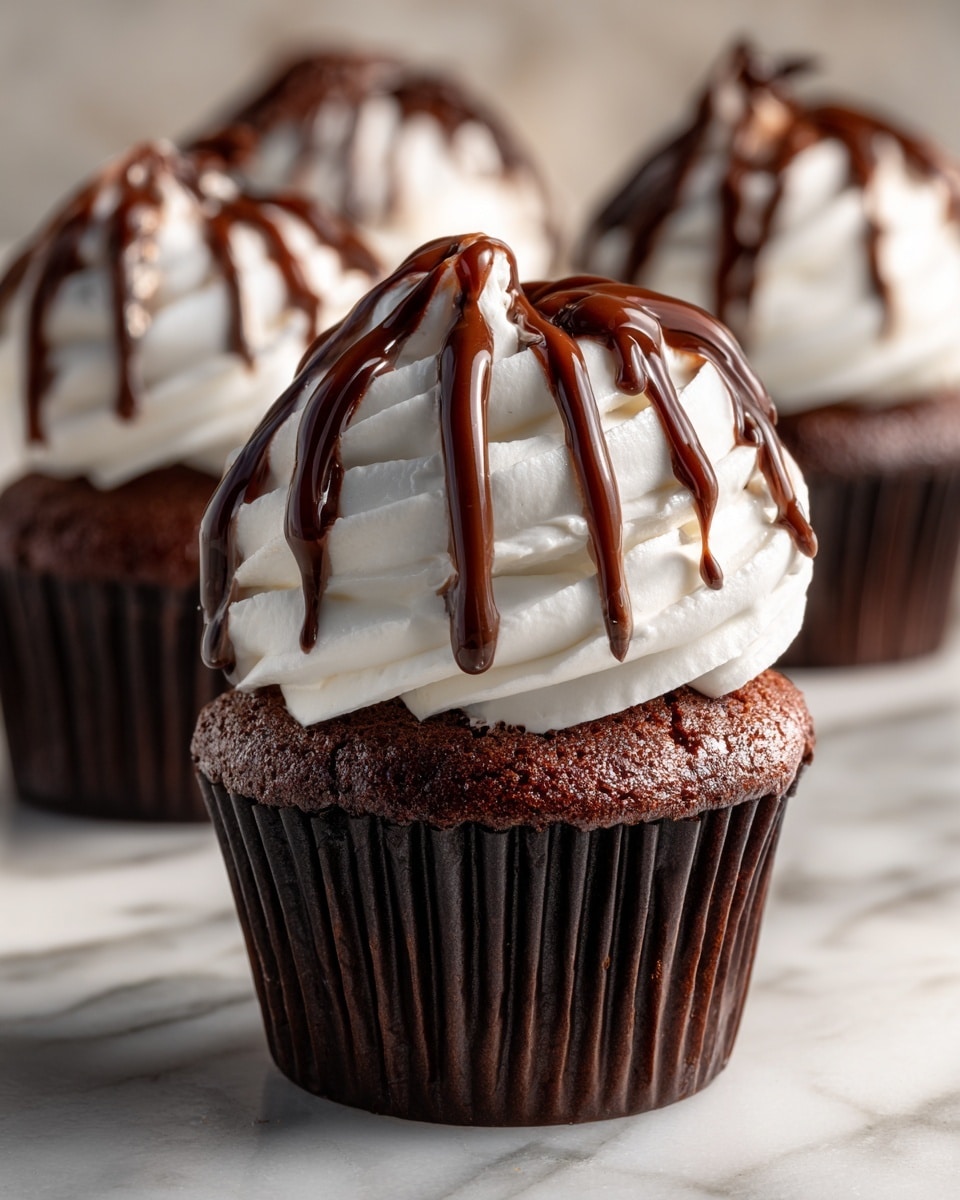
If you love the irresistible combo of rich chocolate and refreshing mint, you are going to adore this Mint Brownie Cheesecake Cups Recipe. It’s a delightful little dessert that brings together fudgy brownie bases topped with a creamy, mint-infused cheesecake layer, all in perfectly portioned individual cups. Easy to make and stunning to serve, this recipe is a serious crowd-pleaser that’s ideal for everything from casual family nights to special celebrations. Let me walk you through how this Mint Brownie Cheesecake Cups Recipe can become your new favorite treat.

Ingredients You’ll Need
What’s so wonderful about this dessert is that it needs just a handful of simple ingredients, each one playing an essential role in building those layers of flavor, texture, and even a pop of color. From the fudgy brownie batter to the light, airy minty cheesecake, everything combines perfectly without any fuss.
- Brownie mix: The foundation of your dessert, providing that rich and fudgy chocolate taste.
- Mini chocolate chips: Optional but highly recommended to add an extra burst of chocolatey goodness and texture.
- Cream cheese, softened: This gives the cheesecake its creamy, luscious body.
- Powdered sugar: Sweetens the cheesecake layer smoothly without any graininess.
- Vanilla extract: Enhances the cheesecake flavor with familiar warmth.
- Mint extract: The star ingredient that adds that fresh, cool twist — adjust to taste.
- Heavy whipping cream: Whipped to stiff peaks to lighten up the cheesecake mixture.
- Green food coloring (optional): Just a touch for that classic mint-green hue that makes these cups irresistible.
- Fresh mint leaves: Perfect for garnish, adding beauty and subtle aroma.
How to Make Mint Brownie Cheesecake Cups Recipe
Step 1: Prepare the Brownie Layer
Start by preheating your oven to 350°F (175°C) and lining your muffin tin with cupcake liners. Whip up your brownie mix according to the package instructions; typically, you’ll add oil, eggs, and water. Spoon about 1 to 2 tablespoons of batter into each liner—filling them about halfway—and sprinkle some mini chocolate chips on top if you want that extra crunch. Then bake for around 15 to 18 minutes, or until a toothpick inserted comes out clean. Once baked, allow the brownies to cool completely before moving on.
Step 2: Make the Cheesecake Layer
While your brownies are cooling, it’s time to whip up the cheesecake topping. In a medium bowl, beat together the softened cream cheese, powdered sugar, vanilla extract, and mint extract until the mixture is smooth and creamy. In a separate bowl, whip your heavy cream until you see those gorgeous stiff peaks forming. Now, gently fold the whipped cream into the cream cheese mix to keep it light and fluffy. For that festive minty green look, add a tablespoon of green food coloring if you like.
Step 3: Assemble the Cups
Once your brownie bases have cooled down, it’s assembly time. Spoon a generous dollop of the mint cheesecake mixture over each brownie cup and use a spatula or the back of a spoon to smooth out the top. After assembling all your cups, pop them in the fridge for at least 2 hours to let the layers set and those flavors mingle beautifully.
Step 4: Top and Serve
After a good chill, your Mint Brownie Cheesecake Cups Recipe is nearly ready to wow! Sprinkle additional mini chocolate chips on top for a lovely finishing touch, and garnish with fresh mint leaves for an extra hint of freshness and a dash of elegance. Serve these chilled and watch them disappear in no time.
How to Serve Mint Brownie Cheesecake Cups Recipe
Garnishes
The right garnishes elevate these cups to a beautiful presentation. Fresh mint leaves bring a vibrant green contrast and fresh aroma, while a light dusting of powdered sugar or extra mini chocolate chips provides visual appeal and enhances texture.
Side Dishes
These cups shine as a stand-alone dessert but can be paired wonderfully with a scoop of vanilla ice cream or even a drizzle of chocolate or caramel sauce. For a refreshing twist, add a small fruit salad featuring berries or citrus, which complements the mint’s coolness perfectly.
Creative Ways to Present
For parties, present these in clear mini jars or elegant glass cups to show off the pretty layers. You can also place them on a platter with assorted toppings available for guests to personalize their cups, making for an interactive and fun dessert experience.
Make Ahead and Storage
Storing Leftovers
These cups keep beautifully covered in the refrigerator for up to 3 days. Just make sure to store them in an airtight container to maintain their moisture and fresh flavors.
Freezing
If you want to prepare them ahead of time, freeze the assembled cups without the mint garnish for up to 1 month. Thaw in the refrigerator overnight before serving and add fresh mint just before eating for the best flavor and freshness.
Reheating
Since these are best enjoyed chilled, reheating isn’t recommended as it changes the texture of the cream cheese layer. Instead, allow frozen cups to thaw slowly in the fridge and enjoy them cold for that perfect creamy and minty taste.
FAQs
Can I use homemade brownies for this Mint Brownie Cheesecake Cups Recipe?
Absolutely! Using your favorite homemade brownie recipe will make these cups even more special and let you customize the fudginess or texture exactly how you like it.
What if I don’t have mint extract? Can I use something else?
If you don’t have mint extract, you can substitute with peppermint extract, but use less because it’s stronger. Avoid fresh mint in the mixture as it won’t infuse the same flavor.
Can these dessert cups be made gluten-free?
Yes! Just choose a gluten-free brownie mix, and make sure all other ingredients are gluten-free for a safe and delicious option.
Is green food coloring necessary?
Not at all. The green coloring is purely for aesthetics. If you prefer a natural look, just skip it and let the mint flavor shine.
How do I make sure the cheesecake layer is smooth and fluffy?
The key is to soften your cream cheese well and to carefully fold in whipped cream without deflating it, keeping the mixture light and airy.
Final Thoughts
This Mint Brownie Cheesecake Cups Recipe is a delightful dessert that combines the best of two beloved flavors in easy-to-handle, beautiful little cups. Whether you’re making them for a special occasion or just to treat yourself, they’re sure to bring smiles all around. So grab your ingredients, follow these simple steps, and prepare to impress everyone with your homemade minty chocolatey magic!
Print
Mint Brownie Cheesecake Cups Recipe
- Prep Time: 10 minutes
- Cook Time: 18 minutes
- Total Time: 33 minutes plus chilling time
- Yield: 12 servings
- Category: Dessert
- Method: Baking
- Cuisine: American
Description
These Mint Brownie Cheesecake Cups combine rich, fudgy brownies with a creamy, mint-flavored cheesecake topping, creating a deliciously refreshing dessert. Easy to make and perfect for parties or a special treat, these individual cups are beautifully garnished with mini chocolate chips and fresh mint leaves for an extra touch of flavor and elegance.
Ingredients
Brownie Layer
- 1 box brownie mix (including required ingredients: usually oil, eggs, and water as per package)
- 1/2 cup mini chocolate chips (optional)
Cheesecake Layer
- 8 oz cream cheese, softened
- 1/2 cup powdered sugar
- 1 tsp vanilla extract
- 1/2 tsp mint extract (or more to taste)
- 1 cup heavy whipping cream
- 1 tbsp green food coloring (optional, for color)
Garnish
- 1/4 cup mini chocolate chips
- Fresh mint leaves (optional)
Instructions
- Prepare the Brownie Layer: Preheat your oven to 350°F (175°C) and line a muffin tin with cupcake liners. Follow the brownie mix package instructions to prepare the batter, typically combining oil, eggs, and water. Spoon about 1 to 2 tablespoons of the batter into each muffin liner, filling them about halfway. For extra texture and flavor, sprinkle mini chocolate chips on top of the batter if you like.
- Bake the Brownies: Bake the brownies according to the box instructions, usually 15 to 18 minutes, or until a toothpick inserted in the center comes out clean. Once done, allow them to cool completely in the muffin tin before proceeding.
- Make the Cheesecake Layer: In a medium bowl, beat together the softened cream cheese, powdered sugar, vanilla extract, and mint extract until the mixture is smooth and creamy. In a separate bowl, whip the heavy cream until stiff peaks form. Carefully fold the whipped cream into the cream cheese mixture until fully combined, being gentle to maintain the light texture. Add green food coloring if you want a minty green hue for visual appeal.
- Assemble the Dessert Cups: Once the brownie bases are cooled, spoon a generous amount of the cheesecake mixture over each brownie in the muffin liners. Use a spatula to smooth out the tops evenly. Place the assembled cups in the refrigerator and chill for at least 2 hours to allow the cheesecake layer to set properly.
- Garnish and Serve: Before serving, top each cup with a sprinkle of mini chocolate chips and a fresh mint leaf for an attractive, fresh garnish. Serve these mint brownie cheesecake cups chilled for the best taste experience.
Notes
- Ensure the brownies are completely cooled before adding the cheesecake layer to prevent melting and blending of layers.
- Adjust the amount of mint extract according to personal preference for stronger or milder mint flavor.
- Green food coloring is optional but adds a festive and visually appealing touch.
- These cups can be stored in the refrigerator for up to 3 days, making them great for preparing ahead.
- For a dairy-free version, consider using dairy-free cream cheese and whipping cream alternatives.


