

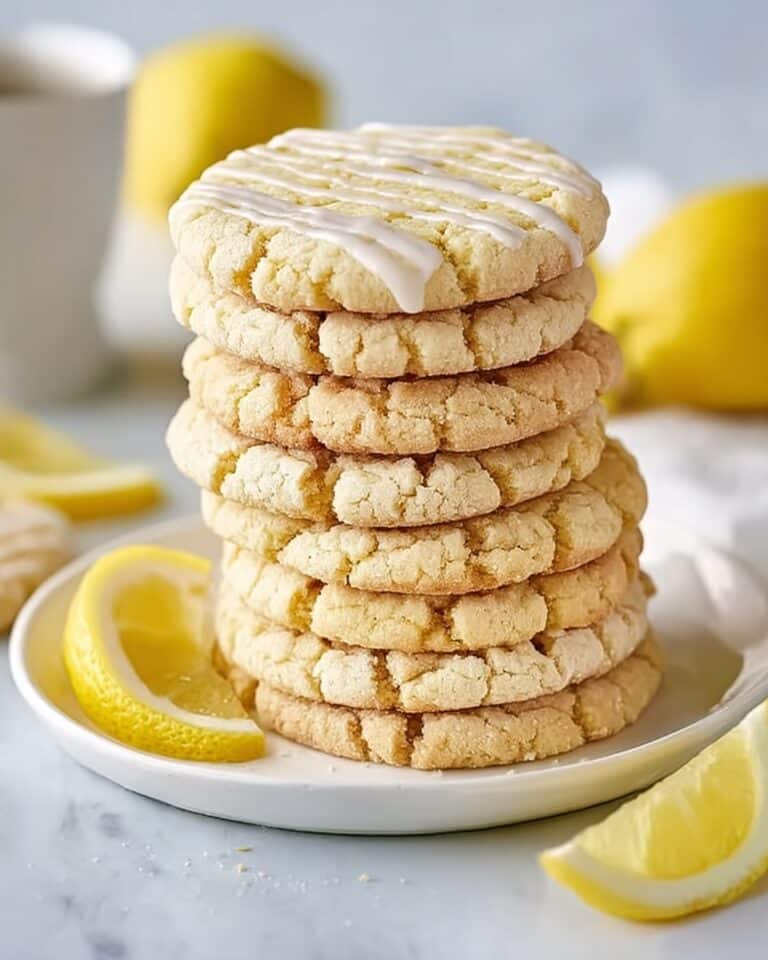
Bright, tangy, and perfect for sharing, Mini Lemon Cheesecakes are the little treats that instantly bring sunshine to any table! Each bite offers a luscious, zesty cheesecake filling on a buttery base, topped with a hint of lemon-laced elegance. Whether for a party, a family picnic, or a sweet midweek surprise, these adorable desserts never fail to charm guests of all ages. They’re easy to whip up, utterly satisfying, and just as much fun to make as they are to eat! If you love citrus and crave mouthfuls of creamy cheesecake without fuss, you’re in for a real treat.

Ingredients You’ll Need
Gathering your ingredients is a breeze, and every single item plays its part in making these Mini Lemon Cheesecakes shine. From the burst of citrus to the creamy base and the irresistibly crunchy crust, you’ll appreciate how each component transforms into absolute magic.
- Cream Cheese: Use full-fat cream cheese, softened to room temperature for the best, creamiest texture in your cheesecakes.
- Granulated Sugar: Adds just enough sweetness to balance out the tart lemon and enrich the creamy filling.
- Fresh Lemons (zest & juice): Nothing beats the sparkle of fresh lemons for the bright poppy flavor and aroma.
- Eggs: Your binding heroes, eggs give the cheesecakes their classic structure while keeping the filling luxuriously smooth.
- Vanilla Extract: A drop of vanilla rounds out the flavors and gives a subtle warmth behind the lemon’s bright notes.
- Graham Cracker Crumbs: The ideal crunchy, buttery base that perfectly supports the creamy filling without overpowering it.
- Butter (melted): Binds the crumbs together for a crust that’s crisp but never dry.
- Pinch of Salt: Just a touch sharpens both the citrus and the sweetness beautifully.
How to Make Mini Lemon Cheesecakes
Step 1: Prep Your Muffin Tin
Start by lining a standard muffin tin with paper liners. This not only makes cleanup a breeze but makes removing the cheesecakes super easy. It also helps keep their adorable shape intact. If you want extra flair, go for brightly colored or patterned liners for a festive look.
Step 2: Mix the Crust
In a small bowl, combine the graham cracker crumbs, melted butter, and a pinch of salt. Give it a good stir until the mixture looks like slightly damp sand. This ensures every cheesecake has a buttery, cohesive base. Spoon about a tablespoon of the mixture into each muffin liner and press it down firmly with the bottom of a glass or your fingers to create compact crusts.
Step 3: Make the Cheesecake Filling
In a large mixing bowl, beat the softened cream cheese and granulated sugar until creamy and smooth. Then, add in the eggs one at a time, mixing after each addition. Next, stir in the vanilla extract, lemon zest, and lemon juice, blending just until everything is combined and the filling smells deliciously fragrant and lemony.
Step 4: Fill and Bake
Spoon the cheesecake mixture evenly over the crusts in your muffin tin. Each cup should be about three-quarters full. Gently tap the tin on the counter to smooth out the tops and release any big air bubbles. Bake in a preheated 325°F (160°C) oven for about 18–22 minutes, or until the centers are just set but still slightly wobbly. They’ll finish setting as they cool.
Step 5: Cool and Chill
After removing from the oven, let your Mini Lemon Cheesecakes cool in the tin for at least 15 minutes, then transfer to a wire rack to cool completely. Once they’re at room temperature, pop them in the fridge to chill for at least 2 hours (overnight is fantastic). The chilling step ensures that melt-in-your-mouth creamy texture that everyone loves.
How to Serve Mini Lemon Cheesecakes

Garnishes
Dress them up with a curl of lemon zest, a few fresh berries, or even a dab of whipped cream. A tiny edible flower makes them extra special for spring and summer gatherings. The right garnish elevates these cheerful treats and highlights their gorgeous lemon flavor.
Side Dishes
Mini Lemon Cheesecakes pair blissfully with fresh fruit salads, a tangy raspberry coulis, or even a selection of crisp cookies on the side. For a brunch table, set them next to light tea sandwiches and sparkling citrus drinks. Their creamy texture and bright notes complement just about any light fare.
Creative Ways to Present
Try serving each cheesecake in a decorative cupcake wrapper, or arrange them on a tiered cake stand for a playful dessert centerpiece. You can even nestle them into mini mason jars for picnics or party favors. Presentation is half the fun—don’t be afraid to get creative and make your Mini Lemon Cheesecakes the star of the show!
Make Ahead and Storage
Storing Leftovers
Leftover Mini Lemon Cheesecakes keep beautifully in the refrigerator. Simply store them in an airtight container for up to 5 days. They stay tender and flavorful, making them an ideal make-ahead treat for busy schedules or last-minute dessert cravings.
Freezing
If you’d like to make a batch ahead of time, these bite-sized cheesecakes are great candidates for freezing. Place fully chilled cheesecakes on a baking sheet to freeze solid, then transfer to a freezer-safe bag or container. Thaw overnight in the fridge, and they’ll taste freshly made every time.
Reheating
While there’s no need to reheat Mini Lemon Cheesecakes (since they’re best served chilled), if you’re after a slightly softer texture, let them rest at room temperature for 20–30 minutes before serving. Avoid microwaving, as it will ruin their delicate, creamy consistency.
FAQs
Can I use bottled lemon juice instead of fresh lemons?
Fresh lemons are highly recommended for both juice and zest, as they bring unmatched brightness and flavor. Bottled juice will work in a pinch, but your cheesecakes may miss that vibrant, aromatic quality.
What if I don’t have graham cracker crumbs?
You can substitute crushed digestive biscuits, vanilla wafers, or even shortbread cookies for the crust. Each alternative adds its own subtle flavor, so choose what sounds best to you!
Can Mini Lemon Cheesecakes be made gluten-free?
Absolutely! Just swap out the graham crackers for your favorite gluten-free cookie crumbs. Make sure all other packaged ingredients are certified gluten-free as well.
How do I know when they’re baked perfectly?
When the edges look set but the centers jiggle just a bit when shaken, they’re done. They’ll continue to firm up as they cool and chill, so don’t overbake!
Can I double the recipe for a crowd?
Yes, simply double all the ingredients and use two muffin tins. Bake them all at once or in batches, and you’ll have plenty of Mini Lemon Cheesecakes ready for your event.
Final Thoughts
There’s something truly special about baking and sharing Mini Lemon Cheesecakes—they bring a burst of joy and a taste of sunshine to any occasion. Try them once and you’ll quickly see why they become a new favorite. Go ahead, gather your friends or family, and make some sweet, lemony memories!
Print
Mini Lemon Cheesecakes Recipe
- Prep Time: 15 minutes
- Cook Time: 20 minutes
- Total Time: 35 minutes (plus chilling)
- Yield: 12 mini cheesecakes
- Category: Dessert
- Method: Oven
- Cuisine: American
- Diet: Vegetarian
Description
These bright and zesty mini lemon cheesecakes feature a buttery graham cracker crust and a creamy lemon-infused filling. Perfect for parties, picnics, or a refreshing dessert anytime!
Ingredients
- 1 cup graham cracker crumbs
- 3 tbsp melted butter
- Pinch of salt
- 16 oz (2 packages) full-fat cream cheese, softened
- 2/3 cup granulated sugar
- 2 large eggs
- 1 tbsp fresh lemon zest
- 1/4 cup fresh lemon juice
- 1 tsp vanilla extract
Instructions
- Preheat oven to 325°F (160°C). Line a 12-cup muffin tin with paper liners.
- Mix graham cracker crumbs, melted butter, and salt in a bowl until texture resembles wet sand. Spoon about 1 tbsp into each liner and press down firmly to form crusts.
- In a large bowl, beat cream cheese and sugar until smooth. Add eggs one at a time, mixing well. Stir in lemon zest, lemon juice, and vanilla until just combined.
- Divide the cheesecake mixture evenly among crusts, filling each about 3/4 full. Tap the tin gently to remove air bubbles.
- Bake for 18–22 minutes, or until edges are set and centers still jiggle slightly. Cool in pan for 15 minutes, then transfer to wire rack to cool completely.
- Chill in the refrigerator for at least 2 hours (or overnight) before serving.
Notes
- Garnish with whipped cream, lemon zest curls, or fresh berries for extra flair.
- To freeze, chill completely, then wrap and store in an airtight container for up to 3 months.
- Use a decorative cupcake wrapper or serve in mini jars for creative presentation.


