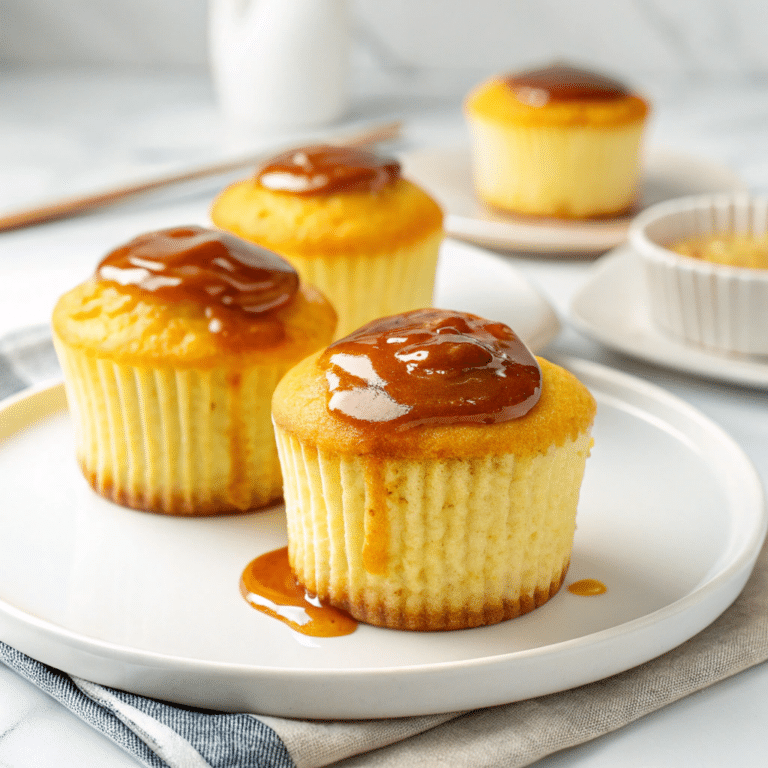
If you’re on the hunt for a show-stopping dessert that delivers big bursts of citrus flavor in the most adorable form, these Mini Key Lime Pie Cheesecakes absolutely belong on your “must-bake” list. They strike the perfect balance between creamy cheesecake and zesty Key lime, complete with a buttery graham cracker crust. Baked in individual portions, they’re easy to serve at parties or just as a sweet treat anytime you deserve a little pick-me-up. Let’s jump into everything you need to make Mini Key Lime Pie Cheesecakes your new go-to dessert!

Ingredients You’ll Need
The beauty of this recipe is in its simplicity—you only need a handful of ingredients, but each one plays an essential role. From the tangy punch of Key lime juice to the rich creaminess of cream cheese, every element works together to create a mini masterpiece.
- Graham cracker crumbs: These create the classic, buttery crust that gives each bite a subtle crunch and warm flavor.
- Melted butter: Helps bind the crust and adds a lovely richness that complements the tart filling.
- Cream cheese: The backbone of any great cheesecake—make sure it’s at room temperature for the creamiest results.
- Sugar: Sweetens both the crust and the filling, balancing the sour Key lime perfectly.
- Egg: Gives structure and silkiness to the cheesecake filling—always best at room temperature for smooth mixing.
- Key lime juice: The star ingredient! Freshly squeezed is ideal, but bottled Key lime juice works in a pinch.
- Key lime zest: Delivers a bold, fragrant aroma and intensifies the citrusy kick.
- Vanilla extract: Rounds out the flavors and adds extra depth to the filling.
- Whipped cream (optional): For topping and a cool, creamy contrast to the tangy cheesecake.
How to Make Mini Key Lime Pie Cheesecakes
Step 1: Prepare Your Muffin Tin
Begin by lining a standard muffin tin with paper liners. This not only makes removing the cheesecakes a breeze, but also makes them easier to serve and share. Trust me, presentation matters—it’s the first step to those “oohs” and “aahs” from your guests!
Step 2: Make the Graham Cracker Crust
Combine your graham cracker crumbs and melted butter, mixing until they resemble wet sand. Press a tablespoonful into the bottom of each liner and gently pack it down with the back of a spoon. Bake the crusts for a few minutes, just until set—this ensures the crust holds together once you add the creamy filling.
Step 3: Mix the Cheesecake Filling
In a large bowl, beat the cream cheese and sugar until silky smooth with no lumps. Add the egg, Key lime juice, Key lime zest, and vanilla extract, continuing to beat until well combined and creamy. Take a moment to scrape down the sides of the bowl—every bit counts for the smoothest Mini Key Lime Pie Cheesecakes!
Step 4: Assemble and Bake
Spoon the cheesecake batter evenly over the pre-baked crusts. Gently tap the tin to level the filling, which helps avoid cracked tops. Pop them in the oven and bake until just set, with the slightest jiggle in the centers. Let them cool completely in the pan, then refrigerate for at least two hours (overnight is best) for the dreamiest texture.
Step 5: Garnish and Serve
Once chilled, it’s time for the finishing touches. Add a dollop of whipped cream and a sprinkle of Key lime zest on top of each mini cheesecake. Now, try not to eat them all before you get to share with friends or family!
How to Serve Mini Key Lime Pie Cheesecakes

Garnishes
The right garnish makes Mini Key Lime Pie Cheesecakes not only taste amazing but also look irresistible. Top each one with a swirl of freshly whipped cream, a thin twist of Key lime, and maybe even a tiny graham cracker wedge. The pop of green zest on top adds extra flair and a burst of citrus aroma every time you take a bite.
Side Dishes
If you’re planning a dessert table, pair these cheesecakes with fresh berries, a fruit salad, or a tropical sorbet. Their citrusy punch works beautifully alongside simple, light sides that let the cheesecakes shine while cleansing the palate.
Creative Ways to Present
Have fun with your presentation! Serve Mini Key Lime Pie Cheesecakes in colorful cupcake wrappers for parties, arrange them on a tiered stand at showers, or place each on a mini plate with a personalized name tag. For a casual touch, stack them in a glass jar for a playful parfait effect at a picnic or BBQ.
Make Ahead and Storage
Storing Leftovers
Mini Key Lime Pie Cheesecakes store like a dream! Simply cover them (still in their liners) in an airtight container and refrigerate for up to five days. The flavors actually intensify after a day or two, making them even more delicious if you (miraculously) don’t finish them all right away.
Freezing
To freeze, place the cooled cheesecakes (without whipped cream) on a baking sheet and freeze until solid. Then transfer them to a zip-top bag or airtight container and freeze for up to two months. Thaw overnight in the fridge whenever a citrus craving strikes!
Reheating
No reheating needed for these creamy treats—just let frozen cheesecakes thaw in the refrigerator. If you prefer a softly chilled texture instead of ice-cold, leave them at room temperature for about 20 minutes before serving, then add your favorite toppings.
FAQs
Can I use regular limes instead of Key limes?
Absolutely! While Key limes give a unique tart flavor, regular Persian limes work well and still make delicious Mini Key Lime Pie Cheesecakes. The key is using fresh juice for the best taste.
Why did my cheesecakes crack?
Cracks often happen if the cheesecakes are overbaked or the oven temperature is too high. Don’t worry—the whipped cream topping covers most imperfections, and a little crack never ruins the flavor!
Can I make these ahead for a party?
Yes! In fact, Mini Key Lime Pie Cheesecakes are even better when made a day ahead. It allows the flavors to meld and the texture to set perfectly, making your dessert table almost effortless on party day.
What can I use instead of graham crackers for the crust?
Crushed vanilla wafers, digestive biscuits, or even gingersnaps make tasty alternatives. Each gives a slightly different twist, so have fun experimenting!
How do I get the smoothest cheesecake filling?
Be patient and make sure your cream cheese is fully at room temperature before mixing. Beat well, and scrape the bowl often. Avoid over-mixing once the eggs are added to keep the filling creamy and silky.
Final Thoughts
Whether you’re a longtime cheesecake fan or just need a big pop of citrus to brighten your day, these Mini Key Lime Pie Cheesecakes are sure to win you over. They’re refreshingly easy, delightfully cute, and brimming with summer flavors. Grab your zester and give them a try—you’ll be hooked from the very first bite!