

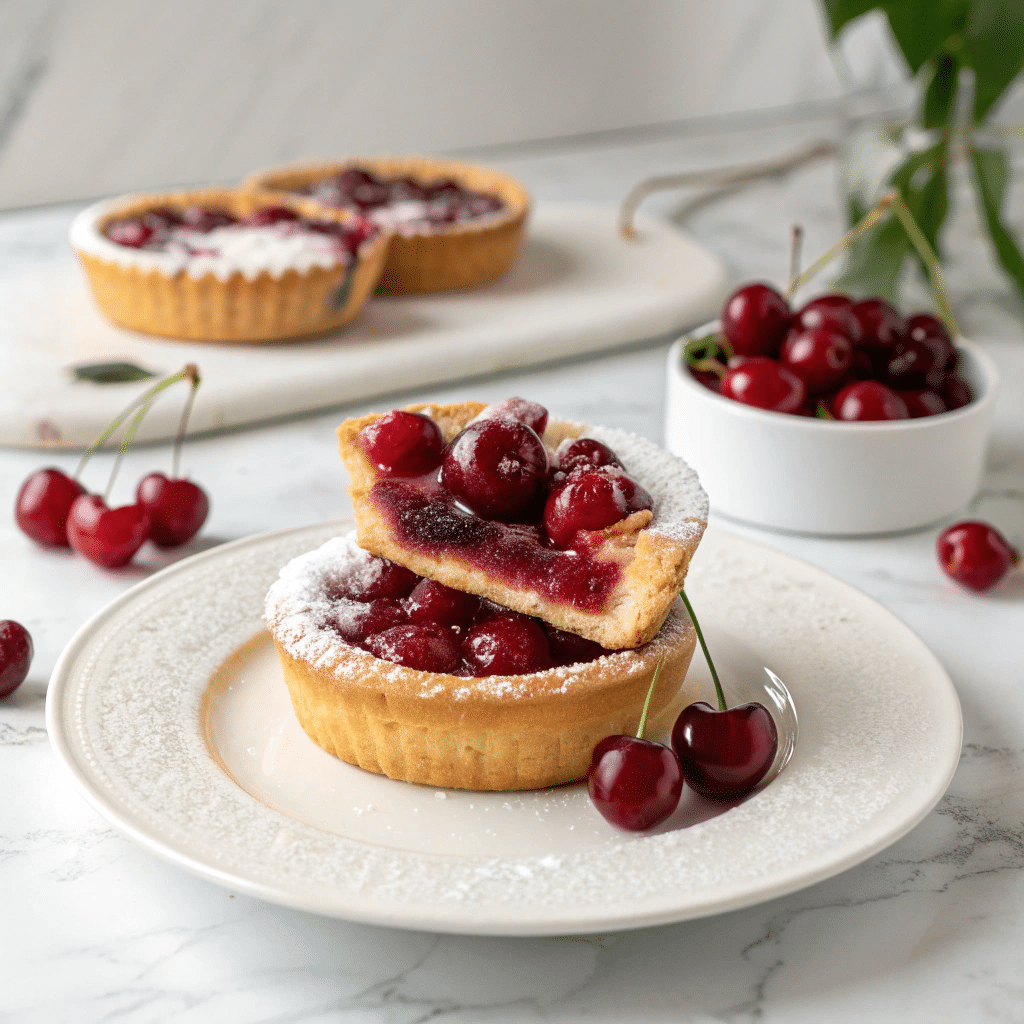
If you’re on the hunt for a delightful treat that feels like a warm hug from your oven, you simply must try this Mini Cherry Pies Recipe. Imagine perfectly golden, flaky crusts hugging juicy, sweet-tart cherry filling that bursts with flavor in every bite. These charming little pies are just the right size for sharing, gifting, or indulging with a scoop of vanilla ice cream. Whether you’re an experienced baker or just learning, this recipe is approachable and guaranteed to brighten up any occasion. Trust me, once you try these mini delights, they’ll quickly become a staple in your dessert rotation.

Ingredients You’ll Need
Every ingredient in this Mini Cherry Pies Recipe plays a crucial role in delivering that perfect balance of taste and texture. From fresh cherries bursting with flavor to that buttery pie crust that crumbles just right, these simple essentials come together beautifully to create magic.
- 2 cups fresh cherries (pitted and halved): Fresh cherries provide natural sweetness and a vibrant pop of color that’s irresistible.
- 1/2 cup granulated sugar: Sweetens the filling just enough to complement the cherries without overpowering them.
- 2 tbsp cornstarch: A little magic that thickens the filling and keeps it wonderfully luscious.
- 1 tbsp lemon juice: Brightens the cherry flavor and balances the sweetness with a hint of zing.
- 1 package (14 oz) pie crust (store-bought or homemade): Creates the flaky, buttery casing that holds all that goodness inside.
- 1 egg (for egg wash): Gives the crust that perfect golden sheen and a beautiful finish.
How to Make Mini Cherry Pies Recipe
Step 1: Preheat and Prepare
Start by heating your oven to 375°F (190°C). This ensures your oven is correctly warmed up, so those pies bake evenly with a golden crust and bubbly filling. A consistent temperature is key to achieving that classic pie texture and flavor we all love.
Step 2: Mix the Cherry Filling
In a mixing bowl, combine the pitted and halved cherries with sugar, cornstarch, and lemon juice. Let the mixture rest for 10 minutes; this allows the sugar to dissolve and the cornstarch to start thickening the juices. The resting time is what transforms these fresh cherries into a luscious, jammy filling.
Step 3: Prepare the Pie Crust Circles
On a floured surface, roll out your chilled pie crust dough to about 1/8 inch thick. Using a round cutter or a glass, cut circles roughly 4 inches in diameter. These will be the base and tops for your mini pies, so make sure each circle is even for a neat finish.
Step 4: Assemble the Mini Pies
Line each cup of a muffin tin with one dough circle. Spoon about a tablespoon of the cherry filling into each crust-lined cup. Cover each with a second dough circle, and carefully crimp the edges together to seal the pies, making sure no filling leaks during baking.
Step 5: Add Egg Wash and Vent
Brush the tops of each pie with beaten egg to give them a shiny, golden finish when baked. Don’t forget to cut small slits in the top crust to let steam escape, which prevents sogginess and helps the filling thicken properly.
Step 6: Bake to Perfection
Pop your mini pies into the oven and bake for 20-25 minutes until the crusts turn beautifully golden and the cherry filling bubbles through the vents. This is the moment your kitchen will start to smell heavenly, signaling that your treats are just about ready.
How to Serve Mini Cherry Pies Recipe
Garnishes
Enhance your mini cherry pies recipe with a dusting of powdered sugar or a dollop of freshly whipped cream. A sprinkle of finely chopped toasted almonds also adds a lovely crunch and nutty aroma that pairs exquisitely with the sweet cherries.
Side Dishes
Mini cherry pies shine alongside classic accompaniments like vanilla ice cream or a scoop of lemon sorbet. The contrast between warm pie and cool ice cream creates an unforgettable dessert experience. Fresh mint leaves on the side can also add a refreshing burst of herbal flavor.
Creative Ways to Present
Serve these mini pies in cute decorative muffin liners or rustic wooden trays for a charming touch. For parties, accompany them with a selection of cheeses and nuts to create an irresistible dessert spread. You can also drizzle a bit of melted dark chocolate over the top for an extra indulgent twist.
Make Ahead and Storage
Storing Leftovers
After enjoying these mini cherry pies, store any leftovers in an airtight container in the refrigerator for up to 3 days. This helps keep the crust crisp and the filling fresh, so you can enjoy them again without a drop in quality.
Freezing
You can freeze the assembled, unbaked mini cherry pies for up to 2 months. Just place them on a baking sheet to freeze individually before transferring to a container or bag. When ready, bake from frozen and add a few extra minutes to the baking time.
Reheating
To reheat, warm pies in a 350°F oven for about 10-15 minutes, just until heated through and crusts regain their crispness. Avoid microwaving to prevent the crust from becoming soggy and losing that delightful flakiness.
FAQs
Can I use frozen cherries instead of fresh?
Absolutely! Frozen cherries work well, but be sure to thaw and drain them thoroughly to avoid excess moisture which can make the pie soggy.
Is it necessary to use cornstarch in the filling?
Cornstarch acts as a thickener to keep the cherry juices from running during baking. Without it, the filling might be too liquidy, so it’s highly recommended.
Can I make these pies dairy-free?
Yes! Many store-bought pie crusts are naturally dairy-free, or you can make your own. Just swap the egg wash for a plant-based milk brush for that golden crust.
How can I tell when the pies are done baking?
Look for a golden brown crust with filling bubbling visibly through the slits. The bubbling indicates the filling is cooked through and perfectly thickened.
Can I double the recipe for a larger batch?
Definitely! This Mini Cherry Pies Recipe scales well. Just keep your muffin tins ready and bake in batches for best results.
Final Thoughts
Making these mini cherry pies is such a joyous and rewarding experience that brings warmth and sweetness to any gathering. With their inviting aroma and irresistible combination of flaky crust and vibrant filling, they are sure to become a cherished favorite in your recipe box. So go ahead, grab those cherries, and dive into baking these delightful bites of happiness—you won’t regret a single moment spent on this Mini Cherry Pies Recipe.
Print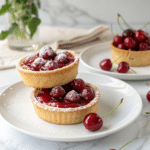
Mini Cherry Pies Recipe
- Prep Time: 20 minutes
- Cook Time: 25 minutes
- Total Time: 45 minutes
- Yield: 12 mini cherry pies (approximately 12 servings)
- Category: Dessert
- Method: Baking
- Cuisine: American
Description
These Mini Cherry Pies are perfect bite-sized treats featuring a sweet and tangy cherry filling encased in flaky, golden pastry. Ideal for parties or a delightful dessert, they combine fresh cherries with a simple sugar and cornstarch mixture, baked to perfection in a muffin tin for easy serving.
Ingredients
Cherry Filling
- 2 cups fresh cherries, pitted and halved
- 1/2 cup granulated sugar
- 2 tbsp cornstarch
- 1 tbsp lemon juice
Dough and Assembly
- 1 package (14 oz) pie crust (store-bought or homemade)
- 1 egg (for egg wash)
Instructions
- Preheat Oven: Preheat your oven to 375°F (190°C) to ensure it’s at the right temperature for baking the pies evenly.
- Prepare Cherry Filling: In a mixing bowl, combine the halved fresh cherries with granulated sugar, cornstarch, and lemon juice. Stir well and let the mixture sit for 10 minutes to allow the juices to meld and the cornstarch to absorb moisture, thickening the filling.
- Prepare Pie Crust: Roll out the chilled pie crust on a lightly floured surface to approximately 1/8 inch thickness. Use a round cutter about 4 inches in diameter to cut out circles for the pie bases and tops.
- Assemble Mini Pies: Place one dough circle into each cup of a muffin tin, gently pressing it into the shape of the cup to form the base. Spoon about 1 tablespoon of the cherry filling into each dough-lined cup. Cover each with another dough circle and crimp the edges firmly to seal the pies, preventing filling leakage.
- Apply Egg Wash and Vent: Lightly beat the egg and brush it over the top crust of each mini pie to achieve a shiny, golden finish when baked. Cut small slits in the top crusts to allow steam to escape during baking.
- Bake: Place the muffin tin in the preheated oven and bake for 20 to 25 minutes, or until the crusts are golden brown and the cherry filling is bubbling through the vents. Remove from oven and let cool before serving.
Notes
- Ensure cherries are fully pitted to avoid any seeds in the pie.
- You can substitute frozen cherries if fresh are unavailable, just thaw and drain excess juice before use.
- For a richer crust, consider brushing the crust edges with a bit of melted butter before baking.
- Allow pies to cool slightly to let the filling set and prevent burns when eating.
- The pies can be served warm or at room temperature, optionally with a scoop of vanilla ice cream.

