
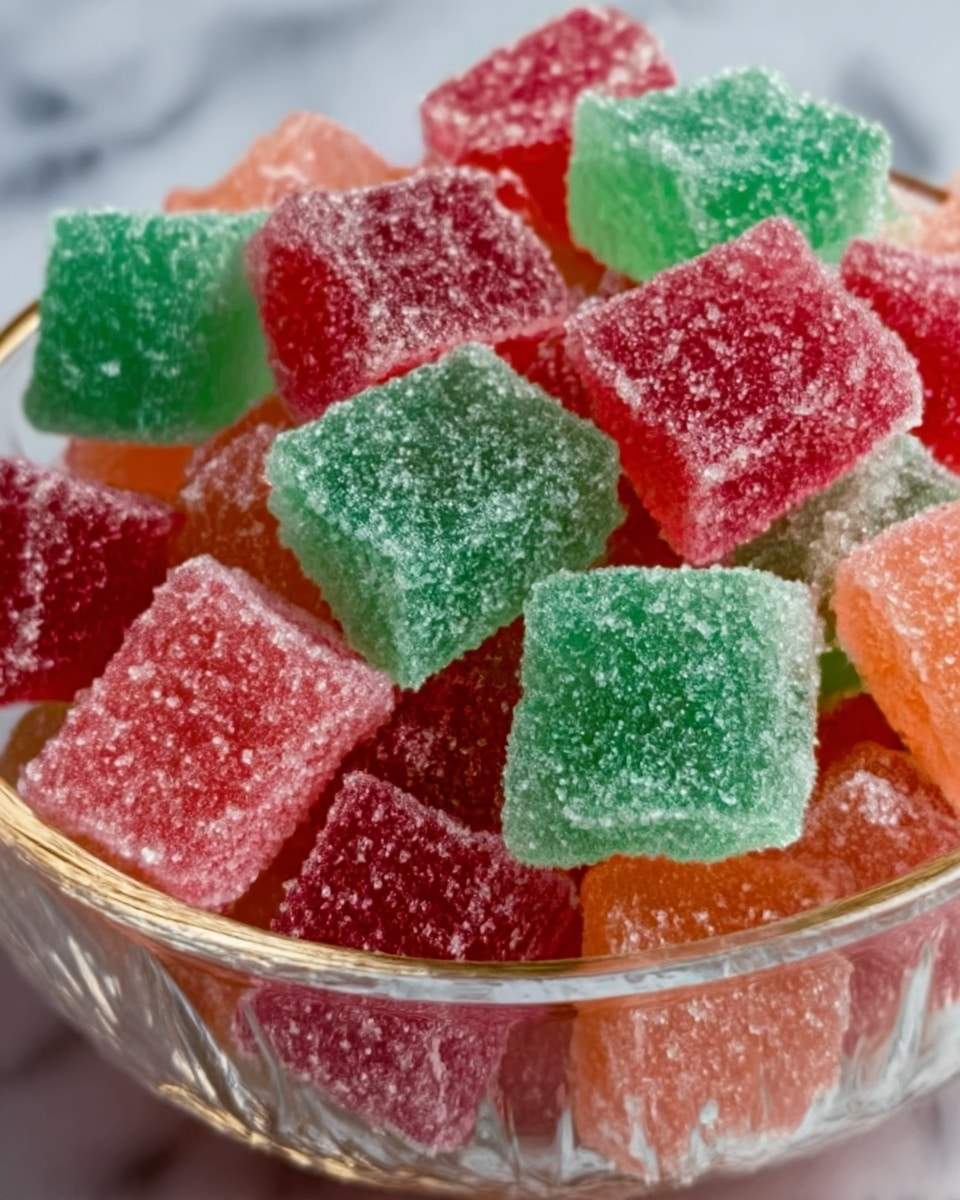
If you have ever marveled at the explosive, fizzy fun of pop rocks and wished you could create that magical candy buzz right in your own kitchen, then this Homemade Pop Rocks Recipe is exactly what you’ve been waiting for. It’s a sensational treat that combines sweet, tangy, and that unmistakable popping sensation, delivering an experience that’s as delightful as it is surprising. With simple ingredients and clear steps, you’ll soon be able to craft your own colorful, fizzy candy that brings a little excitement to any snack time or celebration.

Ingredients You’ll Need
Gathering the right ingredients for this recipe is a total breeze, and each one plays a crucial role in making your Homemade Pop Rocks Recipe come alive. From the sugary sweetness to the fizz-producing citric acid, everything combines for that perfect pop and flavor.
- Granulated sugar: The base of the candy that provides sweetness and structure.
- Light corn syrup: Helps prevent crystallization and keeps the candy smooth and glossy.
- Water: Dissolves the sugar and creates the perfect candy syrup consistency.
- Baking soda: Creates the tiny bubbles that give the popping effect by releasing carbon dioxide.
- Citric acid: Adds a tangy kick and reacts with the baking soda to enhance fizzing.
- Flavoring extracts (optional): Add your favorite flavors like strawberry or raspberry to personalize your candy experience.
- Food coloring (optional): For that fun, vibrant pop of color that makes your homemade candy extra exciting.
- Cornstarch: Used for dusting your work surface to prevent sticking and make breaking the candy easier.
How to Make Homemade Pop Rocks Recipe
Step 1: Prepare Your Workspace
Before you dive into candy-making, it’s vital to get your workspace ready. Line a baking sheet with parchment paper and lightly dust it with cornstarch to prevent sticking. Organize your ingredients and tools to streamline the process.
Step 2: Make the Candy Syrup
In a medium saucepan, combine the granulated sugar, light corn syrup, and water. Heat over medium and stir gently just until the sugar dissolves completely. Attach a candy thermometer to the side of the pan but stop stirring once the mixture starts boiling to ensure a clear, smooth syrup.
Step 3: Boil the Mixture to the Hard-Crack Stage
Allow the syrup to boil until it reaches 300°F on your candy thermometer. This is known as the hard-crack stage, crucial for the candy’s hard texture. Patience here pays off with that signature crisp crunch.
Step 4: Add Baking Soda and Citric Acid
Once you remove the syrup from heat, quickly stir in baking soda and citric acid. Expect a lively reaction—the mixture will foam and bubble as carbon dioxide gets trapped inside, setting the stage for the popping sensation.
Step 5: Add Flavor and Color
Now is the time to personalize your Homemade Pop Rocks Recipe. Stir in a few drops of your chosen flavor extract and add food coloring if you want to brighten things up. This step transforms your candy from simple sugar into a fun, flavored treat bursting with personality.
Step 6: Pour and Cool
Pour the fizzing mixture onto your prepared baking sheet, spreading it out evenly with a spatula. Allow it to cool completely at room temperature—about 30 minutes—to harden into a crisp sheet ready for the next step.
Step 7: Break It Up
Once fully cooled, turn your hardened candy out onto a cutting board dusted with cornstarch and break it into small, bite-sized pieces using a mallet or rolling pin. The smaller the pieces, the more exciting the pop!
Step 8: Store and Enjoy
Keep your Homemade Pop Rocks Recipe fresh and fizzy by storing the candy in an airtight container. This prevents moisture from sneaking in and ruining that iconic crackle-and-pop. Now, get ready to delight in the fizzy fun whenever you please!
How to Serve Homemade Pop Rocks Recipe

Garnishes
Sprinkle your homemade pop rocks on top of cupcakes, ice cream, or yogurt to add a crunchy, popping surprise. Their vibrant colors and lively fizz instantly elevate desserts, making them a show-stopper at any gathering.
Side Dishes
Serve homemade pop rocks alongside classic party snacks or mix them into trail mixes for a playful twist. They also pair wonderfully with tangy drinks and fruit-flavored beverages, lending an interactive, sweet contrast.
Creative Ways to Present
Try packaging your Homemade Pop Rocks Recipe in small, decorative jars or clear bags tied with colorful ribbons as fun party favors. You can also combine flavors and colors to create your own signature candy mix. The possibilities for presenting this playful treat are endless and always exciting!
Make Ahead and Storage
Storing Leftovers
Store your leftover homemade pop rocks in a rigid, airtight container to lock in freshness and maintain the popping effect. Keep the container in a cool, dry place away from humidity, which can soften the candy and kill the fizz.
Freezing
Freezing is not recommended for this candy because moisture build-up during thawing can ruin the texture and dissolve the bubbles, causing your pop rocks to lose their signature crackle.
Reheating
Reheating isn’t needed or advised since popping candy works best in its original, hardened form. If your pop rocks get soft, unfortunately, it’s best to make a new batch rather than try to reheat.
FAQs
What causes pop rocks to pop?
The popping sensation comes from carbon dioxide gas trapped inside the candy during the reaction between baking soda and citric acid—once the candy dissolves in your mouth, the gas is released, creating that fun crackling effect.
Can I use natural flavor extracts in this recipe?
Absolutely! Natural flavor extracts like vanilla, strawberry, or raspberry work beautifully and add a fresh, authentic taste to your Homemade Pop Rocks Recipe.
How long will homemade pop rocks last?
If stored in an airtight container in a cool, dry place, homemade pop rocks can stay fresh and fizzy for several weeks, but it’s best to enjoy them sooner for optimal popping fun.
Is the Homemade Pop Rocks Recipe safe for kids?
Yes, these homemade pop rocks are safe for most kids, but as with any candy, supervise young children to avoid any choking hazards due to the candy’s hard texture.
Can I make this recipe gluten-free?
This recipe is naturally gluten-free, as it contains no wheat or gluten-containing ingredients, making it a great treat for those with gluten sensitivities.
Final Thoughts
There is something truly magical about making your own Homemade Pop Rocks Recipe—it’s a mix of science, flavor, and pure joy all wrapped into one sweet bite. Whether you’re surprising friends, creating party favors, or simply treating yourself, these fizzy candies are sure to delight and impress. Give this recipe a try, and watch your kitchen become the happiest place for pops, fizz, and endless smiles.
Print
Homemade Pop Rocks Recipe
- Prep Time: 10 minutes
- Cook Time: 10 minutes
- Total Time: 20 minutes
- Yield: 2 servings
- Category: Candy
- Method: Stovetop
- Cuisine: American
Description
This Homemade Pop Rocks recipe lets you create your own fizzy, crackling candy right in your kitchen. Combining basic candy-making techniques with the addition of baking soda and citric acid, this treat mimics the signature popping sensation of commercial Pop Rocks. Customize with your favorite flavors and colors for a fun, nostalgic snack that’s perfect for parties or a unique candy experiment.
Ingredients
Pop Rocks Candy Ingredients
- 2 cups granulated sugar
- 1/4 cup light corn syrup
- 1/4 cup water
- 1 tsp baking soda
- 1 tsp citric acid (for the pop)
- Flavoring extracts (optional, such as strawberry or raspberry)
- Food coloring (optional)
- Cornstarch (for dusting)
Instructions
- Prepare Your Workspace: Clear your working area to have enough space for candy making and cooling. This will help maintain safety and organization during the process.
- Line Baking Sheet: Line a baking sheet with parchment paper and lightly dust it with cornstarch. This prevents the candy from sticking as it cools and hardens.
- Make the Candy Syrup: In a medium saucepan, combine the granulated sugar, light corn syrup, and water. Cook over medium heat, stirring gently just until the sugar dissolves completely. Attach a candy thermometer to the pan, and stop stirring once the mixture begins to boil to avoid crystallization.
- Boil the Mixture: Allow the mixture to boil undisturbed until it reaches 300°F (hard-crack stage) on the candy thermometer. This temperature ensures the candy will harden properly to create the crunchy texture.
- Add Baking Soda and Citric Acid: Remove the syrup from heat and rapidly stir in the baking soda and citric acid. The mixture will bubble and foam vigorously, which is essential for creating the characteristic popping bubbles inside the candy.
- Add Flavor and Color: Quickly mix in a few drops of your preferred flavor extract and food coloring if desired, distributing them evenly before the mixture sets.
- Pour and Cool: Immediately pour the hot bubbling mixture onto the prepared baking sheet and spread it out evenly. Leave it untouched for about 30 minutes to cool completely and harden into solid candy.
- Break It Up: Once cooled, use a mallet or rolling pin to gently break the hardened candy into small pieces. These are your homemade Pop Rocks with their signature crackling effect.
- Store and Enjoy: Store the Pop Rocks in an airtight container to preserve their fizz and popping sensation. Enjoy this unique homemade treat whenever you like!
Notes
- Use a candy thermometer for precise temperature control to achieve the perfect hard-crack stage.
- Adding baking soda and citric acid creates carbon dioxide bubbles that cause the popping sensation.
- Work quickly after adding baking soda and citric acid as the reaction starts immediately and sets fast.
- Store Pop Rocks in airtight containers to maintain their popping quality; moisture can ruin the fizz.
- Experiment with different natural flavor extracts and food coloring to customize your candy.


