

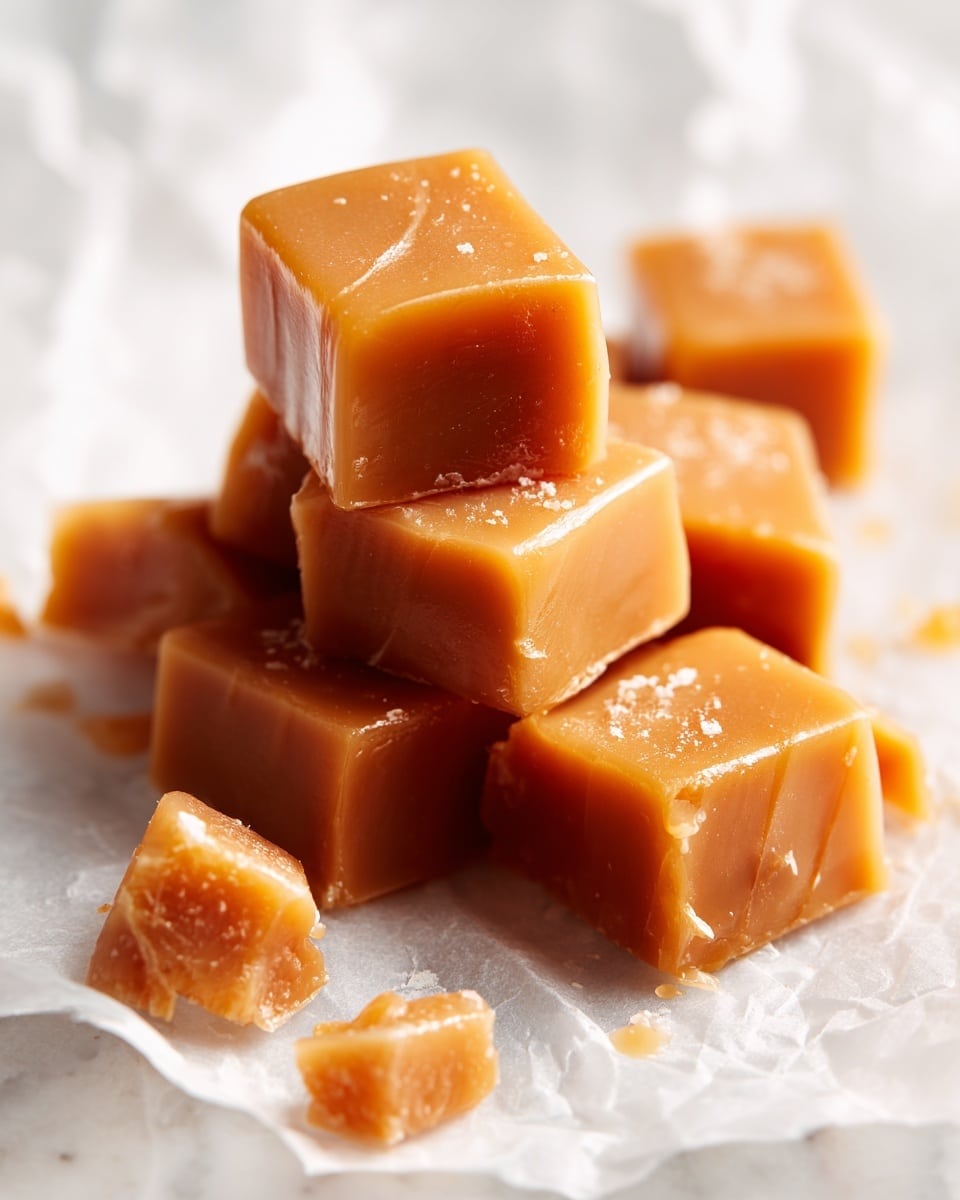
If you have a soft spot for rich, buttery sweets that practically melt in your mouth, you are going to fall head over heels for this Homemade Caramels Recipe. Nothing beats the delight of creating your own luscious, creamy caramels at home, where every chewy bite bursts with the perfect balance of sweetness and a hint of vanilla warmth. These caramels are a timeless treat that bring a touch of magic to any occasion, whether you’re gifting them or indulging yourself during a cozy night in.

Ingredients You’ll Need
This Homemade Caramels Recipe calls for simple, pantry-friendly ingredients that each play a crucial role in delivering that perfect texture and flavor. From the buttery richness to the smooth creaminess, every element works in harmony to create caramel bliss.
- Unsalted butter: Using unsalted butter lets you control the saltiness and enriches the caramel’s creamy texture.
- Granulated sugar: The primary sweetener that caramelizes beautifully to give that classic golden-brown color.
- Light corn syrup: Helps prevent crystallization, ensuring your caramels stay smooth and chewy.
- Salt: Just a pinch to heighten the flavor and balance the sweetness perfectly.
- Heavy cream: Adds rich creaminess and gives the caramels a luscious mouthfeel.
- Vanilla extract: Provides a warm, aromatic depth that transforms simple caramel into an irresistible treat.
How to Make Homemade Caramels Recipe
Step 1: Prepare your Pan
Start by lining an 8×8-inch baking pan with parchment paper, making sure to leave an overhang on the sides. This little trick makes removing the caramel slab after it sets so much easier, saving you from any sticky situations.
Step 2: Melt the Butter
Place a large, heavy-bottomed saucepan over medium heat and melt the unsalted butter. This base is where your caramel journey begins, infusing richness right from the start.
Step 3: Combine Sugar, Corn Syrup, and Salt
Add the granulated sugar, light corn syrup, and salt directly to the melted butter. Stir the mixture well so that everything comes together smoothly before moving on to the next step.
Step 4: Incorporate the Heavy Cream
Slowly pour in the heavy cream, stirring continuously. Bring the mixture to a steady boil over medium heat. This gradual process helps dissolve the sugar and blend the creamy goodness evenly.
Step 5: Cook to the Perfect Temperature
Keep stirring and cooking until your caramel reaches 245°F (118°C) on a candy thermometer. This critical stage ensures your caramels will be perfectly chewy and not too soft or too hard.
Step 6: Finish with Vanilla Extract
Once you hit the right temperature, remove the pot from heat immediately and stir in the vanilla extract. This final touch elevates the caramel with a fragrant note that’s absolutely irresistible.
Step 7: Pour and Cool
Carefully pour the hot caramel mixture into your prepared pan. Allow it to cool slowly at room temperature for 3 to 4 hours until it’s fully set and ready to be sliced.
Step 8: Cut and Wrap
Using the parchment paper overhang, lift the caramel slab out of the pan. Cut into small squares or rectangles with a sharp knife, then wrap each piece in wax paper to keep them fresh and perfectly chewy.
How to Serve Homemade Caramels Recipe
Garnishes
For a special touch, sprinkle a light dusting of flaky sea salt on top of your caramels right after pouring them into the pan but before they set. The saltiness enhances the caramel’s sweetness beautifully and adds an appealing texture contrast.
Side Dishes
Homemade caramels are delightful on their own, but they also pair wonderfully with a hot cup of coffee or tea, ice cream sundaes, or even as a sweet nibble alongside fresh fruit. Their creamy texture makes them a versatile little luxury.
Creative Ways to Present
Wrap your homemade caramels in pretty wax paper or place them in a decorative jar for gifting. You can also layer them between parchment paper sheets in a festive tin. Presentation matters, and these treats are sure to impress!
Make Ahead and Storage
Storing Leftovers
Store leftover caramels in an airtight container at room temperature. They will keep beautifully for up to two weeks, retaining that chewy, soft texture that makes them so addictive.
Freezing
If you want to save your Homemade Caramels Recipe treats for longer, freeze them wrapped individually in wax paper inside a freezer-safe container. They preserve well up to three months and thaw quickly when needed.
Reheating
If your caramels have hardened a bit, let them sit at room temperature for a while, or warm them gently in your hands before enjoying. Avoid microwave heating which can cause uneven melting and loss of texture.
FAQs
Can I use salted butter instead of unsalted butter?
While salted butter can be used in a pinch, unsalted butter is preferred because it gives you better control over the salt content in your caramels, ensuring they’re perfectly balanced.
Why is corn syrup important in this recipe?
Corn syrup prevents the sugar from crystallizing as the caramel cooks, which helps keep the texture silky and smooth rather than grainy or gritty.
What if I don’t have a candy thermometer?
It’s highly recommended for consistent results, but if you don’t have one, watch for the caramel to turn a deep amber color and test the softness by dropping a small bit into cold water—it should form a firm but pliable ball.
How can I make the caramels more chewy?
Cooking the caramel to the exact temperature of 245°F (118°C) is key. Avoid overcooking as it can make the caramel too hard, and undercooking results in softer, stickier pieces.
Can I add nuts or flavorings to this Homemade Caramels Recipe?
Absolutely! Chopped nuts, sea salt flakes, or even a splash of bourbon can be stirred in after removing the caramel from the heat for exciting variations.
Final Thoughts
Making your own Homemade Caramels Recipe is such a rewarding experience that fills your kitchen with inviting aromas and your heart with pride. Whether you’re treating yourself or sharing these chewy delights with loved ones, this recipe opens the door to endless sweet moments that feel just a little bit magical. Don’t wait to try it out and create that signature caramel treasure you’ll want to make again and again.
Print
Homemade Caramels Recipe
- Prep Time: 15 minutes
- Cook Time: 25 minutes
- Total Time: 3 hours 40 minutes
- Yield: 64 servings
- Category: Candy
- Method: Stovetop
- Cuisine: American
Description
Indulge in the rich and buttery goodness of homemade caramels with this easy-to-follow recipe. Made with simple ingredients like butter, sugar, and cream, these soft, chewy caramels are perfect for gifting or treating yourself. The candy thermometer ensures perfect precision for a smooth texture every time.
Ingredients
Caramel Ingredients
- 1 cup unsalted butter
- 2 1/2 cups granulated sugar
- 1 1/4 cups light corn syrup
- 1/2 teaspoon salt
- 2 cups heavy cream
- 1 teaspoon vanilla extract
Instructions
- Prepare the Pan: Line an 8×8-inch baking pan with parchment paper, ensuring there is an overhang on the sides to allow for easy removal of the caramel once set.
- Melt Butter: In a large, heavy-bottomed saucepan, melt the unsalted butter over medium heat until fully liquid.
- Add Sugar Mixture: Stir in the granulated sugar, light corn syrup, and salt into the melted butter, blending well to combine all ingredients evenly.
- Incorporate Cream: Slowly and gradually stir in the heavy cream. Continue stirring while bringing the mixture to a gentle boil over medium heat.
- Cook to Temperature: Keep stirring constantly to avoid burning as the mixture reaches 245°F (118°C) on a candy thermometer. This temperature ensures the correct firmness for the caramel.
- Remove and Flavor: Once the target temperature is reached, promptly remove the saucepan from heat and stir in the vanilla extract to enhance the flavor.
- Pour and Set: Carefully pour the hot caramel into the prepared baking pan. Allow it to cool at room temperature for 3 to 4 hours or until fully firm.
- Cut and Wrap: When the caramel is set, lift it out using the parchment paper overhang. Cut into small squares or rectangles and wrap each piece individually in wax paper for storage or gifting.
Notes
- Use a candy thermometer for precise temperature control to achieve the perfect soft yet firm caramel.
- For easier cutting, chill the caramel slightly before slicing.
- Store caramels in an airtight container at room temperature for up to two weeks.
- Be cautious when handling hot caramel as it can cause burns.


