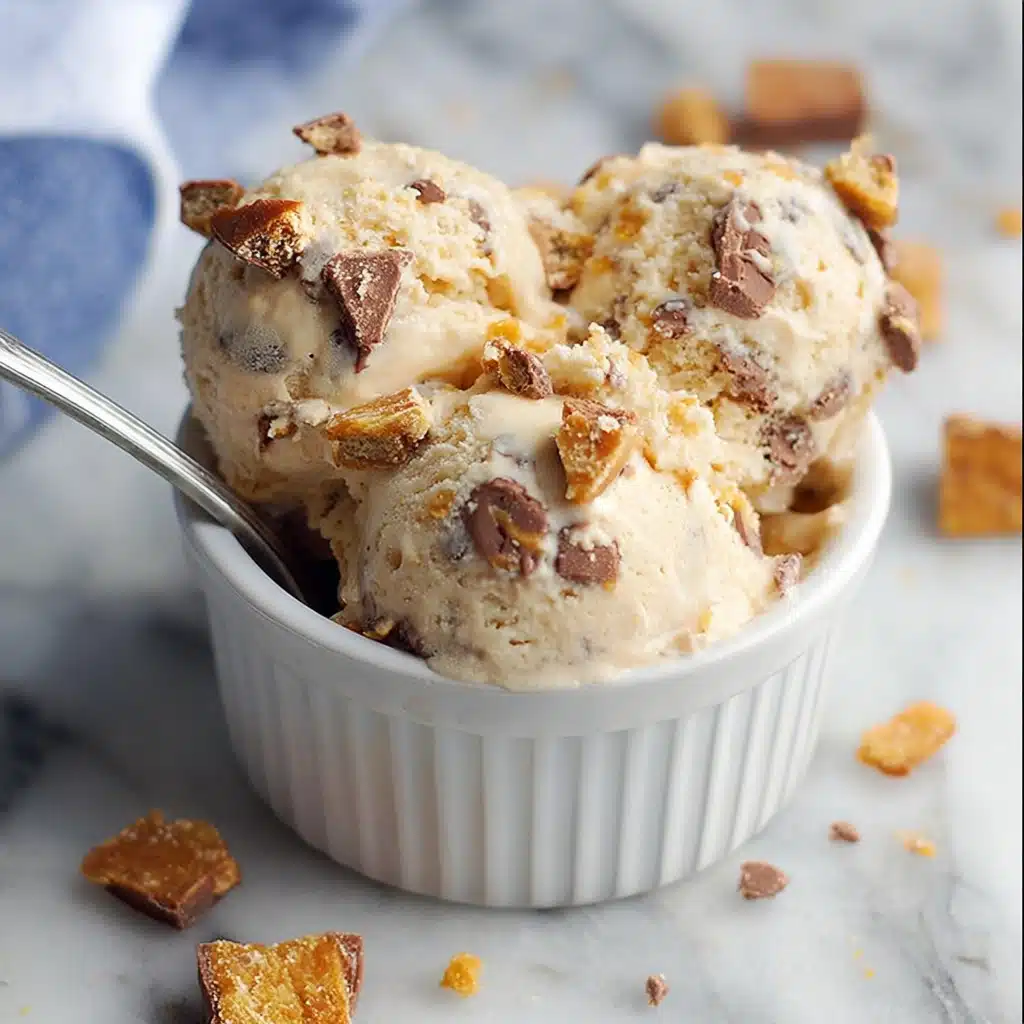
If you’re craving a nostalgic, indulgent treat, Homemade Butterfinger Ice Cream is here to answer your dessert dreams. Imagine the creamy swirl of homemade vanilla ice cream, given a playful crunch with vibrant orange flecks of Butterfinger, melting together in every bite. This frozen masterpiece is blissfully easy to make yet feels gourmet, infusing a classic candy bar into each heavenly scoop. Whether you’re cooling off on a summer day or simply treating yourself, this recipe is a crowd-pleaser for all ages—radiating joy, childhood memories, and irresistible flavor with every spoonful.
Ingredients You’ll Need
One of the best things about Homemade Butterfinger Ice Cream is how it transforms a handful of simple, everyday ingredients into something utterly magical. Each one brings a vital role to the flavor, texture, or vibrant appearance of your finished ice cream.
- Heavy Cream: The backbone of our ice cream base, providing that lush, silky texture everyone craves.
- Whole Milk: Lightens up the creaminess just enough for a smooth, scoopable consistency.
- Granulated Sugar: Balances the sweetness with just the right amount of indulgence.
- Vanilla Extract: Rounds out the flavors and gives the ice cream a beautifully rich aroma.
- Salt: Just a pinch is all it takes to accentuate the sweetness and chocolatey notes.
- Butterfinger Candy Bars: The star ingredient, generously chopped, lending iconic orange crunch and peanut buttery toffee shards in every bite.
How to Make Homemade Butterfinger Ice Cream
Step 1: Whisk Up the Cream Base
In a large bowl, whisk together the heavy cream, whole milk, granulated sugar, vanilla extract, and a pinch of salt until the mixture is smooth and the sugar is dissolved. Take a moment to savor the aroma—this creamy base is what sets the foundation for your Homemade Butterfinger Ice Cream, so make sure everything is fully combined.
Step 2: Chill the Mixture
Cover the bowl with plastic wrap and let your mixture chill in the refrigerator for at least 2 hours, or until it’s cold to the touch. This step ensures your ice cream freezes smoothly and churns into an ultra-creamy dessert you’ll want to dive into straight from the container.
Step 3: Churn to Perfect Creaminess
Once your base is thoroughly chilled, pour it into your ice cream maker according to the manufacturer’s instructions. Churn until the texture becomes thick and creamy—usually around 20 minutes. The transformation here is pure magic, and you’ll love watching your Homemade Butterfinger Ice Cream come to life!
Step 4: Fold in the Butterfinger Candy
As soon as the ice cream reaches a soft-serve consistency, quickly fold in the chopped Butterfinger pieces. The key is adding the candy just before transferring to the freezer, so every scoop comes with crunchy, colorful pockets of that unmistakable flavor.
Step 5: Freeze Until Scoopable
Transfer your churned and candy-studded ice cream into a freezer-safe container. Smooth the top, cover tightly, and freeze for at least 4 hours—or until firm. This patience pays off with perfect Homemade Butterfinger Ice Cream ready to scoop anytime the craving hits.
How to Serve Homemade Butterfinger Ice Cream

Garnishes
For an extra flourish, sprinkle additional chopped Butterfinger on top of each scoop just before serving. Chocolate sauce, crushed salted pretzels, or a dollop of whipped cream complement the vibrant crunch and add visual excitement every time.
Side Dishes
Homemade Butterfinger Ice Cream pairs marvelously with warm brownies or gooey chocolate chip cookies. Fresh, juicy berries on the side bring a bright contrast, and even the simplest butter wafer or waffle cone plays up the buttery, toffee flavors.
Creative Ways to Present
Transform your ice cream into Butterfinger ice cream sandwiches, fill crisp taco shells for a playful “dessert taco,” or scoop into mini bowls for a colorful sundae bar at your next gathering. For something extra special, try layering the ice cream with hot fudge in a clear parfait glass—it’s a showstopper!
Make Ahead and Storage
Storing Leftovers
Store your Homemade Butterfinger Ice Cream in an airtight, freezer-safe container to keep it at peak freshness. Lining the surface of the ice cream with plastic wrap before sealing the lid helps prevent ice crystals and keeps flavors locked in.
Freezing
This ice cream keeps beautifully in the freezer for up to 2 weeks, though chances are it will disappear much sooner! If making ahead for a party, prepare it the day before for the creamiest, freshest results when you serve.
Reheating
No actual reheating is needed—simply let the ice cream sit at room temperature for 5 to 10 minutes to soften before scooping, making it easier to serve perfectly rounded, creamy balls every single time.
FAQs
Can I make Homemade Butterfinger Ice Cream without an ice cream maker?
Yes! Whisk your base ingredients, then fold in whipped cream and chopped Butterfinger. Freeze in a loaf pan, stirring every 30 minutes for a few hours until creamy—no machine required.
What’s the secret to getting crunchy Butterfinger bits throughout?
The trick is to fold in the chopped Butterfinger once the ice cream is churned and thick but not yet fully frozen. This preserves the signature crunch and prevents the candy from dissolving.
Can I substitute different candy bars?
Absolutely. While the classic recipe is all about Homemade Butterfinger Ice Cream, you can experiment with other chocolate or toffee bars—just stick to mix-ins that won’t melt away in the ice cream base.
Is this recipe gluten-free?
The ice cream base itself is gluten-free, but Butterfinger candy bars may contain traces of gluten depending on the brand or recipe changes. Always check packaging if serving to those with allergies.
How do I prevent freezer burn?
Press a sheet of plastic wrap directly against the surface of Homemade Butterfinger Ice Cream before sealing with an airtight lid. This extra step helps lock in moisture and flavor, prolonging that fresh-from-the-freezer taste.
Final Thoughts
The joy of making Homemade Butterfinger Ice Cream is in every creamy bite, each packed with the perfect blend of nostalgia and indulgence. This recipe couldn’t be more inviting—so invite your taste buds (and your friends!) to the party. Scoop it up, share generously, and savor the smiles it brings to your table.

