
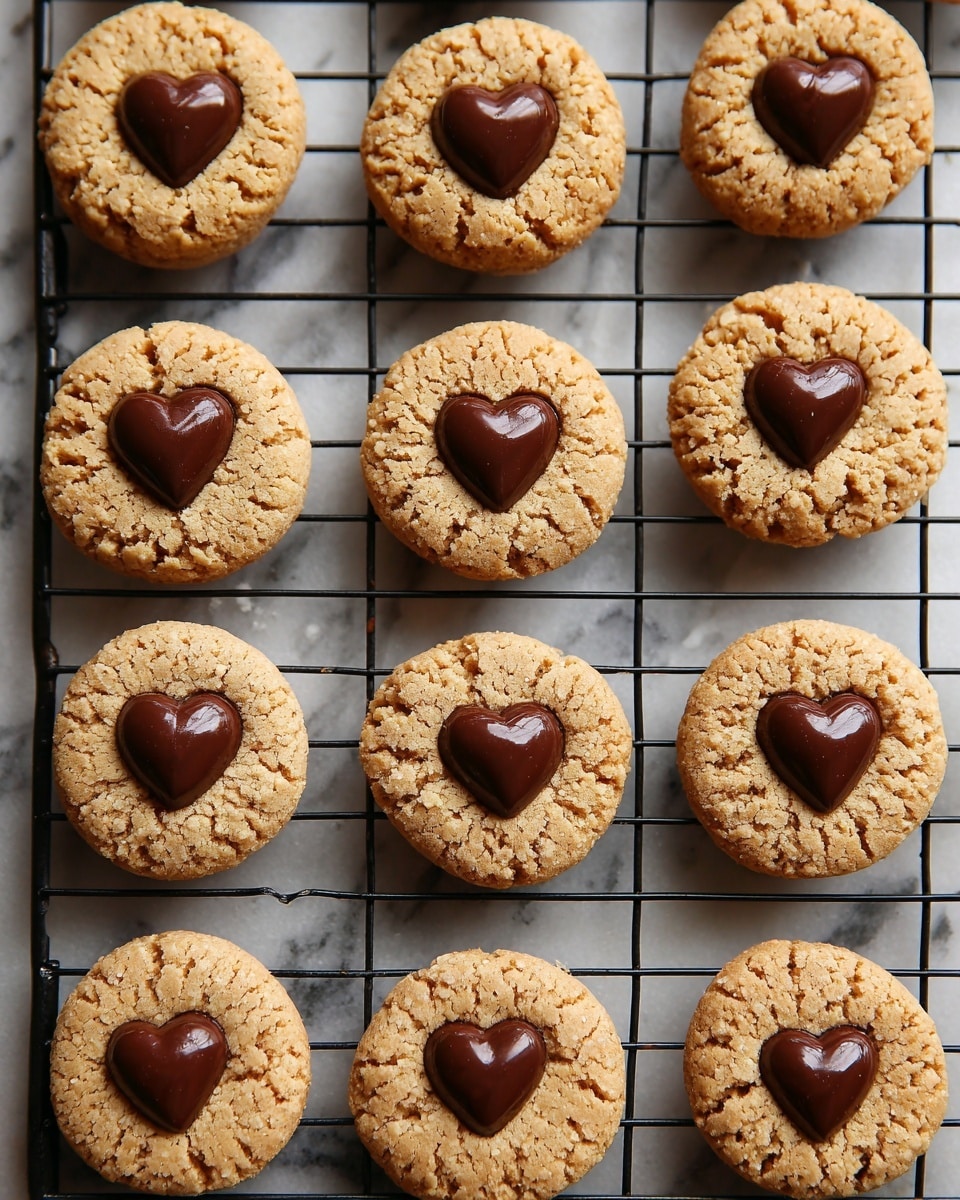
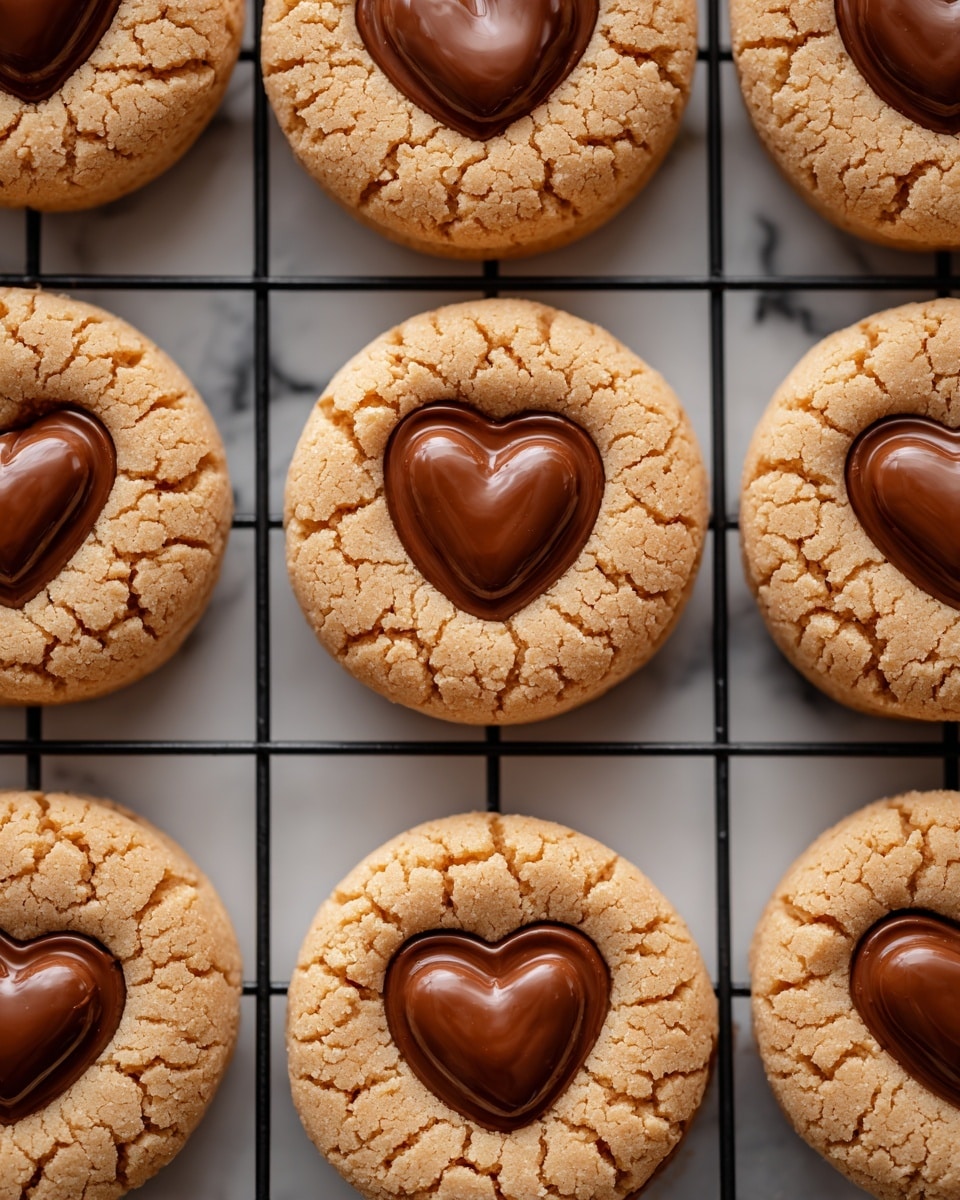
If you are looking for a delightful treat that feels like a warm hug wrapped in sweetness, this Heart-Shaped Peanut Butter Cookies Recipe is your new best friend. These cookies are wonderfully soft, with a rich and nutty flavor that shines through in every bite. Perfectly shaped for any special occasion like Valentine’s Day or anniversaries, they are easy to make and beautifully lend themselves to creative decorating, from a gentle chocolate drizzle to a little sprinkle of flaky sea salt. Whether you’re gifting them or keeping them for yourself, these cookies will quickly become a beloved classic in your baking repertoire.

Ingredients You’ll Need
The magic of this recipe lies in its simple, everyday ingredients that come together to create a cookie that feels both homey and special. Each component plays a key role in balancing flavor, texture, and that perfect golden color.
- Unsalted butter (1/2 cup, softened): Adds richness and tenderness, giving your cookies that melt-in-your-mouth quality.
- Creamy peanut butter (1/2 cup): The star of the show, providing deep nutty flavor and a smooth texture.
- Granulated sugar (1/2 cup): Sweetens the cookies while helping achieve a light and tender crumb.
- Brown sugar (1/2 cup, packed): Brings moisture and a subtle caramel undertone to balance the peanut butter.
- One large egg: Binds all ingredients together and adds a lovely chewiness.
- Vanilla extract (1 teaspoon): Enhances flavor complexity with a warm, aromatic touch.
- All-purpose flour (1 1/4 cups): Provides structure ensuring your cookies hold their iconic heart shape.
- Baking powder (1/2 teaspoon): Gives a gentle lift so cookies are soft but not cakey.
- Baking soda (1/2 teaspoon): Helps with browning and adds lightness.
- Salt (1/4 teaspoon): Balances sweetness and elevates the peanut butter flavor.
- Optional melted chocolate or sanding sugar: Perfect for decorating and adding a final pop of fun or elegance.
How to Make Heart-Shaped Peanut Butter Cookies Recipe
Step 1: Prepare Your Workspace and Ingredients
Start by preheating your oven to 350°F (175°C) and lining two baking sheets with parchment paper; this prevents sticking and helps with even baking. Ensure your butter is softened for easy creaming, and gather all your ingredients so baking flows smoothly without a hitch.
Step 2: Cream Butter, Peanut Butter, and Sugars
In a large mixing bowl, beat together the softened butter, creamy peanut butter, granulated sugar, and packed brown sugar until light and fluffy. This step is crucial because aerating the mixture helps create that tender, melt-in-your-mouth texture you’re craving.
Step 3: Mix in Egg and Vanilla Extract
Beat in your egg and vanilla extract gently but thoroughly. These ingredients not only bring the dough together but also add essential moisture and fragrance that makes these cookies taste so comforting and homemade.
Step 4: Combine Dry Ingredients
In a separate bowl, whisk together your all-purpose flour, baking powder, baking soda, and salt. This ensures that the leavening agents and salt are evenly dispersed, preventing any uneven bites or texture issues.
Step 5: Bring It All Together
Gradually add the dry ingredients to the wet mixture, stirring just until a soft dough forms. Be careful not to overmix; you want just enough to combine everything without toughening the dough.
Step 6: Chill the Dough
Wrap your dough and chill it in the refrigerator for 20 to 30 minutes. This step makes rolling and cutting easier, allowing those adorable heart shapes to hold firm during baking.
Step 7: Roll and Cut
Lightly flour your surface and roll the dough out to about 1/4-inch thickness. Then, using a heart-shaped cookie cutter, cut out your cookies and transfer them to the prepared baking sheets, placing them about 1 inch apart to give room for gentle spreading.
Step 8: Bake to Perfection
Bake your cookies for 8 to 10 minutes, until their edges turn a delicate golden color. For crunchier cookies, add an extra minute or two, but remember they’ll harden up more as they cool.
Step 9: Cool and Decorate
Allow cookies to cool on the baking sheet for 5 minutes before moving them to a wire rack to cool completely. Once cooled, drizzle melted chocolate or sprinkle sanding sugar for that final touch that’ll make your cookies look as good as they taste.
How to Serve Heart-Shaped Peanut Butter Cookies Recipe
Garnishes
Simple garnishes like a drizzle of dark chocolate or a sprinkle of flaky sea salt can elevate these cookies from everyday treats to irresistible showstoppers. You can also add colorful sanding sugar for festive occasions or a dusting of powdered sugar to give a delicate, snowy effect.
Side Dishes
Serve your Heart-Shaped Peanut Butter Cookies alongside a glass of cold milk, a cup of rich coffee, or even a warm mug of tea. Creamy vanilla ice cream also pairs beautifully with these cookies, creating a decadent dessert experience that’s both comforting and fun.
Creative Ways to Present
For gifts or parties, arrange the cookies in a pretty box lined with parchment paper and tie with a ribbon. You can also stack them on a tiered dessert tray or attach small handwritten notes with sweet messages for an extra personal touch. These presentation ideas make your Heart-Shaped Peanut Butter Cookies Recipe even more memorable!
Make Ahead and Storage
Storing Leftovers
Store your baked cookies in an airtight container at room temperature for up to 5 days. This keeps them soft and fresh, allowing you to enjoy them at your leisure without a rush.
Freezing
If you want to keep these treats longer, freeze the unbaked dough wrapped tightly for up to 2 months. When ready to bake, thaw in the fridge overnight and proceed with rolling and cutting. You can also freeze baked cookies by layering them between sheets of parchment and storing in a freezer-safe container for up to 3 months.
Reheating
To enjoy your cookies warm, simply pop them in the oven at 300°F (150°C) for 3 to 5 minutes or microwave briefly for about 10 seconds. This revives their fresh-baked softness and intensifies the peanut butter aroma.
FAQs
Can I use crunchy peanut butter instead of creamy?
Absolutely! Using crunchy peanut butter will add a delightful texture contrast in your cookies, making every bite a little more interesting without changing the core flavor.
Is it necessary to chill the dough?
Chilling the dough helps firm it up for cleaner, easier heart-shaped cuts and prevents excessive spreading during baking, but if you’re short on time, you can skip it and still get tasty cookies.
How do I prevent my cookies from flattening too much?
Make sure your butter is softened but not melted, and chilling the dough can greatly help. Avoid overworking the dough which can cause excess spreading.
Can I decorate these cookies without chocolate?
Yes! Sprinkling sanding sugar, cinnamon sugar, or even edible glitter can beautifully decorate your cookies without adding chocolate, keeping things simple and sweet.
Are these cookies suitable for vegetarians?
Yes, this recipe is vegetarian-friendly since it contains no animal-derived gelatin or other non-vegetarian ingredients.
Final Thoughts
There is something truly heartwarming about baking a batch of these Heart-Shaped Peanut Butter Cookies Recipe from scratch. Whether you’re celebrating a special day or just indulging in a sweet craving, these cookies are a delightful way to spread joy. I encourage you to try this recipe and enjoy the process of creating something deliciously simple that’s sure to bring smiles all around.
Print
Heart-Shaped Peanut Butter Cookies Recipe
- Prep Time: 25 minutes
- Cook Time: 10 minutes
- Total Time: 35 minutes
- Yield: 24 cookies
- Category: Dessert
- Method: Baking
- Cuisine: American
- Diet: Vegetarian
Description
Heart-Shaped Peanut Butter Cookies are sweet, soft, and full of nutty flavor—perfect for Valentine’s Day, anniversaries, or as a homemade edible gift. These tender cookies hold their shape well and are easy to decorate with chocolate drizzle or a sprinkle of sea salt.
Ingredients
Wet Ingredients
- 1/2 cup unsalted butter (softened)
- 1/2 cup creamy peanut butter
- 1/2 cup granulated sugar
- 1/2 cup packed brown sugar
- 1 large egg
- 1 teaspoon vanilla extract
Dry Ingredients
- 1 1/4 cups all-purpose flour
- 1/2 teaspoon baking powder
- 1/2 teaspoon baking soda
- 1/4 teaspoon salt
Optional for Decoration
- Melted chocolate
- Sanding sugar
Instructions
- Preheat Oven: Preheat your oven to 350°F (175°C) and line two baking sheets with parchment paper to prevent sticking and ensure even baking.
- Cream Fats and Sugars: In a large bowl, cream together the softened butter, creamy peanut butter, granulated sugar, and brown sugar until the mixture is light and fluffy, creating a smooth base for your dough.
- Add Egg and Vanilla: Beat in the egg and vanilla extract until fully incorporated, adding moisture and flavor to the dough.
- Mix Dry Ingredients: In a separate bowl, whisk together the all-purpose flour, baking powder, baking soda, and salt to evenly distribute the leavening agents and salt.
- Combine Wet and Dry: Gradually add the dry ingredients to the wet mixture, stirring gently until a soft dough forms, being careful not to overmix to keep the cookies tender.
- Chill Dough: Chill the dough in the refrigerator for 20–30 minutes to firm it up, making it easier to roll and cut out.
- Roll Out Dough: On a lightly floured surface, roll the chilled dough to about 1/4-inch thickness to ensure even baking and proper cookie size.
- Cut Shapes: Use a heart-shaped cookie cutter to cut out cookies and place them about 1 inch apart on the prepared baking sheets to prevent sticking during baking.
- Bake Cookies: Bake the cookies for 8–10 minutes or until the edges are lightly golden, indicating they are cooked through but still soft inside.
- Cool Cookies: Allow cookies to cool on the baking sheet for 5 minutes before transferring them to a wire rack to cool completely, which helps them set up properly.
- Decorate: Once cooled, optionally drizzle with melted chocolate or sprinkle with sanding sugar to add a decorative and flavorful touch.
Notes
- For a crunchier texture, bake for 1–2 minutes longer than the recommended time.
- The dough can be made ahead and refrigerated for up to 2 days for convenience.
- For an attractive finish, you can dip half of each cookie in melted chocolate once cooled.


