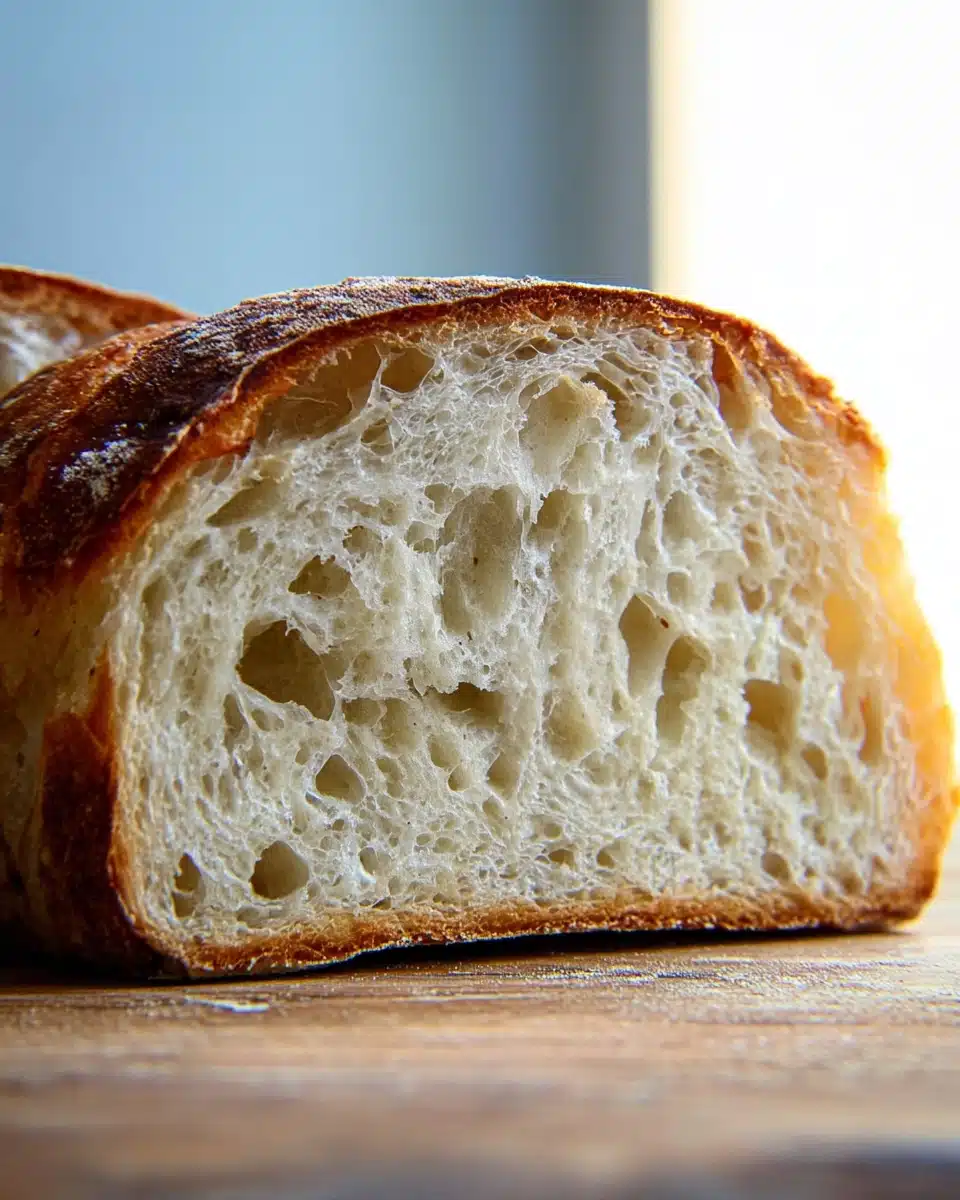
If you’re craving homemade bread with an irresistible golden crust, pillow-soft interior, and that signature tangy sourdough punch, this Easy Sourdough Sandwich Bread will quickly become your new go-to recipe. Perfect for slicing, toasting, or piling high with your favorite sandwich fillings, it’s a wonderful balance of homestyle comfort and artisan flavor—but with none of the stress. This loaf showcases all the texture and character of sourdough, yet it fits beautifully into the rhythm of a busy week and your daily sandwich routine.
Ingredients You’ll Need
The beauty of this recipe lies in its simplicity. Just a handful of quality ingredients work together to build memorable flavor and that soft, sliceable crumb. Each one plays a unique role: in flavor, in structure, or even that gorgeous golden color on top.
- Sourdough starter: Use bubbly, active sourdough starter to bring natural rise and the signature sourdough taste—make sure yours is freshly fed for the best result.
- Bread flour: The higher protein content helps structure the bread and create a tender but sturdy crumb, ideal for slicing.
- Water: Room temperature water makes mixing easy and helps the dough rise evenly.
- Milk: Adds a subtle richness and keeps the crumb extra soft—whole milk works beautifully, but 2% is fine too.
- Butter: A little melted butter infuses the bread with flavor and a melt-in-your-mouth texture.
- Sugar: Just a bit of sugar gently feeds the yeast, balances the tang, and encourages that golden crust.
- Salt: Don’t skip it—salt not only enhances flavor but also controls fermentation and helps strengthen the dough.
How to Make Easy Sourdough Sandwich Bread
Step 1: Mix the Dough
In a large mixing bowl, combine your active sourdough starter, bread flour, water, and milk. Stir until a rough, shaggy dough comes together, then add melted butter, sugar, and salt. Using a spatula or your hands, work everything together until thoroughly combined. Don’t worry if the dough feels slightly sticky at first—this is a moist dough, which helps create that dreamy, fluffy interior sourdough lovers adore.
Step 2: Knead and First Rise
Turn the dough out onto a lightly floured surface and knead for about 8-10 minutes, or until it’s smooth and elastic (a stand mixer with a dough hook makes this even easier). Place the dough in a lightly greased bowl, cover with a damp towel, and set it aside to rise until doubled in size—this can take 4 to 6 hours depending on the activity of your starter and room temperature. Let patience work its magic; this slow fermentation is what gives Easy Sourdough Sandwich Bread its complexity and softness.
Step 3: Shape the Loaf
Once the dough has doubled, gently tip it onto a lightly floured surface. Flatten it into a rectangle about as wide as your loaf pan. Fold in the sides and roll it up tightly, pinching the seam closed. Place the shaped dough, seam-side down, in a greased loaf pan. This step ensures you get that classic, domed sandwich bread look and even slices.
Step 4: Final Rise (Proofing)
Cover the pan loosely and set it aside for the final rise. Depending on the warmth of your kitchen and your sourdough’s vigor, this can take 2 to 4 hours. Look for the loaf to crest about an inch above the rim of your loaf pan—don’t rush it! The whole experience of easy sourdough sandwich bread is letting the dough slowly, naturally fill your home with anticipation.
Step 5: Bake
Preheat your oven to 375°F (190°C). For an extra golden crust, brush the top of your loaf lightly with melted butter or milk. Bake for 35 to 40 minutes, or until deeply golden and the loaf sounds hollow when tapped. Let it cool in the pan for 10 minutes, then transfer to a wire rack to finish cooling—resist slicing while it’s warm, as this will ensure you get perfectly neat slices every time!
How to Serve Easy Sourdough Sandwich Bread

Garnishes
Freshly baked, this bread shines simply with a swipe of creamy butter or a drizzle of honey. But you can also get playful with a sprinkle of flaky sea salt, a smear of garlic confit, or even a handful of fresh herbs tossed into your butter. Each of these finishing touches showcases the bread while adding a little pop of flavor and color—perfect for making the everyday feel gourmet.
Side Dishes
For an unbeatable lunch, serve your Easy Sourdough Sandwich Bread alongside a bowl of tomato soup or a vibrant green salad. It’s also a dream with creamy scrambled eggs for breakfast, or as the hearty base for avocado toast, open-faced melts, or rustic panini. The mild tang and pillowy crumb invite pairing with both light and bold flavors.
Creative Ways to Present
Don’t be afraid to slice the bread thick and serve as toast boards for brunch: think ricotta and berries, smoked salmon and dill, or classic peanut butter and sliced banana. Cut into cubes, it makes a delightful base for bread pudding or savory strata. Hosting dinner? Use it in gourmet grilled cheese sliders or transform it into crispy sourdough croutons for salads.
Make Ahead and Storage
Storing Leftovers
To keep your Easy Sourdough Sandwich Bread tasting wonderfully fresh, store cooled slices in an airtight container at room temperature for up to 3 days. If your kitchen is especially humid or warm, you may want to refrigerate it, though some softness may be lost—just toast it gently to bring back that fluffy texture.
Freezing
This bread freezes exceptionally well! Once completely cooled, wrap the loaf (or individual slices) tightly in plastic wrap or foil, then place in a freezer-safe bag. Stored this way, it’ll stay delicious for up to two months. To enjoy, simply pop a slice or two straight into the toaster—no need to thaw first.
Reheating
For that straight-from-the-oven taste, reheat slices in a toaster, toaster oven, or conventional oven at 350°F (175°C) until warmed through and lightly crisped. For whole loaves, wrap in foil and warm in the oven to keep the crust from getting too hard. A little butter on a warm slice will make the flavor sing all over again!
FAQs
Can I use all-purpose flour instead of bread flour?
You can substitute with all-purpose flour if that’s what you have on hand, though your Easy Sourdough Sandwich Bread may turn out slightly less chewy and structured. Bread flour’s higher protein really boosts rise and texture, so use it when possible for the best result.
What if my dough doesn’t rise as much as expected?
This often comes down to starter strength and room temperature. Make sure your sourdough starter is very bubbly and active before mixing, and remember that cooler rooms will slow the rise—be patient and allow extra rising time if necessary.
Can I add seeds, nuts, or herbs to my loaf?
Absolutely! Feel free to fold in sunflower seeds, pumpkin seeds, chopped nuts, or fresh herbs during shaping for a creative twist. Just be careful not to add too much, as bulky mix-ins can weigh down the dough slightly.
Is it possible to make Easy Sourdough Sandwich Bread vegan?
You can swap the milk with any non-dairy milk (like oat or almond) and use a vegan butter substitute or olive oil. The flavor and crumb will be a touch different but still absolutely delicious and soft.
How should I store my sourdough starter between uses?
Keep your sourdough starter in the refrigerator for up to a week between bakes. Simply feed it as usual, cover loosely, and pop it in the fridge. When you’re ready to bake again, take it out ahead of time and give it a fresh feeding to reactivate it.
Final Thoughts
If you’ve ever wished for a bread you could throw together on a Sunday and enjoy all week, Easy Sourdough Sandwich Bread is the answer. It’s homey, versatile, and endlessly satisfying—whether for a weekday sandwich, a slice of toast, or simply shared with loved ones. You’re going to love this recipe from the very first bite, so gather your ingredients and give it a try soon!


