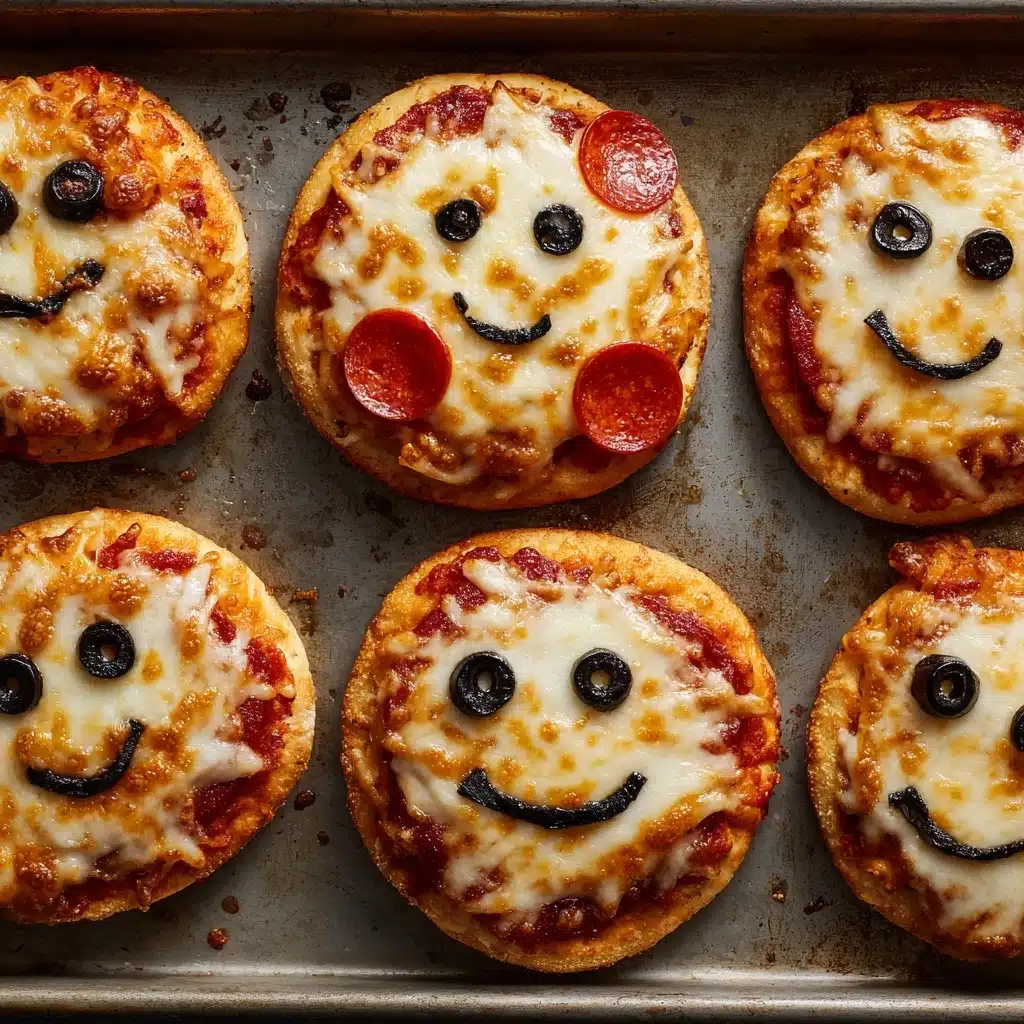
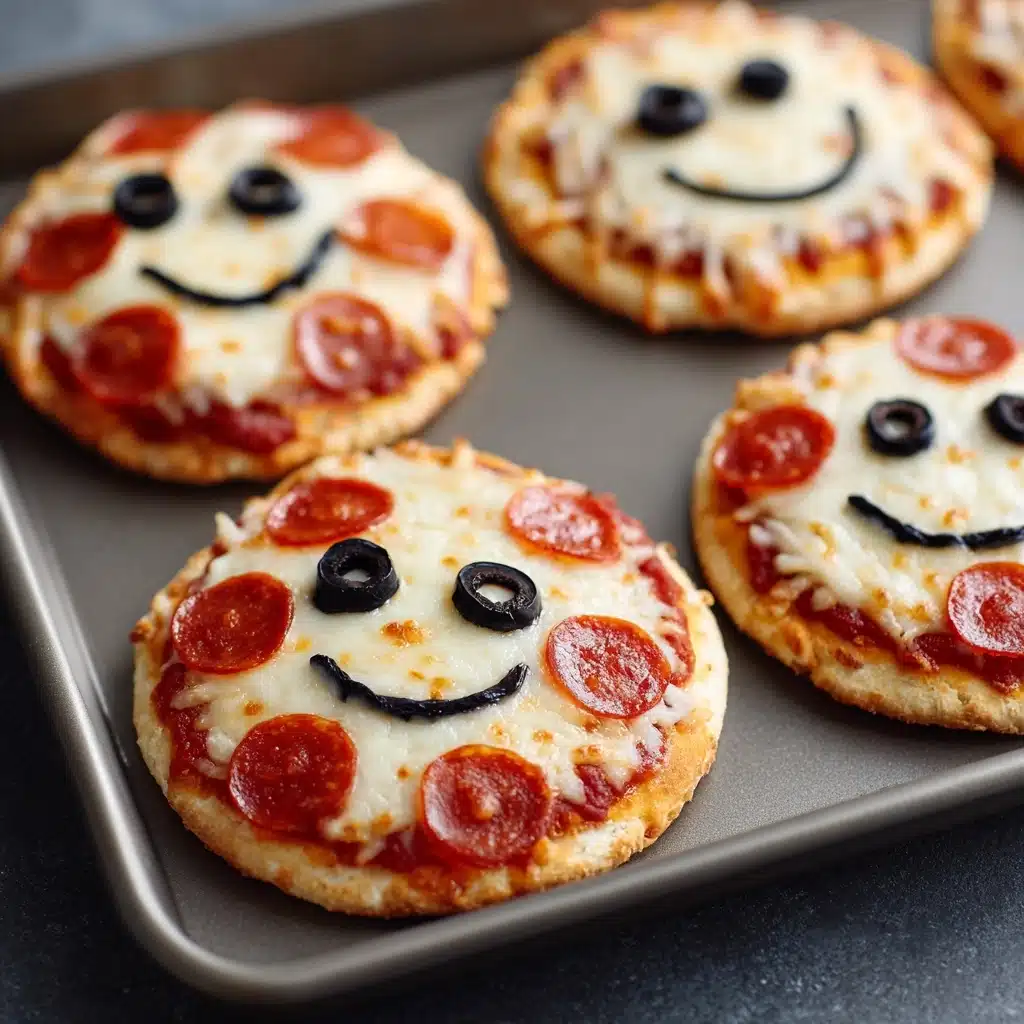
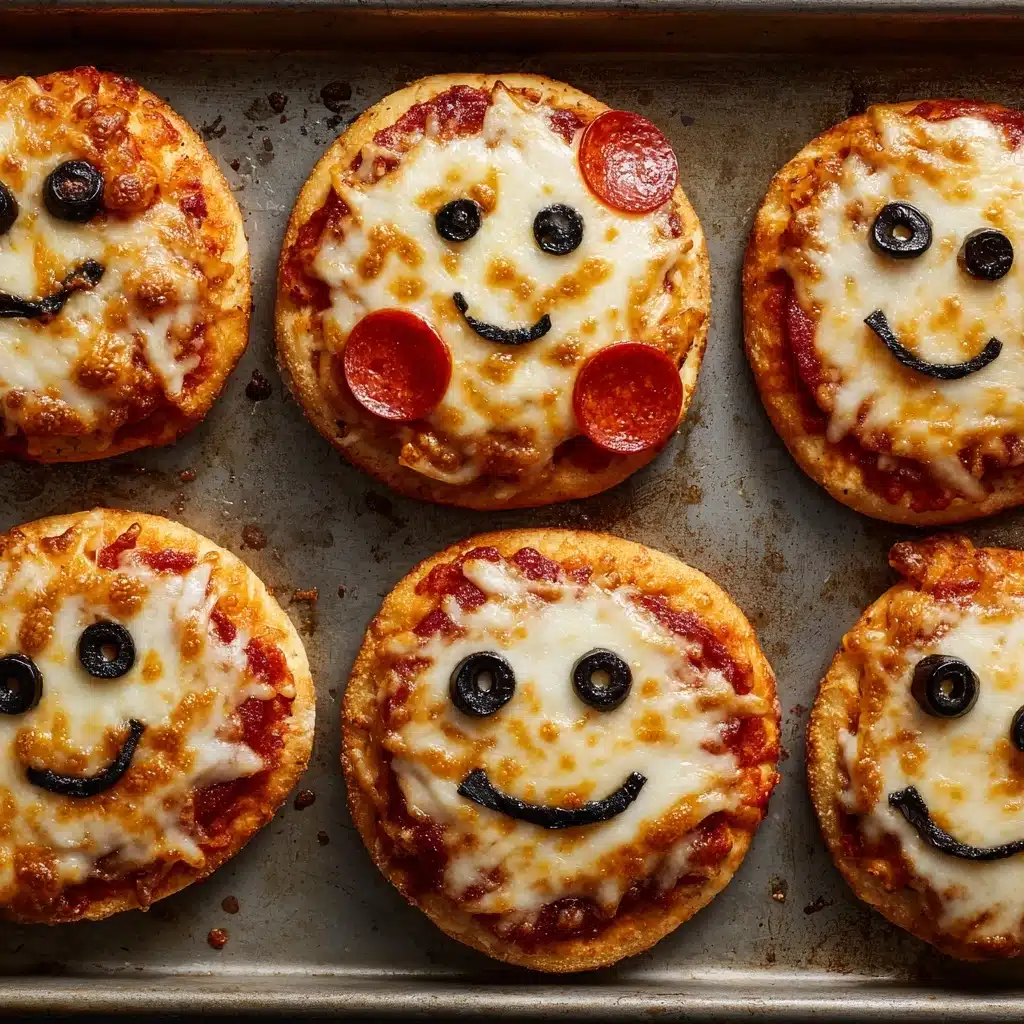
If you’re looking for a show-stopping party snack that’s equal parts festive, customizable, and utterly delicious, these Easy Peasy Mini Halloween Pizzas are the answer. Each little pizza features a toasty English muffin base absolutely loaded with gooey cheese, zesty pizza sauce, and the cutest (or spookiest) Halloween faces you can dream up. Not only are they quick to assemble, but they practically guarantee giggles and wide eyes—making every Halloween party or after-school snack a real event. The best part? Kids and adults alike can join in on the decorating fun, so these mini pizzas turn snack time into a creative family adventure!
Ingredients You’ll Need
Let’s talk about just how easy these ingredients are to handle. Each item plays a starring role in making these Easy Peasy Mini Halloween Pizzas both whimsical and tasty—from the perfectly crisp muffin base to gooey toppings and ghoulish garnishes.
- English muffins (1 package, 8-count, split): These are the ultimate shortcut—crisp edges and a fluffy center make the perfect mini pizza base, no dough mixing required!
- Pizza sauce (1 cup): Whip out your favorite jarred sauce or homemade batch for that signature tangy flavor that holds the toppings together.
- Shredded mozzarella cheese (2 cups): Must-have for that classic, stretchy, ooey-gooey pizza experience; feel free to add extra for a cheesier bite!
- Pepperoni or turkey pepperoni (16 slices): These are perfect for classic monster mouths or as bats and pumpkins when cut with cookie cutters.
- Black olives (8, sliced): They make delightfully creepy eyes or spiders and add a little salty bite.
- Candy eyes or olive pieces for decoration: The finishing touch for transforming each pizza into a mini work of edible art.
- Halloween-shaped cookie cutters (optional): This is where you can really go wild with themed shapes—think bats, pumpkins, or even ghosts cut from cheese or meats.
How to Make Easy Peasy Mini Halloween Pizzas
Step 1: Prep Your Base
Start by preheating your oven to 375°F. Grab a large baking sheet and arrange your split English muffins cut side up. Lining them neatly will give you plenty of space for decorating later. The muffins are sturdy and make the ideal canvas for all sorts of creepy or cute creations.
Step 2: Saucy Situation
Spoon about 1–2 tablespoons of pizza sauce onto each muffin half and use the back of your spoon to spread it all the way to the edges. Don’t worry about making it perfect—some sauce bubbling over just adds to the Halloween charm!
Step 3: Blanket of Cheese
Sprinkle a generous layer of shredded mozzarella on each muffin. If you like things extra cheesy (who doesn’t?), feel free to sneak in a little more. The cheese not only adds flavor, it becomes your blank canvas for ghoulish faces and monster smiles.
Step 4: Decorate Your Monsters
This is the moment when your Easy Peasy Mini Halloween Pizzas really come to life. Top each muffin with pepperoni slices, olive rings, and those lovable candy eyes. Want pumpkins, bats, or mummies? Go wild using your cookie cutters on pepperoni or cheese—let your imagination (or the kids!) take the lead. Don’t be afraid to try strips of bell pepper for monster mouths or mini mozzarella balls for mummy eyes.
Step 5: Bake and Enjoy
Pop your decorated masterpieces in the oven and bake for 10–12 minutes, until the cheese is bubbling and beautifully golden. Let them cool for a minute (trust me—hot cheese is no joke), then admire your handiwork before diving in!
How to Serve Easy Peasy Mini Halloween Pizzas
Garnishes
You can really elevate your Easy Peasy Mini Halloween Pizzas with a sprinkle of fresh basil, extra candy eyes for a crowd, or even a dusting of grated Parmesan “cobwebs.” Edible glitter or colored food gels are a hit for those who want a touch of orange or green pizzazz on top.
Side Dishes
Serve these little pizzas alongside a platter of veggie sticks (bonus points for carrot “witch fingers” or celery “monster stalks”), or add a bowl of tomato soup to scoop up those melty cheese bits. They’re also perfect with a handful of popcorn or a Halloween-themed fruit salad for a balanced, festive spread.
Creative Ways to Present
Arrange your mini pizzas on a wooden board lined with Halloween-themed parchment paper, or stand them upright in a “graveyard” of kale and black tortilla chips for extra spooky vibes. You can even group them by design—mummy army here, pumpkin patch there—for a party table centerpiece that’s as fun as it is delicious.
Make Ahead and Storage
Storing Leftovers
If your party crew somehow leaves a few behind, let the pizzas cool completely, then pop them in an airtight container. They’ll keep perfectly in the fridge for up to 3 days, making a particularly giddy lunchbox surprise the next day.
Freezing
To freeze, arrange the cooled Easy Peasy Mini Halloween Pizzas in a single layer on a baking sheet. Once they’re solid, stack them in freezer bags with parchment between layers. They’ll stay fresh for up to 2 months, ready for a last-minute spooky snack attack.
Reheating
For best results, reheat leftovers in the oven at 350°F for about 8 minutes (or until hot all the way through) to bring back the crisp edges. If you’re in a hurry, a quick zap in the microwave works, but the muffin might get a little soft—just a heads-up!
FAQs
Can I use bagels or pita bread instead of English muffins?
Absolutely! Bagel halves make great sturdy bases for slightly larger mini pizzas, while pita bread gives a thinner, crispier result. Just adjust your baking time if needed since each base crisps up a bit differently.
What can I use instead of candy eyes?
If you’d prefer to skip candy eyes, pipe dots of cream cheese or use small pieces of white cheese with a black olive “pupil” for a totally edible and still adorable spooky stare.
Are there vegetarian topping options for these Easy Peasy Mini Halloween Pizzas?
Of course! Try strips of red and green bell peppers, mushrooms, cherry tomato halves, or even cut shapes from thin slices of zucchini or eggplant for delicious and festive alternatives.
Can kids help decorate the pizzas?
That’s the best part! Decorating is fun, safe, and endlessly entertaining for kids. Lay out a topping buffet and let everyone craft their own monster or pumpkin pizza—these DIY moments always make for great memories and laughter.
What if I don’t have Halloween cookie cutters?
No cutters? No problem. You can use a small knife to cut shapes freehand, or just arrange toppings for silly or spooky faces and patterns. The messier the monsters, the better!
Final Thoughts
If you’re craving a recipe that’s fun, hands-on, and sure to bring a smile to everyone at the table, these Easy Peasy Mini Halloween Pizzas are where the magic happens. Dive in, get creative, and make your next Halloween party delightfully delicious—one cheesy, spooky bite at a time!
Print
Easy Peasy Mini Halloween Pizzas Recipe
- Prep Time: 10 minutes
- Cook Time: 12 minutes
- Total Time: 22 minutes
- Yield: 16 mini pizzas
- Category: Appetizer
- Method: Baking
- Cuisine: American
- Diet: Non-Vegetarian
Description
These Easy Peasy Mini Halloween Pizzas are a fun and kid-friendly recipe perfect for Halloween parties or spooky dinners. Customize with your favorite toppings and get creative with festive shapes!
Ingredients
Ingredients:
- 1 package (8-count) English muffins (split)
- 1 cup pizza sauce
- 2 cups shredded mozzarella cheese
- 16 slices pepperoni or turkey pepperoni
- 8 black olives (sliced)
- candy eyes or olive pieces for decoration
- Halloween-shaped cookie cutters (optional)
Instructions
- Preheat the oven: Preheat the oven to 375°F.
- Prepare English muffins: Arrange split English muffins on a baking sheet, cut side up.
- Add sauce and cheese: Spread about 1–2 tablespoons of pizza sauce on each muffin half. Top with shredded mozzarella.
- Decorate: Add pepperoni slices, olive slices, and candy eyes for spooky faces, or use cookie cutters for Halloween shapes.
- Bake: Bake for 10–12 minutes until cheese is melted and bubbly.
- Serve: Let cool slightly before serving.
Notes
- Get creative with toppings—try green bell pepper strips for monster mouths or mini mozzarella balls for mummy eyes.
- This recipe is a hit with kids and is perfect for Halloween gatherings.

