

If you have a sweet tooth and a love for all things chocolate, this Easy Homemade Chocolate Syrup Recipe is a total game-changer. It’s rich, silky, and surprisingly simple to whip up right in your own kitchen with ingredients you likely already have on hand. Whether drizzled over ice cream, stirred into milk, or used as the secret sauce in your favorite dessert, this syrup transforms everyday treats into something extraordinary. Plus, making it yourself means you get all the deep chocolate flavor without any unnecessary additives. Dive in and discover how effortlessly delicious homemade chocolate syrup can be!

Ingredients You’ll Need
Each ingredient in this recipe plays a pivotal role in creating that perfect balance of richness, sweetness, and smooth texture. With just five essentials, this syrup is proof that good things truly come in simple packages.
- 1/2 cup unsweetened cocoa powder: The star of the show, delivering intense chocolate flavor and beautiful color.
- 1 cup granulated sugar: Sweetens the syrup and helps create a glossy, thick finish.
- 1 cup water: Essential for dissolving the dry ingredients and blending everything into a luscious syrup.
- 1/8 teaspoon salt: Enhances and balances the sweetness, making the chocolate flavor pop.
- 1 teaspoon vanilla extract: Adds a warm, aromatic note that rounds out the chocolate beautifully.
How to Make Easy Homemade Chocolate Syrup Recipe
Step 1: Combine Dry Ingredients
Start by whisking together the cocoa powder, sugar, and salt in a medium saucepan. This ensures the powders are evenly mixed before any liquid is added, which helps prevent lumps and sets the stage for a silky smooth syrup.
Step 2: Add the Water Slowly
Gradually pour in the water while continuing to whisk. This slow incorporation is key to creating a homogeneous mixture and keeps the cocoa from clumping up as the liquid binds everything together.
Step 3: Heat and Stir Constantly
Place the saucepan over medium heat and bring your chocolate mixture to a gentle boil. Constant stirring is crucial here to avoid scorching and to encourage the sugars to dissolve fully, building a glossy syrup consistency.
Step 4: Simmer Until Thickened
Once boiling, reduce the heat slightly and let the syrup simmer for 3 to 5 minutes. You’ll notice it thickens just enough to coat the back of a spoon, signaling it’s ready to take off the heat.
Step 5: Add Vanilla and Cool
Remove the saucepan from heat and stir in the vanilla extract. This final step infuses your syrup with a depth of flavor and scent that makes all the difference. Let it cool to room temperature before proceeding.
Step 6: Store Your Syrup
Once cooled, transfer the chocolate syrup to a clean glass jar or airtight container. Refrigerate it to keep fresh and ready to drizzle over anything that deserves a chocolate touch!
How to Serve Easy Homemade Chocolate Syrup Recipe
Garnishes
A generous drizzle of this chocolate syrup instantly elevates simple desserts like vanilla ice cream, pancakes, or fresh fruit. Try topping with a sprinkle of sea salt or chopped nuts to add a delightful contrast in texture and flavor.
Side Dishes
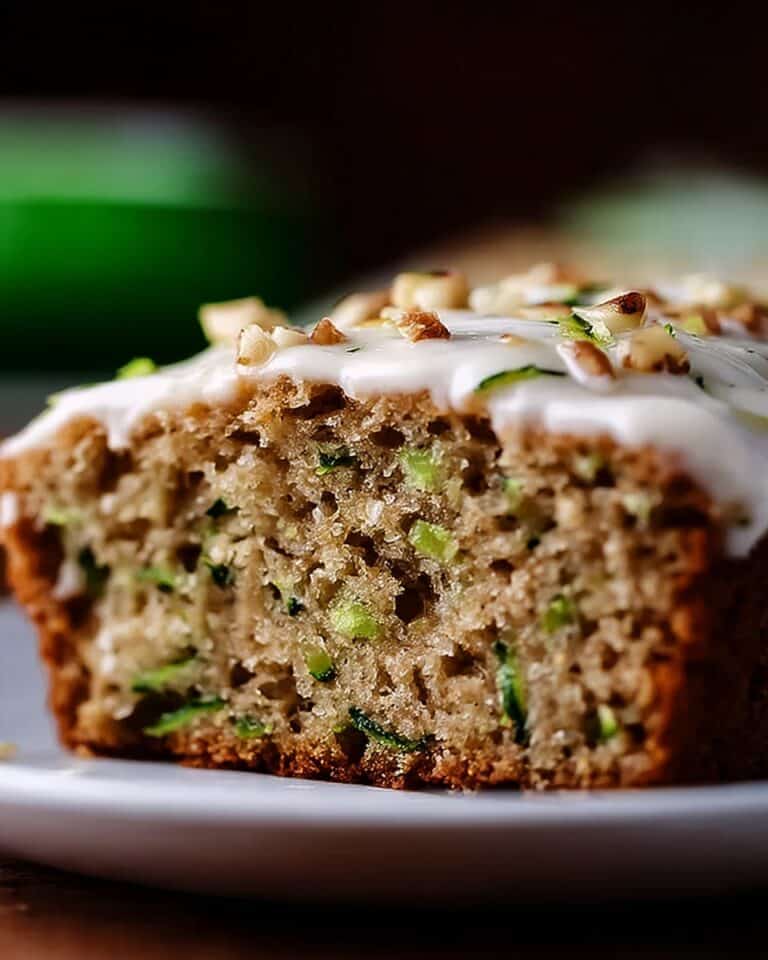
This syrup pairs wonderfully with favorites like waffles, brownies, or even warm banana bread. Its syrupy richness complements the warm, fluffy textures and intensifies the chocolate experience.
Creative Ways to Present
Think beyond the usual: use the syrup as a base for homemade mochas or chocolate milk, swirl it into yogurt or oatmeal, or drizzle it artistically over a white plate alongside desserts for a professional touch that dazzles guests.
Make Ahead and Storage
Storing Leftovers
This chocolate syrup stores beautifully in the fridge for up to two weeks. Just keep it in a sealed container and give it a good stir before each use to restore its perfect pourable texture.
Freezing
While refrigeration is usually best, you can freeze the syrup for longer storage. Pour it into a freezer-safe container, leaving some headspace for expansion. Thaw slowly in the fridge and stir well before serving to bring back its smoothness.
Reheating
If your syrup becomes too thick or crystallizes in the fridge, gently warm it in a saucepan over low heat or microwave in short intervals, stirring frequently until it’s back to silky perfection.
FAQs
Can I use brown sugar instead of granulated sugar?
Absolutely! Brown sugar will add a hint of molasses flavor and make the syrup a little richer and darker. Just keep the same amount and mix it in as you would granulated sugar.
Is it possible to make this syrup vegan?
Yes, this recipe is naturally vegan since it uses no animal products. Just be sure your vanilla extract is vegan-friendly, as some extracts may contain alcohol derived from animal products.
How long does homemade chocolate syrup last?
Stored properly in an airtight container in the refrigerator, it typically stays fresh and tasty for up to two weeks. After that, it may lose flavor or develop off notes.
Can I adjust the sweetness?
Definitely! Feel free to reduce or increase the sugar slightly to suit your taste. Just remember that sugar also affects texture, so major changes might alter the syrup’s consistency.
Why does the syrup sometimes crystallize?
Crystallization happens when sugar re-forms into crystals after cooling. Stirring while the syrup heats and ensuring it fully dissolves before cooling helps prevent this. Reheating gently will fix minor crystallization.
Final Thoughts
There’s nothing quite like homemade, and with this Easy Homemade Chocolate Syrup Recipe, you’re just minutes away from elevating your favorite treats with rich, luscious chocolate goodness. Whether you keep it simple or get creative, this syrup promises to become a beloved staple in your kitchen. Give it a try—you’ll wonder how you ever lived without it!
Print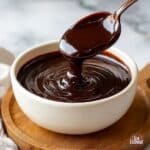
Easy Homemade Chocolate Syrup Recipe
- Prep Time: 5 minutes
- Cook Time: 5 minutes
- Total Time: 10 minutes
- Yield: 1 cup (approximately 1 serving)
- Category: Sauce & Condiment
- Method: Stovetop
- Cuisine: American
Description
This easy homemade chocolate syrup recipe is perfect for adding a rich, chocolatey flavor to your favorite desserts and beverages. Made with simple pantry ingredients like cocoa powder, sugar, and vanilla, it comes together quickly on the stovetop and can be stored in the refrigerator for convenience. Whether drizzled over ice cream, stirred into milk, or used as a topping for baked goods, this versatile syrup is a delicious homemade treat.
Ingredients
Chocolate Syrup Ingredients
- 1/2 cup unsweetened cocoa powder
- 1 cup granulated sugar
- 1 cup water
- 1/8 teaspoon salt
- 1 teaspoon vanilla extract
Instructions
- Combine dry ingredients: In a medium saucepan, whisk together the unsweetened cocoa powder, granulated sugar, and salt until evenly combined to ensure a smooth syrup base.
- Add water: Slowly pour in the water while continuously whisking the mixture to prevent lumps and to achieve a smooth, well-blended consistency.
- Heat mixture: Place the saucepan over medium heat and bring the mixture to a boil, stirring constantly to avoid burning and help dissolve the sugar completely.
- Simmer: Allow the syrup to simmer for 3 to 5 minutes, stirring occasionally, until it slightly thickens to your desired consistency.
- Add vanilla: Remove the saucepan from the heat and stir in the vanilla extract, which enhances the chocolate flavor and adds a pleasant aroma.
- Cool syrup: Let the syrup cool to room temperature to thicken further and ensure safe handling.
- Store: Transfer the cooled chocolate syrup to a clean glass jar or airtight container and refrigerate. Use within 2 weeks for best freshness.
Notes
- For a thicker syrup, simmer a few minutes longer, but be cautious not to burn the mixture.
- Use high-quality cocoa powder for richer flavor.
- The syrup can be stored in the refrigerator for up to 2 weeks.
- Shake or stir well before each use, as some settling may occur.
- Adjust sweetness by reducing or increasing sugar to taste.


