
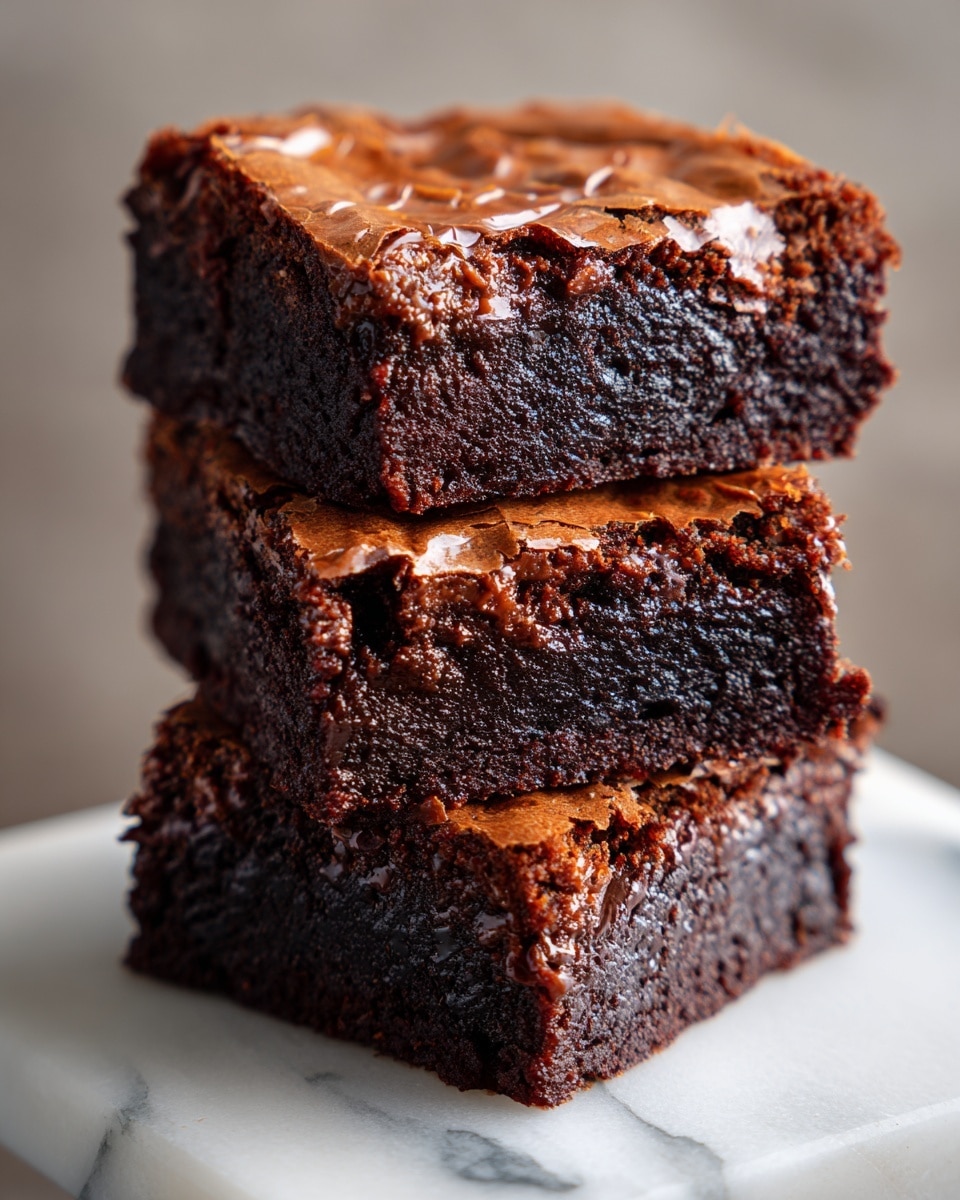
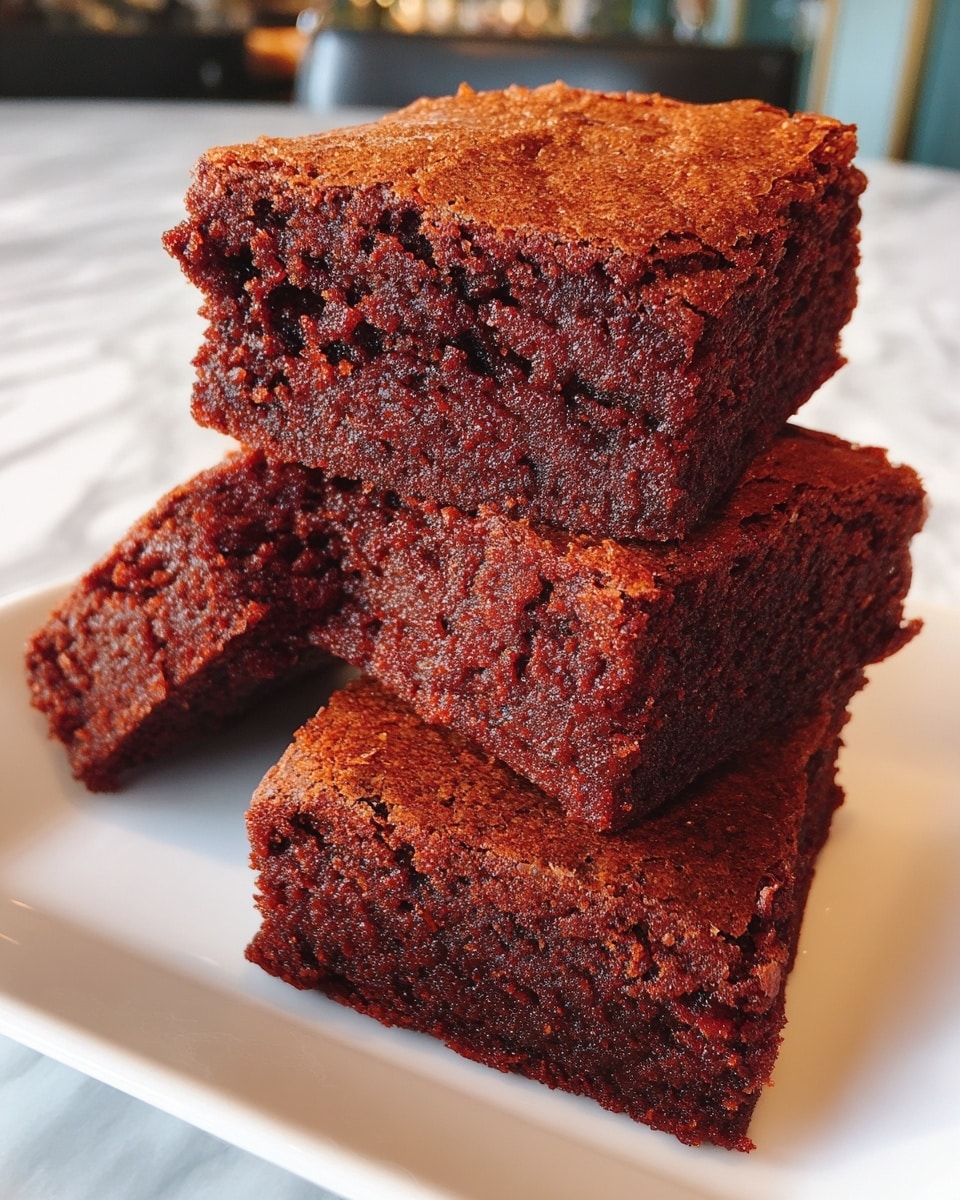
If you have ever dreamed of capturing the perfect balance between crispy, crackly edges and rich, fudgy centers in miniature form, then this Crispy Edge Brownie Bites Recipe will make that dream come true. These little gems deliver the iconic caramelized edge texture every brownie lover adores, but in bite-sized portions that are perfect for parties, quick snacks, or satisfying late-night chocolate cravings. Bursting with deep cocoa flavor and optional melty mini chocolate chips, these irresistible brownie bites are sure to become your go-to treat whenever you want something both decadent and delightfully crispy.

Ingredients You’ll Need
The magic of these Crispy Edge Brownie Bites lies in the simplicity and quality of the ingredients. Each component plays a special role, creating a harmonious texture and flavor that is both familiar and elevated.
- 1/2 cup unsalted butter, melted: Provides richness and helps create those coveted crispy edges.
- 1 cup granulated sugar: Adds sweetness and contributes to the crackly top texture.
- 2 large eggs: Acts as the binding agent while adding moisture for a fudgy center.
- 1 tsp vanilla extract: Enhances the chocolate flavor with a warm, aromatic note.
- 1/3 cup unsweetened cocoa powder: Delivers that deep, intense chocolate taste.
- 1/2 cup all-purpose flour: Gives structure without weighing down the bites.
- 1/4 tsp baking powder: Provides a touch of lift and lightness.
- 1/4 tsp salt: Balances the sweetness and intensifies the chocolate flavor.
- 1/2 cup mini chocolate chips (optional): For those who want an extra melty hit in every bite.
- Nonstick spray or butter: Essential for greasing the mini muffin pan to achieve perfect crispy bottoms.
How to Make Crispy Edge Brownie Bites Recipe
Step 1: Preheat and Prepare Your Pan
Begin by heating your oven to 350°F (175°C). Generously grease a mini muffin tin with butter or nonstick spray to ensure the brownie bites release easily after baking, and to help form that signature crispy edge on the bottoms and sides.
Step 2: Mix Butter and Sugar
In a medium bowl, whisk together the melted butter and granulated sugar until the mixture is silky smooth. This combination creates the foundation for the chewy texture and crackly surface we’re aiming for.
Step 3: Add Eggs and Vanilla
Whisk in the eggs one at a time along with the vanilla extract. Be sure to mix until fully combined, as the eggs contribute moisture and richness that balances the crispy edges with a fudgy center.
Step 4: Incorporate Dry Ingredients
Sift together the cocoa powder, flour, baking powder, and salt, then gently fold them into the wet mixture. Stir just until everything is combined — overmixing can toughen brownies and detract from the perfect fudgy texture.
Step 5: Fold in Chocolate Chips (Optional)
If you’re adding a little extra indulgence, fold in the mini chocolate chips carefully. They’ll add delightful pockets of gooey chocolate that contrast beautifully with the crunchy edges.
Step 6: Fill the Mini Muffin Pan
Spoon the batter into each greased mini muffin cavity, filling about three-quarters full. For those who crave extra crispy edges, slightly overfill the cups, which encourages more caramelization along the edges.
Step 7: Bake to Perfection
Bake your brownie bites for 12 to 15 minutes until the edges become firm and crackly while centers remain just set but still soft. Keep a close eye near the end — taking them out at the perfect moment results in the best crispy edge to fudgy center ratio.
Step 8: Cool and Remove
Allow the brownie bites to cool in the pan for 5 to 10 minutes. This resting time helps them firm up so you can remove them gently using a knife or offset spatula without damaging those gorgeous edges.
How to Serve Crispy Edge Brownie Bites Recipe
Garnishes
Elevate your Crispy Edge Brownie Bites with a dusting of powdered sugar or a few flakes of sea salt to highlight the rich chocolate. For a playful touch, top with a swirl of whipped cream or a drizzle of caramel or raspberry sauce to add another dimension of flavor and visual appeal.
Side Dishes
Pair these brownie bites with a scoop of vanilla bean ice cream or a dollop of mascarpone cheese for a luxurious dessert experience. Fresh berries or a simple citrus salad can also counterbalance the sweetness, making your treat feel more sophisticated and balanced.
Creative Ways to Present
Present these brownie bites on a rustic wooden board or a tiered dessert stand during parties for an irresistible display. You can also serve them with small picks as part of a chocolate tasting flight, inviting guests to savor their textures and flavor contrasts bite by bite.
Make Ahead and Storage
Storing Leftovers
Store any leftover Crispy Edge Brownie Bites in an airtight container at room temperature. They will stay fresh and maintain their texture for up to 4 days, perfect for keeping a stash ready for snack emergencies.
Freezing
If you want to keep these delightful bites longer, pop them into a freezer-safe container or bag. They freeze beautifully for up to 2 months. When you want a quick treat, just thaw them at room temperature — the texture and flavor will remain just as incredible as fresh.
Reheating
To enjoy the brownie bites warm, gently reheat them in the microwave for 10 to 15 seconds or in a preheated oven at 300°F (150°C) for a few minutes. This warms the fudgy center without compromising the crispy edges, making every bite feel freshly baked.
FAQs
Can I use a regular muffin pan instead of a mini muffin pan?
You can, but the texture will change slightly because larger brownies won’t develop as many crispy edges. The mini muffin pan is key to achieving that signature caramelized crunch in each bite.
What if I don’t have mini chocolate chips?
No worries! You can skip the chips entirely or chop up regular-sized chocolate chips or a favorite chocolate bar into small pieces to sprinkle into the batter.
How do I make the edges extra crispy?
Try slightly overfilling the mini muffin cups to encourage more caramelized edges and bake until those edges turn a beautiful deep brown. Avoid overbaking, though, to keep the centers luscious.
Are these brownie bites gluten-free?
This recipe uses all-purpose flour, so it is not gluten-free as written. However, you can experiment by substituting a gluten-free flour blend designed for baking to make a gluten-free version.
Can I make these ahead for a party?
Absolutely! These brownie bites can be made a day or two in advance. Store them at room temperature or refrigerated and bring to room temperature before serving for the best taste and texture.
Final Thoughts
This Crispy Edge Brownie Bites Recipe is a celebration of everything we love about brownies, condensed into perfect little treats that pack a punch. They are easy to make, wonderfully chocolaty, and offer that delectable crunch that keeps you reaching for more. Whether you’re hosting friends, need a quick pick-me-up, or simply want to indulge your chocolate craving, these bites are guaranteed to delight — give them a try and prepare to fall in love!
Print
Crispy Edge Brownie Bites Recipe
- Prep Time: 10 minutes
- Cook Time: 15 minutes
- Total Time: 25 minutes
- Yield: 24 brownie bites
- Category: Dessert
- Method: Baking
- Cuisine: American
- Diet: Vegetarian
Description
Crispy Edge Brownie Bites are the perfect treat for fans of the chewy, caramelized edges of a classic brownie pan. These bite-sized delights feature crisp, crackly edges with rich, fudgy centers, offering the best of both worlds in every bite. Ideal for parties, snack trays, or satisfying chocolate cravings, these mini brownies are easy to make and irresistibly delicious.
Ingredients
Main Ingredients
- 1/2 cup (1 stick) unsalted butter, melted
- 1 cup granulated sugar
- 2 large eggs
- 1 tsp vanilla extract
- 1/3 cup unsweetened cocoa powder
- 1/2 cup all-purpose flour
- 1/4 tsp baking powder
- 1/4 tsp salt
- 1/2 cup mini chocolate chips (optional)
- Nonstick spray or butter for greasing mini muffin pan
Instructions
- Preheat Oven and Prepare Pan: Preheat your oven to 350°F (175°C). Grease a mini muffin tin thoroughly with butter or nonstick spray to prevent sticking and ensure easy removal of the brownie bites.
- Mix Butter and Sugar: In a medium bowl, whisk together the melted butter and granulated sugar until the mixture is smooth and well combined, creating a rich base for the batter.
- Add Eggs and Vanilla: Incorporate the eggs and vanilla extract into the mixture, stirring until fully combined to add moisture and flavor to the batter.
- Sift and Add Dry Ingredients: Sift in the unsweetened cocoa powder, all-purpose flour, baking powder, and salt. Stir gently until just combined to maintain a tender texture—avoid overmixing to prevent toughness.
- Fold in Chocolate Chips: If using, fold the mini chocolate chips into the batter evenly for added bursts of chocolate in each bite.
- Fill Muffin Tin: Spoon the batter into the prepared mini muffin pan cavities, filling each about 3/4 full. For extra crispy edges, slightly overfill the cavities.
- Bake: Bake the brownie bites for 12–15 minutes, or until the edges are firm and crispy and the centers have set but remain fudgy.
- Cool and Remove: Let the brownie bites cool in the pan for 5–10 minutes. Gently remove each brownie with a knife or offset spatula to keep their shape intact.
Notes
- For extra crispy edges, slightly overfill each cavity when spooning in batter.
- Avoid overbaking to keep the centers soft and fudgy.
- Store brownie bites in an airtight container at room temperature for up to 4 days.
- Freeze the brownie bites for longer storage; thaw before serving.


