

Get ready to fall in love with Crispy Chilli Chicken, the kind of dish that instantly turns any meal into a celebration! Imagine succulent strips of chicken, encased in a golden, shatteringly crunchy crust, all tossed through a sticky, fiery, and slightly sweet sauce that just clings to every bite. This recipe channels restaurant-style indulgence, yet it’s totally achievable at home with a handful of pantry basics, ensuring you never have to compromise on that addictive combination of heat, flavor, and crunch. Trust me, one bite of this Crispy Chilli Chicken and you’ll be hooked!

Ingredients You’ll Need
Let’s talk ingredients! Each choice here impacts the entire personality of your Crispy Chilli Chicken, from the juiciness of the chicken to that irresistible glaze. Stick to the basics, and you’ll be amazed at how every single addition pulls its own weight in taste, texture, or jaw-dropping color.
- Chicken thighs or breast: Thighs stay juicy and tender, but breasts work if you prefer them leaner—just slice into evenly sized strips.
- Cornflour (cornstarch): The secret to that delicate, glassy crunch! It creates the perfect coating for crispy frying.
- All-purpose flour: Blends with the cornflour to give your chicken structure and substance.
- Egg: Acts as the binder that helps the crispy coating hug every piece.
- Salt and pepper: These essentials season both the chicken and the coating, laying the foundation for bold, balanced flavor.
- Red chillies: Brings both heat and gorgeous red flecks—use fresh for punchy spice or adjust quantity for your taste.
- Garlic and ginger: As the aromatic engine, these two guarantee layers of unmistakable, mouthwatering flavor.
- Bell pepper (red or green): Adds crunch and sweet bursts of color to contrast the spice.
- Spring onions: Lend a pop of herbal brightness and a fresh finish—don’t skip them!
- Soy sauce: Delivers salty depth and umami, helping the sauce become positively craveable.
- Vinegar: A little acid sharpens the flavors and cuts through the richness.
- Sugar or honey: Just a spoonful balances the heat and gives a glossy, sticky finish.
- Oil (for frying): Any neutral oil with a high smoke point gets your chicken ultra-crispy without flavor interference.
How to Make Crispy Chilli Chicken
Step 1: Prep the Chicken
Start by slicing the chicken into thin strips—aim for uniformity, so everything cooks evenly. Give the pieces a pat-down with paper towels; a drier surface means your crispy coating will really stick, ensuring that signature bite.
Step 2: Create the Coating
In a bowl, mix cornflour, all-purpose flour, salt, and pepper. Crack in an egg and stir until you get a sticky batter. Drop in your chicken pieces, tossing them gently until every strip is thoroughly coated—think of this step as the difference between so-so and spectacular crunch.
Step 3: Fry to Perfection
Heat enough oil in a deep skillet or wok for shallow frying—hot but not smoking. Fry the chicken in batches; don’t crowd the pan. Let them sizzle until gloriously golden and crisp, then rest on a wire rack or paper towels. If you want outrageously crunchy Crispy Chilli Chicken, this is the step that delivers.
Step 4: Make the Sauce
In another wok, add a touch of oil. Sauté your minced garlic, ginger, and red chillies until fragrant, then toss in diced bell peppers and half the spring onions. Pour in soy sauce, vinegar, and add just enough sugar or honey for that glistening, sweet-hot punch. Let the sauce bubble till it thickens and coats the back of your spoon.
Step 5: Toss and Finish
Finally, add the crisply fried chicken to the pan, tossing enthusiastically to ensure every piece is glossed with spicy, tangy sauce. Once everything looks sticky, shiny, and irresistible, top with the reserved spring onions. Your restaurant-style Crispy Chilli Chicken is ready to devour!
How to Serve Crispy Chilli Chicken

Garnishes
A sprinkle of fresh spring onions and a flurry of sliced red chilli take your Crispy Chilli Chicken from just delicious to dazzling. If you want to go all out, add a pinch of toasted sesame seeds for extra crunch and a hint of nuttiness.
Side Dishes
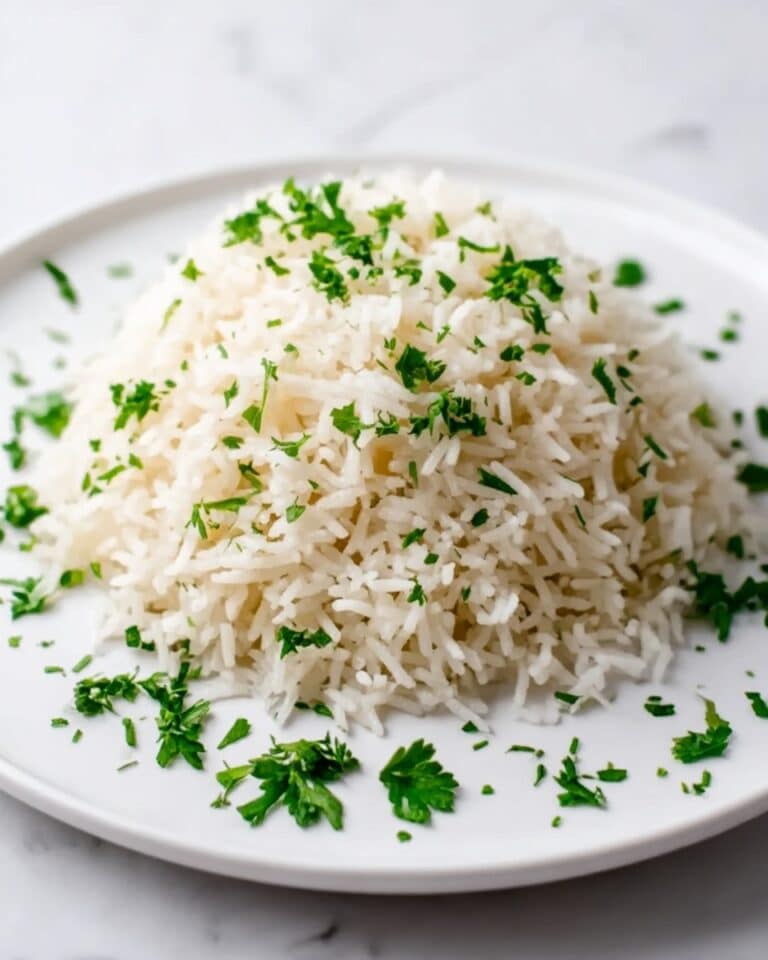
Pair this flavor bomb with classic steamed jasmine rice, fluffy fried noodles, or even a chilled cucumber salad. The rice and noodles soak up every last drop of sauce, while a crisp salad brings cooling relief from the heat.
Creative Ways to Present
For something unique, pile your Crispy Chilli Chicken onto lettuce leaves for DIY lettuce wraps, serve as spicy sliders in toasted buns, or even tuck inside roti for a fusion feast. Any way you serve it, those crispy bites will steal the show!
Make Ahead and Storage
Storing Leftovers
Transfer cooled Crispy Chilli Chicken to an airtight container and pop it in the fridge. It’ll keep safely for two to three days. Keep the sauce and chicken separate if possible, so when you reheat, the texture stays as crisp as possible.
Freezing
While freshly made is best for crunch, you can freeze the fried chicken pieces without sauce for up to one month. Lay them out in a single layer on a tray to freeze, then stash in freezer bags. When you’re ready, just reheat and toss in hot sauce for a near-fresh finish!
Reheating
To regain the crunch, spread pieces on a baking sheet and bake at 375°F (190°C) for about 10 minutes until heated through and crisp. Alternatively, give them a quick toss in a hot pan. Avoid the microwave—it’ll transform the delicious crunchiness into chewiness.
FAQs
Can I make Crispy Chilli Chicken without deep-frying?
Absolutely! For a lighter version, bake the coated chicken strips on a wire rack at a high temperature or air fry until crisp. You’ll still get a satisfyingly crunchy result without the extra oil.
How spicy is Crispy Chilli Chicken?
It’s got a definite kick, but you can completely control the heat by adjusting the amount or type of red chillies. Remove the seeds for a milder touch, or amp it up for chilli lovers!
Is it possible to make this dish gluten-free?
Yes! Just swap out the all-purpose flour for your favorite gluten-free blend and use tamari or a gluten-free soy sauce. The cornflour keeps the coating naturally gluten-free.
What’s the best cut of chicken to use?
Chicken thighs are usually juicier and more forgiving to cook, but breast works just as well if you slice it thinly and don’t overcook. Both pick up the flavors of the sauce fabulously.
Can I use pre-cooked chicken for Crispy Chilli Chicken?
Fresh, raw chicken is best for maximum crunch and flavor absorption. Pre-cooked chicken won’t yield the same results, since the coating needs to crisp and cook together with the chicken.
Final Thoughts
If you’re craving a show-stopping treat that’s easy enough for a weeknight yet dazzling enough for guests, give this Crispy Chilli Chicken a try. There’s nothing like mastering your own takeout favorite at home—get ready for rave reviews and requests for seconds!
Print
Crispy Chilli Chicken Recipe
- Prep Time: 15 minutes
- Cook Time: 20 minutes
- Total Time: 35 minutes
- Yield: 4 servings
- Category: Main Course
- Method: Frying, Sautéing
- Cuisine: Asian
- Diet: Halal
Description
Golden, crispy chicken strips coated in a sticky, sweet-spicy sauce with garlic, ginger, and red chilies. This dish is a perfect balance of crunch, heat, and flavor—restaurant-style indulgence you can make at home.
Ingredients
- 4 boneless, skinless chicken breasts or thighs, cut into strips
- 1/4 cup cornstarch (cornflour)
- 1/4 cup all-purpose flour
- 1 egg, beaten
- Salt and pepper, to taste
- Vegetable oil, for frying
- 3 red chilies, sliced (adjust to taste)
- 3 cloves garlic, minced
- 1-inch piece of ginger, minced
- 1 bell pepper, diced (red or green)
- 1/4 cup soy sauce
- 2 tbsp rice vinegar
- 1 tbsp sugar or honey
- Spring onions, sliced (for garnish)
- Sesame seeds (optional, for garnish)
Instructions
- Pat the chicken strips dry with paper towels. Season with salt and pepper.
- In a bowl, mix cornstarch, all-purpose flour, salt, and pepper. Dip each piece of chicken in the egg, then dredge in the flour mixture until fully coated.
- Heat enough oil in a deep skillet or wok to shallow fry the chicken. Fry the chicken pieces in batches, turning them until golden and crisp (about 4-5 minutes). Remove and set aside on paper towels to drain excess oil.
- In another pan, add a little oil and sauté garlic, ginger, and red chilies until fragrant. Add the bell pepper and cook for another 1-2 minutes.
- Stir in soy sauce, rice vinegar, and sugar (or honey). Allow the sauce to bubble and thicken slightly for 2 minutes.
- Add the fried chicken back to the pan and toss it in the sauce until it’s coated evenly. Let the sauce stick and thicken for another 1-2 minutes.
- Garnish with spring onions and sesame seeds (optional). Serve immediately with jasmine rice or noodles.
Notes
- For a lighter version, bake the chicken on a wire rack at 400°F or air-fry the pieces for a crispy result without the extra oil.
- If you prefer a milder dish, reduce the amount of chili or remove the seeds from the chilies.
- For a gluten-free version, use gluten-free flour and tamari soy sauce.


