
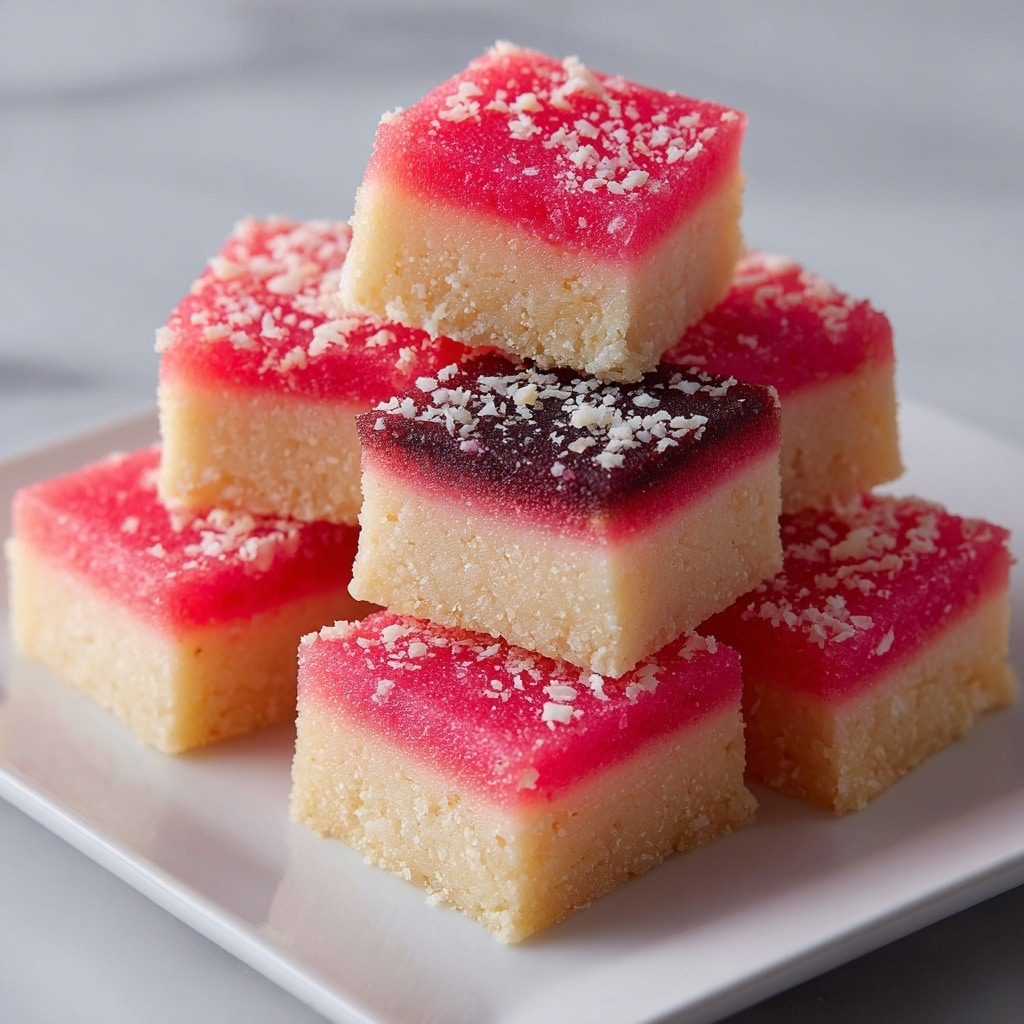
If you have a sweet tooth and love nostalgic treats, this Coconut Ice Recipe is an absolute must-try. This classic no-bake candy combines the rich creaminess of sweetened condensed milk with the delightful chewiness of desiccated coconut, all layered in a charming pink and white duo that looks as good as it tastes. Perfectly sweet, supremely simple, and irresistibly colorful, this Coconut Ice Recipe transports you back to cozy afternoons and festive gatherings with every bite.

Ingredients You’ll Need
Gathering just a handful of straightforward yet essential ingredients, this recipe keeps things incredibly easy while delivering that perfect balance of sweet, creamy, and coconutty goodness. Each component plays a crucial role in texture, flavor, or appearance, so it’s best not to skip or swap anything.
- Powdered sugar: Using sifted powdered sugar ensures a smooth, melt-in-your-mouth texture free of lumps.
- Desiccated coconut: Adds that signature coconut chew and a natural, rustic bite.
- Sweetened condensed milk: The rich, velvety binder that holds the candy together and provides delectable sweetness.
- Vanilla extract: Just a hint brightens the flavor and deepens the candy’s overall profile.
- Pink food coloring (optional): Creates the iconic, pretty pink layer that makes this treat so visually delightful.
How to Make Coconut Ice Recipe
Step 1: Prepare Your Pan
Start by lining an 8×8-inch square pan with parchment paper. This simple step ensures your Coconut Ice will lift out cleanly once it’s set, making cutting and serving a breeze.
Step 2: Mix the Dry Ingredients
In a large mixing bowl, blend the sifted powdered sugar with the desiccated coconut. The powdered sugar’s fine texture allows it to combine perfectly with the coconut for that classic Coconut Ice’s tender crumb.
Step 3: Add the Wet Ingredients
Pour in the sweetened condensed milk and vanilla extract. Stir everything together until a thick, sticky dough forms. This mixture should be pliable but firm enough to hold its shape when pressed.
Step 4: Divide and Color
Split this glorious mixture evenly into two bowls. Leave one portion as the classic creamy white, and add just a few drops of pink food coloring to the other bowl. Stir well until you get a beautifully even pink shade for that signature look.
Step 5: Layer and Press
Firmly press the white mixture into the lined pan, using clean, damp hands or the back of a spoon to create a smooth, even layer. Then, carefully press the pink mixture on top, smoothing it out evenly to form the distinct two-tone layer that makes Coconut Ice so charming.
Step 6: Chill Until Set
Pop the pan in the refrigerator for at least two hours to let everything firm up. This chilling step is crucial for achieving perfect squares that hold their shape and slice cleanly.
Step 7: Cut and Enjoy
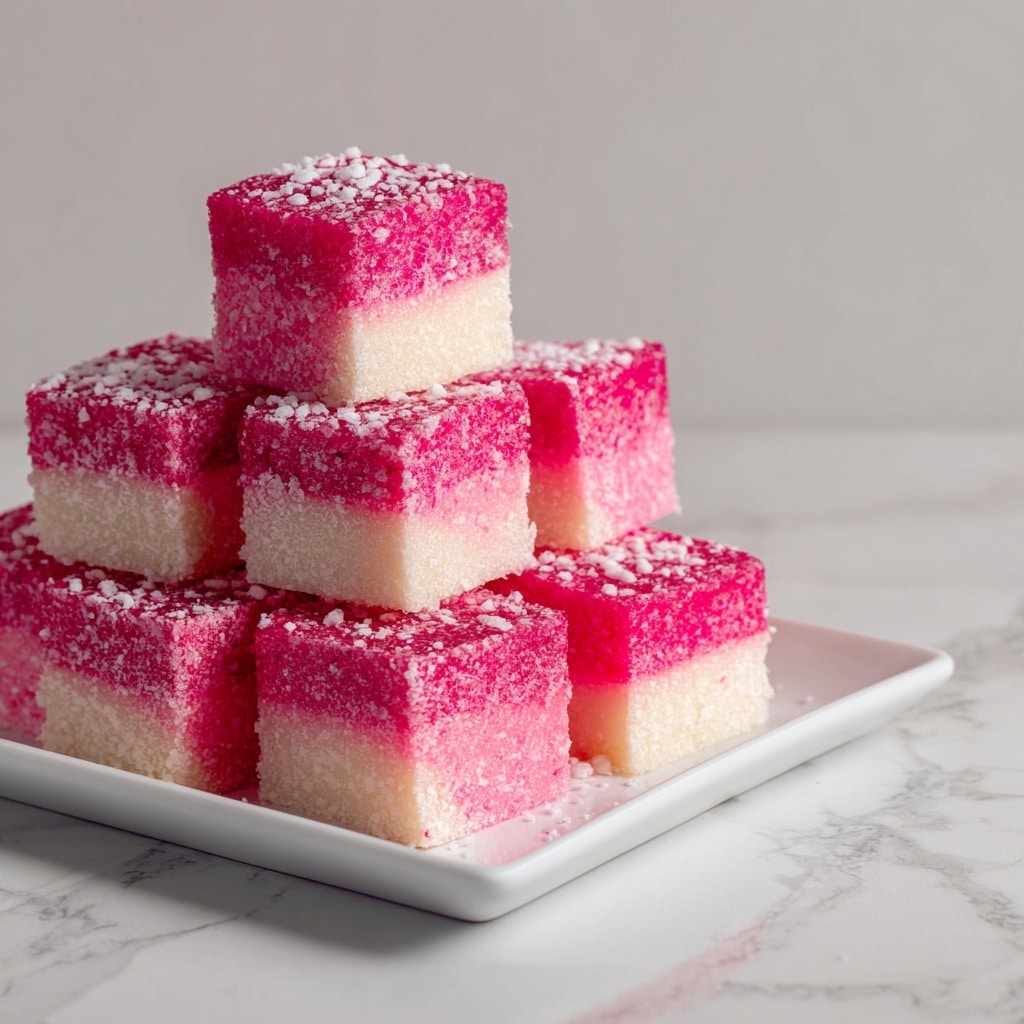
Once set, carefully lift the Coconut Ice from the pan using the overhanging parchment paper, then cut into small, bite-sized squares. Each piece should show off those two lovely layers — pure white and pretty pink — ready to delight.
How to Serve Coconut Ice Recipe
Garnishes
Coconut Ice is fantastic on its own, but for a little extra flair, sprinkle some extra desiccated coconut on top, or add a delicate dusting of edible glitter. These simple touches elevate the visual appeal and add a slight textural contrast that’s just fun to bite into.
Side Dishes
This treat pairs wonderfully with a warm cup of tea or coffee, making it a perfect sweet companion for afternoon chats. You might also serve it alongside a fresh fruit platter to balance the rich sweetness, or even as an indulgent little dessert after a hearty meal.
Creative Ways to Present
For parties or gifting, arrange the Coconut Ice squares in a decorative box lined with wax paper. You could also stack them into mini coconut ice towers tied with a pastel ribbon, or serve them on a vintage-style cake stand to add a touch of whimsical nostalgia.
Make Ahead and Storage
Storing Leftovers
Keep any leftover Coconut Ice in an airtight container in the refrigerator. Stored properly, it stays fresh and chewy for up to two weeks, making it a fantastic make-ahead treat to satisfy cravings anytime.
Freezing
You can freeze Coconut Ice for longer storage. Wrap the squares tightly in plastic wrap and place them in a freezer-safe container. When you’re ready to enjoy, just thaw them in the fridge overnight for the best texture and flavor.
Reheating
Since this is a no-bake candy, reheating isn’t necessary — and is not recommended as it may affect the texture. Instead, simply allow frozen Coconut Ice to thaw naturally, and enjoy that perfect chewy consistency every time.
FAQs
Can I use unsweetened coconut instead of desiccated coconut?
Unsweetened coconut can be used, but it will result in a less sweet candy. You might want to slightly increase the amount of powdered sugar or condensed milk to maintain the right sweetness and texture.
Is this Coconut Ice Recipe suitable for vegans?
Unfortunately, no, because it contains sweetened condensed milk made from dairy. However, you could experiment with vegan condensed milk alternatives, though results may vary.
How do I get clean, sharp edges when cutting?
Use a sharp knife, and for the cleanest cuts, warm the blade with hot water, wiping it dry between cuts. This prevents the sticky mixture from clinging and ensures neat squares.
Can I color both layers instead of just one?
Absolutely! While traditional Coconut Ice features a pink and white layer, feel free to add food coloring to both layers to create custom color combinations for holidays or themed parties.
What’s the best way to serve Coconut Ice at a gathering?
Cut the pieces into small squares and serve them on a pretty platter or tiered tray. They’re perfect bite-sized sweets that guests can easily enjoy between conversations.
Final Thoughts
This Coconut Ice Recipe is a charming, nostalgic treat that’s as fun to make as it is to eat. Its simplicity, vibrant colors, and chewy-sweet texture have won hearts for generations, and I’m confident it will become a favorite in your kitchen too. So, don’t wait—grab those ingredients, and indulge in the delightful layers of this beloved sweet!
Print
Coconut Ice Recipe
- Prep Time: 15 minutes
- Cook Time: 0 minutes
- Total Time: 2 hours 15 minutes
- Yield: 36 small squares
- Category: Dessert
- Method: No-Cook
- Cuisine: British
- Diet: Vegetarian
Description
Coconut Ice is a classic British no-bake confection featuring a sweet, chewy texture with distinct pink and white layers. This traditional treat combines powdered sugar, desiccated coconut, and sweetened condensed milk, flavored with vanilla extract. Perfect as a colorful dessert or candy, it requires minimal preparation and chilling to set into delightful small squares.
Ingredients
Ingredients
- 3 1/2 cups powdered sugar (sifted)
- 2 1/2 cups desiccated coconut
- 14 oz (1 can) sweetened condensed milk
- 1/2 teaspoon vanilla extract
- Pink food coloring (optional)
Instructions
- Prepare Pan: Line an 8×8-inch square pan with parchment paper to ensure easy removal of the set candy.
- Mix Dry Ingredients: In a large mixing bowl, combine the sifted powdered sugar and desiccated coconut thoroughly.
- Add Wet Ingredients: Pour in the sweetened condensed milk and vanilla extract, mixing until a thick, sticky dough forms that holds together well.
- Divide Mixture: Split the mixture evenly into two bowls. Leave one portion white and add a few drops of pink food coloring to the other, stirring until the color is uniform.
- Layer the Candy: Firmly press the white mixture evenly into the prepared pan using clean, damp hands or the back of a spoon to create a smooth base layer.
- Add Pink Layer: Press the pink-colored mixture evenly over the white layer, smoothing the surface carefully for neat layers.
- Chill: Refrigerate the layered mixture for at least 2 hours or until fully set and firm.
- Cut and Serve: Once firm, lift the coconut ice out of the pan using the parchment paper and cut into 36 small squares for serving.
Notes
- For the best layered appearance, press each layer down firmly before adding the next.
- Store the coconut ice in an airtight container in the refrigerator to maintain freshness for up to 2 weeks.


