
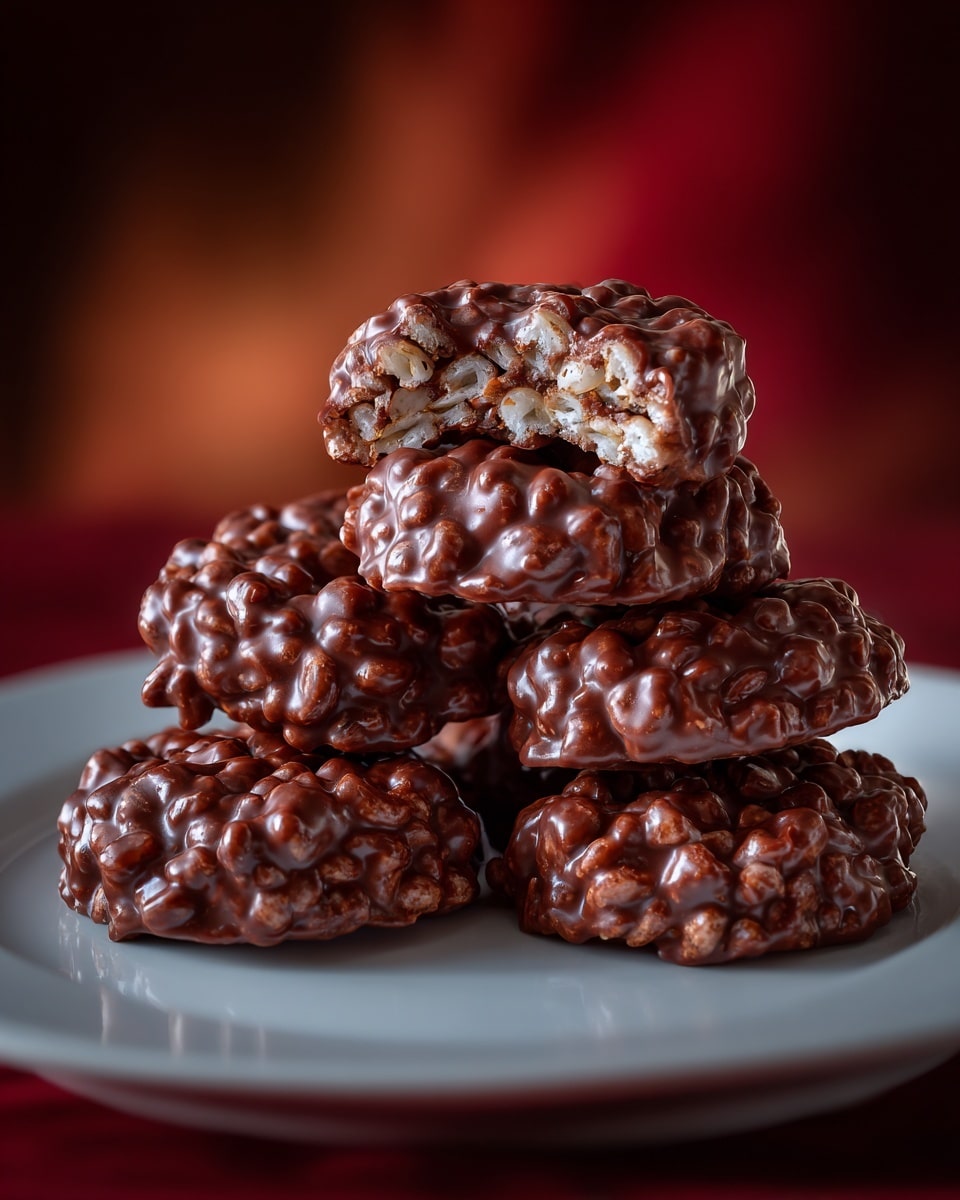
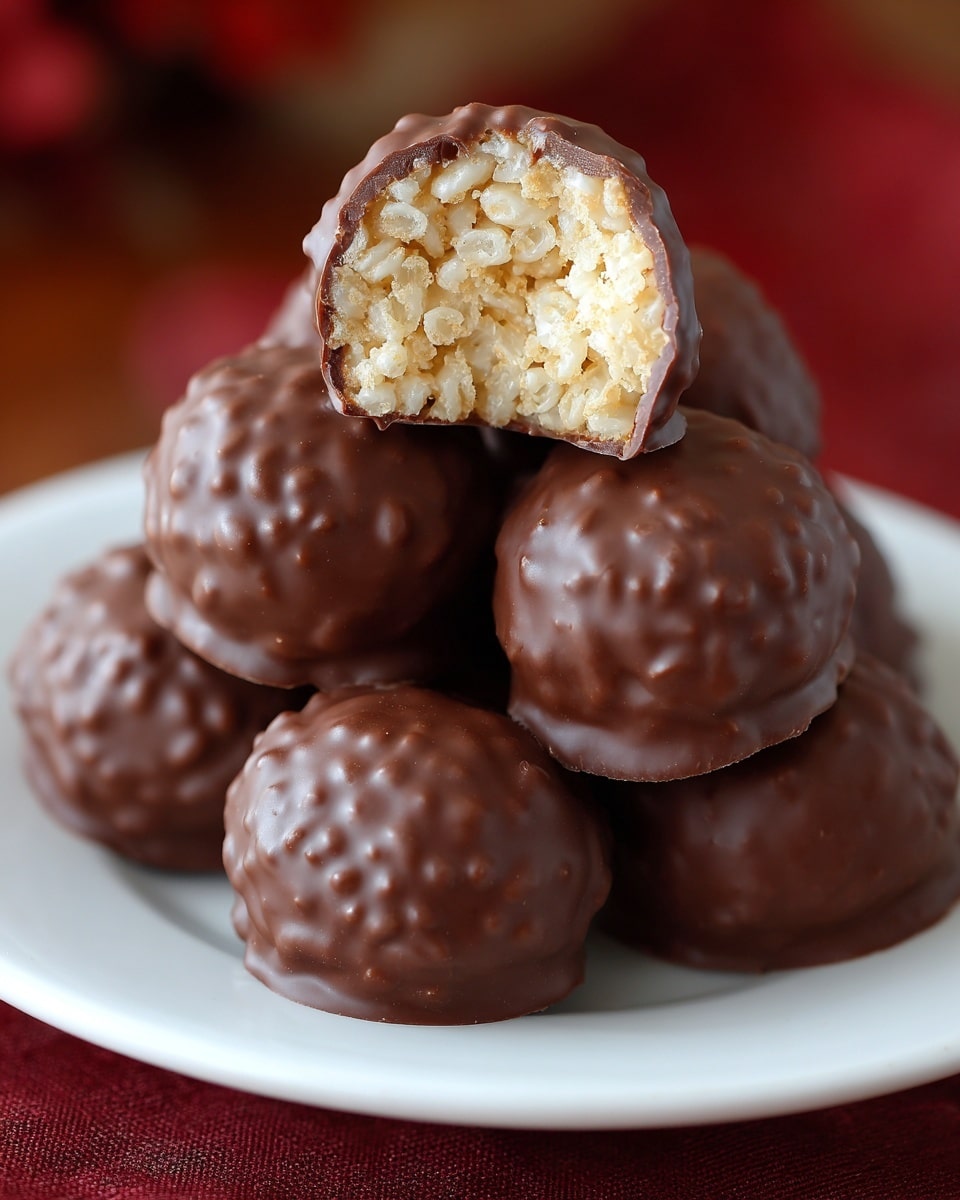
If you’re looking for a nostalgic treat that feels like a warm hug, you simply must try this Chocolate Rice Krispie Balls Recipe. These delightful bites combine the crunchy texture of Rice Krispies with the rich, creamy goodness of peanut butter and a silky chocolate coating. Each ball is a perfect balance of sweet and salty, crunchy and smooth, making them an irresistible snack for all ages. Whether you’re preparing for a party or just craving a fun homemade dessert, this recipe will become an instant favorite in your kitchen.

Ingredients You’ll Need
This Chocolate Rice Krispie Balls Recipe calls for a handful of simple ingredients, each bringing its own magic to the final treat. From the creamy peanut butter to the crispy cereal and luscious chocolate coating, every component plays a key role in flavor, texture, and appearance.
- Peanut butter: Adds rich creaminess and a subtle salty depth that balances the sweetness perfectly.
- Soft butter: Provides smoothness and helps bind the mixture while enhancing flavor.
- Vanilla extract: A touch of vanilla brightens the overall taste, adding warmth and complexity.
- Rice Krispies cereal: The star crunch that gives each bite that iconic crispy snap.
- Powdered sugar: Sweetens the mixture evenly without graininess, creating a smooth texture.
- Chocolate chips: For the decadent outer coating that melts beautifully around each ball.
- Coconut oil (optional): Helps melt the chocolate more smoothly and gives a lovely sheen to the coating.
How to Make Chocolate Rice Krispie Balls Recipe
Step 1: Mix the Base Ingredients
Start by combining the peanut butter, soft butter, vanilla extract, and powdered sugar in a medium bowl. Stir everything together until it becomes smooth and well blended. This rich, creamy base is the glue that holds your crispy surprises together, so take a little time to get it just right.
Step 2: Fold in the Rice Krispies Cereal
Gently fold the Rice Krispies into the peanut butter mixture, being careful not to crush the cereal. You want those crispy bits intact because they give your balls that delightful crunch that’s impossible to resist.
Step 3: Shape the Balls
Scoop out tablespoon-sized portions of the mixture and roll them between your hands to form smooth, compact balls. Place each one on a baking sheet lined with parchment paper to prevent sticking. This step is all about forming little bites of joy.
Step 4: Chill Until Firm
Pop your tray of formed balls into the refrigerator for about 30 minutes. This chilling time helps them firm up so they hold their shape beautifully when coated.
Step 5: Melt the Chocolate Coating
In a microwave-safe bowl, melt the chocolate chips along with the optional coconut oil in 20-second intervals. Stir thoroughly after each interval until you have a smooth, glossy melted chocolate ready for dipping.
Step 6: Dip the Balls in Chocolate
Carefully dip each chilled ball into the melted chocolate, making sure it’s completely covered. Then place the coated balls back on the parchment-lined tray. This chocolate shell adds a luxurious finish to the crispy interior.
Step 7: Final Chill and Serve
Return the tray to the refrigerator for another 15 to 20 minutes or until the chocolate coating is set. Once firm, these Chocolate Rice Krispie Balls are ready to delight your taste buds!
How to Serve Chocolate Rice Krispie Balls Recipe
Garnishes
Simple garnishes like a light dusting of powdered sugar, colorful sprinkles, or even a drizzle of white chocolate can elevate the presentation joyfully. These little touches make your Chocolate Rice Krispie Balls Recipe feel extra special and festive.
Side Dishes
Pair these treats with a cold glass of milk, a scoop of vanilla ice cream, or even fresh berries to balance the richness. Serving them alongside a hot cup of coffee or tea also creates a cozy snacking moment.
Creative Ways to Present
For parties, arrange the balls in mini cupcake liners or stack them on a pretty platter with a few edible flowers. Wrapping them up as individual favors in clear cellophane with a ribbon makes for an adorable gift your friends and family will rave about.
Make Ahead and Storage
Storing Leftovers
Store your Chocolate Rice Krispie Balls in an airtight container in the refrigerator for up to a week. This keeps them fresh and maintains the perfect chewy crunch inside with a firm chocolate shell outside.
Freezing
These treat balls freeze wonderfully! Place them in a single layer on a baking sheet to freeze individually, then transfer to a freezer-safe container. When properly wrapped, they last up to two months in the freezer without losing texture or flavor.
Reheating
When ready to enjoy frozen balls, simply thaw them in the fridge overnight. No reheating is needed since they are best served chilled to keep their luscious chocolate coating intact and crunchy texture preserved.
FAQs
Can I use almond butter instead of peanut butter?
Absolutely! Almond butter works well and gives a slightly different but equally delicious nutty flavor. Just make sure it’s smooth for easy mixing.
What if I don’t have coconut oil for the chocolate coating?
You can melt the chocolate chips without coconut oil, but adding it helps create a smoother, shinier finish and makes dipping easier. If you skip it, just be sure to stir the chocolate often as it melts.
Can I use another cereal instead of Rice Krispies?
Rice Krispies provide the signature crunch, but you can substitute with other light, crispy cereals like Corn Flakes or Cheerios. Keep in mind the texture and flavor might vary slightly.
How long do these balls last at room temperature?
They can sit out comfortably for a few hours, perfect for parties or gatherings. For longer storage, refrigeration is best to keep the chocolate coating firm and prevent melting.
Is this recipe suitable for kids to help make?
Definitely! This Chocolate Rice Krispie Balls Recipe is fun and safe for kids to assist with mixing, rolling, and dipping (with adult supervision during melting chocolate). It’s a fantastic way to get kids involved in the kitchen.
Final Thoughts
There’s something truly heartwarming about making and sharing this Chocolate Rice Krispie Balls Recipe. The blend of crunchy cereal, creamy peanut butter, and smooth chocolate creates a snack that’s simple, satisfying, and absolutely delicious. Give it a try, and watch these little balls of joy disappear from the plate in no time—your friends and family will thank you!
Print
Chocolate Rice Krispie Balls Recipe
- Prep Time: 15 minutes
- Cook Time: 0 minutes
- Total Time: 1 hour 10 minutes
- Yield: 12 servings
- Category: Dessert
- Method: No-Cook
- Cuisine: American
Description
Delightfully simple and no-bake, these Chocolate Rice Krispie Balls combine the crunch of classic Rice Krispies cereal with the creamy richness of peanut butter and a smooth chocolate coating. Perfect as a quick treat or party snack, they are easy to make and loved by all ages.
Ingredients
Main Ingredients
- 1/2 cup peanut butter
- 3 tablespoons soft butter
- 1 teaspoon vanilla extract
- 1 cup Rice Krispies cereal
- 1/2 cup powdered sugar
Chocolate Coating
- 1/2 cup chocolate chips
- 1 teaspoon coconut oil (optional, for smoother coating)
Instructions
- Prepare the mixture: In a medium bowl, combine the peanut butter, soft butter, vanilla extract, and powdered sugar. Stir them together until the mixture is smooth and well blended, creating a sweet, creamy base.
- Add the cereal: Gently fold the Rice Krispies cereal into the peanut butter mixture. Do this carefully to keep the cereal intact and maintain the crisp texture in the balls.
- Shape the balls: Using a tablespoon-sized scoop, form the mixture into balls by rolling them between your palms. Place each ball onto a baking sheet lined with parchment paper to prevent sticking.
- Chill the balls: Place the baking sheet in the refrigerator and chill the balls for 30 minutes. This firms them up and helps them hold their shape for coating.
- Melt the chocolate coating: In a microwave-safe bowl, combine the chocolate chips and optional coconut oil. Heat in 20-second intervals, stirring each time until the chocolate is fully melted and smooth.
- Coat the balls: Dip each chilled rice krispie ball into the melted chocolate, ensuring it is evenly coated. Place the coated balls back onto the parchment-lined sheet for setting.
- Final chilling: Return the coated balls to the refrigerator and chill for an additional 15 to 20 minutes or until the chocolate coating has set firmly. Serve once ready and enjoy!
Notes
- Using soft butter helps achieve a smoother texture when mixing.
- The optional coconut oil in the chocolate coating helps create a shinier and smoother chocolate shell.
- For a nut-free version, substitute peanut butter with sunflower seed butter.
- Store leftovers in an airtight container in the refrigerator for up to one week.


