

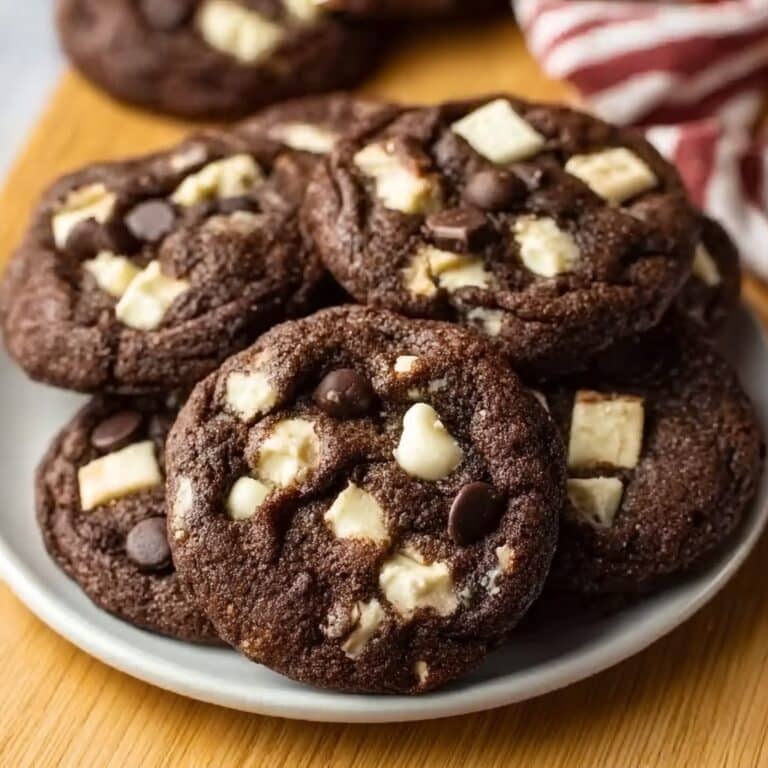
Get ready to fall in love with Chocolate Lava Brownie Cookies, the ultimate dessert hybrid for every chocolate enthusiast. Imagine gooey, molten centers tucked inside fudgy brownie cookies—each bite is pure chocolate euphoria. These cookies deliver a melt-in-your-mouth experience with that signature lava flow in the middle, making them impossible to resist whether you’re baking for a special celebration or indulging in a cozy night at home. You’ll soon see why this treat becomes a fast favorite wherever it goes!

Ingredients You’ll Need
All you need are a handful of familiar pantry staples to create unforgettable Chocolate Lava Brownie Cookies at home. Each ingredient is carefully chosen to give these cookies their signature rich texture and decadent taste, so don’t skip a single one!
- Unsalted Butter: Creates that classic rich, moist base essential in brownie-style cookies; always use unsalted so you can control the saltiness.
- Semisweet Chocolate Chips: The heart of the molten “lava” and the deep chocolate flavor; use extra for that gooey center surprise!
- Granulated Sugar: Lends just the right amount of sweetness and helps achieve a crackly cookie crust.
- Brown Sugar: Adds depth, moisture, and a subtle caramel flavor for extra gooeyness.
- Large Eggs: Bind everything together for that fudgy, chewy texture you crave.
- Vanilla Extract: Brings all the chocolatey flavors together with warmth and complexity.
- All-Purpose Flour: Provides the structure; don’t overmix for the perfect tender cookie.
- Unsweetened Cocoa Powder: Intensifies the brownie flavor and ensures deep, dramatic color.
- Baking Powder: Gives the cookies their slight lift while keeping them irresistibly thick and dense.
- Salt: Balances the sweetness and highlights the chocolate.
How to Make Chocolate Lava Brownie Cookies
Step 1: Prepare the Oven and Baking Sheets
Start by preheating your oven to 350°F so it’s ready to go once your dough is mixed. Line a baking sheet with parchment paper – not only does this prevent sticking, but it also makes cleanup a breeze.
Step 2: Melt the Butter and Chocolate
In a microwave-safe bowl, combine the unsalted butter and 1 cup of semisweet chocolate chips. Microwave in 30-second bursts, stirring after each interval, until the mixture is smooth and glossy. Set it aside for a couple of minutes so it can cool slightly—this prevents your eggs from scrambling later!
Step 3: Mix Wet Ingredients
In a large mixing bowl, whisk together the slightly cooled chocolate-butter mixture with granulated sugar, brown sugar, eggs, and vanilla extract. Whisk until the mixture is glossy, thick, and enticing—this is the foundation of your Chocolate Lava Brownie Cookies.
Step 4: Combine Dry Ingredients
In a separate medium bowl, whisk together flour, unsweetened cocoa powder, baking powder, and salt. This step ensures the leavener and cocoa are completely incorporated for an even texture and flavor throughout the cookies.
Step 5: Make the Dough
Gradually stir the dry ingredients into your wet mixture. Mix just until combined—a soft, chocolatey dough will form. Be careful not to overmix to guarantee a dense but tender brownie cookie.
Step 6: Add the Lava Centers
Scoop about two tablespoons of dough into your hand and gently flatten it. Place three to four extra chocolate chips right in the center, then carefully roll and seal the dough around them to form a ball. This extra step is the magic behind that irresistible lava center!
Step 7: Bake to Perfection
Arrange your cookie dough balls on the prepared baking sheet, leaving space between each one. Bake for 9 to 11 minutes—edges should look set, but the centers will remain soft. This underbaking is key for the gooey molten middle.
Step 8: Cool and Serve
Let the cookies cool on the baking sheet for 5 minutes to set up, then transfer to a wire rack. Serve warm to experience that perfect chocolate lava flow at its best.
How to Serve Chocolate Lava Brownie Cookies

Garnishes
A simple shower of powdered sugar or a few extra chocolate chips sprinkled on top brings visual appeal and a little extra sweetness. If you want to go all-in, try a drizzle of caramel sauce or a few fresh berries for a pop of color and contrast.
Side Dishes
Chocolate Lava Brownie Cookies are a dream when paired with a scoop of creamy vanilla ice cream, as the cold ice cream mingles with the warm, molten center. For something lighter, a side of fresh strawberries or raspberries balances the richness perfectly.
Creative Ways to Present
Transform these cookies into a decadent dessert plate: stack a couple on top of each other, add a dollop of whipped cream, and scatter chocolate shavings for a restaurant-worthy treat. For entertaining, tuck them into cupcake liners or serve them in a mini cast iron skillet for a playful twist!
Make Ahead and Storage
Storing Leftovers
If you happen to have leftovers (which is a rare feat!), keep your Chocolate Lava Brownie Cookies in an airtight container at room temperature. They’ll stay soft and fudgy for up to three days—just make sure they’re well-sealed to preserve that signature texture.
Freezing
To enjoy lava cookies on demand, freeze cookie dough balls pre- or post-bake. If freezing unbaked, keep them on a tray until firm, then transfer to a freezer bag. Bake straight from frozen, adding a minute or two to the bake time, or thaw baked cookies overnight in the fridge and let them come to room temp before serving.
Reheating
For that molten center, pop a cookie in the microwave for 10–15 seconds. The chocolate chips inside will melt right back to lava perfection. This trick also freshens up any cookies that have been stored a couple days!
FAQs
Can I use a different type Dessert
Absolutely! While semisweet chocolate chips maintain a classic lava cookie flavor, you can swap in dark chocolate for a richer taste or milk chocolate for extra sweetness. Just be sure to use chips or chunks that melt well for that gooey center.
What if I don’t have parchment paper?
You can lightly grease your baking sheet if you don’t have parchment, but be aware that parchment really helps prevent sticking and makes moving the cookies easy. If using greased trays, let cookies cool a bit longer before transferring so they don’t break apart.
Can I make Chocolate Lava Brownie Cookies gluten free?
Yes! Substitute your favorite 1:1 gluten-free all-purpose flour blend for traditional flour. The results are just as gooey and delicious—no one will ever guess a thing.
Can I refrigerate the dough?
Chilling the dough for 30 minutes before baking helps make thicker, chewier cookies. If you like a slightly plumper, bakery-style cookie, don’t skip this step—it’s perfect when making the dough in advance.
How do I know when the cookies are done?
Bake until the edges look set and the centers are still a little soft but not shiny. They’ll continue to set as they cool on the pan, keeping the inside gloriously molten. A slightly underbaked appearance is the secret to the signature Chocolate Lava Brownie Cookies texture!
Final Thoughts
If you’re searching for a show-stopping yet approachable dessert, Chocolate Lava Brownie Cookies are sure to become your new go-to recipe. So grab your favorite mixing bowl and some chocolate chips—once you taste that gooey lava inside, you’ll want to make these cookies again and again!
Print
Chocolate Lava Brownie Cookies Recipe
- Prep Time: 15 minutes
- Cook Time: 10 minutes
- Total Time: 25 minutes
- Yield: 12 cookies
- Category: Dessert
- Method: Baking
- Cuisine: American
- Diet: Vegetarian
Description
Indulge in the decadent combination of rich chocolate and gooey centers with these Chocolate Lava Brownie Cookies. A perfect treat for any chocolate lover!
Ingredients
Cookie Dough:
- 1/2 cup unsalted butter
- 1 cup semisweet chocolate chips (plus extra for filling)
- 3/4 cup granulated sugar
- 1/4 cup brown sugar
- 2 large eggs
- 1 teaspoon vanilla extract
- 3/4 cup all-purpose flour
- 1/4 cup unsweetened cocoa powder
- 1/2 teaspoon baking powder
- 1/4 teaspoon salt
Instructions
- Preheat the Oven: Preheat the oven to 350°F and line a baking sheet with parchment paper.
- Melt Chocolate: In a microwave-safe bowl, melt the butter and 1 cup of chocolate chips in 30-second intervals, stirring until smooth. Let cool slightly.
- Mix Wet Ingredients: In a large bowl, whisk together the melted chocolate mixture with the granulated sugar, brown sugar, eggs, and vanilla extract until glossy and thick.
- Combine Dry Ingredients: In a separate bowl, whisk together the flour, cocoa powder, baking powder, and salt. Gradually stir the dry ingredients into the wet mixture until a soft dough forms.
- Form Cookies: Scoop about 2 tablespoons of dough, place chocolate chips in the center, roll and seal the dough around the chips to form a ball. Place on the baking sheet and repeat with remaining dough.
- Bake: Bake for 9–11 minutes until edges are set and centers look slightly soft. Cool on the pan for 5 minutes before transferring to a wire rack.
Notes
- Serve warm for a gooey lava center.
- Refrigerate the dough for 30 minutes before baking for thicker cookies.


