

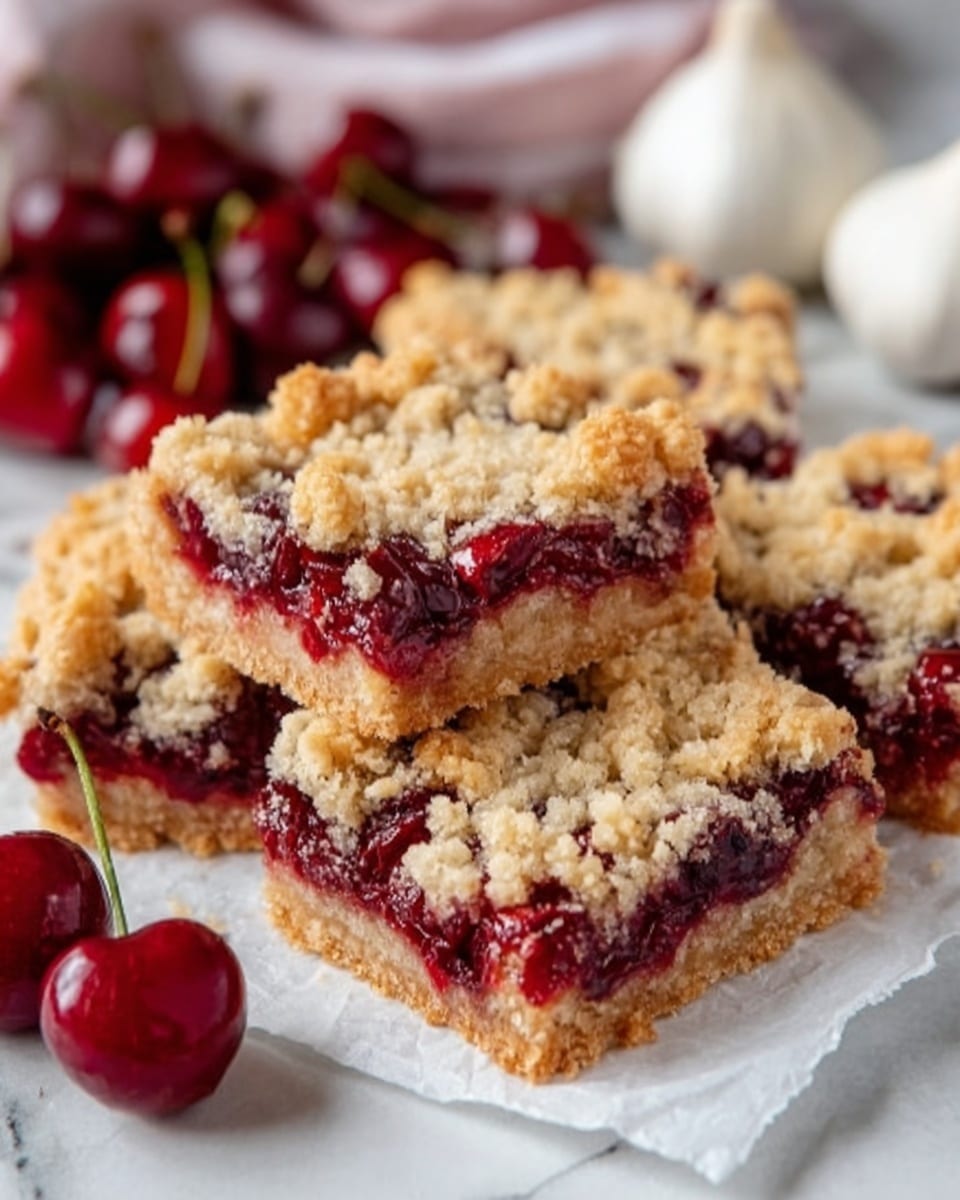
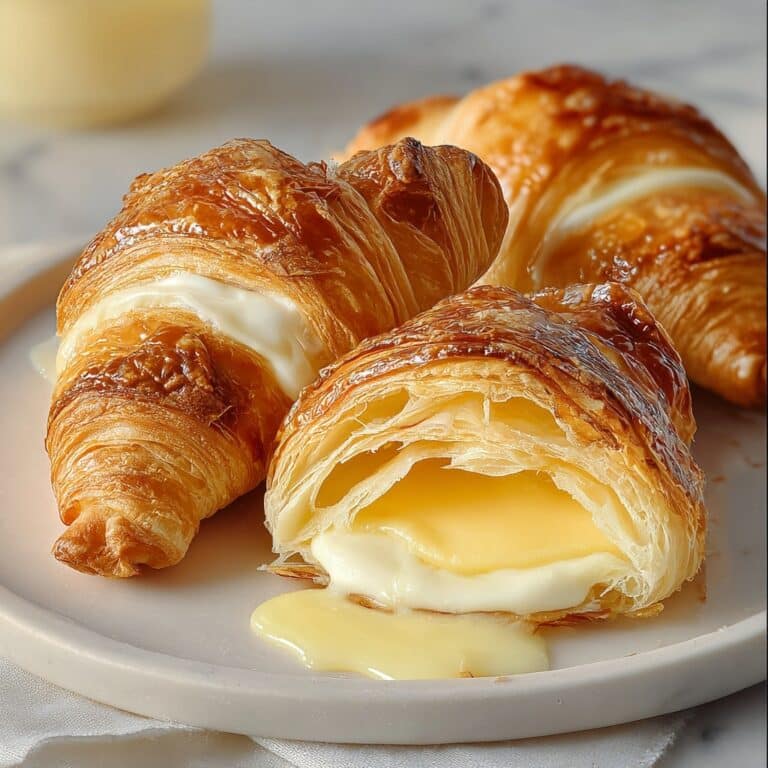
If you’re craving a dessert that perfectly balances tangy cherries with a buttery, oat-crumble crust, you’re about to fall in love with this Cherry Crumble Bars Recipe. These bars bring together juicy cherries and a sweet, crunchy topping in a delightful handheld treat that’s as comforting as it is irresistible. Whether you’re looking for an easy bake to impress guests or a cozy snack for yourself, these bars are sure to hit the spot every single time.

Ingredients You’ll Need
Believe it or not, this Cherry Crumble Bars Recipe uses simple, everyday ingredients that come together to create layers of flavor and texture you’ll keep dreaming about. Each component plays a crucial role—from the tart cherries to the rich brown sugar and oats—that builds a bar that’s bursting with goodness.
- Cherries (2 cups, pitted and quartered): The star of the show, these add a vibrant color and juicy tartness that gives the bars their signature flavor.
- Granulated sugar (2 tablespoons): Adds just the right touch of sweetness to balance the cherries’ natural tartness.
- All-purpose flour (3/4 cup plus 2 tablespoons): Provides structure and helps thicken the cherry filling so it doesn’t get runny.
- Vanilla or almond extract (1/2 teaspoon): A little splash of aroma magic that really elevates the overall flavor profile.
- Old-fashioned rolled oats (1 cup): Gives the crumble topping a rustic, hearty texture that’s oh-so-satisfying.
- Brown sugar (1/2 cup): Adds a deep, molasses-like sweetness that enhances the buttery crumble crust.
- Salt (1/4 teaspoon): Just a pinch to balance all the sweetness and bring out the flavors.
- Salted butter (6 tablespoons, melted): The key to that golden, rich crumble topping that holds everything together perfectly.
How to Make Cherry Crumble Bars Recipe
Step 1: Prep Oven & Pan
Start by preheating your oven to 375°F (190°C). For the best results and easy cleanup, line an 8-inch square baking pan with parchment paper. This little prep step ensures your bars slide out effortlessly after baking, keeping their perfect shape intact.
Step 2: Make Cherry Filling
In a medium bowl, mix the pitted and quartered cherries with granulated sugar, all-purpose flour, and your chosen vanilla or almond extract. The flour acts as a thickening agent so the juices won’t run all over your pan, while the sugar sweetens things up just right. Let this mixture sit for a few minutes to meld those flavors beautifully.
Step 3: Prepare Crumble Topping
In a separate bowl, combine the rolled oats, flour, brown sugar, and salt. Pour in the melted salted butter and stir thoroughly until every crumb is coated and the mixture holds together without dry spots. This crumble topping is the crunchy, buttery layer that will crown your bars with irresistible texture.
Step 4: Assemble Bars
Press about two-thirds of the crumble mixture firmly and evenly into the bottom of your lined pan—think of it like making a sturdy base for everything else to sit on. Spread the cherry filling evenly over this oat crust, then sprinkle the remaining crumble mixture on top in a nice, even layer. That top layer bakes into a crisp, golden finish that you’ll adore.
Step 5: Bake
Pop the pan into your preheated oven and bake for about 20 minutes. You’re looking for a light golden color on the crumble topping and bubbly spots of cherry filling peeking through around the edges. This baking step perfectly melds all those amazing flavors and textures together.
Step 6: Cool & Serve
Let your newly baked cherry crumble bars cool in the pan for at least 20 minutes. This step is key so the fruit filling thickens up and the bars hold their shape when you cut them. Once cooled, slice into 16 delicious bars that are fantastic warm or at room temperature. Get ready for compliments galore!
How to Serve Cherry Crumble Bars Recipe
Garnishes
Simple garnishes can take your Cherry Crumble Bars Recipe to the next level. A light dusting of powdered sugar instantly adds a pretty, snowy finish. For extra indulgence, a dollop of whipped cream or a scoop of vanilla ice cream complements the warm, fruity bars splendidly.
Side Dishes
While perfectly satisfying on their own, these bars pair wonderfully with a cup of hot coffee or a chai latte for a cozy afternoon treat. If serving at a party, consider pairing with fresh berries or a light fruit salad to echo the cherry flavor and keep things fresh.
Creative Ways to Present
For a fun twist, serve these bars on a wooden board lined with parchment paper to give that rustic bakery vibe. You might also try cutting them into bite-size squares for easy finger food, ideal for potlucks or tea parties. Another idea is layering the bars with yogurt and granola for a beautiful parfait that shines at breakfast or brunch.
Make Ahead and Storage
Storing Leftovers
Once cooled, store your cherry crumble bars in an airtight container at room temperature for up to two days. If you want them to last longer, refrigeration is the way to go—they’ll stay fresh for about a week and keep that delightful chewiness.
Freezing
This Cherry Crumble Bars Recipe freezes beautifully! Wrap individual bars tightly in plastic wrap and place them in a freezer-safe container or bag. They’ll keep well for up to three months, making them a perfect make-ahead treat when you want something sweet in a pinch.
Reheating
To enjoy your bars warm, simply pop them in the microwave for 15 to 20 seconds or reheat briefly in a preheated oven at 350°F (175°C) for about 5 to 7 minutes. This will revive the melty buttery crumble and the luscious cherry filling just like fresh from the oven.
FAQs
Can I use frozen cherries instead of fresh?
Absolutely! Frozen cherries work well in this recipe, just be sure to thaw and drain any excess juice before mixing to avoid a soggy crust.
What if I don’t have almond extract?
If you’re out of almond extract, vanilla extract is a fantastic substitute that adds lovely warmth and depth to the cherry filling.
Can I make these bars gluten-free?
Yes! Swap the all-purpose flour for a gluten-free blend and choose certified gluten-free oats to keep the crumble topping delicious and safe for gluten-sensitive eaters.
How do I prevent the crumble topping from burning?
Keep an eye on the bars during baking; if the topping starts to brown too quickly, tent the pan loosely with foil for the remaining bake time.
Can I add other fruits to this recipe?
Definitely! Blueberries, raspberries, or blackberries would all pair beautifully with the crumble topping, or mix them with the cherries for a unique fruity twist.
Final Thoughts
There’s something undeniably comforting about a homemade fruit crumble, and this Cherry Crumble Bars Recipe hits all the right notes with its juicy filling and buttery oat topping. It’s simple to make, utterly delicious, and perfect for sharing (or keeping all to yourself). I can’t wait for you to try it and add it to your go-to sweet treats anytime you crave a little slice of happiness.
Print
Cherry Crumble Bars Recipe
- Prep Time: 10 minutes
- Cook Time: 20 minutes
- Total Time: 30 minutes
- Yield: 16 bars
- Category: Dessert
- Method: Baking
- Cuisine: American
Description
These Cherry Crumble Bars combine juicy, sweet-tart cherries with a buttery oat crumble topping and base, baked to golden perfection. Perfect for a spring or summer dessert, they offer a delightful balance of fruitiness and crumbly texture in every bite.
Ingredients
Cherry Filling
- 2 cups (300 g) cherries, pitted and quartered (about 60)
- 2 Tablespoons (25 g) granulated sugar
- 2 Tablespoons (16 g) all-purpose flour
- 1/2 teaspoon vanilla or almond extract
Crumble Topping & Base
- 1 cup (100 g) old-fashioned rolled oats
- 3/4 cup (90 g) all-purpose flour
- 1/2 cup (105 g) brown sugar
- 1/4 teaspoon salt
- 6 Tablespoons (85 g) salted butter, melted
Instructions
- Prep Oven & Pan: Preheat your oven to 375°F (190°C). Line an 8-inch (20 cm) square baking pan with parchment paper for easy removal after baking.
- Make Cherry Filling: In a medium bowl, combine the pitted and quartered cherries, granulated sugar, all-purpose flour, and vanilla or almond extract. Mix thoroughly and set aside to allow the flavors to meld.
- Prepare Crumble Topping: In a separate medium bowl, stir together rolled oats, flour, brown sugar, and salt. Pour melted salted butter over the mixture and stir until all ingredients are fully moistened and no dry clumps remain.
- Assemble Bars: Press about two-thirds of the crumble mixture firmly and evenly into the bottom of the prepared baking pan. Spoon the cherry filling evenly over the base, spreading to the edges. Sprinkle the remaining crumble mixture over the cherries in an even layer.
- Bake: Place the pan into the preheated oven and bake for approximately 20 minutes, or until the topping is lightly golden and the cherry filling is bubbling around the edges.
- Cool & Serve: Let the cherry crumble bars cool in the pan for at least 20 minutes to set. Once cooled, cut into 16 bars. Serve warm or at room temperature and enjoy!
Notes
- Using parchment paper makes removal from the pan easier and reduces sticking.
- For a more intense cherry flavor, add a teaspoon of lemon juice or zest to the filling.
- You can substitute almond extract with vanilla extract based on your preference.
- Store bars in an airtight container at room temperature for up to 3 days, or refrigerate for up to a week.
- To make these bars gluten-free, substitute all-purpose flour with gluten-free flour blend.


