

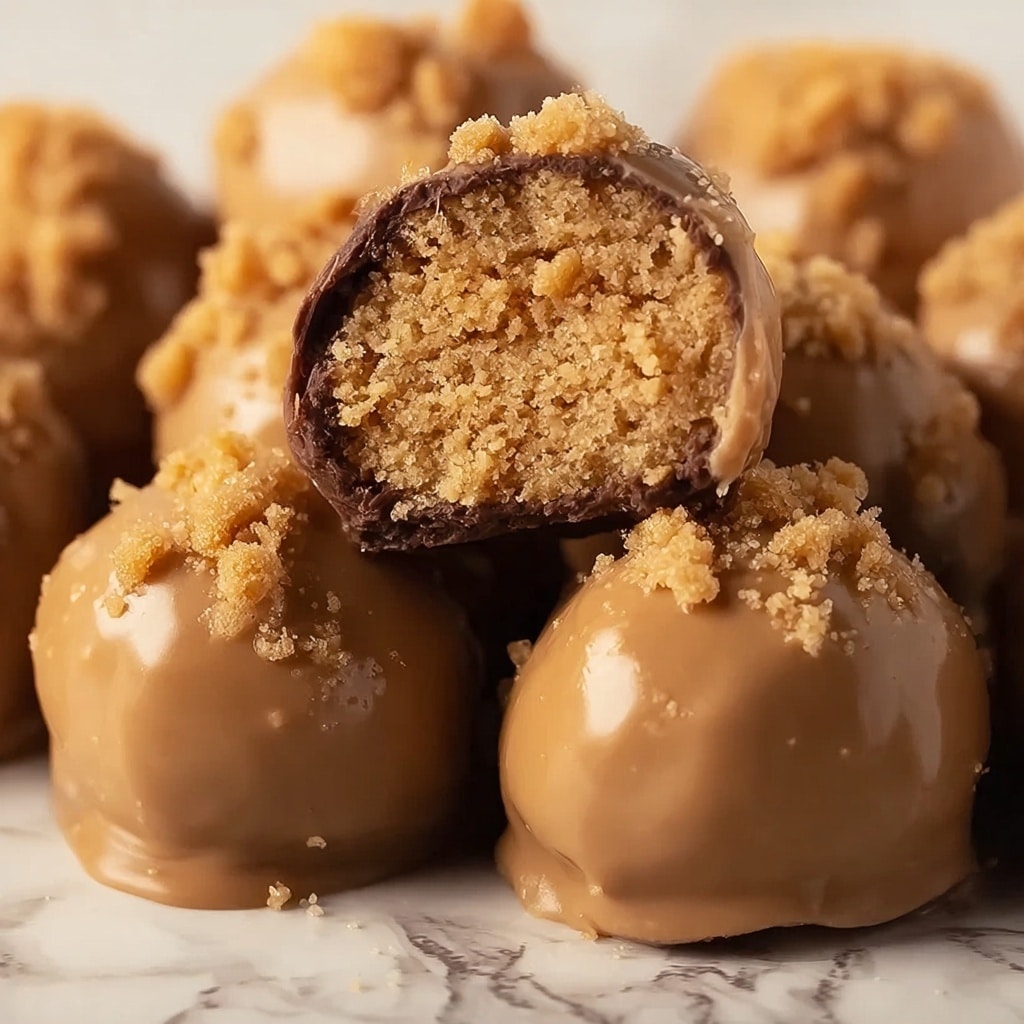
If you are a fan of crunchy, creamy, and irresistibly sweet treats, this Butterfinger Balls Recipe will become your new obsession. Combining the iconic crunch of Butterfinger candy bars with a luscious peanut butter and cream cheese filling, all wrapped in a smooth chocolate shell, these little bites of heaven are as delightful to make as they are to eat. Whether you’re preparing them for a party, holiday, or just because, these Butterfinger Balls are guaranteed to win hearts and disappear fast.

Ingredients You’ll Need
The magic behind this Butterfinger Balls Recipe is in its simple but thoughtfully chosen ingredients. Each component brings something special to the party — from the crunch of crushed candy bars to the creamy richness of peanut butter and cream cheese, all embraced by luscious chocolate. Here’s what you’ll need to create these irresistible bites:
- Butterfinger candy bars (2 cups crushed): Provide the signature crunch and flavor that make these balls stand out.
- Cream cheese (8 oz., softened): Adds smoothness and helps bind the mixture perfectly.
- Semi-sweet chocolate chips (2 cups): For coating the balls with a rich, glossy chocolate layer.
- Vegetable shortening (1 tablespoon, optional): Ensures the melted chocolate dips smoothly and sets nicely.
- Powdered sugar (1 cup): Sweetens and balances the texture of the filling.
- Graham cracker crumbs (1 cup): Adds body and a subtle, honeyed crunch to the mixture.
- Melted butter (½ cup): Enhances richness and helps with binding.
- Peanut butter (1 cup): Brings creamy, nutty depth that pairs beautifully with Butterfinger flavors.
- Additional crushed Butterfinger pieces: For garnish and extra crunch on top.
- Chocolate sprinkles: Optional decoration that adds a festive touch.
How to Make Butterfinger Balls Recipe
Step 1: Prepare the Mixture
Start by combining the powdered sugar, graham cracker crumbs, crushed Butterfinger candy, melted butter, and peanut butter in a large bowl. Mix everything thoroughly until you get a uniform, slightly sticky dough. This blend of crunchy and creamy textures is what makes the filling so deliciously addictive.
Step 2: Form the Balls
Using your hands, shape the mixture into roughly 1-inch balls — don’t worry about perfection; they’re meant to be rustic and inviting. Place each ball on a baking sheet lined with parchment paper to prevent sticking. This step is a fun hands-on part that gets you excited for the next phases.
Step 3: Chill
Pop the tray into the refrigerator for about 30 minutes. Chilling firm ups the balls nicely, which makes them much easier to coat with chocolate later on without them falling apart.
Step 4: Melt the Chocolate
Place the semi-sweet chocolate chips in a microwave-safe bowl. If you want a silkier finish, add the tablespoon of vegetable shortening. Heat the chocolate in 30-second bursts, stirring after each, until smooth and velvety. This silky chocolate is the perfect complement to the crunchy-cream filling.
Step 5: Dip the Balls
Remove your chilled Butterfinger balls from the fridge. Using a fork, dip each ball into the melted chocolate, making sure it’s completely covered. Let any excess chocolate drip back into the bowl to avoid a thick coating, then gently lift the ball and transfer it back to the parchment.
Step 6: Set and Decorate
Before the chocolate sets, sprinkle the tops with extra crushed Butterfinger pieces or some cheerful chocolate sprinkles. This adds texture and makes them look absolutely irresistible.
Step 7: Allow to Set
Leave your chocolate-coated Butterfinger Balls at room temperature until the coating hardens, usually about 15-30 minutes. If you’re in a hurry, the refrigerator will speed up the process so you can snack sooner!
How to Serve Butterfinger Balls Recipe
Garnishes
For a beautiful presentation, sprinkle additional crushed Butterfinger candy or chocolate sprinkles on each ball just after dipping. A dusting of powdered sugar can add a snowy effect, while a drizzle of white chocolate offers a stunning contrast against the dark chocolate coating.
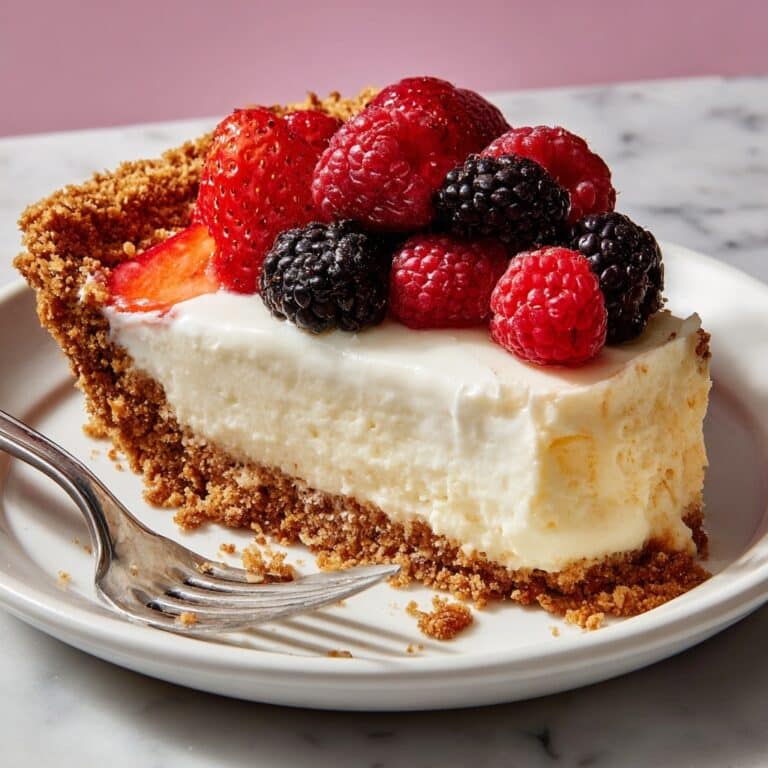
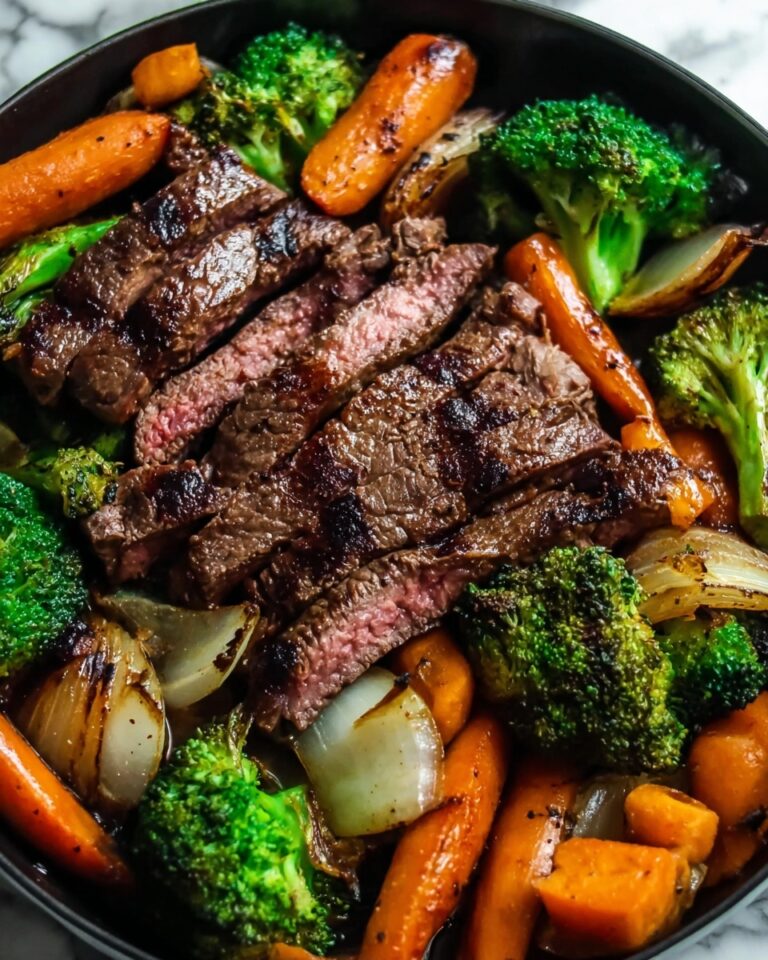
Side Dishes
Butterfinger Balls are rich and sweet, so pairing them with light accompaniments such as fresh berries or a small scoop of vanilla ice cream creates a nice balance. A cup of hot coffee or milk is also the ultimate classic pairing to complement their peanut buttery crunch.
Creative Ways to Present
Try serving your Butterfinger Balls on a decorative platter with colorful toothpicks for easy finger food at parties. You can also arrange them in small cupcake liners for individual servings or stack them as a sweet dessert pyramid to wow your guests.
Make Ahead and Storage
Storing Leftovers
You can store leftover Butterfinger Balls in an airtight container in the refrigerator for up to a week. Keep them chilled to maintain the crisp chocolate shell and the soft, flavorful interior.
Freezing
Butterfinger Balls freeze wonderfully. Place them in a single layer on a baking sheet to freeze initially, then transfer to a freezer-safe container or bag. They’ll keep well for up to 3 months. Thaw in the refrigerator before serving to enjoy their best texture.
Reheating
These treats are best enjoyed chilled or at room temperature, so reheating isn’t necessary. If you prefer them slightly softened, leave them out for 10–15 minutes before indulging. Avoid microwave heating as it can melt the chocolate coating unevenly.
FAQs
Can I use full-sized Butterfinger bars instead of fun-sized?
Absolutely! Simply crush the full-sized bars and measure out 2 cups of crushed candy. The full-sized bars will work beautifully for this Butterfinger Balls Recipe.
Is there a substitute for cream cheese?
You can try using mascarpone or a cream cheese alternative if needed, but cream cheese gives the perfect balance of creaminess and tang that complements the peanut butter and candy crunch.
Can I make these vegan or dairy-free?
While this recipe relies heavily on dairy ingredients like cream cheese and butter, you could experiment with vegan cream cheese and dairy-free chocolate chips for a plant-based version, though the texture might vary slightly.
How long do Butterfinger Balls last once made?
Stored properly in the refrigerator, they stay fresh for about a week. The combination of chocolate and peanut butter means they keep their flavor and texture very well within that time.
Can I use a different type of chocolate?
Definitely! Milk chocolate or dark chocolate chips can be used based on your taste preferences. Just be mindful that darker chocolates will alter the sweetness and overall taste profile.
Final Thoughts
This Butterfinger Balls Recipe is a total crowd-pleaser that brings together nostalgic candy crunch with smooth peanut butter richness, all wrapped in decadent chocolate. It’s such a joy to make and even more fun to share with friends and family. I can’t wait for you to try this recipe and discover how fast these bite-sized treasures disappear. Enjoy every sweet, crunchy, chocolatey moment!
Print
Butterfinger Balls Recipe
- Prep Time: 15 minutes
- Cook Time: 0 minutes
- Total Time: 45 minutes
- Yield: 24 balls
- Category: Dessert
- Method: No-Cook
- Cuisine: American
Description
Butterfinger Balls are a delightful no-bake treat featuring a creamy peanut butter and crushed Butterfinger candy mixture, coated in rich semi-sweet chocolate. These bite-sized indulgences are perfect for parties or as a sweet snack, combining crunchy candy pieces with a smooth chocolate shell.
Ingredients
Butterfinger Mixture
- 2 cups crushed Butterfinger candy bars (approximately 16 fun-sized bars)
- 1 cup powdered sugar
- 1 cup graham cracker crumbs
- 1/2 cup melted butter
- 1 cup peanut butter
Cream Cheese Coating
- 8 oz. cream cheese, softened
Chocolate Coating
- 2 cups semi-sweet chocolate chips
- 1 tablespoon vegetable shortening (optional, for smoother dipping)
Decoration
- Additional crushed Butterfinger pieces
- Chocolate sprinkles
Instructions
- Prepare the Mixture: In a large bowl, combine the powdered sugar, graham cracker crumbs, crushed Butterfinger pieces, melted butter, and peanut butter. Mix thoroughly until the ingredients are well incorporated.
- Form the Balls: Shape the mixture into 1-inch balls and place them on a parchment-lined baking sheet.
- Chill: Refrigerate the balls for 30 minutes to firm up, making them easier to dip.
- Melt the Chocolate: In a microwave-safe bowl, melt the semi-sweet chocolate chips. If using, add the vegetable shortening to achieve a smoother consistency. Microwave in 30-second intervals, stirring in between, until the chocolate is fully melted and smooth.
- Dip the Balls: Remove the chilled balls from the refrigerator. Using a fork, dip each ball into the melted chocolate, ensuring it’s fully coated. Allow any excess chocolate to drip off.
- Set and Decorate: Place the dipped balls back onto the parchment-lined baking sheet. If desired, sprinkle additional crushed Butterfinger pieces or chocolate sprinkles on top before the chocolate sets.
- Allow to Set: Let the chocolate-coated balls sit at room temperature until the chocolate has fully set. For quicker setting, refrigerate them for about 15 minutes.
Notes
- Ensure the cream cheese is fully softened for easier mixing.
- Vegetable shortening is optional but helps achieve a smoother chocolate coating.
- Store the Butterfinger Balls in the refrigerator in an airtight container for up to one week.
- Allow the chocolate to fully set before serving to avoid messy hands.
- Use parchment paper to prevent sticking during chilling and dipping.


