

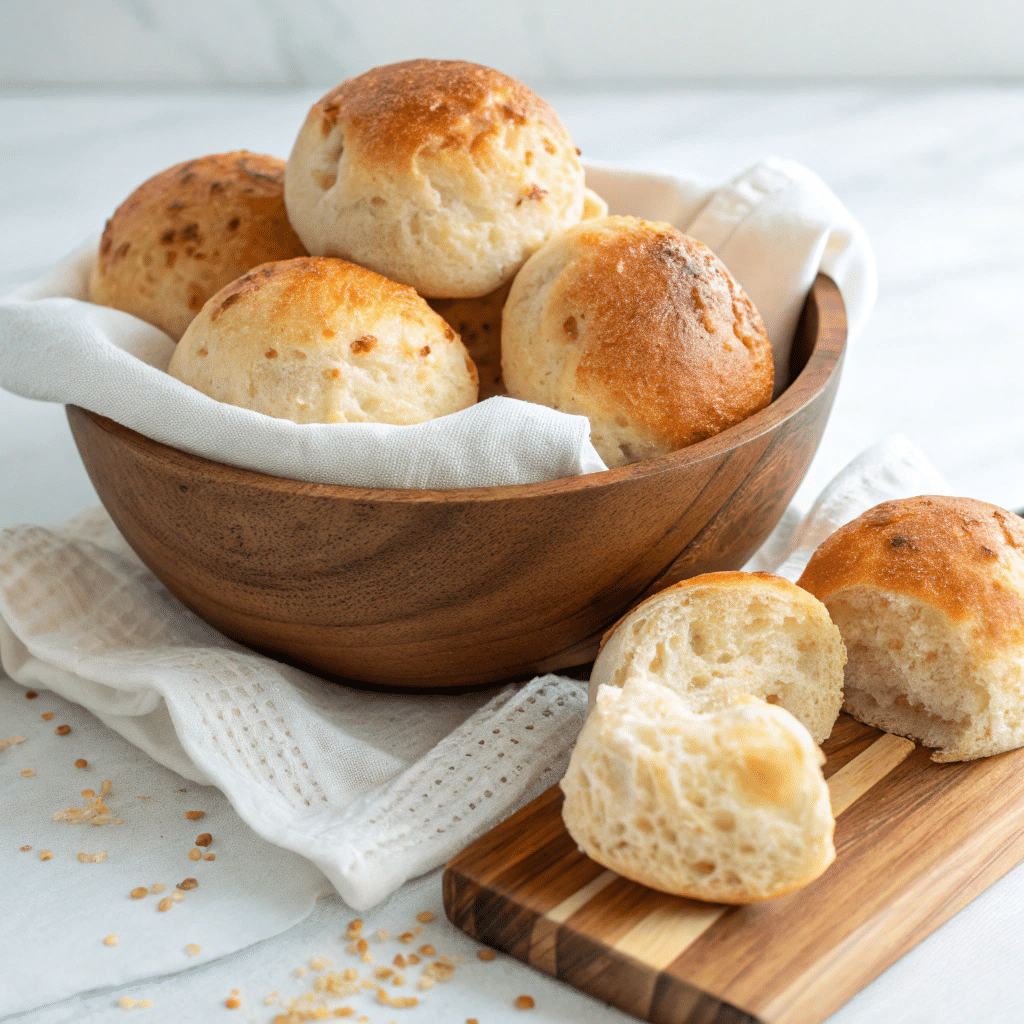
If you have ever wished for a snack that is irresistibly chewy on the inside, lightly crispy on the outside, and loaded with cheesy goodness, then this Brazilian Cheese Bread (Pão de Queijo) Recipe is your new best friend. Hailing from Brazil, these delightful little puffs are bursting with the perfect balance of savory cheeses and the unique texture created by tapioca flour. Whether as a breakfast treat, an afternoon pick-me-up, or a party favorite, this recipe transforms simple ingredients into a warm, comforting bite that will have you reaching for seconds every time.

Ingredients You’ll Need
The magic of Brazilian Cheese Bread comes from its surprisingly simple list of ingredients, each playing a crucial role in creating its signature texture and flavor. From the elastic, chewy crumb courtesy of tapioca flour to the rich creaminess of the cheeses, every component contributes to a truly delightful result.
- 2 cups tapioca flour: This gluten-free starch gives the bread its chewy, airy texture that sets it apart from regular bread.
- 1 cup milk: Adds moisture to the dough, helping to create a smooth, pliable batter.
- 1/2 cup vegetable oil: Provides richness and tenderness without overpowering the cheese flavors.
- 2 large eggs: Bind the ingredients together and contribute to the bread’s structure and golden color.
- 1 cup grated Parmesan cheese: Offers a sharp, salty flavor that deepens the overall taste.
- 1/2 cup grated Mozzarella cheese: Melts beautifully inside, adding gooey, creamy pockets.
- 1/2 teaspoon salt: Enhances all the flavors without making the bread taste salty.
How to Make Brazilian Cheese Bread (Pão de Queijo) Recipe
Step 1: Preheat and Prepare Your Pan
Start by heating your oven to 375°F (190°C). While it comes up to temperature, lightly grease a mini muffin tin – this helps the breads pop out easily once baked and ensures they don’t stick, preserving their perfect round shape.
Step 2: Blend the Batter
In your blender, combine the milk, vegetable oil, eggs, tapioca flour, and salt. The key here is to blend until the batter is completely smooth. This ensures the tapioca flour is fully hydrated and disperses evenly, which is essential for the airy texture of the pão de queijo.
Step 3: Fill the Muffin Tin
Pour the batter into the prepared muffin tin, filling each cavity about three-quarters full. This gives the dough room to puff up and creates those iconic golden domes that Brazilian Cheese Bread is loved for.
Step 4: Add the Cheeses
Next, it’s time for the cheese magic. You can either mix the grated Parmesan and Mozzarella directly into the batter before pouring it in the tin for a uniform cheesy bite or sprinkle some on top for a beautifully browned, cheesy crust. Both ways yield delicious results!
Step 5: Bake Until Golden
Place the tin in the oven and bake for 15 to 20 minutes. Keep an eye out—they are done when puffed, golden, and just starting to crisp on the edges. That’s when all the cheesy flavors and textures come alive.
Step 6: Cool Slightly and Serve Warm
Remove the mini pães de queijo from the oven and let them cool for about 5 minutes in the pan. This resting time helps them set just enough to hold their shape while still being warm and soft inside, ready to be enjoyed.
How to Serve Brazilian Cheese Bread (Pão de Queijo) Recipe
Garnishes
This Brazilian Cheese Bread (Pão de Queijo) Recipe is wonderful on its own but can be elevated with simple garnishes. Freshly chopped herbs like parsley or chives add a hint of freshness and color, while a light brush of garlic butter can bring out even more savory richness. You can also serve with a little side of spicy aioli or a tangy chimichurri for dipping fun.
Side Dishes
These cheesy little breads make a fantastic companion to fresh salads, especially something crisp and bright like a mixed greens salad tossed with lemon vinaigrette. They also pair beautifully with hearty soups or stews—the perfect handheld bread to dunk and scoop. For a more traditional Brazilian approach, serve with coffee or a cup of hot chocolate for a cozy snack.
Creative Ways to Present
Thinking outside the muffin tin adds another layer of fun. You might make mini sliders using the pão de queijo as buns packed with thinly sliced meats and fresh veggies. Or turn them into bite-sized appetizers by stuffing the dough with bits of cooked sausage or peppers before baking. Their subtle cheesy flavor makes them incredibly versatile for all sorts of creative presentations.
Make Ahead and Storage
Storing Leftovers
If you’re lucky enough to have any leftover Brazilian Cheese Bread, store them in an airtight container at room temperature for up to two days. This keeps their texture reasonably soft and chewy, though best enjoyed fresh.
Freezing
For longer storage, freezing is your friend. After baking and cooling completely, place them in a freezer-safe bag or container. They can keep well for up to three months. When you want to enjoy them, simply thaw at room temperature or reheat straight from frozen for a quick snack.
Reheating
To bring back that just-baked warmth, reheat the breads in an oven or toaster oven at 350°F (175°C) for about 5 minutes. This restores the crispy exterior while softening the inside, reviving the delightful texture and cheesy aroma.
FAQs
Can I use regular flour instead of tapioca flour?
Tapioca flour is essential for the chewy and elastic texture of pão de queijo. Using regular wheat flour will result in a completely different bread, lacking that unique stretch and chewiness.
What cheeses work best in this recipe?
Traditional recipes use a mix of Parmesan and Mozzarella, but you can experiment with other hard cheeses like Asiago or Gruyere for a different flavor twist. Just keep the cheese finely grated to help it melt evenly.
Is this recipe gluten-free?
Yes! Since tapioca flour is naturally gluten-free, this Brazilian Cheese Bread (Pão de Queijo) Recipe is a perfect option for those avoiding gluten, offering a safe and tasty alternative to traditional bread.
How big should the portions be?
Mini muffin tins create perfectly sized bite-sized breads that are ideal for snacking. If you want larger rolls, you can use regular muffin tins but increase baking time slightly and fill the cups accordingly.
Can I make this recipe dairy-free?
It’s a challenge because cheese is central to the flavor profile, but you could experiment with vegan cheese substitutes and a plant-based milk to try a dairy-free version. The texture and flavor will differ, but still enjoyable.
Final Thoughts
This Brazilian Cheese Bread (Pão de Queijo) Recipe truly brings a delightful slice of Brazilian culinary tradition right into your kitchen. With its simple ingredients, straightforward steps, and wonderful flavor, it’s a recipe that welcomes both beginners and seasoned bakers alike. So, go ahead and make these cheesy gems for your next gathering or cozy night in—you might just discover a new favorite snack to cherish forever!
Print
Brazilian Cheese Bread (Pão de Queijo) Recipe
- Prep Time: 10 minutes
- Cook Time: 15 to 20 minutes
- Total Time: 25 to 30 minutes
- Yield: 24 mini cheese breads
- Category: Snack
- Method: Baking
- Cuisine: Brazilian
- Diet: Gluten Free
Description
Brazilian Cheese Bread, known as Pão de Queijo, is a delightful gluten-free snack made with tapioca flour, cheese, milk, and eggs. These bite-sized, golden, and chewy cheese breads are perfect served warm and make a fantastic snack or appetizer with a crispy exterior and soft, cheesy interior.
Ingredients
Dry Ingredients
- 2 cups tapioca flour
- 1/2 teaspoon salt
- 1 cup grated Parmesan cheese
- 1/2 cup grated Mozzarella cheese
Wet Ingredients
- 1 cup milk
- 1/2 cup vegetable oil
- 2 large eggs
Instructions
- Preheat the oven: Preheat your oven to 375°F (190°C) and lightly grease a mini muffin tin to prevent sticking.
- Prepare the batter: In a blender, combine the milk, vegetable oil, eggs, tapioca flour, and salt. Blend until the mixture is smooth and well incorporated.
- Fill the muffin tin: Pour the batter into the prepared mini muffin tin, filling each cavity about three-quarters full to allow room for rising.
- Add the cheese: Stir the grated Parmesan and Mozzarella cheeses into the batter before pouring or sprinkle them on top as preferred for a cheesy crust.
- Bake: Bake the cheese breads in the preheated oven for 15 to 20 minutes or until they are puffed up and golden brown on top.
- Cool and serve: Let them cool for about 5 minutes after baking, then remove from the pan and serve warm for the best texture and flavor.
Notes
- You can substitute vegetable oil with olive oil for a different flavor.
- Ensure the mini muffin tin is well greased to prevent sticking.
- Use a blender for smooth batter, but mixing by hand is possible though texture may vary slightly.
- These cheese breads are best eaten fresh and warm but can be reheated in the oven.
- For a crispier crust, bake a few minutes longer, watching carefully to avoid burning.


