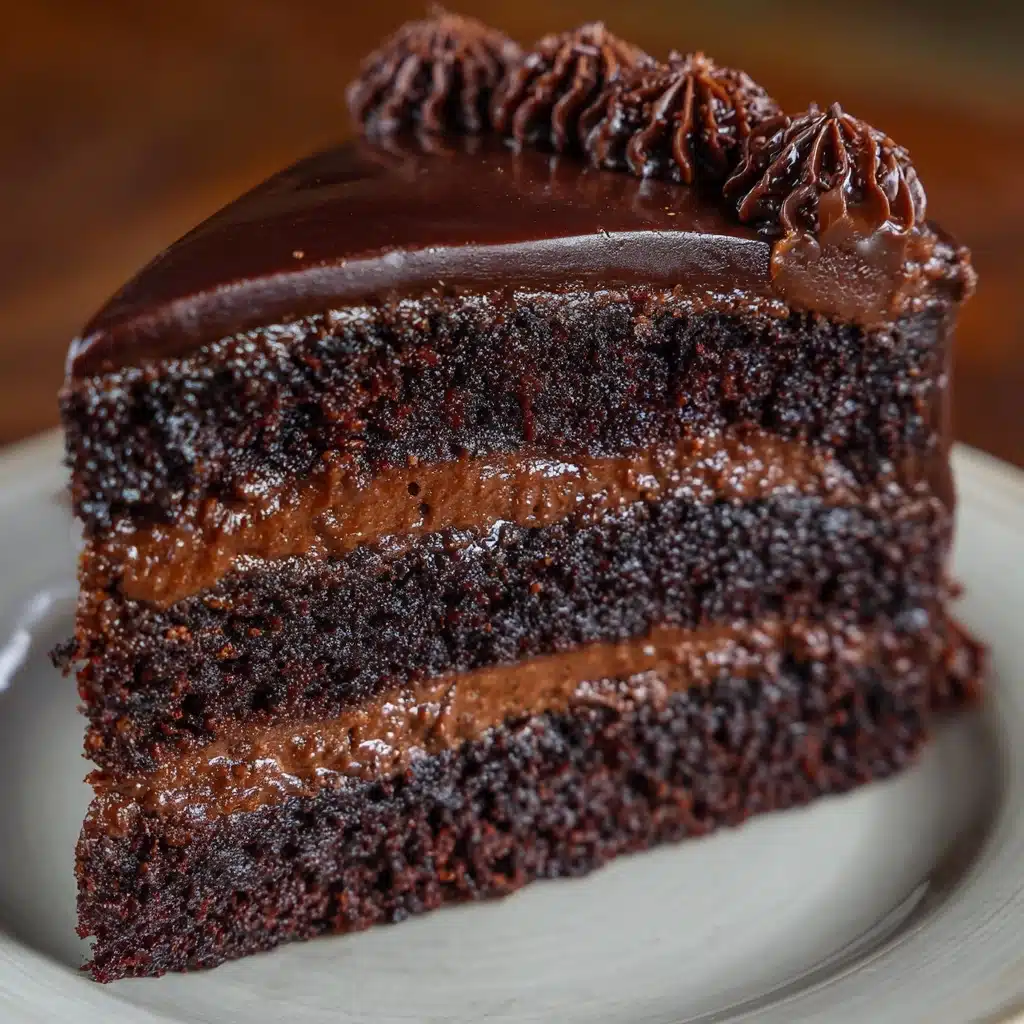
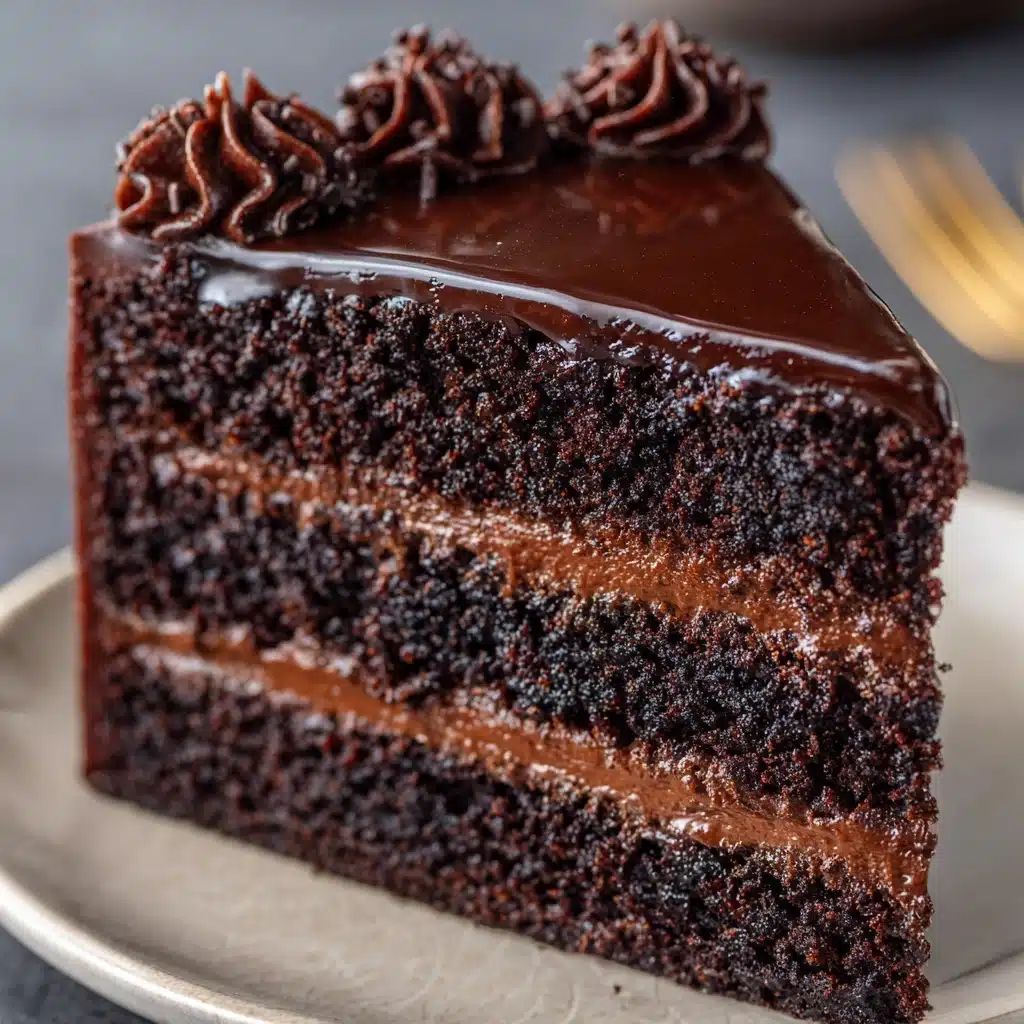
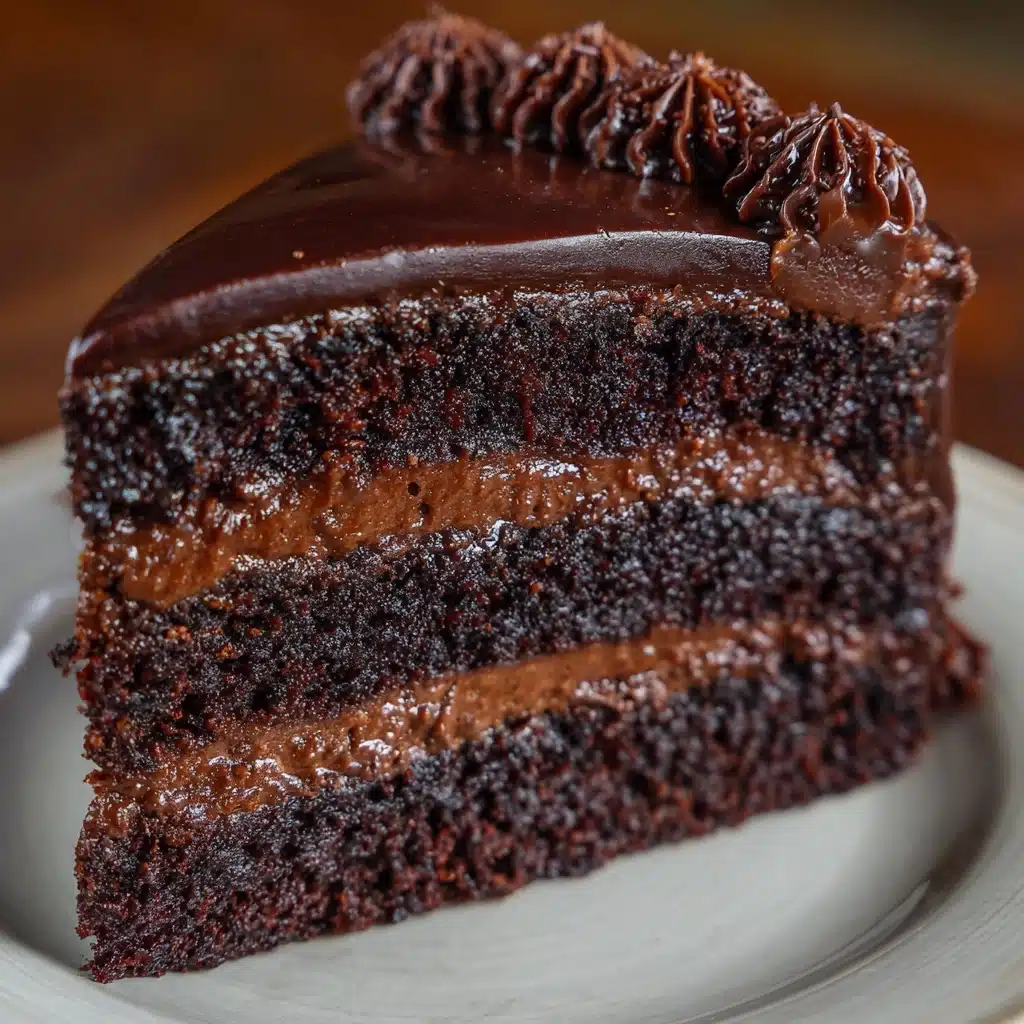
If you’ve ever dreamt of a dessert as mysterious as it is decadent, Black Velvet Cake will surely enchant you. This showstopping beauty is a bold twist on the classic velvet cake family, radiating an inky chocolate hue and boasting an impossibly rich flavor thanks to specialty cocoa. With a pillowy layer of tangy cream cheese frosting cloaking its tender crumbs, Black Velvet Cake is an irresistible treat for dramatic celebrations, cozy evenings, or just because you crave something unforgettable.
Ingredients You’ll Need
The magic of this cake lies in its thoughtfully chosen ingredients, each playing a crucial part in flavor, texture, and dramatic appearance. No fancy techniques or hard-to-find components—just a few pantry staples and a splash of something special to create pure chocolate magic.
- All-purpose flour: Gives the cake structure and helps achieve that perfect, plush crumb.
- Granulated sugar: Sweetens the batter and balances the bitterness of the cocoa.
- Unsweetened black cocoa powder: The star ingredient, delivering striking color and deep, complex chocolate notes; you can blend with Dutch-process cocoa if needed.
- Baking powder: Adds lift and tenderness to keep your layers light.
- Baking soda: Reacts with the acid in the buttermilk and vinegar for the perfect rise.
- Salt: Just a touch to enhance all those chocolate flavors.
- Large eggs: Bind everything and contribute to richness and texture.
- Vegetable oil: Ensures a moist crumb that stays soft even after chilling.
- Buttermilk: Adds tang and makes every bite tender and delicious.
- White vinegar: Intensifies the cake’s plushness while enhancing the deep color.
- Vanilla extract: Layers in fragrant, warm undertones behind all that chocolate.
- Hot coffee or boiling water: Blooms the cocoa, making the chocolate flavor even richer.
- Cream cheese (for frosting): Delivers creamy tang, which contrasts the dark cake beautifully.
- Unsalted butter (for frosting): Makes the frosting luscious and stable.
- Powdered sugar (for frosting): Provides sweetness and smooth texture to the frosting.
- Vanilla extract (for frosting): Adds flavor depth to the creamy frosting.
- Pinch of salt (for frosting): Balances the sweetness—don’t skip it!
- Black gel food coloring (optional): For the most dramatic, midnight-black finish on your frosting.
How to Make Black Velvet Cake
Step 1: Prep Your Pans
Start by preheating your oven to 350°F (175°C). Grease and flour two 8-inch round cake pans, making sure every nook is coated. This will help your Black Velvet Cake layers release easily after baking, ensuring perfectly shaped slices ready for their big reveal. If you have parchment rounds, use them for extra peace of mind.
Step 2: Mix the Dry Ingredients
Grab a large mixing bowl and whisk together the all-purpose flour, granulated sugar, black cocoa powder, baking powder, baking soda, and salt. This step isn’t just about combining ingredients—it’s key to dispersing the cocoa and leaveners evenly, giving your cake maximum chocolate flavor with every bite.
Step 3: Blend the Wet Ingredients
In another bowl, whisk the eggs, vegetable oil, buttermilk, white vinegar, and vanilla extract until everything is smooth and homogenous. This mixture infuses richness, tang, and moisture—the secret behind a tender, decadent Black Velvet Cake.
Step 4: Combine Batter and Add Coffee
Pour the wet ingredients into the bowl with the dry mixture. Gently stir until just combined—be careful not to overmix, which can lead to a tough cake. Now, slowly add in the hot coffee or boiling water. At this stage, the batter will look thin, which is exactly right; the final cake will bake up moist and rich thanks to this consistency.
Step 5: Bake the Cake Layers
Divide the batter evenly between your prepared pans. Slide them into the oven and bake for 30–35 minutes. You’ll know they’re done when a toothpick inserted into the center of the cakes comes out clean or with just a few moist crumbs. Let the cakes cool in the pans for about 10 minutes before using a thin knife to gently loosen the sides and transfer them onto a wire rack to cool completely.
Step 6: Make the Frosting
While the cakes are cooling, beat together the softened cream cheese and butter until the mixture is smooth and wonderfully fluffy. Slowly add the powdered sugar, followed by the vanilla and a pinch of salt. If you want an extra gothic look, now’s the time to mix in a little black gel food coloring for an intensely dark frosting. Beat the frosting until it’s light, creamy, and irresistible.
Step 7: Assemble and Frost
Place your first cake layer on a serving platter. Swirl a generous amount of frosting over the top, then set the second cake layer on top. Use the remaining frosting to artfully coat the top and sides of your Black Velvet Cake. Chill the cake in the fridge until you’re ready to dazzle your guests (or yourself) with the first slice—don’t worry, the crumb stays beautifully tender.
How to Serve Black Velvet Cake
Garnishes
This cake’s dramatic color means a simple garnish goes a long way. Try chocolate curls, a sprinkle of black sanding sugar, or a crown of fresh berries for a pop of contrast. Edible gold leaf or silver pearls are wonderful for an ultra-luxe touch, especially for special occasions.
Side Dishes
Because Black Velvet Cake is so decadent, keep your accompaniments simple. A scoop of vanilla bean ice cream offers creamy balance, or opt for a dollop of lightly sweetened whipped cream. Coffee or an after-dinner liqueur pairs beautifully, elevating each bite with complementary flavors.
Creative Ways to Present
For parties, slice the cake into elegant, thin wedges and arrange them on a vintage cake stand with dramatic lighting to highlight the deep black crumb. Mini cakes or cupcakes are perfect for buffets or individual servings. For Halloween or a moody celebration, try adding sugar skulls or edible glitter for extra flair.
Make Ahead and Storage
Storing Leftovers
To keep your Black Velvet Cake as fresh as possible, cover any leftovers tightly and store them in the refrigerator. The moist crumb and creamy frosting will stay delicious for up to four days—if it lasts that long! Just bring it out about 30 minutes before serving for the best texture and flavor.
Freezing
If you want to make the cake ahead or save some for later, you’re in luck—Black Velvet Cake freezes well. Wrap unfrosted cake layers tightly in plastic and then in foil before freezing for up to two months. For frosted cakes, freeze uncovered until firm, then wrap and store. Let thaw in the refrigerator overnight before serving.
Reheating
While you don’t need to reheat this cake, if you prefer it slightly warm, let slices come to room temperature or give them a few seconds in the microwave. Just enough to soften the crumb and make the chocolate aroma bloom—pure bliss without melting your luscious frosting.
FAQs
What makes Black Velvet Cake different from a traditional red velvet cake?
Black Velvet Cake swaps the classic red coloring and milder cocoa for intensely dark black cocoa, giving it that showstopping appearance and a hypnotically rich chocolate flavor. The texture is still plush and velvety, but with a dramatic new personality.
Can I make this recipe with regular cocoa powder?
You can—but for the iconic look and flavor, black cocoa is the key. Mixing Dutch-process with a little black cocoa will still yield a delicious and dark result. Regular unsweetened cocoa works in a pinch, though your cake will be lighter in both color and taste.
Is the black gel food coloring necessary?
Not at all! The black cocoa alone gives the cake a deep, striking color. The gel food coloring is purely for those who want an extra midnight-black effect, especially in the frosting. It’s optional, but a fun way to impress at themed events.
Can I turn this into cupcakes or a sheet cake?
Absolutely! Black Velvet Cake batter is versatile. For cupcakes, divide the batter among a lined muffin tin and bake for about 18–22 minutes. For a sheet cake, pour into a greased 9×13-inch pan and bake until a toothpick comes out clean, usually around 35 minutes.
What’s the best way to get perfectly smooth frosting?
Start with room temperature cream cheese and butter—they beat together much more smoothly, avoiding lumps. Sift your powdered sugar for a truly silky finish, and don’t be afraid to use an offset spatula or the back of a spoon to create pretty swirls or designs on your Black Velvet Cake.
Final Thoughts
If you’re ready to impress, there’s nothing quite like the magic of a homemade Black Velvet Cake. Rich, dramatic, and utterly unforgettable, it’s a recipe that guarantees gasps and second slices—so don’t be surprised if it vanishes in a flash!
Print
Black Velvet Cake Recipe
- Prep Time: 20 minutes
- Cook Time: 35 minutes
- Total Time: 1 hour
- Yield: 12 slices
- Category: Dessert
- Method: Baking
- Cuisine: American
- Diet: Vegetarian
Description
Indulge in the dark and decadent delight of this Black Velvet Cake. A rich and moist chocolate cake made with unsweetened black cocoa, topped with a creamy cream cheese frosting. Perfect for special occasions or whenever you crave a dramatic dessert.
Ingredients
Cake:
- 2 cups all-purpose flour
- 1 3/4 cups granulated sugar
- 3/4 cup unsweetened black cocoa powder
- 2 teaspoons baking powder
- 1 1/2 teaspoons baking soda
- 1/2 teaspoon salt
- 3 large eggs
- 3/4 cup vegetable oil
- 1 cup buttermilk
- 1 tablespoon white vinegar
- 1 tablespoon vanilla extract
- 3/4 cup hot coffee or boiling water
Frosting:
- 8 ounces cream cheese, softened
- 1/2 cup unsalted butter, softened
- 3 cups powdered sugar
- 1/2 teaspoon vanilla extract
- pinch of salt
- black gel food coloring (optional for deep color)
Instructions
- Preheat the oven and prepare pans: Preheat to 350°F. Grease and flour two 8-inch round cake pans.
- Mix dry ingredients: In a large bowl, whisk flour, sugar, cocoa, baking powder, baking soda, and salt.
- Combine wet ingredients: In another bowl, mix eggs, oil, buttermilk, vinegar, and vanilla.
- Blend the batter: Gradually add wet ingredients to dry, then stir in coffee until smooth.
- Bake: Divide batter into pans and bake for 30–35 minutes.
- Make frosting: Beat cream cheese and butter, then add sugar, vanilla, salt, and food coloring.
- Frost and serve: Frost cooled cakes, refrigerate, and enjoy!
Notes
- Black cocoa gives this cake its signature rich color and deep chocolate flavor.
- Store leftovers covered in the refrigerator for up to 4 days.

