
If you’re on the hunt for a dessert that is both delightful to look at and a joy to eat, this Beautiful and Easy Butterfly Cake Recipe is just what you need. It’s charmingly whimsical, perfect for celebrations or simply brightening up your day, and with its tender vanilla sponge and colorful, creamy frosting designs, it’s bound to captivate everyone’s attention. The magic lies in how simple ingredients come together to create a cake that not only tastes heavenly but also brings a smile with its butterfly-inspired presentation. Whether you’re a baking pro or a beginner, this recipe is designed to be accessible and fun, making your baking journey as joyful as the final result.

Ingredients You’ll Need
Every ingredient in this recipe plays a special role in creating the perfect texture, sweetness, and visual appeal. From the soft vanilla cake layers to the smooth, colorful frosting, each component is simple but essential.
- Vanilla cake mix and required add-ins: Provides a light, fluffy base that’s easy and quick to prepare without sacrificing flavor.
- Unsalted butter: Ensures the frosting is creamy and rich without being salty, forming the perfect canvas for your decorations.
- Powdered sugar: Sweetens and thickens the frosting while giving it that smooth texture ideal for piping and spreading.
- Vanilla extract: Adds a lovely, warm aroma and depth to the frosting’s flavor.
- Milk: Helps achieve the right consistency in your frosting, making it easy to spread but firm enough to hold shape.
- Gel food coloring (assorted): Brings your butterfly wings to life with vibrant colors that won’t thin your frosting.
- Pastel sprinkles or edible glitter (optional): Adds sparkle and whimsy for that extra wow factor on special occasions.
- Cupcake liners and candy decorations (optional): Great for crafting delicate wing accents or a fancy butterfly body.
How to Make Beautiful and Easy Butterfly Cake Recipe
Step 1: Bake the Cake Layers
Start by preparing your vanilla cake mix according to the directions on the box. Baking these in two 8-inch round pans allows you to have perfectly even layers, ideal for forming those lovely butterfly wings. Once baked, cool completely to ensure easy handling and a clean cut in the next step.
Step 2: Shape the Butterfly Wings
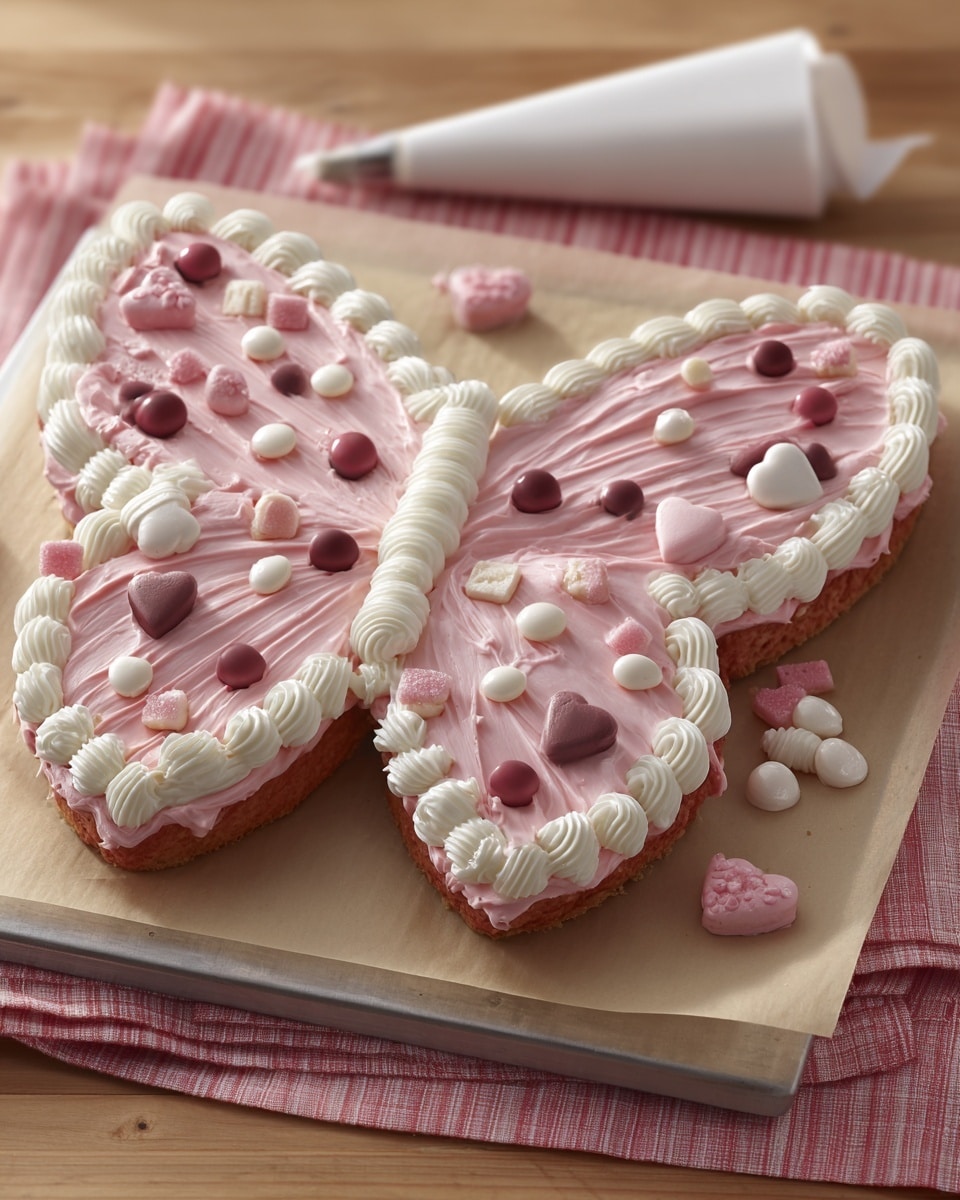
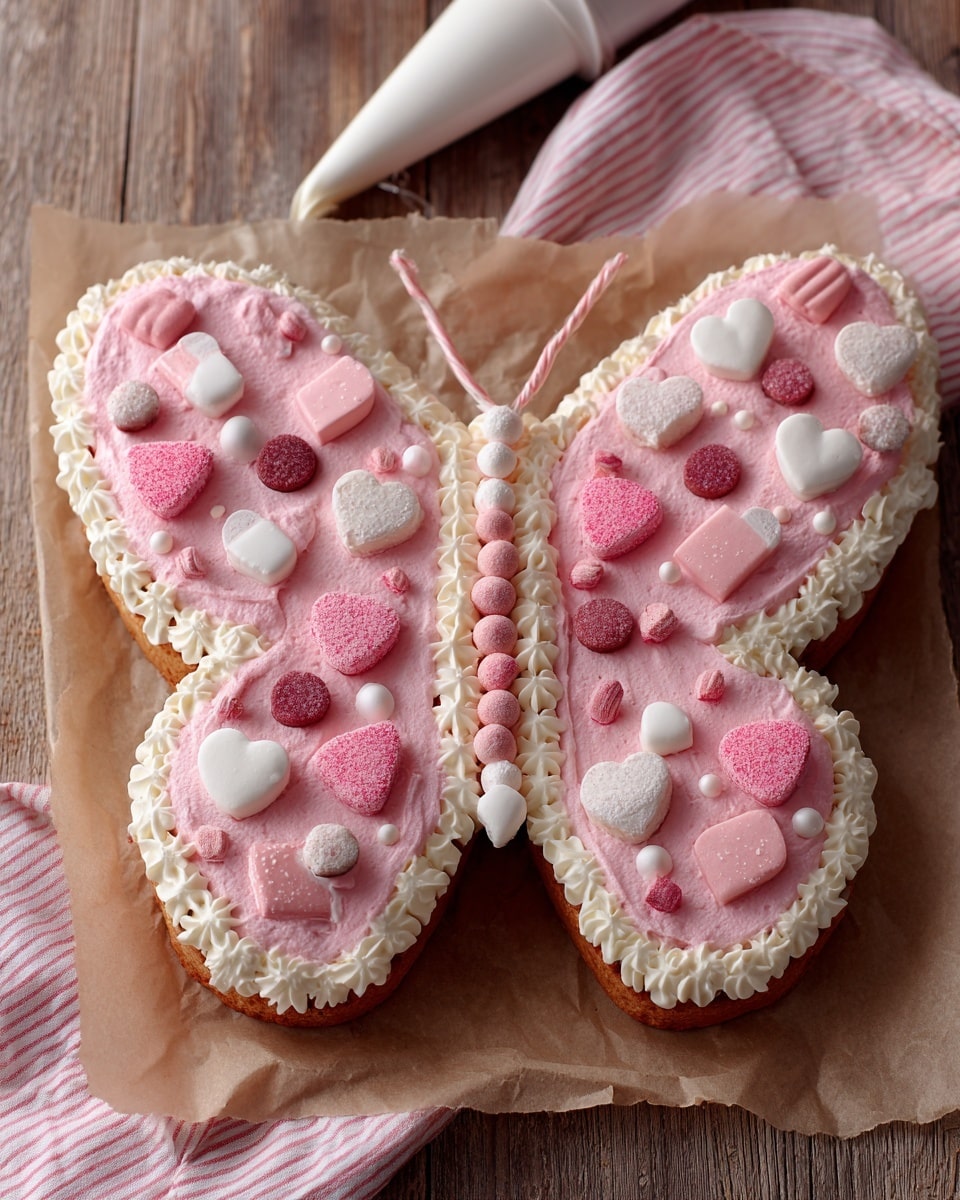
Once your cakes are completely cool, level the tops if they’ve domed during baking, then carefully cut each round cake in half. This will give you four semi-circular pieces. Place two halves with their cut edges facing out on either side of your display surface; this forms the beautiful wings of your butterfly. Feel free to trim the edges slightly for an even more authentic shape.
Step 3: Create the Butterfly Body
For the butterfly’s body, simply use a cupcake positioned vertically between the two wings or a collection of candy pieces arranged in a line. You can also pipe a thick line of your frosting as the body if that’s more your style. This central element ties the whole design together and adds structural charm.
Step 4: Make the Frosting
Beat the softened butter until it’s light and fluffy for the perfect frosting base. Gradually add your powdered sugar, vanilla extract, and milk until you have a smooth, spreadable frosting. Divide the batch into several bowls and tint each with different shades of gel food coloring. This step lets you unleash your creativity and make beautiful designs on your butterfly wings.
Step 5: Decorate the Wings
Use piping bags, spatulas, or even simple spoons to create swirls, dots, or blocks of vibrant color on each wing. Don’t forget to add a sprinkle of pastel sprinkles or some edible glitter to give your butterfly a magical shimmer. After decorating, refrigerate the whole cake for a little while to set the frosting before serving.
How to Serve Beautiful and Easy Butterfly Cake Recipe
Garnishes
A lightly dusted edible glitter or a scattering of pastel sprinkles adds just the right amount of sparkle to complement your frosting designs. For a playful touch, add candy pearls or shaped gummies along the butterfly’s body or wing edges to mimic natural patterns and textures.
Side Dishes
This cake pairs wonderfully with fresh fruit salad, especially berries or citrus slices that bring a refreshing contrast to the sweet, buttery notes of the cake. Another excellent match is a lightly brewed herbal tea or a creamy vanilla milkshake to keep the mood celebratory and comforting.
Creative Ways to Present
Try placing the butterfly cake on a bed of edible flowers or green-tinted coconut flakes for a springtime effect. For a kid-friendly twist, let little ones add their own candy decorations right before serving, making it a tasty and entertaining interactive experience.
Make Ahead and Storage
Storing Leftovers
Your leftover Beautiful and Easy Butterfly Cake can be stored in an airtight container in the refrigerator for up to three days. This keeps the frosting fresh and prevents the cake from drying out. Make sure to bring it to room temperature before serving for the best flavor.
Freezing
If you want to keep it longer, wrap the cake tightly in plastic wrap and foil, then freeze it. It will maintain its quality for up to one month. When ready, thaw overnight in the refrigerator and allow the frosting to soften slightly before serving.
Reheating
Because this cake is best enjoyed cool, reheating is generally not recommended. However, if you prefer a slightly warm slice, let it sit at room temperature rather than using a microwave to avoid melting the beautifully piped frosting and decorations.
FAQs
Can I use a different cake flavor for this recipe?
Absolutely! While vanilla is classic and easy to decorate, chocolate, carrot, or lemon cake variations work beautifully with this butterfly design and can make the cake even more personalized to your taste.
Is this cake suitable for beginners?
Yes! The simplicity of the cake mix combined with the freedom to decorate your butterfly wings however you like makes this a suitable project for bakers at all skill levels. It’s a fun way to practice decorating without pressure.
Can I make the frosting ahead of time?
Definitely. You can prepare your buttercream frosting up to a day in advance. Just cover it tightly and store it in the refrigerator, then beat it gently before using to restore its spreadable texture.
What if I don’t have gel food coloring?
Gel food coloring is preferred because it adds vibrant color without thinning the frosting, but liquid food coloring can work in a pinch. Just add it sparingly to avoid making your frosting too soft.
How do I transport the cake without damaging the decoration?
Transport your butterfly cake on a sturdy, flat surface and keep it chilled until just before serving. Using a cake box can provide protection, and placing it in the refrigerator helps the frosting stay firm during transit.
Final Thoughts
There’s something truly enchanting about this Beautiful and Easy Butterfly Cake Recipe. It combines the joy of baking with the fun of decoration, resulting in a showstopper that tastes as amazing as it looks. Whether you’re celebrating a special occasion or simply craving a beautiful treat, this recipe invites you to spread your wings and have fun in the kitchen. Dive in, and let this butterfly cake be a new favorite in your baking repertoire!
Print
Beautiful and Easy Butterfly Cake Recipe
- Prep Time: 30 minutes
- Cook Time: 30 minutes
- Total Time: 1 hour
- Yield: 12 servings
- Category: Dessert
- Method: Baking
- Cuisine: American
- Diet: Vegetarian
Description
This Beautiful and Easy Butterfly Cake is a delightful and visually stunning dessert perfect for birthdays, spring parties, or baby showers. Featuring a classic vanilla cake base decorated with colorful, swirl-patterned frosting shaped like butterfly wings, it’s an impressive yet simple cake to make that combines fun and elegance in every bite.
Ingredients
Cake
- 1 box vanilla cake mix (plus ingredients listed on box such as eggs, oil, and water)
Frosting
- 1 cup unsalted butter, softened
- 4 cups powdered sugar
- 2 teaspoons vanilla extract
- 2–3 tablespoons milk
- Gel food coloring (assorted colors)
Decoration
- Pastel sprinkles or edible glitter (optional)
- Cupcake liners (if making wing accents)
- Cake decorations like candy pearls or shaped gummies (optional)
Instructions
- Prepare the Cake: Follow the package directions on the vanilla cake mix box to prepare the batter. Pour the batter evenly into two 8-inch round cake pans and bake as directed. Once baked, allow the cakes to cool completely before proceeding.
- Shape the Wings: Level the tops of the cooled cakes if necessary to create an even surface. Carefully cut each round cake in half to yield four semi-circles. Arrange two semi-circles side by side with their cut edges facing outward to form each butterfly wing on your serving tray or cake board. Trim edges slightly if you want more defined wing shapes.
- Create the Body: For the butterfly’s body, position a cupcake or a few candy pieces between the wings, or simply pipe a line of frosting down the center where the wings meet to form the body shape.
- Make the Frosting: In a large bowl, beat the softened butter until light and fluffy. Gradually add the powdered sugar, vanilla extract, and milk, mixing until smooth and spreadable. Divide the frosting into several bowls to tint with different gel food colors for a vibrant effect.
- Decorate the Wings: Using piping bags or spatulas, decorate each wing with colorful swirls, dots, or blocks of color. Add pastel sprinkles or edible glitter for extra sparkle and whimsy. Use cupcake liners or candy decorations to accentuate the wings if desired.
- Chill and Serve: Once decorated, chill the cake slightly to set the frosting before serving to ensure the design holds firm. Slice the cake into 12 pieces and enjoy your elegant butterfly-themed dessert!
Notes
- This cake works well with any flavor cake, including chocolate or your preferred mix.
- For a quicker version, use store-bought frosting and decorate with pre-made candies or cupcake toppers.
- Perfect for birthday celebrations, spring-themed parties, or baby showers.
- Gel food coloring provides vibrant colors without altering frosting texture.
- Chilling the cake briefly helps the frosting set and keep its shape during serving.


