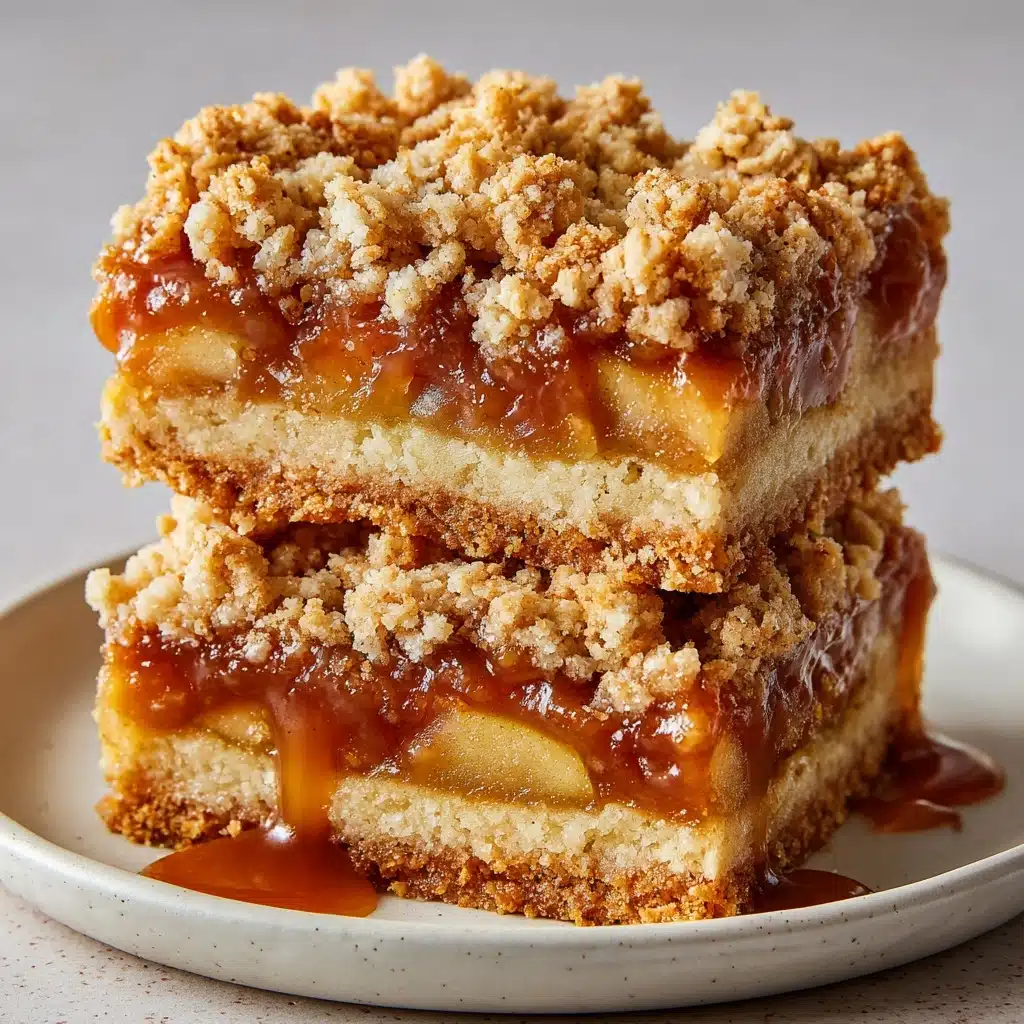
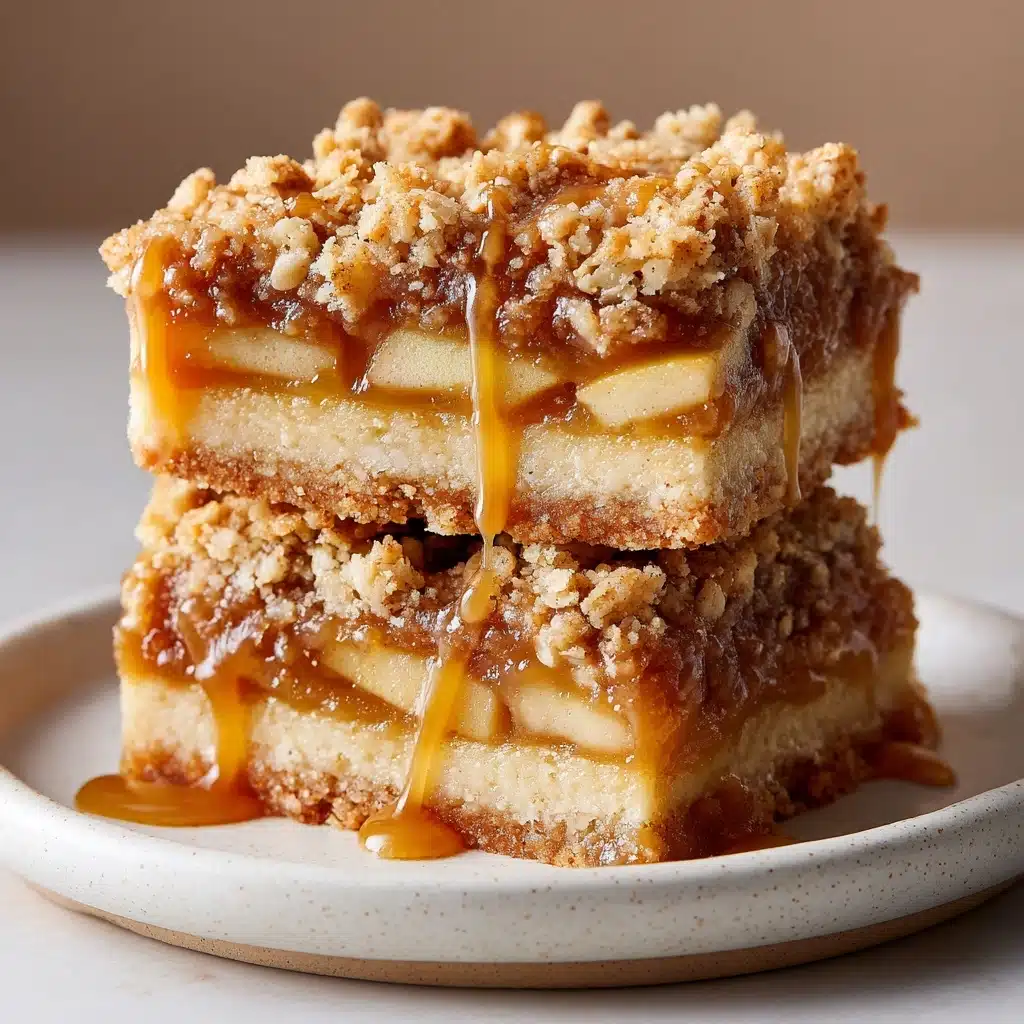
If you’re looking for a comforting, crowd-pleasing dessert that captures all the cozy flavors of autumn, these Apple Pie Bars are about to become your new go-to treat. Imagine all the nostalgia of a classic apple pie—sweet-tart apples, warm cinnamon spice, buttery crust—in a fuss-free, hand-held form. Whether you’re hosting a family gathering or sneaking in a sweet afternoon pick-me-up, these Apple Pie Bars deliver all the flavors you crave with a fraction of the effort. Trust me, this recipe is a keeper!
Ingredients You’ll Need
Gather a handful of pantry staples and some fresh apples, and you’re halfway to dessert bliss! Each of these ingredients plays a key role in creating the rich flavor, tender crumb, and gooey apple filling that makes these bars irresistible.
- All-purpose flour: The foundation for both the base and crumb topping, giving structure to the bars.
- Granulated sugar: Adds essential sweetness and helps give the crust a delicate crisp edge.
- Salt: A tiny amount balances the sweetness and sharpens the flavors.
- Cold unsalted butter, diced: Creates that melt-in-your-mouth texture in every bite—keep it cold for extra flakiness!
- Large egg: Binds the crust for easy cutting and adds richness.
- Peeled and diced apples (like Granny Smith or Honeycrisp): The star of the show—firm, tart apples hold their shape and bring that sweet-tangy punch.
- Packed brown sugar: Brings caramel notes and depth of flavor to the apple layer.
- Flour (for the apple filling): Thickens the juicy apples so your bars are chewy, not soggy.
- Cinnamon: A generous sprinkle infuses the apples with classic warmth and spice.
- Nutmeg: Adds a subtle earthiness that earns compliments every time.
- Lemon juice: Brightens the flavor and keeps those apple chunks looking fresh.
- Powdered sugar: The key to a sweet, glossy glaze on top.
- Milk (for glaze): Blends with powdered sugar for a pourable, drizzle-ready finish.
How to Make Apple Pie Bars
Step 1: Prep Your Pan and Oven
Begin by preheating your oven to 350°F (175°C). Line a 9×13-inch baking pan with parchment paper, allowing an overhang for easy removal later. This small step ensures no sticking and makes lifting out your beautiful Apple Pie Bars a breeze.
Step 2: Mix the Crust
In a large mixing bowl, combine the flour, granulated sugar, and salt. Add your cubes of cold unsalted butter. Use a pastry cutter or a fork to cut the butter into the dry ingredients until you see coarse, pea-sized crumbs—this is the secret to a tender, crumbly crust! Beat in the egg until the dough just comes together; don’t overmix. Scoop out 1 cup of dough and set aside for the top crumble.
Step 3: Press and Form the Base
Take the remaining dough and press it evenly into the bottom of your prepared pan. Use clean hands or the flat bottom of a measuring cup to press firmly—this will help the bars hold their shape and give you that satisfying sturdy base.
Step 4: Prepare the Apple Filling
In another bowl, toss your peeled and diced apples with the brown sugar, flour, cinnamon, nutmeg, and lemon juice. Give everything a gentle mix until the apples are evenly coated. This isn’t just about flavor; the flour thickens the juices and the spices infuse the apples with warmth and aroma.
Step 5: Layer and Crumble
Spread the spiced apple mixture over the pressed dough, spreading it to the edges for an even layer. Grab the cup of reserved dough, crumble it between your fingers, and sprinkle those buttery morsels over the apple filling. This step ensures every bite has a little crunch and visual appeal.
Step 6: Bake to Golden Perfection
Slide your pan into the preheated oven and bake for 45 to 50 minutes. You’ll know your Apple Pie Bars are done when the topping is a beautiful golden brown and the apples are tender and bubbling slightly at the edges. Your kitchen will smell absolutely amazing!
Step 7: Cool, Glaze, and Serve
Let the bars cool completely in the pan—this is the hardest part, but it helps them set up nicely for neat slices. Once cool, whisk together the powdered sugar and enough milk to make a smooth, pourable glaze. Drizzle it generously over the bars, allow it to set, then lift them from the pan and cut into squares. Perfection!
How to Serve Apple Pie Bars
Garnishes
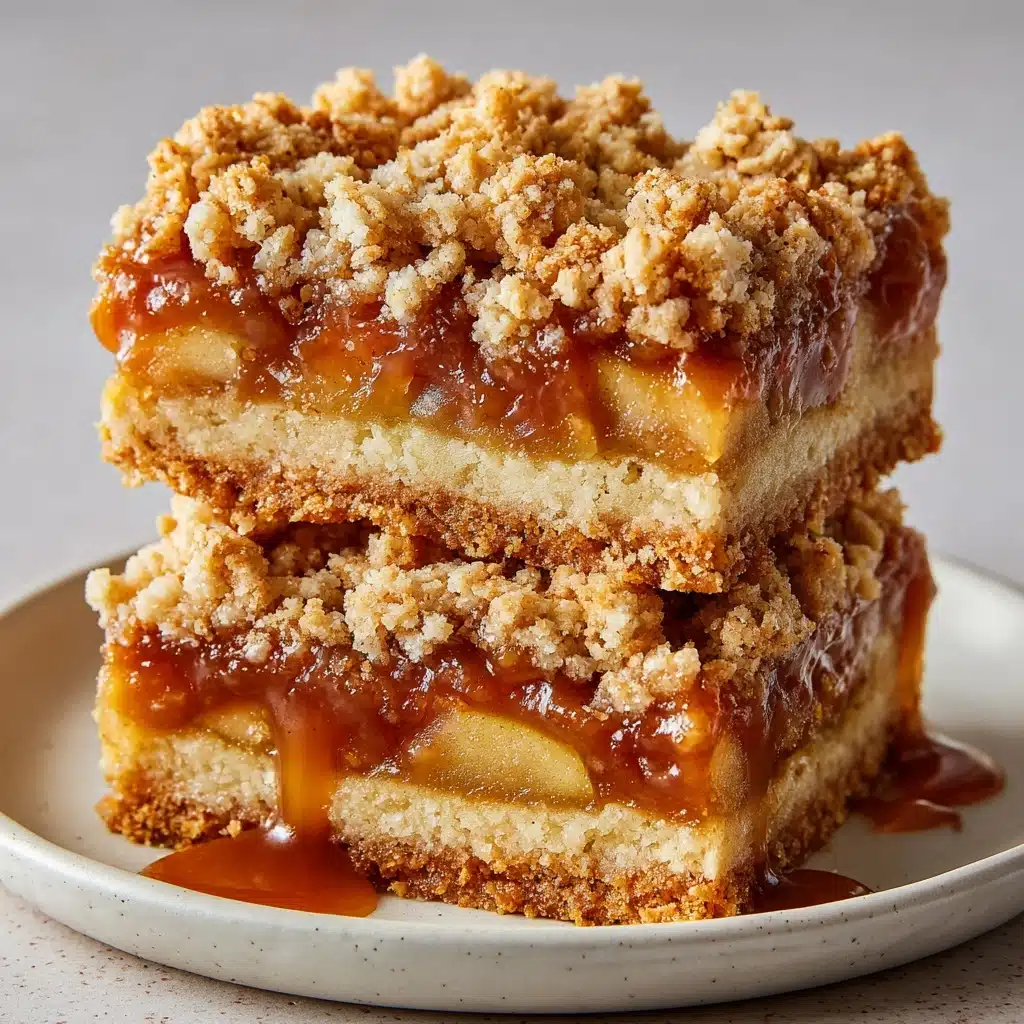
For a truly irresistible finish, dust your Apple Pie Bars with a sprinkle of extra cinnamon or a bit more powdered sugar. You can also add a handful of toasted nuts or a drizzle of warm caramel sauce for that bakery-shop touch. If you’re feeling fancy, serve them with a dollop of vanilla whipped cream or a scoop of vanilla ice cream on the side!
Side Dishes
These bars are absolutely delightful with a hot cup of coffee, spiced chai, or a mug of hot apple cider. If you’re planning a dessert buffet, they pair beautifully with other classic treats like pumpkin bread, oatmeal cookies, or even a platter of sharp cheddar for a sweet-and-savory combo.
Creative Ways to Present
Apple Pie Bars can go from rustic to elegant, depending on your mood! Try cutting them into triangles or bite-sized squares for easy party platters. For gatherings, place each bar in a decorative cupcake liner and arrange on a tiered stand. Want a show-stopper? Serve slightly warmed bars with a pool of caramel sauce and a scoop of ice cream nestled on top.
Make Ahead and Storage
Storing Leftovers
Apple Pie Bars store beautifully at room temperature. Just keep them in an airtight container or tightly covered with foil for up to 2 days. After that, pop them in the fridge for extra freshness. If stacking, place parchment between the layers to keep the glaze intact and the bars neat.
Freezing
You’ll be delighted to know these bars freeze exceptionally well! Arrange cooled, sliced Apple Pie Bars in a single layer on a baking sheet and freeze until solid. Once frozen, transfer them to an airtight container or freezer bag, separating layers with parchment. They’ll keep for up to 3 months—simply thaw overnight in the fridge when ready to enjoy.
Reheating
If you want to revive that just-baked coziness, warm individual bars in the microwave for 10–15 seconds or pop them in a 300°F oven for a few minutes. This is especially wonderful if you plan to serve them with a scoop of cold vanilla ice cream or a drizzle of warm sauce.
FAQs
Can I use a different type Dessert
Absolutely! While Granny Smith and Honeycrisp are tried-and-true choices for their balance of sweet and tart, you can use any firm, baking apple you love—Pink Lady, Braeburn, or Fuji all work well and bring their own unique flavors to your Apple Pie Bars.
Do I have to peel the apples?
Peeling the apples is recommended for the best texture, but if you enjoy a bit of rustic charm (and extra fiber), you can leave the skins on. Just dice the apples a bit smaller so they soften nicely while baking.
Can I make Apple Pie Bars gluten-free?
Yes! Swapping in a good-quality cup-for-cup gluten-free flour blend for the all-purpose flour works well in this recipe. Check that your blend contains xanthan gum for structure, and you’ll have delicious gluten-free Apple Pie Bars to share.
What’s the best way to cut neat slices?
For perfect squares, wait until the bars are completely cool (chilling them briefly in the fridge helps, too). Use a sharp knife, wiping it off between cuts, and for ultra-clean edges, lift the parchment out of the pan before slicing.
Can I add other mix-ins to the filling?
Definitely! Feel free to toss in a handful of chopped walnuts or pecans, a few dried cranberries, or even a sprinkle of mini toffee bits with the apples to make your Apple Pie Bars extra special and personalized.
Final Thoughts
Once you taste these Apple Pie Bars, you’ll wonder how you ever lived without them. They’re ridiculously easy, bursting with apple flavor and cozy spices, and sure to impress anyone who gets a bite. Roll up your sleeves, give this recipe a try, and let the simple magic of Apple Pie Bars win over your family and friends!
Print
Apple Pie Bars Recipe
- Prep Time: 20 minutes
- Cook Time: 50 minutes
- Total Time: 1 hour 10 minutes (plus cooling time)
- Yield: 16 bars
- Category: Dessert
- Method: Baking
- Cuisine: American
- Diet: Vegetarian
Description
Indulge in the delicious flavors of a classic apple pie in the form of convenient and portable bars with this easy recipe for Apple Pie Bars. These bars feature a buttery crust, a sweet and spiced apple filling, and a simple glaze that adds a touch of sweetness.
Ingredients
For the Crust:
- 2 1/2 cups all-purpose flour
- 1/2 cup granulated sugar
- 1/2 tsp salt
- 1 cup cold unsalted butter (cut into cubes)
- 1 large egg
For the Filling:
- 4 cups peeled and diced apples (such as Granny Smith or Honeycrisp)
- 1/2 cup packed brown sugar
- 2 tbsp all-purpose flour
- 1 1/2 tsp cinnamon
- 1/4 tsp nutmeg
- 1 tbsp lemon juice
For the Glaze:
- 1/2 cup powdered sugar
- 1–2 tbsp milk (for glaze)
Instructions
- Preheat the oven and prepare the pan: Preheat the oven to 350°F (175°C) and line a 9×13-inch baking pan with parchment paper.
- Make the crust: In a large bowl, mix the flour, granulated sugar, and salt. Cut in the cold butter until the mixture resembles coarse crumbs. Beat the egg and mix it in until the dough begins to come together. Press the dough into the pan.
- Prepare the filling: Toss the apples with brown sugar, flour, cinnamon, nutmeg, and lemon juice. Spread over the crust.
- Add the topping: Crumble the reserved dough over the apple mixture.
- Bake: Bake for 45–50 minutes until golden and apples are tender.
- Glaze and serve: Mix powdered sugar and milk to form a glaze. Drizzle over the bars after they have cooled. Cut into squares and enjoy!
Notes
- These bars can be made a day ahead and stored covered at room temperature.
- Try adding chopped walnuts or a touch of caramel drizzle for extra flavor.

