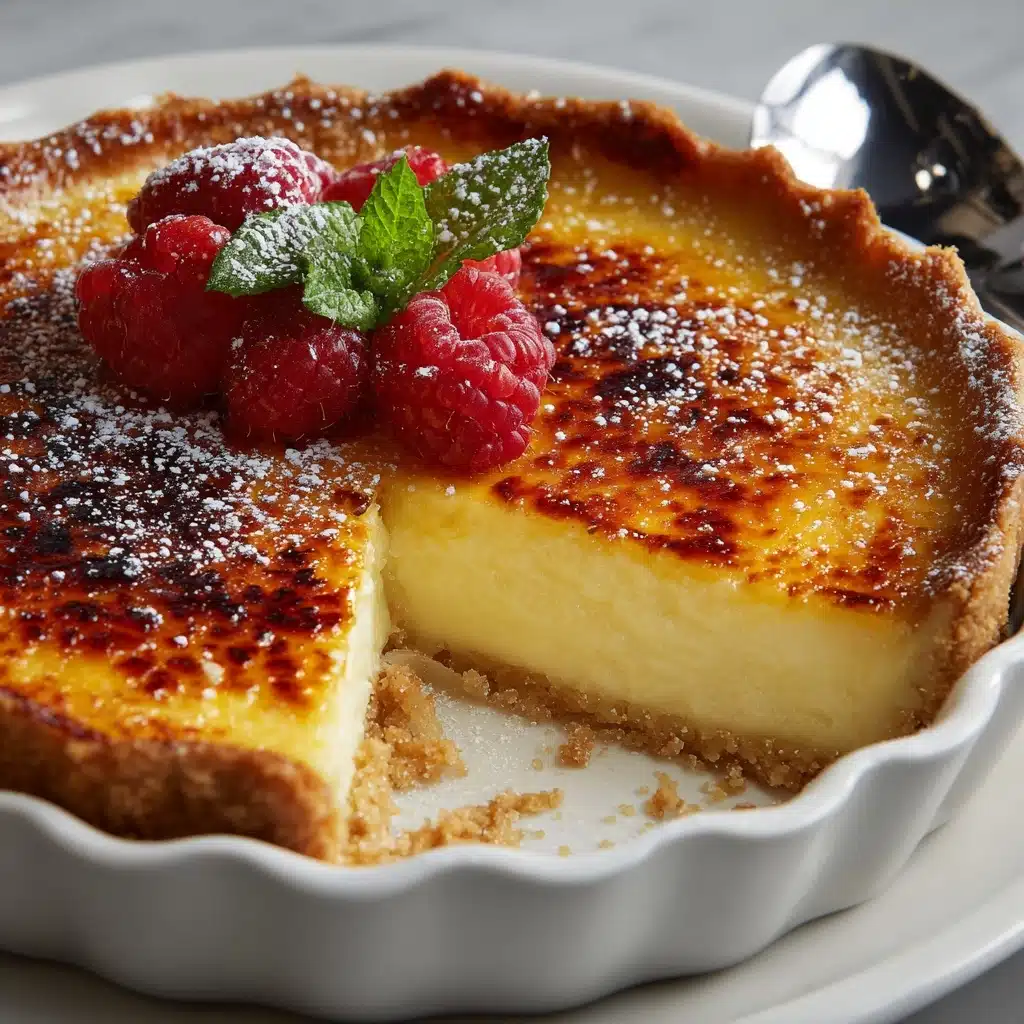
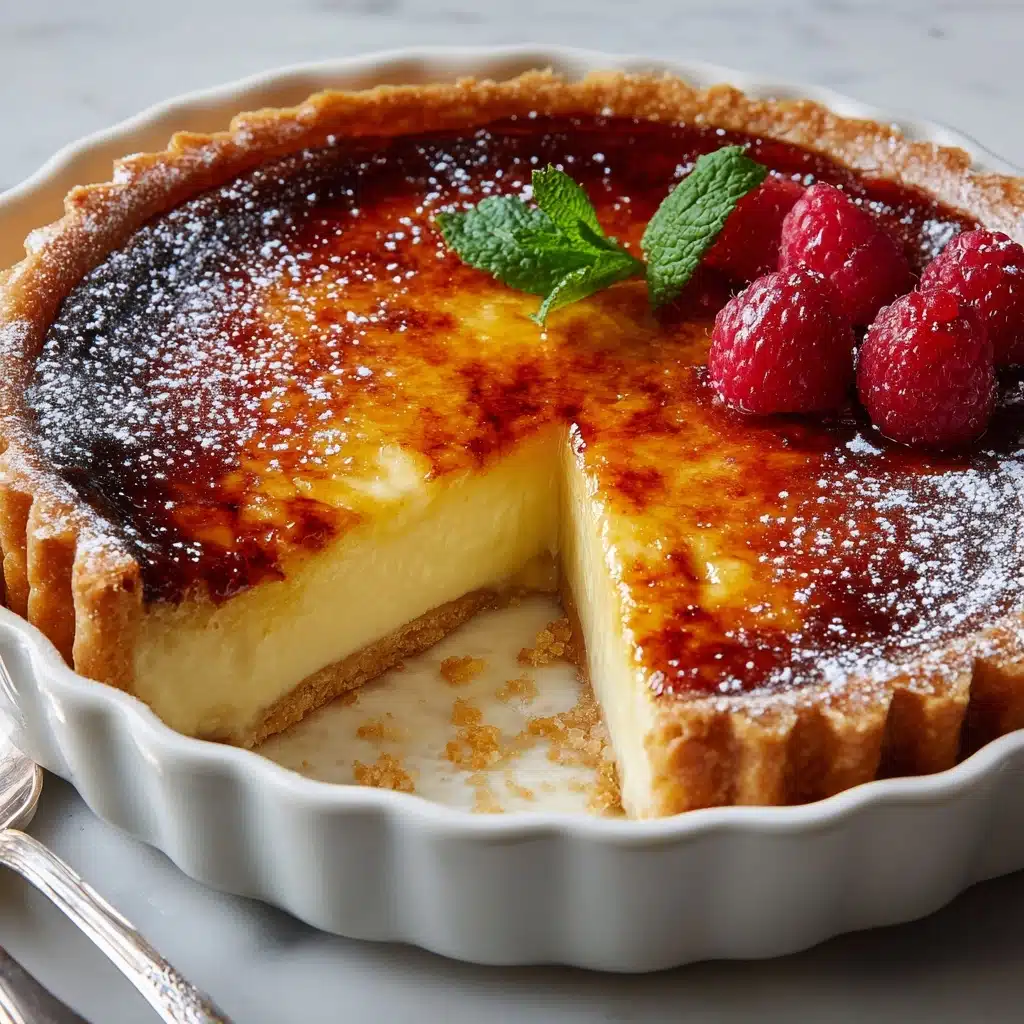
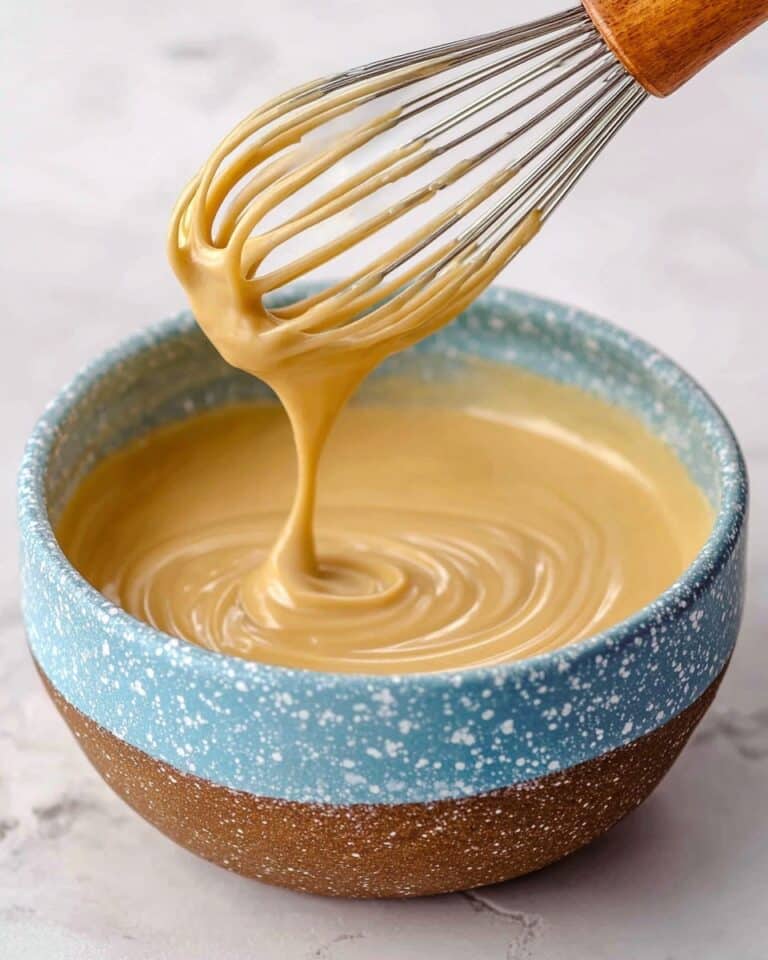
If you’re dreaming of something decadently creamy, delicately crisp, and sure to impress, look no further than the Authentic French Crème Brûlée Tart. This stunning dessert brings together the silky vanilla custard of a classic crème brûlée with the buttery embrace of a golden tart crust, all topped off by that irresistible glassy caramelized sugar shell. With its elegant look and unforgettable texture, it’s just the treat to make any occasion feel like a little celebration.
Ingredients You’ll Need
Each ingredient in this Authentic French Crème Brûlée Tart is carefully chosen for a reason: from achieving that perfect short, crumbly base to creating a lusciously smooth custard and crisp brûlée crown. Simplicity is the secret here — every element comes together in harmony, so don’t be tempted to skip or swap!
- All-purpose flour: The foundation of your tart crust, bringing lightness and structure.
- Powdered sugar: Adds a gentle sweetness and a finer texture to the base.
- Salt: Just a pinch balances out the sweetness and deepens every flavor.
- Unsalted butter (cold and cubed): Essential for flakiness — cold butter is the magic for that melt-in-the-mouth crust.
- Egg yolk: Lends richness to the tart dough and helps bind it all together.
- Ice water: A touch brings the dough together without overworking it for maximum tenderness.
- Heavy cream: The star of the custard, giving you a silky, luxurious filling.
- Vanilla bean (or pure vanilla extract): Real vanilla infuses that deep, fragrant aroma crème brûlée is famous for.
- Egg yolks: These give the custard its rich flavor and creamy texture.
- Granulated sugar: Used twice, for sweetening the filling and creating that glassy brûlée topping.
How to Make Authentic French Crème Brûlée Tart
Step 1: Prepare and Chill the Tart Crust
Let’s get things started with the foundation! Whisk together the flour, powdered sugar, and salt in a mixing bowl. Then, work in the cold, cubed butter using a pastry cutter or your fingertips until you have a mixture that looks like coarse crumbs. Gently mix in the egg yolk and a spoonful of ice water at a time, just until the dough comes together — don’t overdo it. Shape it into a disk, wrap in plastic, and let it chill in the fridge for a good 30 minutes. This rest is crucial for that famously tender tart shell.
Step 2: Roll, Shape, and Bake the Crust
Once chilled, roll out your dough on a lightly floured surface until it’s big enough for your 9-inch tart pan. Carefully press it in, trim any overhanging edges, and prick the bottom with a fork. Now’s the time for a quick trip back to the fridge for 15 minutes — this helps hold its shape as it bakes. Line with parchment, fill with pie weights or beans, and bake at 375°F (190°C) for 15 minutes. Remove the weights, bake another 10 minutes till golden, and let your masterpiece-in-progress cool completely.
Step 3: Whisk and Warm the Custard Filling
While the crust cools, infuse your filling! Gently heat the heavy cream and split vanilla bean (or wait to add vanilla extract) in a saucepan until just simmering but not boiling. In a separate bowl, whisk the egg yolks and sugar until the mixture turns pale and fluffy. Slowly drizzle the hot cream into the eggs, whisking like a pro all the while, so your eggs don’t scramble. Strain this luscious liquid through a fine sieve for a silky-smooth custard.
Step 4: Bake the Tart to Silky Perfection
Reduce the oven to 300°F (150°C). Pour the strained custard into your cooled tart shell, being careful not to overfill. Bake for 30 to 35 minutes — what you’re aiming for is custard that’s set around the edges but still wobbly at the center. Set aside to cool to room temperature, then refrigerate at least four hours (overnight is even better) for that unforgettable crème brûlée texture.
Step 5: Brûlée and Serve
Here’s the fun part: sprinkle granulated sugar evenly across the chilled custard. Using a kitchen torch, caramelize the sugar until it’s golden, bubbly, and forms a crackling crust. Give it a minute or two to harden — anticipation is part of the magic! Now it’s ready to slice, serve, and absolutely wow your guests with the Authentic French Crème Brûlée Tart.
How to Serve Authentic French Crème Brûlée Tart
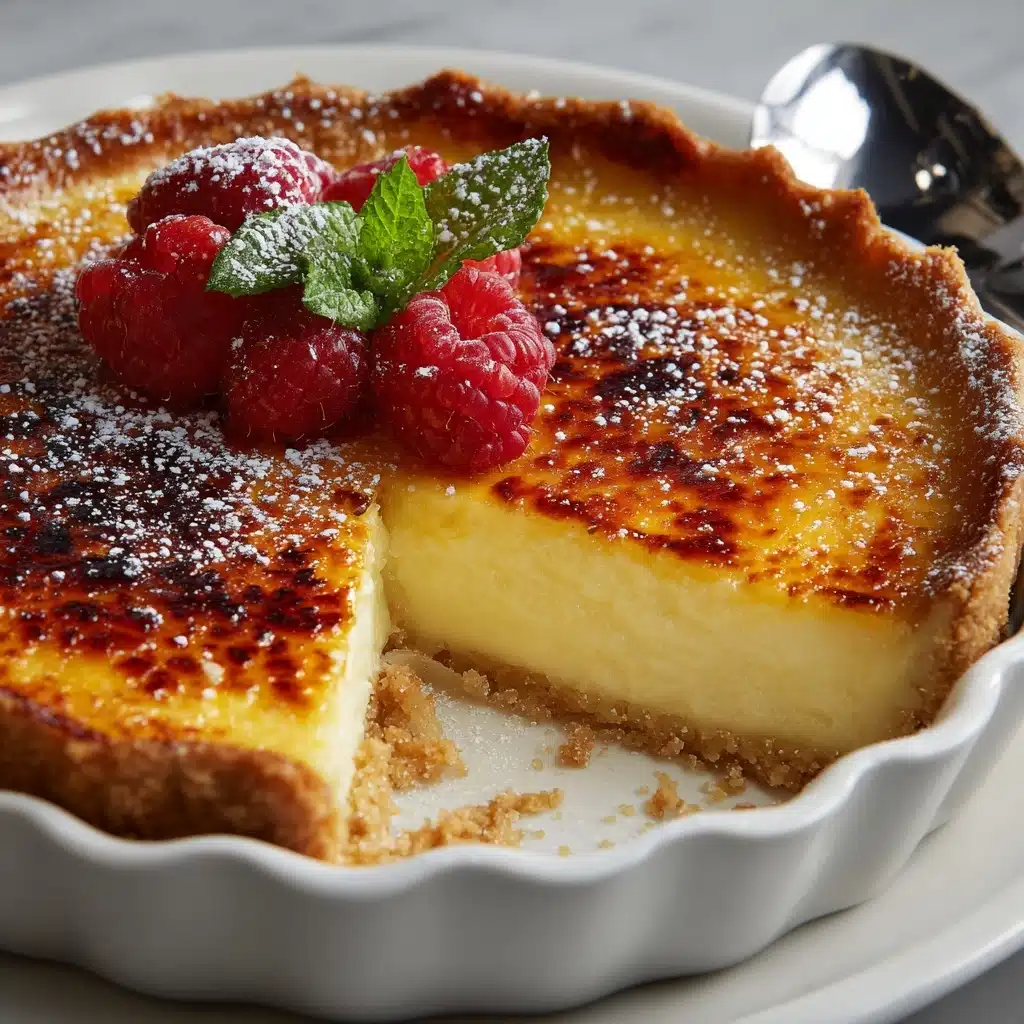
Garnishes
This tart is a showstopper on its own, but a little pop of color and freshness makes it even more irresistible. Try scattering ruby-red raspberries, a few sliced strawberries, or delicate mint leaves on each slice just before serving. A dusting of powdered sugar or a couple of edible flowers can make your Authentic French Crème Brûlée Tart look straight out of a Parisian patisserie.
Side Dishes
Wondering what to pair with such a rich treat? Something light and refreshing is perfect next to the creamy custard and caramel crust. Consider a bowl of sweet-tart berries, a scoop of tangy sorbet, or even a bubbly glass of sparkling wine. These help balance out the richness and keep the flavors feeling bright.
Creative Ways to Present
Want to showcase your Authentic French Crème Brûlée Tart in a fresh, unforgettable way? Slice into slender wedges and serve on chic dessert plates with unique spoons for cracking the sugar top. Or, make mini tartlets for an elegant buffet or afternoon tea. For a whimsical spin, offer each guest their own mini brûlée torch to create that classic sugar crust at the table — talk about interactive dessert drama!
Make Ahead and Storage
Storing Leftovers
If you’ve magically managed to have leftovers, simply wrap the tart loosely with plastic wrap and keep it in the refrigerator. The Authentic French Crème Brûlée Tart will stay delicious for up to two days, though the sugar crust may gradually soften over time.
Freezing
For longer storage, you can freeze the fully cooled tart (before brûlée-ing the top) tightly wrapped in plastic and foil. When ready to enjoy, thaw overnight in the refrigerator, then add the sugar and caramelize just before serving for best results.
Reheating
This tart is magical when cold, but if you prefer a bit of warmth, simply let it rest at room temperature for 20 to 30 minutes before serving. Avoid reheating in the oven or microwave, as this can change the texture of the custard and melt the brûlée top.
FAQs
Can I make Authentic French Crème Brûlée Tart without a kitchen torch?
Absolutely! While a kitchen torch gives the most even caramelization, you can use your oven broiler as an alternative. Just keep a vigilant eye, as sugar can burn quickly. Place the tart under the broiler for a minute or two until the top is golden and crisp.
Is it possible to use pre-made tart dough?
If you’re short on time, a high-quality store-bought tart shell will still yield a delicious dessert. However, making the crust from scratch gives the Authentic French Crème Brûlée Tart its classic flavor and unbeatable texture.
Can I substitute the vanilla bean with extract?
Yes, pure vanilla extract is a great substitute if you can’t get a vanilla bean. Add it after you heat the cream to preserve its delicate aroma and flavor.
How do I know when the custard is perfectly baked?
Gently jiggle the pan — the center should quiver slightly, but not slosh. Overbaking could lead to a grainy custard, so pull it out while it’s still a tiny bit wobbly in the middle.
Is this tart gluten-free?
The traditional version uses all-purpose flour, but you can easily swap in your favorite gluten-free flour blend for the crust. Just check your blend’s instructions in case your dough needs a touch more or less water.
Final Thoughts
If ever there was a dessert worth sharing with loved ones, it’s the Authentic French Crème Brûlée Tart. Treat yourself (and your lucky guests) to this French classic with a twist — your kitchen will smell amazing, and the look of delight as everyone cracks through that sugar lid says it all. Don’t wait for a special occasion; make this tart your new reason to celebrate. Bon appétit!
Print
Authentic French Crème Brûlée Tart Recipe
- Prep Time: 45 minutes (plus chilling)
- Cook Time: 45 minutes
- Total Time: 6 hours (including chilling)
- Yield: 8 servings
- Category: Dessert
- Method: Baking
- Cuisine: French
- Diet: Vegetarian
Description
Indulge in the rich and creamy goodness of an Authentic French Crème Brûlée Tart. This classic dessert combines a buttery tart crust with a silky vanilla custard filling, topped with a caramelized sugar crust for a delightful crunch.
Ingredients
For the tart crust:
- 1¼ cups all-purpose flour
- ¼ cup powdered sugar
- ½ teaspoon salt
- ½ cup unsalted butter (cold and cubed)
- 1 large egg yolk
- 1–2 tablespoons ice water
For the filling:
- 2 cups heavy cream
- 1 vanilla bean (split and scraped) or 2 teaspoons pure vanilla extract
- 5 large egg yolks
- ½ cup granulated sugar
For the topping:
- ¼ cup granulated sugar (for brûlée crust)
Instructions
- To make the crust: Whisk flour, powdered sugar, and salt. Cut in cold butter until crumbly. Add egg yolk and ice water, mix until dough forms. Chill, roll out, and press into tart pan. Bake until golden.
- For the filling: Simmer cream and vanilla. Whisk yolks and sugar, then slowly add cream. Strain and pour into crust. Bake until set.
- For the topping: Sprinkle sugar on tart, caramelize with torch until golden. Let cool before serving.
Notes
- Use a kitchen torch for best results when brûléeing the top.
- If using vanilla extract, add it after heating the cream.
- Garnish with fresh berries if desired.

