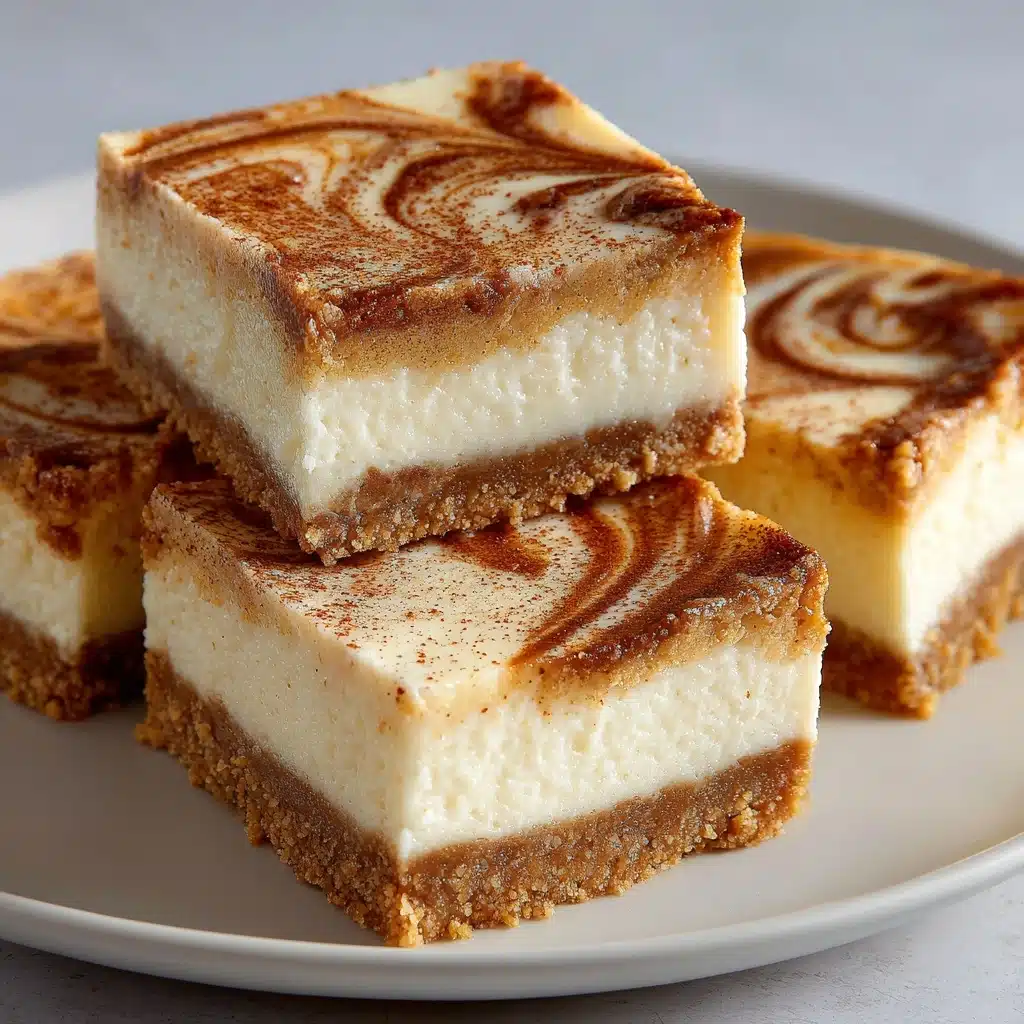
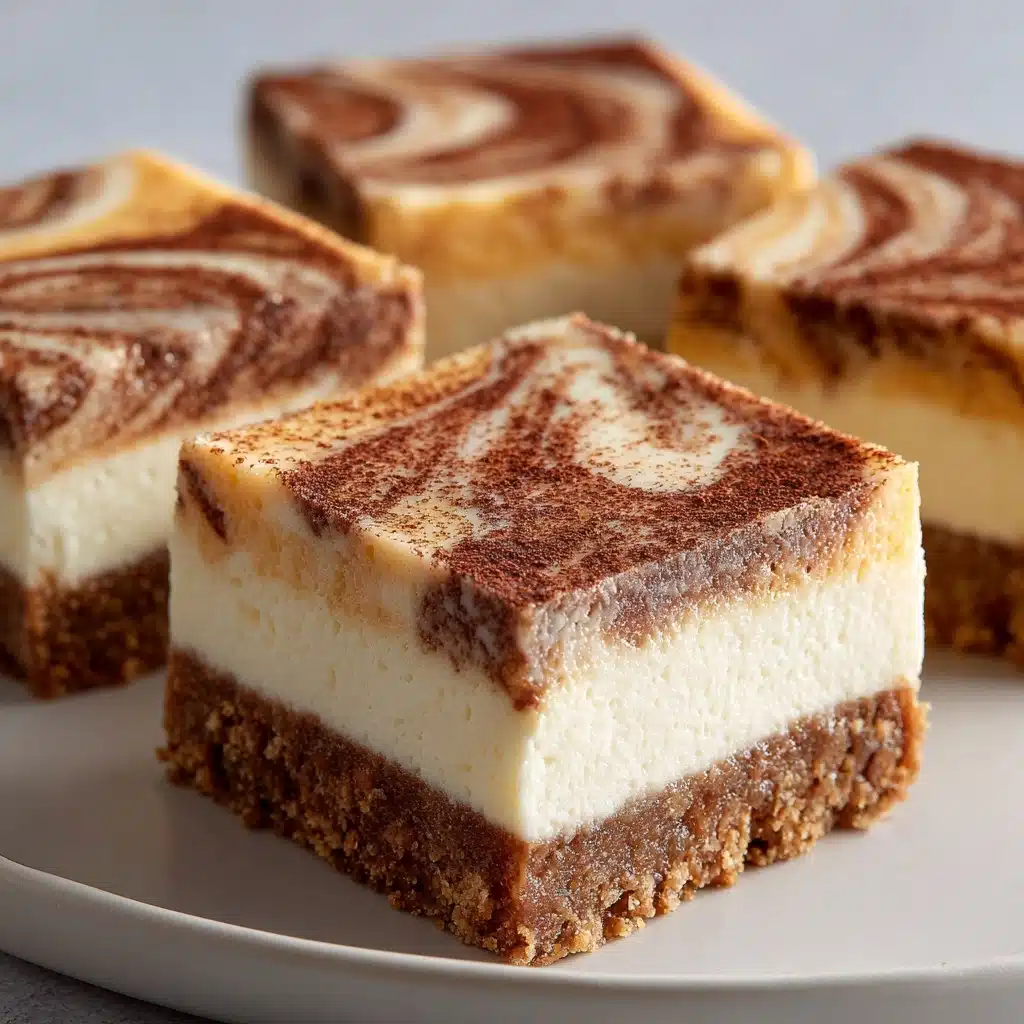
Dreamy layers of creamy cheesecake and cinnamon swirl, all on a buttery graham cracker crust—what’s not to love? With these Blender Cinnamon Roll Cheesecake Bars, the magic happens in just a few steps and one trusty blender. This is the ultimate treat for anyone who loves the comforting flavors of a classic cinnamon roll and the silky smoothness of cheesecake, all wrapped up in an easy-to-share dessert bar. Whether you’re baking for brunch, potlucks, or just a quiet night at home, these irresistible bars hit all the sweet spots.
Ingredients You’ll Need
Ingredients You’ll Need
The beauty of Blender Cinnamon Roll Cheesecake Bars lies in their simple yet thoughtfully chosen ingredients. Each one brings something special: from the rich, creamy body of the cream cheese to the warm spice of cinnamon and that signature crunch you get from a perfectly made graham cracker crust.
- Graham cracker crumbs: The classic base for cheesecake bars, giving you that nostalgic, slightly sweet crunch.
- Granulated sugar: Used in both the crust and cheesecake filling for balanced sweetness throughout.
- Unsalted butter (melted): Helps bind your crust and swirls into luscious cinnamon ribbons.
- Cream cheese (softened): The star of the cheesecake filling—make sure it’s softened for the creamiest texture.
- Sour cream: Adds a gentle tang that keeps the bars rich but never too heavy.
- Large eggs: Essential for setting up that custardy, sliceable texture.
- Vanilla extract: Blooms in the batter, boosting sweet, aromatic undertones.
- Ground cinnamon: The real showstopper; it infuses every bite with fragrant, bakery-style warmth.
- All-purpose flour: Helps the cheesecake filling set up beautifully for perfect bars every time.
- Brown sugar: Adds depth and that irresistible molasses-y hug to the cinnamon swirl.
- Powdered sugar: The secret to the dreamy glaze that tops things off in sweet style.
- Milk or cream: Used for making a silky glaze—cream is extra luxurious, but milk works wonderfully.
How to Make Blender Cinnamon Roll Cheesecake Bars
Step 1: Prepare the Pan and Preheat
Start by preheating your oven to 325°F (163°C). Line an 8×8-inch baking pan with parchment paper, making sure you have enough overhang to lift those gorgeous bars out after chilling. This step sets the scene for easy serving and clean edges later—trust me, you’ll thank yourself.
Step 2: Make the Graham Cracker Crust
In a medium bowl, combine the graham cracker crumbs, 2 tablespoons granulated sugar, and 4 tablespoons melted butter. Stir until the mixture looks like wet sand and everything is evenly moistened. Press this mixture firmly and evenly into the bottom of your prepared pan, using the flat bottom of a measuring cup for a smooth finish. Set aside while you get to the good stuff—the cheesecake layer!
Step 3: Blend the Cheesecake Filling
Grab your blender and add the cream cheese, sour cream, eggs, 1/2 cup granulated sugar, vanilla extract, 1/2 teaspoon ground cinnamon, and flour. Blend until the batter is creamy and lump-free, scraping down the sides as you need. This is where the magic of Blender Cinnamon Roll Cheesecake Bars comes in—no hand-mixing, no fuss, just pure velvety cheesecake in seconds.
Step 4: Start the Cinnamon Swirl
In a small bowl, mix together the brown sugar, 1 tablespoon ground cinnamon, and 2 tablespoons melted butter until you have a thick, dreamy cinnamon paste. If it feels stiff, zap it in the microwave for a few seconds to loosen it up—swirling will be so much easier and prettier this way.
Step 5: Assemble and Swirl
Pour half the cheesecake filling over your crust, spreading it into an even layer. Dot spoonfuls of the cinnamon mixture across the surface, then use a knife or a toothpick to gently swirl it into the filling, creating marbled cinnamon ribbons. Pour the rest of your cheesecake mixture on top and, if you like, swirl in any leftover cinnamon paste for an even more eye-catching effect.
Step 6: Bake
Slide your pan into the preheated oven and bake for 35 to 40 minutes, or until the edges are just puffed and the center is set but still a little jiggly. Let the bars cool to room temperature to finish setting, then transfer to the fridge for at least 3 hours. Patience pays off—the chill guarantees perfect, clean slices.
Step 7: Make the Glaze and Finish
Once your Blender Cinnamon Roll Cheesecake Bars are fully chilled, it’s time for the grand finale. In a small bowl, whisk together powdered sugar, milk or cream, and 1/4 teaspoon vanilla extract until smooth and pourable. Drizzle this sweet glaze generously over the bars, then slice, serve, and bask in compliments.
How to Serve Blender Cinnamon Roll Cheesecake Bars
Garnishes
For an extra touch of joy, dress up your bars with a pinch of cinnamon dust, a sprinkle of chopped pecans, or even a delicate drizzle of caramel sauce. Fresh berries can add a pop of color and tartness that makes each bite sing. Whether you’re going simple or fancy, every option pairs beautifully with the sweet, spiced flavor of these bars.
Side Dishes
Blender Cinnamon Roll Cheesecake Bars are showstoppers on their own, but they pair wonderfully with a strong cup of coffee, chai latte, or a cold glass of milk. If you’re hosting a brunch, serve them alongside a fruit salad or some fresh orange segments for a refreshing contrast. The creamy texture and warm spice play well with just about any breakfast or dessert spread.
Creative Ways to Present
Try cutting the bars into mini bite-sized squares for a dessert platter, or stack them on a cake stand for a striking centerpiece. You could also serve them in cupcake liners for easy grab-and-go treats—perfect for parties or gifting. If you’re feeling extra creative, arrange the bars in a spiral pattern on a large platter and sprinkle with a touch more cinnamon for that irresistible “wow” factor.
Make Ahead and Storage
Storing Leftovers
Store any leftover Blender Cinnamon Roll Cheesecake Bars in an airtight container in the refrigerator. They’ll stay delicious for up to 5 days, and the flavors meld together even more after a night in the fridge—if you have the willpower to make them last that long!
Freezing
These bars freeze beautifully. Simply wrap individual bars tightly in plastic wrap, then place in a zip-top freezer bag. They’ll keep for up to 2 months. Thaw overnight in the refrigerator before serving for the best texture.
Reheating
While you can enjoy these bars straight from the fridge, if you prefer them a bit warmer, let them sit at room temperature for 20-30 minutes before serving. Avoid microwaving, as it can make the glaze run and the texture less creamy.
FAQs
Can I use a different type Dessert
Absolutely! While the classic graham cracker crust is a crowd favorite, try swapping in crushed digestive biscuits, vanilla wafers, or even gingersnaps for a twist. Each one brings a unique flavor that pairs wonderfully with the cinnamon cheesecake filling.
Do I have to use a blender for the cheesecake layer?
The blender guarantees silky-smooth results with minimal effort, but if you don’t have one, a food processor or even a hand mixer will work. Just make sure your cream cheese is very soft before mixing to avoid lumps.
How do I know when the Blender Cinnamon Roll Cheesecake Bars are baked through?
Bake until the edges look a little puffed and the center jiggles slightly when you nudge the pan. The bars will continue to set as they cool, so don’t overbake—they’re done even if the center looks a bit soft coming out of the oven.
Can I double the recipe for a crowd?
Yes! Double all the ingredients and bake in a 9×13-inch pan. You may need to add a few minutes to the baking time, so keep an eye out for that signature set center and golden edges.
Is it possible to make this recipe gluten free?
Definitely. Use gluten-free graham crackers for the crust and substitute the all-purpose flour in the filling with a gluten-free flour blend. The results are just as delicious and satisfying as the original.
Final Thoughts
If you love the flavors of cinnamon rolls and crave the decadence of cheesecake, you simply have to make these Blender Cinnamon Roll Cheesecake Bars. They’re easy enough for a beginner, quick enough for last-minute cravings, and guaranteed to elicit smiles from anyone lucky enough to get a square. Dive in and let these bars become your new go-to for celebrating—or just savoring an ordinary day.
Print
Blender Cinnamon Roll Cheesecake Bars Recipe
- Prep Time: 20 minutes
- Cook Time: 40 minutes
- Total Time: 1 hour
- Yield: 9 bars
- Category: Dessert
- Method: Baking
- Cuisine: American
- Diet: Non-Vegetarian
Description
Indulge in the irresistible combination of cinnamon rolls and cheesecake with these decadent Blender Cinnamon Roll Cheesecake Bars. A perfect dessert for any occasion!
Ingredients
For the Crust:
- 1 cup graham cracker crumbs
- 2 tablespoons granulated sugar
- 4 tablespoons unsalted butter, melted
For the Cheesecake:
- 16 ounces cream cheese, softened
- 1/2 cup sour cream
- 2 large eggs
- 1/2 cup granulated sugar
- 1 teaspoon vanilla extract
- 1/2 teaspoon ground cinnamon
- 1/4 cup all-purpose flour
For the Cinnamon Swirl:
- 1/4 cup brown sugar
- 1 tablespoon ground cinnamon
- 2 tablespoons melted butter
For the Glaze:
- 1/4 cup powdered sugar
- 1 tablespoon milk or cream
- 1/4 teaspoon vanilla extract
Instructions
- Preheat the oven and prepare the pan: Preheat the oven to 325°F and line an 8×8-inch baking pan with parchment paper.
- Make the crust: Combine graham cracker crumbs, sugar, and melted butter. Press into the bottom of the pan.
- Prepare the cheesecake mixture: Blend cream cheese, sour cream, eggs, sugar, vanilla, cinnamon, and flour until smooth.
- Layer and swirl: Pour half the cheesecake mixture over the crust. Add spoonfuls of cinnamon swirl mixture and swirl with a knife. Pour remaining cheesecake mixture and swirl again.
- Bake and chill: Bake for 35–40 minutes, then cool to room temperature and refrigerate for at least 3 hours.
- Make the glaze: Whisk together powdered sugar, milk or cream, and vanilla. Drizzle over chilled bars before serving.
Notes
- For an easier swirl, warm the cinnamon mixture slightly to loosen it.
- You can use a pre-made graham cracker crust base if preferred.

