

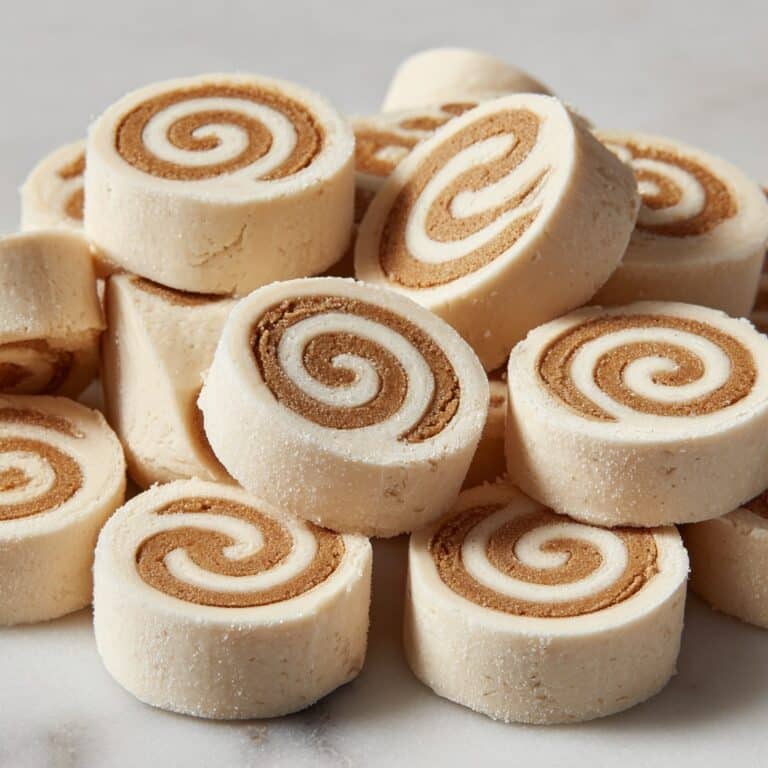
If you’re looking for a treat that’s as enchanting to make as it is to eat, Homemade Resurrection Rolls are a sweet, golden symbol of springtime and new beginnings. These pillowy-soft rolls hide a delicious secret: as they bake, the marshmallow melts away, leaving a magical, hollow center that’s both surprising and symbolic. With just a handful of pantry staples, you’ll have a dessert that’s perfect for teaching traditions, sharing stories, and savoring together, whether it’s Easter morning or an ordinary weekend you’d like to make memorable.

Ingredients You’ll Need
-
Crescent Roll Dough:
- 1 (8-count) can crescent roll dough
Marshmallows:
- 8 large marshmallows
Melted Butter Mixture:
- 1/4 cup melted butter
Cinnamon Sugar Coating:
- 1/4 cup granulated sugar
- 1 tablespoon ground cinnamon
How to Make Homemade Resurrection Rolls
Step 1: Prep Your Baking Sheet and Ingredients
Set yourself up for baking success by preheating your oven to 375°F (190°C) and lining a baking sheet with parchment paper. This way, any gooey filling that sneaks out will be easy to clean, and your rolls will come off the tray without sticking. Measure out your cinnamon and sugar, melt your butter, and grab those fluffy marshmallows—having everything ready streamlines the fun to come!
Step 2: Mix the Cinnamon Sugar
In a small, shallow bowl, mix together the granulated sugar and ground cinnamon until it’s beautifully blended and fragrant. This will become the irresistible coating for your marshmallows, giving the finished rolls that iconic swirl of sweetness and spice.
Step 3: Wrap the Marshmallows
Gently separate your crescent roll dough along the perforated triangles. Dip each marshmallow first into the melted butter (let it drip for a moment), then roll it in your cinnamon-sugar mixture to coat completely. Place each coated marshmallow in the center of a crescent triangle, then carefully fold the dough over the marshmallow, pinching, tucking, and sealing all the edges so the marshmallow is completely enclosed. Don’t leave any cracks—this keeps all the gooey goodness inside!
Step 4: Arrange and Bake
Place your dough-wrapped marshmallows seam-side down onto the prepared baking sheet, evenly spaced for golden-brown results. Pop them in the oven and bake for 10 to 12 minutes, or until the rolls are puffed and beautifully golden. The marshmallows will melt right into thin air, leaving behind a sweetly hollow center that’s the signature of Homemade Resurrection Rolls.
Step 5: Cool (Just a Bit) and Serve
For the best texture and to avoid hot sugar surprises, let the rolls cool on the pan for a couple of minutes. They’re tastiest served warm—so gather everyone around, break them open, and reveal the magical “empty tomb” while sharing the story and symbolism behind this delightful tradition.
How to Serve Homemade Resurrection Rolls

Garnishes
To make your Homemade Resurrection Rolls even more special, try brushing them with a little extra melted butter as soon as they come out of the oven, then dust with a touch more cinnamon sugar, or go all out and drizzle with a simple powdered sugar glaze. A sprinkle of powdered sugar offers a snowy, festive finish that both looks and tastes wonderful.
Side Dishes
These rolls pair beautifully with fresh fruit like strawberries or a citrus salad to balance the richness. If you’re serving them for breakfast or brunch, they’re lovely next to a savory egg casserole or a crisp bacon platter. Hot coffee, tea, or a cool glass of milk make them extra comforting and perfect for sharing.
Creative Ways to Present
Transform your Homemade Resurrection Rolls into the centerpiece of your table by piling them high on a vintage cake stand, tucking them into a basket lined with a linen napkin, or wrapping each one in colorful tissue for an Easter egg hunt surprise. You can even add festive toothpick flags or tie individual rolls in parchment for a sweet take-home treat.
Make Ahead and Storage
Storing Leftovers
If you find yourself with leftover Homemade Resurrection Rolls (a rare occurrence!), store them in an airtight container at room temperature for up to two days. The rolls will stay soft and delicious, though the hollow inside might become a little chewy over time—but still tasty!
Freezing
You can freeze Homemade Resurrection Rolls after they’ve baked and cooled completely. Wrap each roll individually in plastic wrap, then place them together in a freezer bag or airtight container. They’ll keep their flavor and texture for up to two months—perfect for pulling out whenever you want a quick, heartwarming treat.
Reheating
To reheat, simply unwrap the rolls and place them on a baking sheet in a 300°F (150°C) oven for about 6 to 8 minutes, or until warmed through. If you’re short on time, a quick zap in the microwave (about 10 to 15 seconds each) will do the trick, bringing back their soft and gooey goodness.
FAQs
Can I use homemade dough instead of canned crescent rolls?
Absolutely! If you enjoy making dough from scratch, a simple sweet roll or brioche dough works wonderfully. Just roll it out thin and cut into triangles as you would with canned dough—the results will be extra tender and full of homemade love.
Why did my marshmallow leak out during baking?
A leaky roll usually means there was a gap or seam that wasn’t pinched tightly enough. It’s important to really seal the dough around the marshmallow completely. Press and smooth the edges, tucking in any stray corners for a foolproof seal every time.
Can I add chocolate or other fillings inside the rolls?
Definitely! A few mini chocolate chips inside with the marshmallow can make your Homemade Resurrection Rolls even more decadent. You can also try caramel pieces or a spoonful of nut butter—get creative, and see which combination becomes your family’s new favorite.
Is there a way to make these gluten-free?
Yes, look for gluten-free crescent dough at your local grocery store or specialty market. The process remains the same—just be sure to carefully seal those edges, as gluten-free doughs are often a bit more delicate.
Can I make Resurrection Rolls in advance?
The rolls are best when freshly baked, but you can assemble them (up through the sealing step) and refrigerate overnight. Pop them in the oven straight from the fridge in the morning, adding an extra couple of minutes to the baking time if they’re very cold.
Final Thoughts
I hope you feel inspired to invite a little more warmth, sweetness, and togetherness into your kitchen with Homemade Resurrection Rolls. Whether you’re making them for a special holiday, a cozy brunch, or simply as a fun project with family, these rolls never fail to create smiles and stories. Go on—give them a try, and let the magic unfold!
Print
Homemade Resurrection Rolls Recipe
- Prep Time: 10 minutes
- Cook Time: 12 minutes
- Total Time: 22 minutes
- Yield: 8 rolls
- Category: Dessert
- Method: Baking
- Cuisine: American
- Diet: Vegetarian
Description
These Homemade Resurrection Rolls are a delightful Easter treat with a symbolic twist. Marshmallows wrapped in sweet dough symbolize the resurrection story, making them a perfect addition to your holiday table.
Ingredients
Crescent Roll Dough:
- 1 (8-count) can crescent roll dough
Marshmallows:
- 8 large marshmallows
Melted Butter Mixture:
- 1/4 cup melted butter
Cinnamon Sugar Coating:
- 1/4 cup granulated sugar
- 1 tablespoon ground cinnamon
Instructions
- Preheat and Prepare: Preheat oven to 375°F (190°C) and line a baking sheet with parchment paper.
- Mix Sugar and Cinnamon: Combine sugar and cinnamon in a small bowl.
- Prepare Dough and Marshmallows: Separate crescent roll dough into triangles. Dip each marshmallow in melted butter, then coat with cinnamon sugar.
- Wrap Marshmallows: Place a coated marshmallow in the center of each dough triangle, seal edges tightly to form a ball.
- Bake: Arrange rolls seam-side down on the baking sheet and bake for 10-12 minutes until golden brown.
- Serve: Let cool briefly before serving warm.
Notes
- The melted marshmallow inside the baked rolls creates an empty ‘tomb’ – a meaningful Easter symbolism.
- Explain the story behind the rolls when serving for a more impactful experience.
- For extra sweetness, consider drizzling with icing or powdered sugar glaze.


