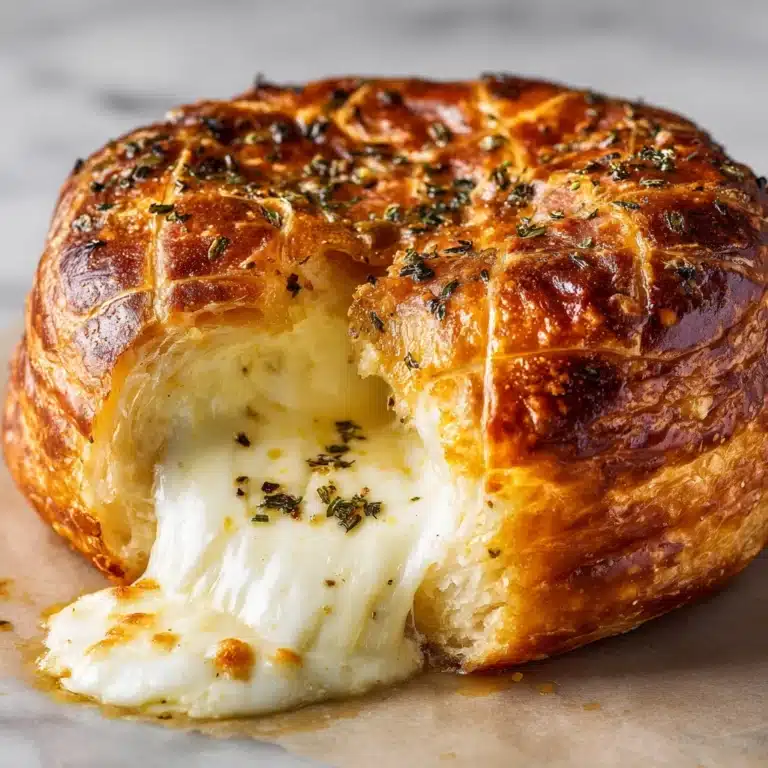
If there ever was a dish that can instantly elevate any gathering or cozy night at home, it has to be Cheesy Garlic Butter Rollups. Imagine golden, buttery rolls stuffed with gooey cheese and punchy garlic, sending waves of irresistible aroma wafting through your kitchen. They’re ridiculously easy to whip up, yet fancy enough to impress. The beauty of this recipe lies in how each bite delivers that perfect harmony of soft bread, molten cheese, and rich, savory butter—sure to leave everyone reaching for seconds.
Ingredients You’ll Need
The magic of Cheesy Garlic Butter Rollups is how just a handful of classic ingredients come together to create something spectacular. Each component does its part, whether adding flavor, texture, or a pop of color. Here’s what you’ll be working with:
- Store-bought crescent roll dough: This is your shortcut hero, providing the perfect tender, flaky base for your rollups with zero fuss.
- Shredded mozzarella cheese: Its meltiness gives you those epic cheese pulls that make every bite pure joy.
- Grated Parmesan cheese: For a salty, nutty finish that deepens the cheesy flavor.
- Unsalted butter: Melted and brushed on, it ensures the rolls are golden and rich.
- Fresh garlic: The star aroma! Freshly minced garlic infuses the butter, making each rollup wonderfully fragrant.
- Chopped parsley: Scattered on top, it adds a vibrant green pop and freshness.
- Salt and pepper: Just a pinch brings everything into balance.
How to Make Cheesy Garlic Butter Rollups
Step 1: Prepare the Garlic Butter
Start by melting your butter in a small saucepan or in the microwave. Once it’s melted and still hot, stir in the minced garlic, a pinch of salt, and pepper. Let this mixture sit for a couple of minutes—the heat will coax all that beautiful flavor out of the garlic, infusing your butter with savory magic that will make your rollups sing.
Step 2: Lay Out the Crescent Dough
Unroll your crescent dough onto a clean surface. Gently separate the triangles and lay them flat. If you want a more uniform rollup, lightly pinch together any perforations. The dough is wonderfully pliable, so don’t stress about perfection.
Step 3: Add the Cheesy Filling
Sprinkle each triangle generously with mozzarella and Parmesan. Leave a small border around the edges so the cheese doesn’t ooze out as you roll. If you love extra flavor, add a little cracked black pepper at this stage. Trust me, the more cheese, the better the cheese pull.
Step 4: Roll and Arrange
Starting from the widest end, gently roll up the dough triangles towards the point to create snug, cheesy bundles. Place them seam-side down on a parchment-lined baking sheet, spacing them out so they have room to puff up and brown.
Step 5: Brush with Garlic Butter
Take your fragrant garlic butter and brush it generously over each unbaked rollup. Don’t be shy—even a little drizzle in the cracks makes a difference. The buttery coat will help each Cheesy Garlic Butter Rollup crisp up and soak in all that garlicky flavor.
Step 6: Bake to Golden Perfection
Slide your sheet into a preheated oven and watch the magic happen. In about 12–15 minutes, the rolls will turn golden, puffed, and irresistibly aromatic. The cheese inside becomes molten, and the tops glisten with buttery sheen.
Step 7: Finish with Parsley and More Cheese
As soon as they’re out of the oven, shower your Cheesy Garlic Butter Rollups with a sprinkle of fresh parsley and a touch more Parmesan. This last step brings a flash of color and that extra “wow” factor. Let them cool slightly before devouring—they’re best enjoyed warm!
How to Serve Cheesy Garlic Butter Rollups
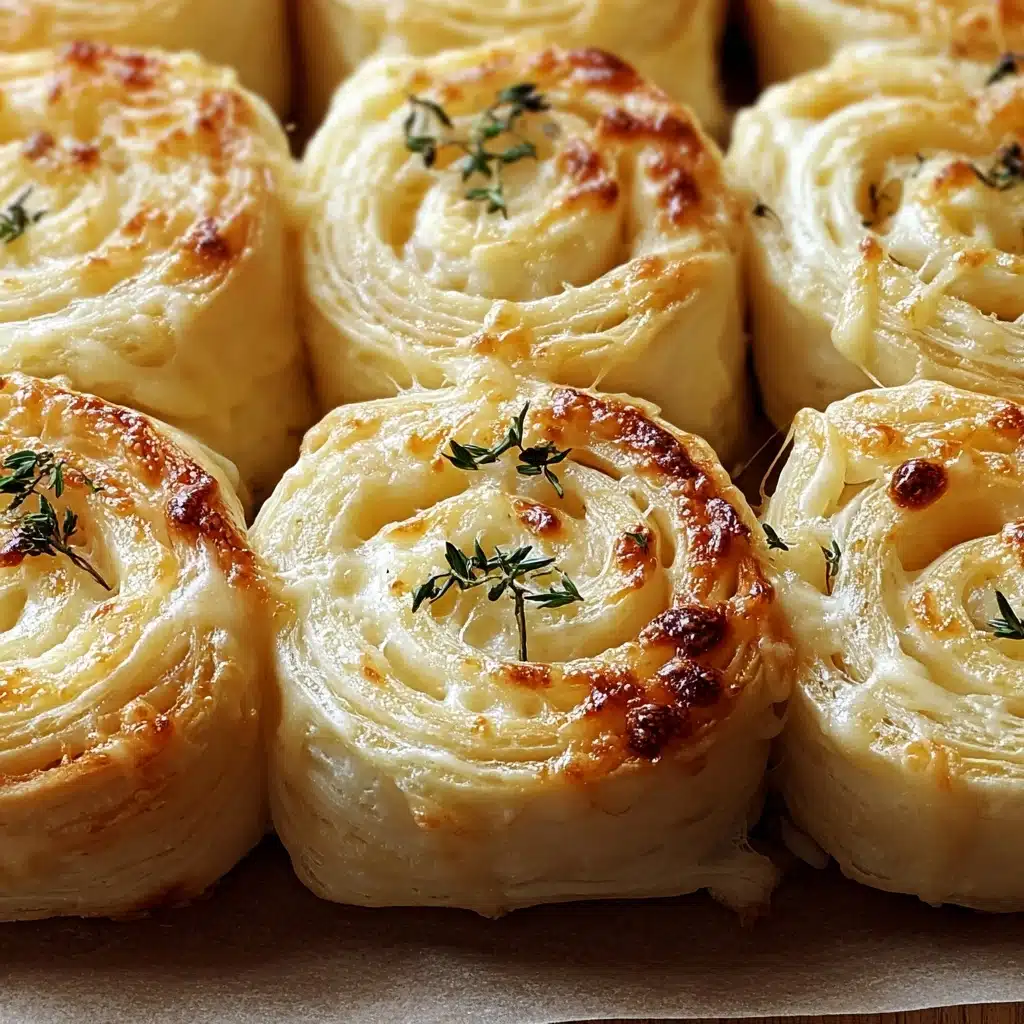
Garnishes
For that final chef’s touch, a flurry of chopped fresh parsley always wins. Don’t forget a little extra Parmesan grated right on top while the rollups are still warm—melty cheese and a fresh herby note take the whole plate up a notch.
Side Dishes
Pair Cheesy Garlic Butter Rollups with classic tomato soup for dunking, a crisp Caesar salad, or your favorite pasta. They’re a natural alongside Italian-inspired dishes, or just as a fun, cheesy snack on their own. If you’re going for a party spread, set them beside an antipasto platter and watch them disappear first!
Creative Ways to Present
You can arrange the rollups in a circular pull-apart pattern for game day, stack them high on a rustic wooden board, or serve them in a bread basket lined with a fun napkin. They also make the cutest appetizer “trees” if you pile them and stick in a sprig of rosemary at the top—guaranteed crowd-pleasers at holiday gatherings!
Make Ahead and Storage
Storing Leftovers
Keep any leftover Cheesy Garlic Butter Rollups in an airtight container in the fridge. They’ll stay delicious for up to three days, making them a dreamy treat for lunchboxes or midnight snacks.
Freezing
Yes, these rollups freeze beautifully! Let them cool completely, then wrap individually and place in a freezer-safe bag. They’ll be good for up to a month. Just don’t forget to label them—future you will thank you when the craving hits.
Reheating
To bring back that just-baked magic, reheat Cheesy Garlic Butter Rollups in a 350°F oven for about 8 minutes, or until the cheese is melty again. The microwave works in a pinch, but the oven is your ticket to restoring that irresistible crisp exterior.
FAQs
Can I use a different kind of cheese for these rollups?
Absolutely! While mozzarella and Parmesan are classic, feel free to experiment with cheddar, provolone, or even a spicy pepper jack. Any good melting cheese will work fabulous in Cheesy Garlic Butter Rollups.
Do I have to use crescent roll dough, or can I make my own?
Crescent roll dough makes things quick and easy, but you can swap in pizza dough or even puff pastry for a unique spin. Just be sure to roll it thin so the filling stays tucked in.
What’s the best way to keep the rollups from unrolling while baking?
Place the rollups seam-side down on the baking sheet and press the tip into the dough to seal. A good brush of butter also helps everything stay together and brown evenly.
How do I make these Cheesy Garlic Butter Rollups vegetarian?
Great news—they’re already vegetarian as written! If you want to go vegan, just substitute plant-based cheese and butter. The method remains the same and the results are still scrumptious.
Can I prep these ahead and bake later?
Definitely! Assemble your Cheesy Garlic Butter Rollups and store them covered in the fridge for up to 8 hours. Brush with garlic butter just before baking, and enjoy hot out of the oven when you’re ready to serve.
Final Thoughts
If you’re looking for something that’s easy, crowd-pleasing, and full of indulgent flavor, Cheesy Garlic Butter Rollups always deliver. Don’t be surprised if they become your new favorite comfort food or the star of your next get-together—give them a try, and get ready for cheesy, garlicky goodness in every bite!
Print
Cheesy Garlic Butter Rollups Recipe
- Prep Time: 15 minutes
- Cook Time: 20 minutes
- Total Time: 35 minutes
- Yield: 6 rollups
- Category: Appetizer
- Method: Baking
- Cuisine: American
- Diet: Vegetarian
Description
These Cheesy Garlic Butter Rollups are a delightful twist on classic garlic bread. Soft bread rolls are filled with a savory garlic butter mixture and gooey melted cheese, then baked to golden perfection. Perfect as a snack, appetizer, or side dish!
Ingredients
For the Rolls:
- 6 soft bread rolls
- 1/2 cup butter, softened
- 3 cloves garlic, minced
- 2 tablespoons fresh parsley, chopped
For the Filling:
- 1 cup shredded mozzarella cheese
- 1/2 cup grated Parmesan cheese
- 1 teaspoon Italian seasoning
Instructions
- Prepare the Garlic Butter: In a small bowl, combine the softened butter, minced garlic, and chopped parsley. Mix well.
- Assemble the Rollups: Flatten each bread roll and spread a generous amount of the garlic butter mixture on one side. Sprinkle mozzarella and Parmesan cheese, then a pinch of Italian seasoning over the butter.
- Roll and Bake: Roll up the bread tightly and place them on a baking sheet. Bake in a preheated oven at 350°F (175°C) for about 15-20 minutes or until golden and cheese is melted.
- Serve: Remove from the oven, let cool slightly, then slice and serve warm. Enjoy these Cheesy Garlic Butter Rollups!
Notes
- Feel free to add cooked and crumbled bacon or chopped fresh herbs for extra flavor.
- These rollups are best served fresh but can be stored in an airtight container in the refrigerator for up to 2 days.

