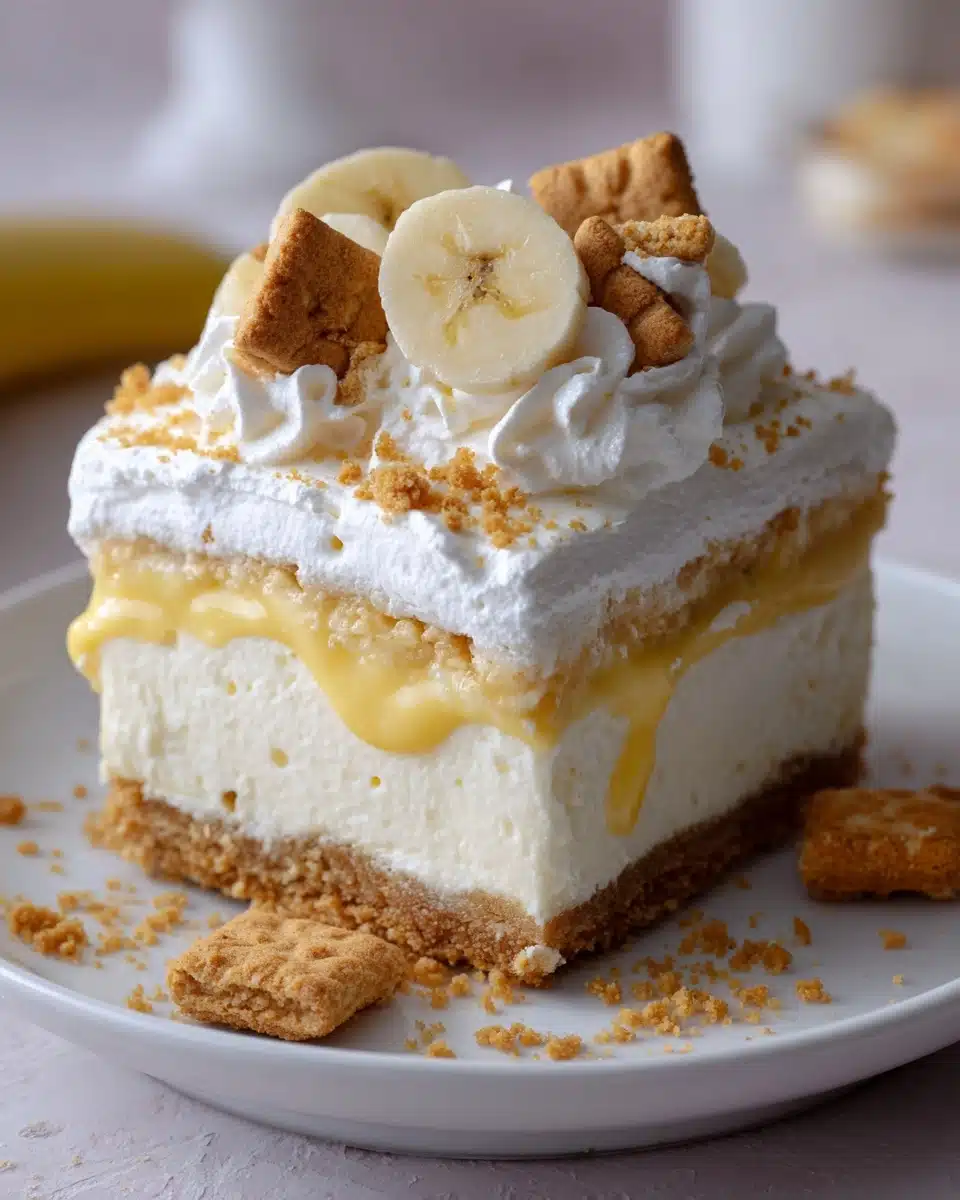
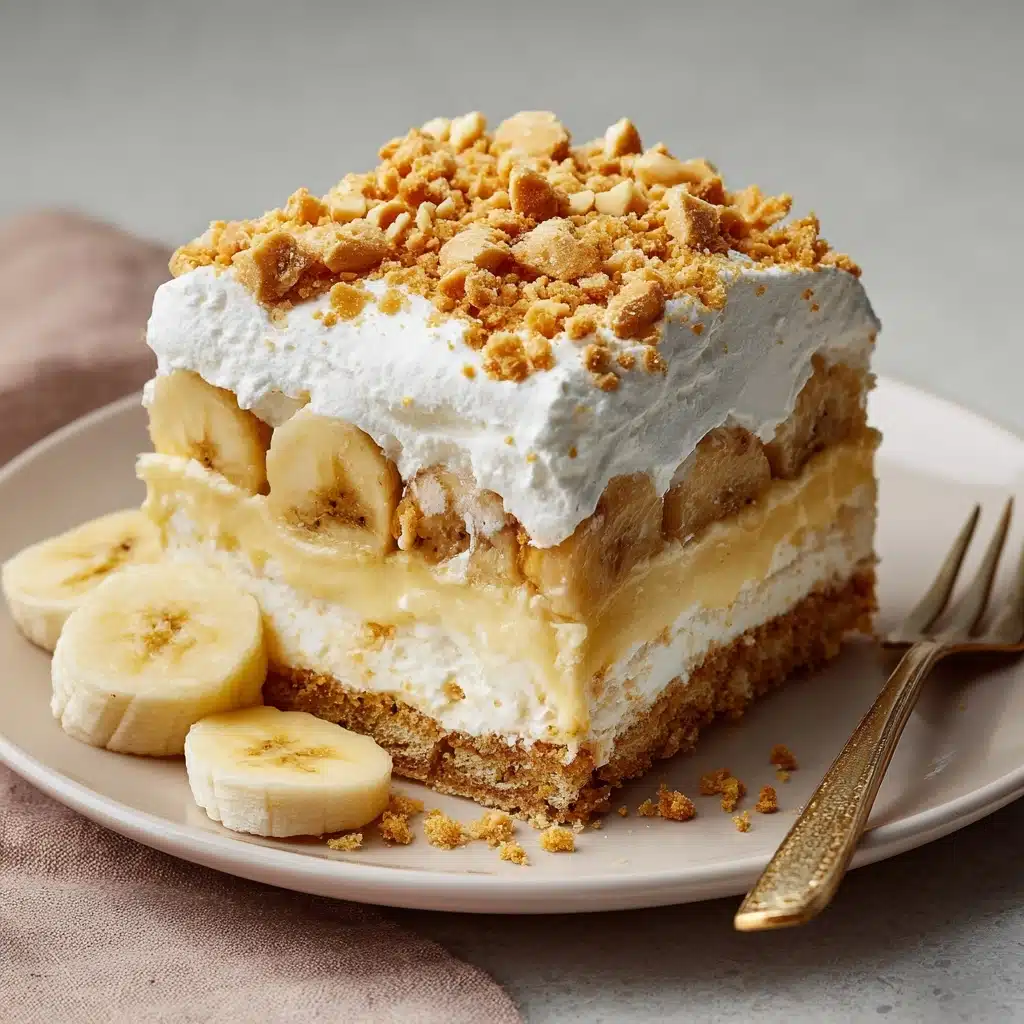
If you’re searching for a dessert that feels like a warm hug in every bite, look no further than these Banana Pudding Dream Bars. Imagine the best parts of classic southern banana pudding — creamy layers, bananas, Nilla wafers — all transformed into easy-to-eat bars that are perfect for sharing (or not!). With a delightful crunch, rich banana flavor, and a silky smooth pudding layer, this treat is not only nostalgic but also impossibly decadent. Whether you’re serving them at a family gathering or sneaking a square for a midnight snack, these dreamy bars are destined to become your new go-to dessert.
Ingredients You’ll Need
The magic of Banana Pudding Dream Bars lies in their simple, familiar ingredients — each one serves up flavor and comfort in every bar! Here’s what you’ll need, and why each item matters for ultimate deliciousness:
- Nilla Wafers: These classic cookies provide that iconic, sweet foundation and a hint of crunch for your dreamy crust.
- Unsalted Butter: Melted butter holds the crust together and gives it a rich, golden finish.
- Instant Banana Pudding Mix: The heart of banana flavor that makes the whole dessert sing — and it thickens up quickly!
- Cold Whole Milk: Turns the pudding mix into a luscious, creamy layer (skip skim — you want that full, decadent feel).
- Heavy Whipping Cream: Gives the whipped topping extra body and a billowy, cloud-like texture.
- Powdered Sugar: Lightly sweetens the whipped cream, keeping things dreamy and not cloying.
- Very Ripe Bananas: Soft, spotted bananas are best for maximum sweetness and that true banana pudding flavor.
- Cream Cheese: Brings a tangy, creamy element to balance all the sweet layers.
- Vanilla Extract: Just a splash enhances the overall flavor and brings the pudding and cream cheese together.
How to Make Banana Pudding Dream Bars
Step 1: Build the Dreamy Nilla Wafer Crust
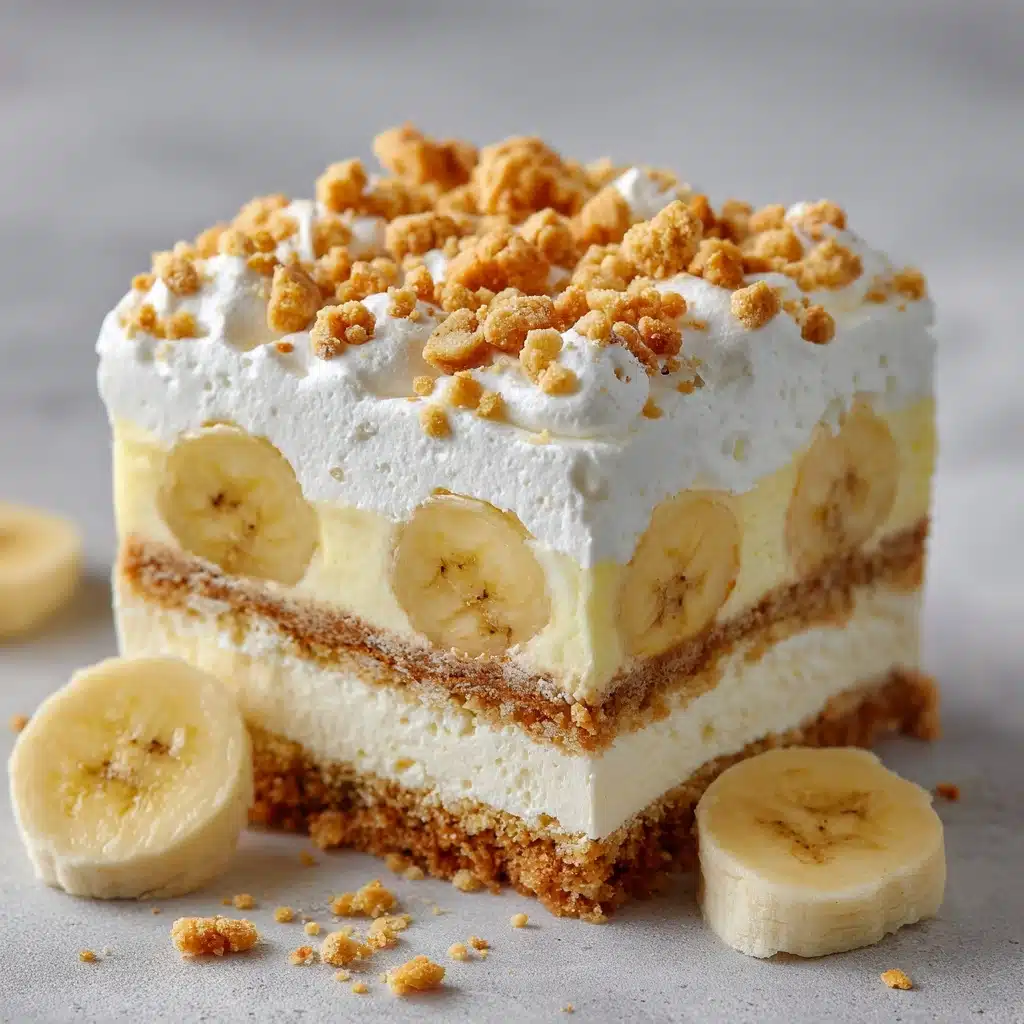
Start by crushing your Nilla wafers until they’re fine crumbs. Mix them with melted butter, making sure every crumb is well-coated — this will help your crust hold together and add buttery deliciousness. Press the mixture firmly into the bottom of a parchment-lined baking pan to form an even base, then chill it in the fridge while you get started on your next layer. This base is the secret to those signature Banana Pudding Dream Bars squares holding their shape!
Step 2: Make the Cream Cheese Layer
Beat softened cream cheese with powdered sugar and vanilla extract until it’s velvety smooth and fluffy. This layer adds the perfect amount of tang and creaminess, balancing out the sweet bananas and pudding. Spread the cream cheese mixture over your chilled crust, making sure to get all the way to the edges for that satisfying layered look.
Step 3: Layer the Bananas
Slice your ripe bananas just before layering to keep them at their freshest and brightest. Arrange the banana slices in a single, cozy layer right on top of the cream cheese — you want every bite of your Banana Pudding Dream Bars to deliver a pop of real banana flavor. Don’t be shy; pile them on generously!
Step 4: Whip Up the Pudding
Using a whisk or electric mixer, combine the instant banana pudding mix with cold whole milk. Beat until smooth and it starts to thicken (about 2 minutes). The instant pudding should be silky with a lovely pale yellow hue. Spread the pudding evenly over your layer of bananas, letting it settle into every little gap for total coverage.
Step 5: Pile on the Whipped Cream
In a clean, chilled bowl, beat the heavy whipping cream with powdered sugar until it forms stiff peaks. This homemade whipped cream is light, fluffy, and far superior to anything from a tub! Dollop and spread it over your pudding layer, creating beautiful swoops and peaks for an irresistible finish to your Banana Pudding Dream Bars.
Step 6: Chill, Slice, and Serve
Pop the assembled bars into the fridge for at least 4 hours — overnight is even better. This step is vital, allowing the layers to set and the flavors to meld. Once chilled, lift the dessert out by the parchment and slice into squares. Each one should hold its shape while showcasing every dreamy layer!
How to Serve Banana Pudding Dream Bars
Garnishes
Add extra flair to your Banana Pudding Dream Bars by sprinkling crushed Nilla wafers on top, arranging fresh banana slices, or even a dusting of cinnamon for a pretty finish. A few mint leaves give a pop of color and freshness that really wows on the dessert table.
Side Dishes
These bars are rich and luscious all on their own, but they also shine accompanied by a scoop of vanilla ice cream or a fruit salad with berries and citrus. A glass of iced coffee or sweet tea can complete the nostalgic Southern vibe.
Creative Ways to Present
Try layering the ingredients in mini mason jars for personal desserts at parties, or cut the bars into bite-sized cubes and serve them as part of a dessert platter. For a summery touch, serve each bar on a banana leaf or in a cupcake liner for easy grab-and-go snacking.
Make Ahead and Storage
Storing Leftovers
Keep leftover Banana Pudding Dream Bars covered in the fridge. They’ll stay delicious for about 3 days, though the bananas may darken slightly over time. For best texture and flavor, press a layer of plastic wrap directly against the surface to minimize air exposure.
Freezing
While the whipped cream and bananas don’t love the freezer, you can freeze assembled bars in a pinch. Wrap them tightly and freeze for up to a month, though expect a softer texture on thawing. For the best results, freeze without the whipped topping and add it fresh after thawing.
Reheating
No need to reheat these dreamy bars! They’re best enjoyed cold, straight from the fridge. If you’ve frozen them, thaw overnight in the refrigerator for the creamiest texture and true banana pudding experience.
FAQs
Can I use homemade pudding instead of instant?
Absolutely! If you have a favorite homemade banana pudding recipe, you can use that instead of instant pudding mix — just make sure it’s thick enough to hold its shape in bars.
What’s the best way to keep bananas from browning?
Be sure to use ripe, but not overripe, bananas and slice them just before layering. You can also toss banana slices lightly with lemon juice to slow down browning without affecting the flavor.
Can I make Banana Pudding Dream Bars gluten-free?
Yes! Swap out regular Nilla wafers for your favorite gluten-free vanilla cookies and double-check that your pudding mix is gluten-free as well. The bars will still be just as dreamy.
Can these bars be made in advance?
Definitely. In fact, Banana Pudding Dream Bars taste even better after a night in the fridge, as the flavors meld and the bars set up perfectly for cutting and serving.
What if I don’t have heavy whipping cream?
If you’re in a pinch, you can substitute stabilized whipped topping, but for the dreamiest texture and fresh flavor, homemade whipped cream is truly worth the extra few minutes.
Final Thoughts
I can’t wait for you to fall in love with these Banana Pudding Dream Bars the way I have — every slice is like a sweet little slice of sunshine. Whether for a gathering or just a weeknight treat, they’re guaranteed to bring big smiles and second helpings. Go ahead and make a batch; I promise, you’ll be dreaming about them long after the last crumb is gone!
Print
Banana Pudding Dream Bars Recipe
- Prep Time: 25 minutes
- Cook Time: 0 minutes
- Total Time: 4 hours 25 minutes (including chilling)
- Yield: 9-12 bars
- Category: Dessert
- Method: No-Bake
- Cuisine: Southern American
- Diet: Vegetarian
Description
A decadent and nostalgic dessert that layers buttery Nilla wafer crust, creamy banana pudding, sweet cream cheese, ripe bananas, and fluffy whipped cream into dreamy, shareable bars.
Ingredients
- 2 cups Nilla wafer crumbs
- 1/2 cup unsalted butter, melted
- 1 (8 oz) package cream cheese, softened
- 1/2 cup powdered sugar (for cream cheese layer)
- 1 tsp vanilla extract
- 2–3 very ripe bananas, sliced
- 1 (3.4 oz) box instant banana pudding mix
- 2 cups cold whole milk
- 1 cup heavy whipping cream
- 2 tbsp powdered sugar (for whipped cream)
Instructions
- Mix crushed Nilla wafers with melted butter and press into a parchment-lined 9×9-inch pan. Chill while preparing the filling.
- In a bowl, beat cream cheese, 1/2 cup powdered sugar, and vanilla until smooth. Spread over the chilled crust.
- Arrange banana slices evenly over the cream cheese layer.
- Whisk pudding mix with cold milk for 2 minutes until thickened. Spread over bananas.
- In a clean bowl, beat heavy cream and 2 tbsp powdered sugar until stiff peaks form. Spread whipped cream over pudding layer.
- Chill for at least 4 hours or overnight. Slice into bars and serve cold.
Notes
- Garnish with crushed Nilla wafers, fresh banana slices, or a dash of cinnamon.
- For easier slicing, refrigerate overnight and use a sharp knife.
- You can swap Nilla wafers for gluten-free cookies or graham crackers if desired.

