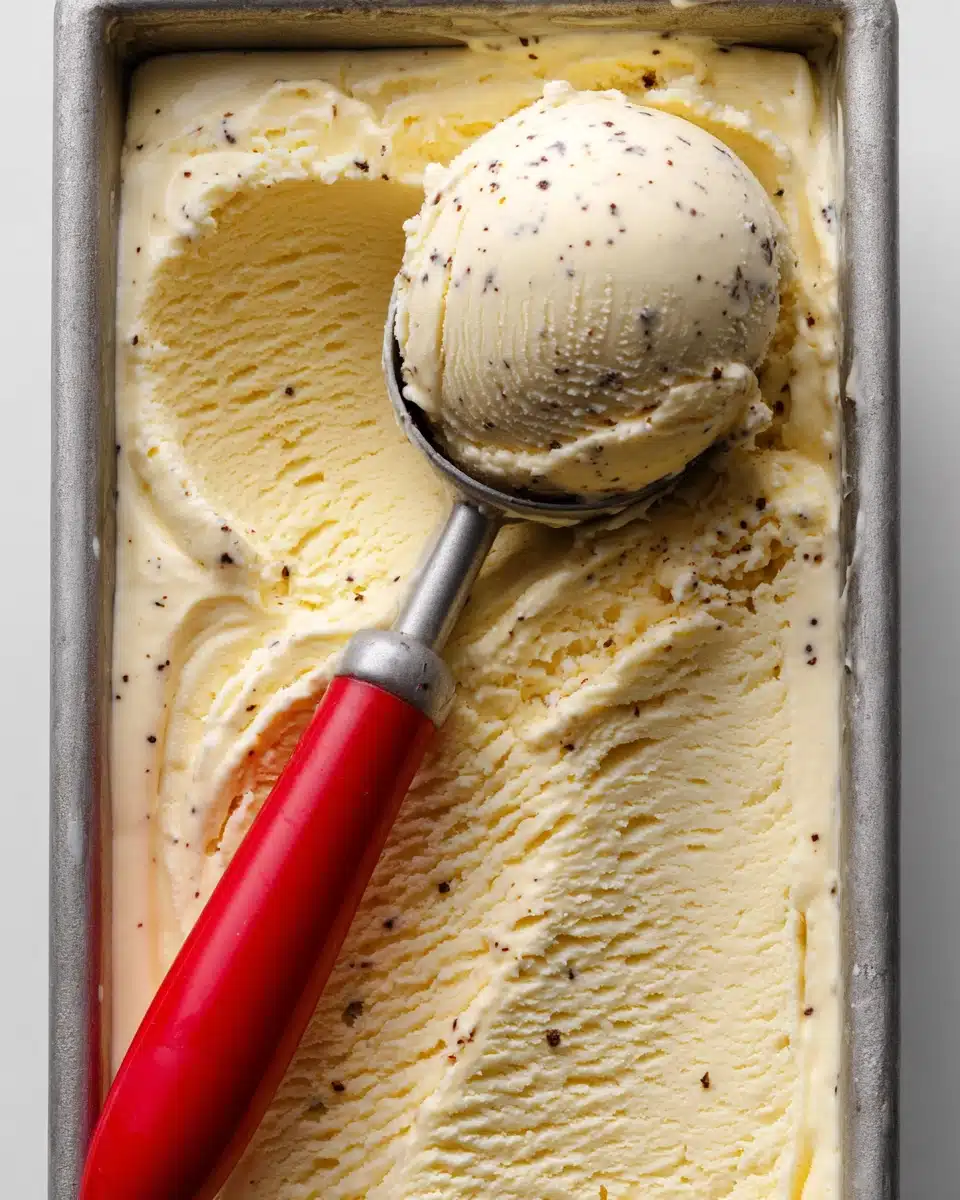
There is truly nothing more nostalgic or beloved than Homemade Vanilla Ice Cream. Silky, creamy, and perfectly sweet, this treat dances with flecks of real vanilla and is beguilingly simple to make in your own kitchen. Whether you’re whipping up a batch for a summer celebration or topping off a classic pie, this recipe delivers the pure, comforting essence of old-fashioned ice cream. Trust me—once you’ve savored a spoonful of this homemade wonder, you’ll understand why it’s a year-round favorite that never goes out of style.
Ingredients You’ll Need
This recipe for Homemade Vanilla Ice Cream comes together with just a handful of classic ingredients. Each one plays a key role—creating a symphony of flavor, texture, and that signature creamy color we all crave.
- Heavy Cream: Provides the luxurious, rich consistency and helps give the ice cream its dreamy mouthfeel.
- Whole Milk: Adds body and lightens up the heavy cream so the ice cream isn’t overly rich.
- Sugar: Sweetens the base and also keeps the texture smooth by interfering with ice crystal formation.
- Egg Yolks: These add richness, create a custard base, and ensure your ice cream stays velvety after freezing.
- Vanilla Bean or Pure Vanilla Extract: Delivers that iconic flavor; the specks from the bean make every scoop extra special.
- Salt: Just a pinch, to balance and intensify all the flavors.
How to Make Homemade Vanilla Ice Cream
Step 1: Create the Custard Base
In a medium saucepan, combine the heavy cream and whole milk over medium heat. While it gently warms, whisk together the egg yolks, sugar, and a pinch of salt until the mixture is pale and creamy. Slowly stream the warm milk mixture into the eggs about a half-cup at a time, whisking constantly—this tempers the eggs so they don’t curdle. Pour everything back into the saucepan and cook gently, stirring constantly with a wooden spoon, until the custard thickens enough to coat the back of the spoon. Take care not to let it boil!
Step 2: Infuse That Gorgeous Vanilla
Once your custard’s off the heat, split your vanilla bean down the center and scrape out those fragrant seeds (or stir in high-quality vanilla extract if that’s what you’re using). Swirl the seeds and pod into the custard, letting it sit for about 30 minutes so the vanilla can fully infuse every silky drop.
Step 3: Chill Thoroughly
Remove the vanilla pod and pour the custard through a fine-mesh sieve into a clean bowl. Press plastic wrap directly onto the surface and chill in the refrigerator for at least 4 hours—or overnight. This step is crucial for both safety and achieving that ultra-smooth texture characteristic of great Homemade Vanilla Ice Cream.
Step 4: Churn to Perfection
Once nicely chilled, pour your base into an ice cream maker. Churn according to the manufacturer’s directions until your ice cream looks like thick, soft-serve magic. The transformation is so satisfying to watch, and the aroma will have everyone circling the kitchen!
Step 5: Freeze Until Firm
At this point, your Homemade Vanilla Ice Cream will be perfectly scoopable but still quite soft. Transfer it to a lidded container, press a piece of waxed paper or parchment against the surface to prevent ice crystals, and freeze for at least 2-4 hours until set. Now, all that’s left is to scoop and savor.
How to Serve Homemade Vanilla Ice Cream

Garnishes
Dress up your Homemade Vanilla Ice Cream with an array of tempting garnishes! Try a drizzle of hot fudge or salted caramel, toasted nuts for crunch, or a dusting of cinnamon. Fresh berries on top make a vibrant, juicy counterpoint while shaved chocolate or sprinkles add pure joy for both kids and adults.
Side Dishes
This ice cream is the ultimate blank canvas—pair it with a slice of warm apple pie, gooey brownies, or roasted peaches for a next-level dessert experience. It’s equally divine served atop a homemade fruit crisp or sandwiched between two cookies for a DIY ice cream sandwich.
Creative Ways to Present
Get playful! Layer scoops in a tall glass with berries and cake cubes for a parfait, or fill mini cones for a fun party treat. You can even use Homemade Vanilla Ice Cream as the base for classic floats—just add your favorite soda or cold brew coffee and watch your guests light up.
Make Ahead and Storage
Storing Leftovers
Store any leftover Homemade Vanilla Ice Cream in an airtight, freezer-safe container. Press a piece of parchment or wax paper tightly against the surface before sealing—this small step helps fend off freezer burn and pesky ice crystals, keeping each scoop fresh and luscious.
Freezing
Homemade ice cream is best enjoyed within 1-2 weeks of churning. The texture may slowly change as time passes and tiny ice crystals form, but a properly sealed container will help preserve its creamy quality as long as possible.
Reheating
While ice cream itself isn’t something you “reheat,” you can let it sit at room temperature for 5-10 minutes before serving to soften it, making scooping easier and highlighting its best texture and flavor.
FAQs
Can I make Homemade Vanilla Ice Cream without an ice cream maker?
Yes! Chill the custard base well, then pour into a freezer-safe dish. Freeze, stirring vigorously every 30 minutes for a few hours. While the texture may not be quite as airy as churned ice cream, it’s still creamy and delicious.
What’s the difference between using vanilla bean and vanilla extract?
Vanilla bean gives you those striking, aromatic specks and slightly more nuanced flavor, while high-quality extract is convenient and still wonderfully tasty. Use whichever you have—the ice cream will be fabulous either way.
Can I make this recipe dairy-free?
Absolutely! Swap the milk and cream for rich coconut milk or your favorite unsweetened plant-based cream and milk alternatives. The process stays the same, and you’ll still enjoy creamy, delicious results.
How do I prevent ice crystals from forming?
Chill the base fully before churning, store in an airtight container, and always press parchment or wax paper directly on the surface. These steps significantly reduce ice crystals and keep your Homemade Vanilla Ice Cream smooth as silk.
Can I add mix-ins like chocolate chips or cookie dough?
Definitely—add your favorite mix-ins during the last few minutes of churning, just before transferring to your storage container. This way they’re evenly distributed and don’t sink to the bottom.
Final Thoughts
If you’re ready to experience nostalgia and pure joy in every bite, don’t wait another day to whip up this Homemade Vanilla Ice Cream. It’s simple, satisfying, endlessly versatile, and guaranteed to become a family tradition. Give it a try and discover just how magical homemade truly tastes!
Print
Homemade Vanilla Ice Cream Recipe
- Prep Time: 20 minutes
- Cook Time: 10 minutes
- Total Time: 4 hours 30 minutes
- Yield: 1 quart
- Category: Dessert
- Method: Custard, Churned
- Cuisine: American
- Diet: Vegetarian
Description
Creamy, nostalgic, and flecked with real vanilla, this classic custard-based ice cream is rich, smooth, and perfect for topping pies or savoring solo.
Ingredients
- 2 cups heavy cream
- 1 cup whole milk
- 3/4 cup granulated sugar
- 5 large egg yolks
- 1 vanilla bean (split and scraped) or 2 tsp pure vanilla extract
- 1/8 tsp salt
Instructions
- In a medium saucepan, combine heavy cream and milk. Heat over medium until just steaming, not boiling.
- In a separate bowl, whisk egg yolks, sugar, and salt until pale and smooth. Slowly whisk in about 1/2 cup of the warm milk mixture to temper.
- Pour tempered yolks back into the saucepan. Cook over medium, stirring constantly, until custard thickens and coats the back of a spoon (about 170°F). Do not boil.
- Remove from heat. Stir in vanilla bean seeds and pod (or vanilla extract). Let steep for 30 minutes if using vanilla bean.
- Strain custard through a fine mesh sieve into a clean bowl. Cover surface directly with plastic wrap and refrigerate for at least 4 hours or overnight.
- Churn chilled base in an ice cream maker according to manufacturer’s instructions until thick and creamy.
- Transfer to a freezer-safe container, press parchment or wax paper onto the surface, and freeze 2–4 hours until firm.
Notes
- Soften before scooping by letting it sit at room temperature for 5–10 minutes.
- Add mix-ins like chocolate chips or cookie dough during the last minute of churning.
- Swap cream and milk for coconut milk or plant-based alternatives for dairy-free version.

