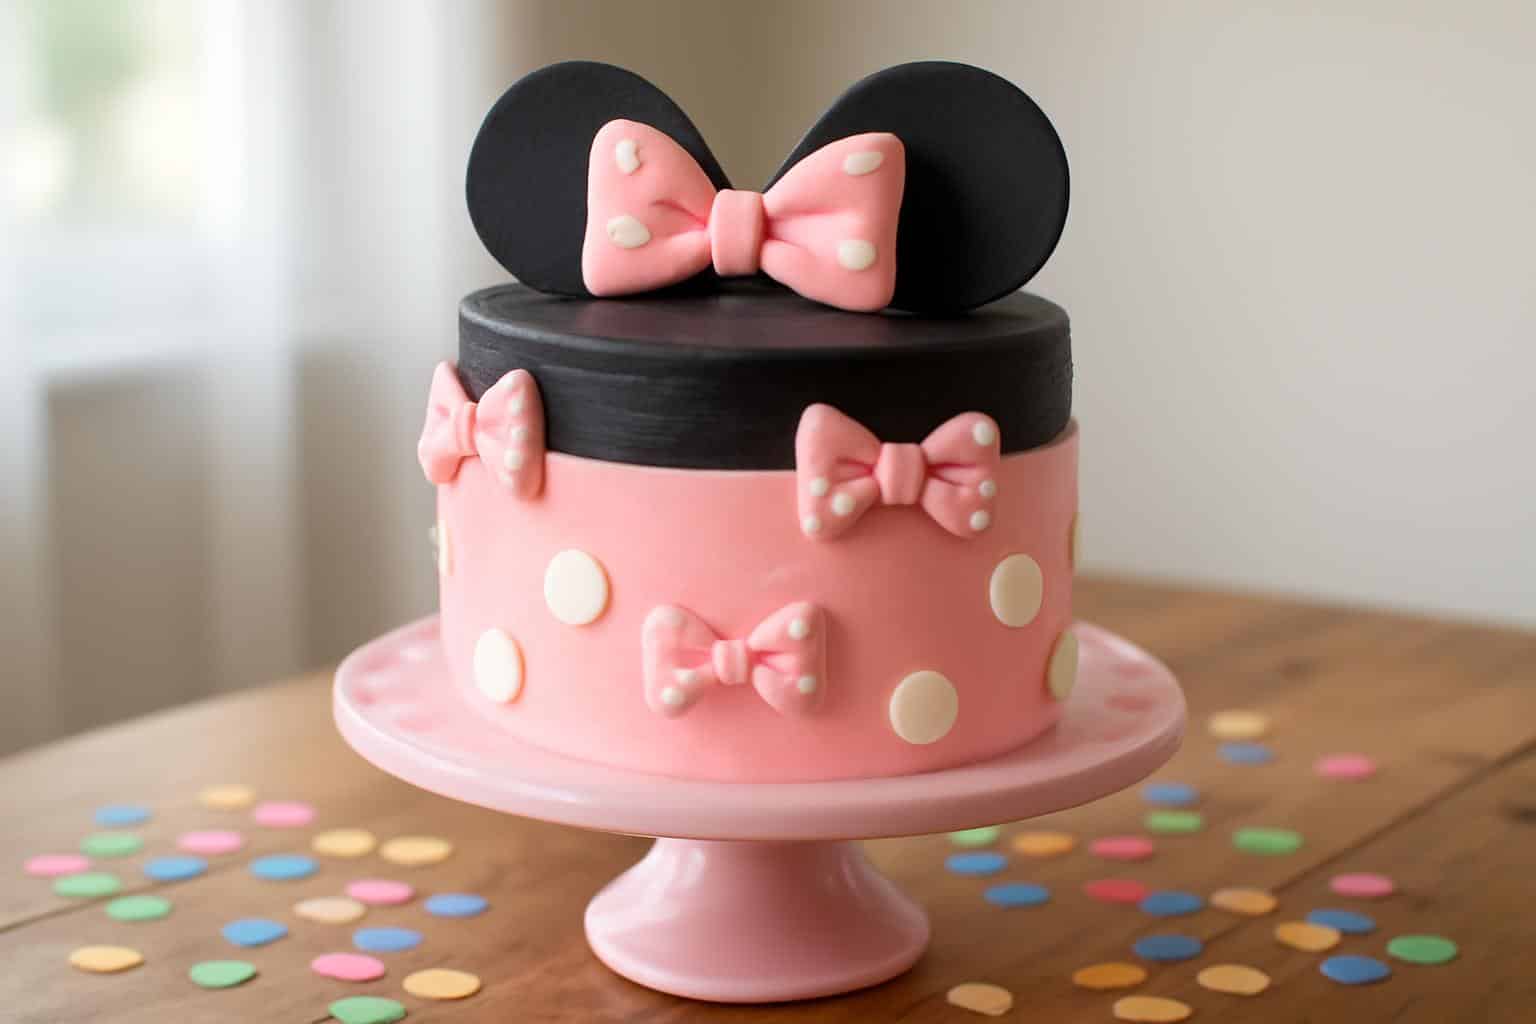
There’s something truly magical about making a themed cake that lights up a child’s face, and this Minnie Mouse cake does just that. Whether you’re celebrating a birthday or a special occasion, this recipe helps you create a charming dessert that’s as delightful to look at as it is to eat.

With simple ingredients and straightforward steps, you’ll soon have a Minnie Mouse cake that looks professionally made but is entirely homemade. Let’s dive into this fun baking adventure and bring Minnie to life on your party table.
Why You’ll Love This Recipe
- Easy-to-follow steps perfect for beginner bakers or parents.
- Uses common ingredients you likely have in your pantry.
- Themed decoration that kids will absolutely adore.
- Moist, tender cake paired with smooth buttercream frosting.
- Customizable colors and decorations to suit your party style.
Ingredients
Gather these ingredients to bake the cake and prepare the frosting as well as the Minnie Mouse decorations.
- 2 1/2 cups all-purpose flour
- 2 1/2 tsp baking powder
- 1/2 tsp salt
- 1 cup unsalted butter, softened
- 1 3/4 cups granulated sugar
- 4 large eggs
- 1 tbsp vanilla extract
- 1 cup whole milk
- 4 cups powdered sugar (for frosting)
- 1 cup unsalted butter, softened (for frosting)
- 1 tsp vanilla extract (for frosting)
- 2-3 tbsp heavy cream (for frosting)
- Red food coloring (gel or liquid)
- Black food coloring (gel recommended)
- Edible candy bows or red fondant for decoration
- Black fondant or modeling chocolate for Minnie’s ears
Recipe Details
- Prep Time: 30 minutes
- Cook Time: 30 minutes
- Total Time: 1 hour
- Servings: 12 slices
- Calories: Approximately 350 per serving
How to Make Minnie mouse cake
- Preheat your oven to 350°F and grease two 8-inch round cake pans, lining them with parchment paper for easy removal.
- In a medium bowl, whisk together the flour, baking powder, and salt; set aside.
- In a large bowl, beat the softened butter and sugar together until light and fluffy, about 3-4 minutes using a mixer on medium speed.
- Add eggs one at a time, beating well after each addition, then stir in the vanilla extract.
- Alternate adding the flour mixture and milk to the butter mixture, beginning and ending with the flour, mixing until just combined; avoid overmixing.
- Divide the batter evenly between the two pans and bake for 28-32 minutes, or until a toothpick inserted in the center comes out clean. Let cakes cool in pans for 10 minutes before transferring to wire racks.
- While the cakes cool, prepare the buttercream frosting by beating the butter until creamy, gradually adding powdered sugar, then vanilla and heavy cream until fluffy. Divide frosting into three bowls and color one with red food coloring, one with black, leaving one plain for mixing if desired.
- Once cooled, level the cakes if needed. Stack one layer with a thin spread of frosting, then cover the entire cake with a crumb coat and chill for 20 minutes.
- Finish frosting the cake smoothly with red buttercream. Shape black fondant or modeling chocolate into two large circles for ears and attach to the top of the cake. Add a red candy bow or fondant bow between the ears to complete Minnie’s signature look.
Tips for the Best Results
- Make sure your butter is softened at room temperature for smooth batter and frosting.
- Use gel food coloring for the most vibrant red and black without thinning the frosting.
- Chill the cake after crumb coating to avoid crumbs mixing into your final layer of frosting.
- Use a serrated knife to level your cakes for a stable, even stack.
- For sturdier ears, allow the fondant or modeling chocolate to dry a few hours before placing on the cake.
Storage and Reheating
Store the Minnie mouse cake covered in an airtight cake container or wrapped gently with plastic wrap in the refrigerator for up to 4 days. This keeps the frosting fresh and the cake moist.
If you wish to freeze the cake, wrap it tightly in plastic wrap and then aluminum foil, freezing for up to 2 months. Thaw overnight in the refrigerator before serving and bring to room temperature for best flavor.
Frequently Asked Questions
Can I make this cake gluten-free?
Yes! Substitute the all-purpose flour with a gluten-free flour blend suitable for baking. Be sure the blend contains xanthan gum or add it separately to help with texture.
What can I use instead of fondant for the ears?
You can use black-colored chocolate disks or cookies shaped into circles to create Minnie’s ears if you prefer not to work with fondant or modeling chocolate.
How far in advance can I decorate the cake?
It’s best to bake the cake and prepare the frosting a day ahead. You can assemble and decorate the cake the day before the event and keep it refrigerated until serving.
Can I use buttercream from a store-bought mix?
Yes, store-bought frosting can be used to save time. Just add a little fresh vanilla or heavy cream to improve flavor and texture, and tint it with food coloring as needed.