
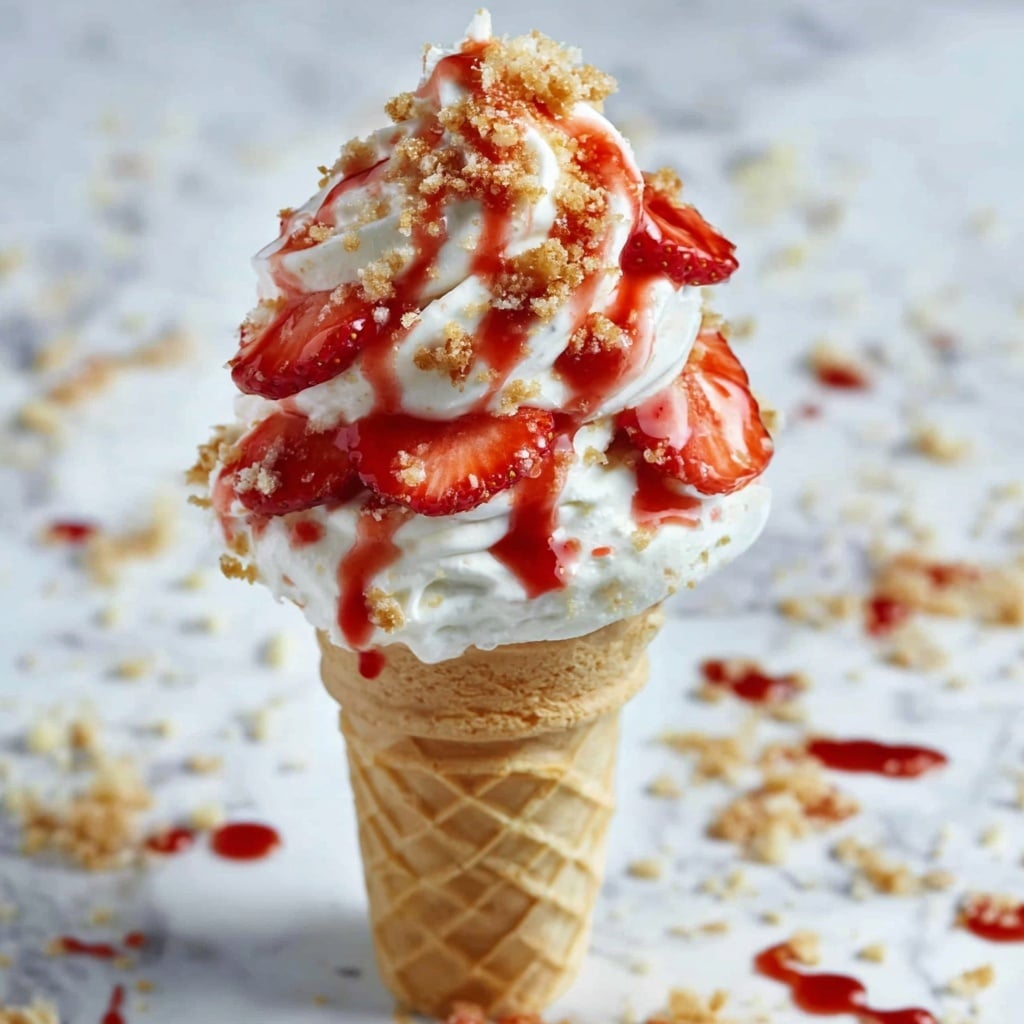
There is something utterly delightful about the Strawberry Crunch Cheesecake Cones Recipe that makes it an irresistible treat for any occasion. Imagine crisp waffle cones enveloped in a smooth layer of melted white chocolate, topped with a vibrant, fruity crunch, and filled to the brim with luscious no-bake cheesecake and fresh strawberries. This recipe brings together the best of textures and flavors—creamy, crunchy, sweet, and fresh—all harmonizing perfectly in a handheld dessert that’s as beautiful as it is delicious. Whether you’re aiming to impress guests or simply want a new favorite dessert to indulge in, these cheesecake cones will quickly become a cherished go-to.

Ingredients You’ll Need
Gathering the right ingredients for the Strawberry Crunch Cheesecake Cones Recipe is both simple and essential. Each component is chosen to balance taste and texture, making the final creation wonderfully fresh and indulgent.
- 6 Waffle or Sugar Cones: These provide the perfect crunchy vessel for your cheesecake filling.
- 5 oz white chocolate, melted: Adds a creamy sweetness and helps the strawberry crunch topping stick.
- 1 cup Strawberry Crunch Topping: This topping adds vibrant color and an irresistible crunch.
- 24 oz No Bake Cheesecake Filling (premade or homemade): The creamy heart of the cones, rich and velvety without any oven time.
- 6-8 strawberries, diced: Fresh and juicy, they bring brightness and balance to the sweetness.
- Strawberry Glaze or Sauce, as needed: A luscious drizzle to elevate flavor and add a glossy finish.
How to Make Strawberry Crunch Cheesecake Cones Recipe
Step 1: Melt the White Chocolate
Start by melting the white chocolate according to package instructions until it becomes smooth and pourable. This step is the foundation for coating your cones to give them a luscious, sweet shell that will hold the strawberry crunch topping perfectly.
Step 2: Coat the Cones
Dip the top part of each waffle or sugar cone into the melted white chocolate. Tap off any excess chocolate gently to avoid dripping. This chocolate coating not only tastes divine but also acts as glue for the topping to stick firmly.
Step 3: Add Strawberry Crunch
Immediately after chocolate dipping, roll the coated edge of the cones in the strawberry crunch topping. The crunch sticks beautifully, adding a burst of flavor and a colorful, textured finish that’s as pretty as it is delicious.
Step 4: Set the Cones
Place the coated cones upright on a parchment-lined baking sheet. Let them rest for 5 to 10 minutes to allow the white chocolate to harden fully. This is a crucial step to prevent all the toppings from sliding off during filling.
Step 5: Prepare the Filling Bag
Transfer your no-bake cheesecake filling into a piping bag or a Ziploc bag with a corner snipped off. This makes filling the cones a breeze and gives you more control over the layers inside.
Step 6: Initial Filling
Pipe the cheesecake filling carefully into each cone until it’s about halfway full. Spoon a small dollop of strawberry glaze over the cheesecake filling, then add a few diced fresh strawberries for a juicy surprise in every bite.
Step 7: Final Filling
Continue piping until the cones are filled to the top. Add another layer of strawberry glaze and sprinkle extra diced strawberries on top for eye-catching freshness and flavor.
Step 8: Finish and Decorate
Sprinkle additional strawberry crunch topping over the tops of the filled cones. For an extra touch of indulgence, drizzle more melted white chocolate and add a final light dusting of topping. Each cone becomes a masterpiece of texture and flavor.
Step 9: Chill and Serve
Chill the assembled cones in your refrigerator for 10 to 20 minutes. This brief rest sets everything beautifully and ensures the cheesecake filling is firm yet creamy, making each bite perfect.
How to Serve Strawberry Crunch Cheesecake Cones Recipe

Garnishes
To enhance the visual and flavor appeal, top each cone with a small fresh strawberry or a dusting of powdered sugar. Adding a mint leaf can also bring a fresh pop of color and aroma that complements the sweetness beautifully.
Side Dishes
These cones shine as a standalone dessert, but pairing them with a light fruit salad or a scoop of vanilla ice cream adds a refreshing balance. A cup of iced tea or lemonade makes a lovely beverage to round out your serving.
Creative Ways to Present
Serve the cones upright in a stylish stand or nestled in a box filled with crinkled tissue paper for parties. You can even wrap the cone in clear cellophane tied with a ribbon for a charming gift idea that friends and family will adore.
Make Ahead and Storage
Storing Leftovers
Keep your leftover Strawberry Crunch Cheesecake Cones Recipe refrigerated in an airtight container. They will stay fresh and creamy for up to two days, making them perfect for prepping ahead or enjoying the next day.
Freezing
If you want to save your cheesecake cones for longer, freeze them in a single layer on a baking sheet, then transfer to a freezer bag. Consume within one month for best quality, defrosting in the refrigerator before serving.
Reheating
Since these are chilled desserts, reheating is not recommended. Instead, serve them straight from the fridge for the best texture and flavor experience.
FAQs
Can I use regular strawberries instead of diced ones?
Absolutely! You can slice or even mash the strawberries if you prefer, but diced strawberries give the best texture and bite alongside the crunchy topping.
Is it okay to use homemade no-bake cheesecake filling?
Yes, homemade no-bake cheesecake filling works wonderfully and allows you to customize sweetness and creaminess. Just make sure it’s firm enough to pipe nicely into the cones.
What do I do if the white chocolate hardens before I finish dipping cones?
Just gently reheat the white chocolate in short bursts in the microwave, stirring in between, to keep it smooth and pourable without scorching.
Can this recipe be made vegan or dairy-free?
With some ingredient swaps like vegan white chocolate, dairy-free cheesecake filling, and cones, you can create a delicious vegan version. Just ensure all substitutions melt and hold up like the originals.
How far in advance can I prepare these cones?
You can assemble the Strawberry Crunch Cheesecake Cones Recipe up to a day ahead. Just keep them refrigerated and cover them well, so the cones stay crisp and the filling fresh.
Final Thoughts
There is something truly magical about the way the Strawberry Crunch Cheesecake Cones Recipe combines familiar flavors into an extraordinary treat. It’s fun to make, impressive to serve, and downright delicious to eat. Don’t hesitate to whip these up for your next gathering or simply to treat yourself—once you try them, they’re bound to become a cherished favorite in your dessert repertoire!
Print
Strawberry Crunch Cheesecake Cones Recipe
- Prep Time: 10 minutes
- Cook Time: 10 minutes
- Total Time: 20 minutes
- Yield: 6 servings
- Category: Dessert
- Method: No-Cook
- Cuisine: American
- Diet: Vegetarian
Description
Enjoy a delightful and visually stunning Strawberry Crunch Cheesecake Cones recipe that combines creamy no-bake cheesecake filling with crispy waffle cones, sweet melted white chocolate, and a vibrant strawberry crunch topping. Perfect for a refreshing dessert that’s easy to assemble and sure to impress.
Ingredients
Cones and Coating
- 6 Waffle or Sugar Cones
- 5 oz White Chocolate, melted
- 1 cup Strawberry Crunch Topping
Filling
- 24 oz No Bake Cheesecake Filling (premade or homemade)
- 6–8 Strawberries, diced
- Strawberry Glaze or Sauce, as needed
Instructions
- Melt the White Chocolate: Melt the white chocolate according to the package directions until it becomes smooth and pourable for easy dipping.
- Coat the Cones: Dip the top part of each waffle or sugar cone into the melted white chocolate, tapping off any excess chocolate to avoid drips.
- Add Strawberry Crunch: Immediately roll the white chocolate-coated portion of the cone in strawberry crunch topping, pressing gently so the topping adheres well.
- Set the Cones: Place the coated cones upright on a parchment-lined baking sheet and let them rest for 5-10 minutes until the chocolate hardens.
- Prepare the Filling Bag: Transfer the no-bake cheesecake filling into a piping bag or a Ziploc bag, and snip off one corner to create a piping tip for controlled filling.
- Initial Filling: Pipe the cheesecake filling halfway into each cone, then add a small spoonful of strawberry glaze and a few diced fresh strawberries on top for added flavor and texture.
- Final Filling: Pipe the remaining cheesecake filling to fill each cone to the top, then add another layer of strawberry glaze and diced strawberries as garnish.
- Finish & Decorate: Sprinkle additional strawberry crunch topping on the surface, drizzle with more melted white chocolate if desired, and add a final dusting of strawberry crunch for extra crunch and presentation.
- Chill & Serve: Refrigerate the fully assembled cheesecake cones for 10-20 minutes before serving to allow the filling to set and enhance the texture.
Notes
- Ensure the white chocolate is not overheated to prevent burning and maintain smoothness.
- The strawberry crunch topping should be pressed gently to stick well to the melted chocolate.
- Use fresh strawberries for the best flavor and texture contrast.
- Chilling the cones before serving helps the cheesecake filling firm up for easier eating.
- These cones are best enjoyed within a day to preserve the crispiness of the cones.


