

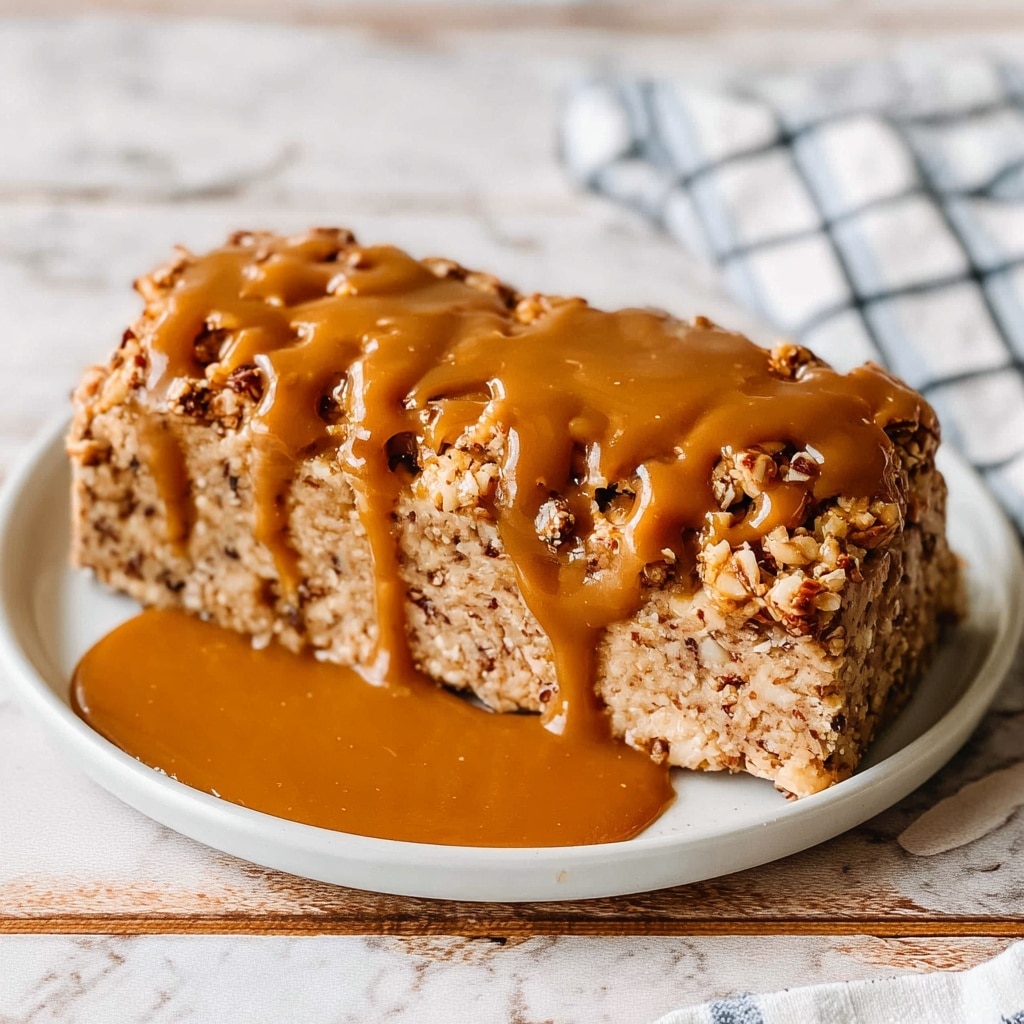
The Vintage Ice Cream Bread Recipe is a delightful, nostalgic treat that brings together the creamy sweetness of ice cream with the comforting texture of homemade bread. This simple two-ingredient bread is perfect when you want a quick and charming baked good without complicated steps. Whether you choose classic vanilla or a fun ice cream flavor, this recipe yields a moist, tender loaf with a subtle sweetness and a tender crumb that feels like a warm hug from the past. It’s a wonderfully easy way to turn your favorite ice cream into something new and irresistible.

Ingredients You’ll Need
The magic of the Vintage Ice Cream Bread Recipe lies in its simplicity. Each ingredient plays an essential role in creating a tender, flavorful bread with minimal fuss. These ingredients are simple but hit all the right notes for taste, texture, and color.
- 2 cups full-fat ice cream (softened, any flavor): This is the star of the show, bringing moisture, sweetness, and richness that makes the bread irresistibly soft.
- 1 1/2 cups self-rising flour: Provides the structure and the perfect rise without needing extra leavening agents, ensuring a tender crumb.
How to Make Vintage Ice Cream Bread Recipe
Step 1: Prepare Your Oven and Pan
Start by preheating your oven to 350°F (175°C). Grease a 9×5-inch loaf pan lightly or line it with parchment paper. This step prevents sticking and helps the bread come out smoothly after baking.
Step 2: Mix Ice Cream and Flour
In a large mixing bowl, combine the softened ice cream and self-rising flour. Stir them gently until just combined to form a thick batter. Resist the urge to overmix, as you want the bread to stay tender and soft, not dense.
Step 3: Pour Batter into Pan
Transfer your batter into the prepared loaf pan and smooth out the top with a spatula to ensure even baking. This simple, even surface helps the bread bake consistently throughout.
Step 4: Bake Your Bread
Bake in your preheated oven for 35 to 40 minutes. Check for doneness by inserting a toothpick in the center; it should come out clean or with a few moist crumbs but no wet batter. Remember, every oven is a bit different, so keep an eye on it toward the end.
Step 5: Cool Before Slicing
Let the bread cool in the pan for about 10 minutes to set, then carefully remove it and transfer to a wire rack. Allow it to cool completely before slicing to maintain its tender texture and prevent crumbling.
How to Serve Vintage Ice Cream Bread Recipe
Garnishes
This bread is a joy on its own, but adding a simple garnish can elevate it instantly. Try a light dusting of powdered sugar, a drizzle of honey, or a slather of softened butter. Fresh berries or a spoonful of whipped cream complement the subtle sweetness beautifully.
Side Dishes
Pair this Vintage Ice Cream Bread Recipe with warm tea or rich coffee for a cozy snack. If you want to go big, serve it alongside fruit compote or a scoop of ice cream for an indulgent, retro-style dessert that doubles down on creamy sweetness.
Creative Ways to Present
Think beyond the loaf pan: slice the bread thinner for delicate tea sandwiches stuffed with cream cheese and jam, or toast slices lightly and add a scoop of ice cream for a dreamy take on an ice cream sandwich. The bread also makes a fun base for French toast when you want to use it in another fantastic way.
Make Ahead and Storage
Storing Leftovers
Store leftover Vintage Ice Cream Bread Recipe wrapped tightly in plastic wrap or in an airtight container at room temperature for up to two days. This keeps it moist and fresh without drying out. Beyond that, refrigeration can dry the bread, so it’s best eaten fresh or frozen.
Freezing
If you want to keep your ice cream bread longer, wrap it well in plastic wrap and then in foil before freezing. It will keep for up to three months. When ready to enjoy, thaw it overnight in the fridge or at room temperature for a few hours.
Reheating
To bring back that fresh-baked warmth, reheat slices in a toaster oven or regular oven at 300°F for 5 to 7 minutes. This revives the tender crumb and gives you a fresh-from-the-oven feel that’s just as lovely the next day.
FAQs
Can I use low-fat or dairy-free ice cream for this recipe?
While you can experiment with low-fat or dairy-free ice cream, full-fat ice cream is recommended to maintain the rich texture and proper rise. Lower fat versions might result in a denser bread.
What if I don’t have self-rising flour?
No worries! You can substitute 1 1/2 cups of all-purpose flour combined with 2 teaspoons of baking powder and 1/2 teaspoon of salt for the same effect. Just mix the dry ingredients well before combining with the ice cream.
Can I add mix-ins like nuts or chocolate chips?
Absolutely! Fold in your favorite mix-ins gently after combining the ice cream and flour. Nuts, chocolate chips, or dried fruit add wonderful texture and bursts of flavor to the bread.
How thick should I slice the bread?
For most uses, slices about one inch thick work perfectly. If you’re using the bread for tea sandwiches or toast, thinner slices, around ½ inch, might be best.
Is this bread sweet enough to eat plain?
The sweetness depends on your choice of ice cream, but usually, the Vintage Ice Cream Bread Recipe is lightly sweet with a tender crumb, making it delightful on its own or with simple toppings.
Final Thoughts
There’s something truly special about the Vintage Ice Cream Bread Recipe that makes it a charming, easy treat to whip up anytime. With just two simple ingredients, you’re creating more than just bread—you’re baking a slice of nostalgia that’s perfect for sharing with friends and family. So go ahead and give this delightful recipe a try; it’s sure to bring smiles and fill your kitchen with a warm, sweet aroma that invites everyone to gather ’round.
Print
Vintage Ice Cream Bread Recipe
- Prep Time: 5 minutes
- Cook Time: 40 minutes
- Total Time: 45 minutes
- Yield: 8 slices
- Category: Snack, Dessert
- Method: Baking
- Cuisine: American
- Diet: Vegetarian
Description
This Vintage Ice Cream Bread Recipe is a nostalgic, easy-to-make quick bread that uses only two main ingredients: softened full-fat ice cream and self-rising flour. Perfect for a snack or dessert, this bread has a delightful texture and a variety of flavor possibilities depending on the ice cream chosen. It’s a fun, retro treat that requires minimal prep and baking time.
Ingredients
Ingredients
- 2 cups full-fat ice cream (softened, any flavor)
- 1 1/2 cups self-rising flour
Instructions
- Preheat Oven: Preheat your oven to 350°F (175°C). Lightly grease a 9×5-inch loaf pan or line it with parchment paper to prevent sticking.
- Mix Ingredients: In a large mixing bowl, combine the softened ice cream with the self-rising flour. Stir gently until just combined into a thick batter, being careful not to overmix to maintain the bread’s tenderness.
- Prepare for Baking: Pour the batter into the prepared loaf pan and smooth the top evenly to ensure uniform baking.
- Bake Bread: Place the loaf pan in the oven and bake for 35–40 minutes, or until a toothpick inserted into the center of the bread comes out clean, indicating it is fully cooked.
- Cool Bread: Allow the bread to cool in the pan for 10 minutes. Then, remove it from the pan and transfer it to a wire rack to cool completely before slicing, which helps maintain the bread’s structure and texture.
Notes
- Use full-fat ice cream for the best texture and rise of the bread.
- Classic flavor options include vanilla, chocolate, or butter pecan, but feel free to experiment with fruity or fun ice cream mix-ins for variety.
- If you don’t have self-rising flour, you can substitute by mixing 1 1/2 cups all-purpose flour with 2 teaspoons baking powder and 1/2 teaspoon salt.


