
If you are a coffee lover with a sweet tooth, you are going to adore this Homemade Coffee Ice Cream Recipe. It captures the rich, deep flavors of freshly brewed espresso combined with the creamy, luscious texture of traditional ice cream. Each bite delivers a smooth, velvety coffee essence that dances on your palate, making it an irresistible dessert to enjoy any time of year. Whether you want to cool down on a summer day or treat yourself after dinner, this recipe brings café-quality coffee ice cream right to your kitchen.

Ingredients You’ll Need
The beauty of this recipe lies in its simplicity and how each ingredient plays a crucial role in creating that perfect creamy, coffee-flavored ice cream. From the richness of heavy cream to the aromatic coffee granules, every element is essential for flavor and texture.
- Heavy cream: Provides the creamy, smooth base that makes the ice cream rich and indulgent.
- Whole milk: Balances the creaminess with a lighter texture for a perfect mouthfeel.
- Granulated sugar: Sweetens the ice cream evenly while helping with the texture.
- Egg yolks: Add a custard base that thickens beautifully and gives a luscious consistency.
- Instant coffee granules or espresso powder: Infuse the ice cream with deep, robust coffee flavor without bitterness.
- Vanilla extract: Enhances and rounds out the coffee flavor with a subtle sweet warmth.
- Pinch of salt: Balances sweetness and accentuates the flavors harmoniously.
How to Make Homemade Coffee Ice Cream Recipe
Step 1: Whisk the Egg Yolks and Sugar
Start by whisking the egg yolks and half of the granulated sugar together in a bowl. You want to beat them until the mixture turns pale and thick, almost like a ribbon consistency. This step is crucial because it sets the stage for the custard base, giving the ice cream its creamy texture and stability.
Step 2: Heat the Cream Mixture
In a medium saucepan over medium heat, combine the heavy cream, whole milk, the remaining sugar, salt, and your instant coffee granules or espresso powder. Heat the mixture until it becomes steaming hot but make sure it does not boil. This slow warming allows the flavors to meld and the coffee to fully dissolve, which creates that unmistakable espresso aroma in your ice cream.
Step 3: Temper the Eggs
Now, slowly pour a small amount of the hot cream mixture into your egg yolks while whisking constantly. This is called tempering and it’s important because it gently raises the temperature of the eggs without scrambling them. Once tempered, return the egg yolk mixture back to the saucepan with the rest of the cream mixture.
Step 4: Cook the Custard
Place the saucepan back on low heat and stir continuously. You need to cook the mixture until it thickens enough to coat the back of a spoon. Be patient and gentle at this stage to avoid curdling — this custard is the magic behind that rich, creamy texture your Homemade Coffee Ice Cream Recipe is known for.
Step 5: Finish and Chill
Remove the saucepan from heat and stir in the vanilla extract for that delightful mellow sweetness. Strain the custard through a fine mesh sieve into a clean bowl to ensure silky smoothness. Let it cool to room temperature before covering and refrigerating for at least 4 hours or until it’s fully chilled. Patience here pays off with a beautifully textured ice cream.
Step 6: Churn the Ice Cream
Once chilled, pour the custard into your ice cream maker and churn according to the manufacturer’s instructions. If you don’t have an ice cream maker, no worries—simply freeze it in a shallow dish and stir vigorously every 30 minutes until smooth and frozen. This step brings the creamy coffee flavors together into a delightful frozen treat.
Step 7: Freeze Before Serving
Transfer the churned ice cream into a freezer-safe container and let it freeze for at least 4 hours to achieve that perfect scoopable texture. When you’re ready to impress your friends or enjoy a quiet indulgence, your Homemade Coffee Ice Cream Recipe will be waiting!
How to Serve Homemade Coffee Ice Cream Recipe

Garnishes
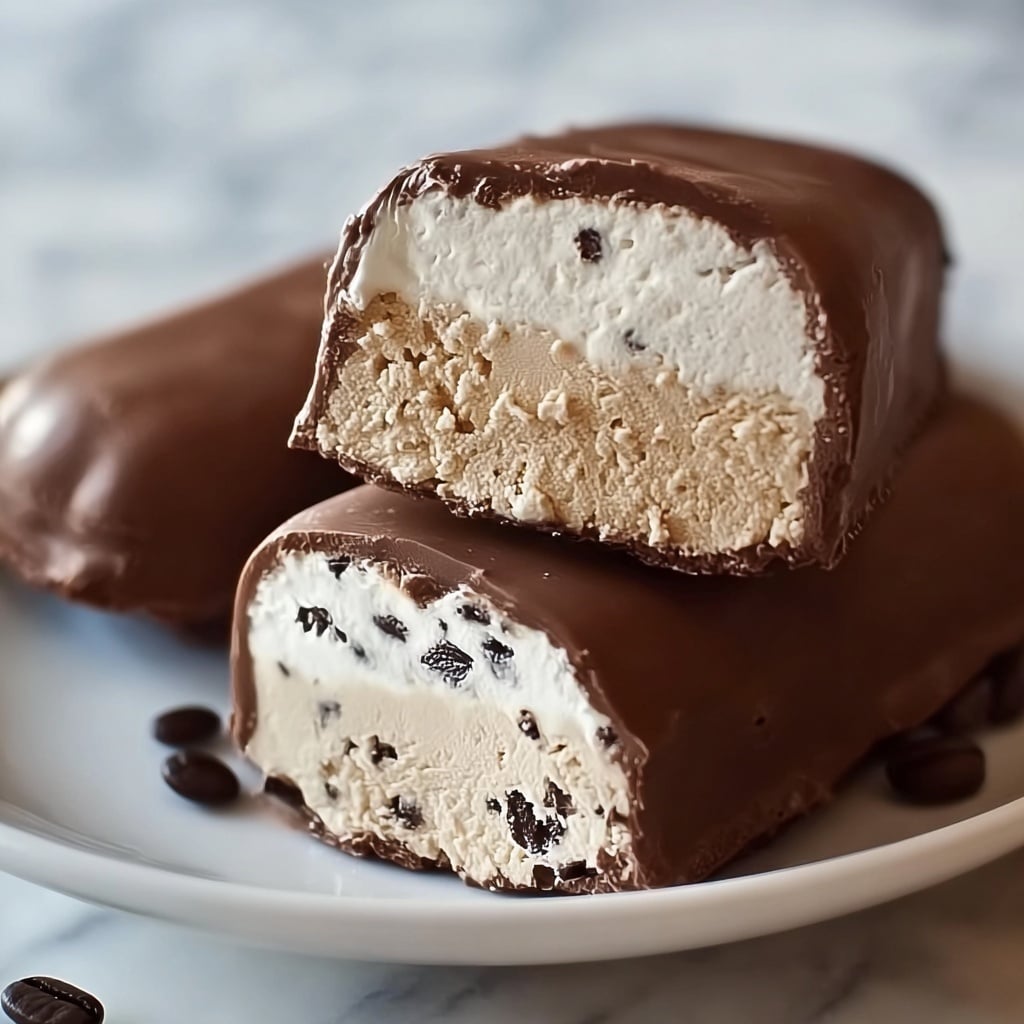
Elevate your ice cream by adding chocolate shavings, a sprinkle of cinnamon, or crushed chocolate-covered espresso beans on top. These add texture and extra flavor layers that complement the coffee notes wonderfully.
Side Dishes
This ice cream pairs beautifully with warm desserts like brownies, chocolate cake, or a slice of apple pie. The cold, creamy coffee flavor balances the warm, hearty desserts perfectly, creating a flawless finish to any meal.
Creative Ways to Present
Consider serving your Homemade Coffee Ice Cream Recipe in elegant espresso cups for a cute, café-inspired vibe or alongside freshly baked biscotti for a true Italian touch. You can also sandwich it between two biscuits for a delightful ice cream sandwich twist.
Make Ahead and Storage
Storing Leftovers
Leftover ice cream should be stored in an airtight container to protect it from freezer burn and unwanted odors. Keep it tightly sealed and smooth the surface with a spatula before sealing to reduce ice crystal formation.
Freezing
Your Homemade Coffee Ice Cream Recipe freezes well for up to two weeks. For best texture, make sure your freezer maintains a consistent temperature, and avoid frequent thaw-freeze cycles which can degrade the creaminess.
Reheating
While ice cream is best enjoyed cold, if it hardens too much in the freezer, let it sit at room temperature for 5–10 minutes before scooping. This softens just enough without melting and helps keep that perfect creamy texture intact.
FAQs
Can I use regular brewed coffee instead of instant coffee granules?
Instant coffee or espresso powder is preferred because it dissolves completely without altering the texture. Using brewed coffee may add extra liquid and can affect the custard’s consistency, but you can experiment by reducing other liquids if you prefer brewed coffee flavor.
Is it necessary to use an ice cream maker for this recipe?
While an ice cream maker produces the creamiest results by churning air into the mixture, you can still make this recipe without one. Freeze in a shallow dish and stir vigorously every 30 minutes to mimic the texture of churned ice cream.
How can I increase the coffee flavor intensity?
If you want a bolder coffee punch, simply increase the amount of espresso powder or instant coffee granules slightly. Just be careful not to add too much or it may become bitter. Adjust gradually and taste the custard before chilling.
Can I add mix-ins to my coffee ice cream?
Absolutely! Fold in chopped chocolate, chopped nuts, or crushed espresso beans after the ice cream has churned but before freezing. They add delightful texture and extra bursts of flavor.
Is this Homemade Coffee Ice Cream Recipe suitable for vegetarians?
Yes, this recipe is vegetarian-friendly as it contains no meat or gelatin ingredients. It uses dairy and eggs, so it’s not vegan, but ideal for a traditional vegetarian diet.
Final Thoughts
There is something truly magical about making your own Homemade Coffee Ice Cream Recipe from scratch. The rich aroma, the creamy texture, and the depth of coffee flavor will make this dessert a treasured favorite. Once you try it, you’ll likely never want to go back to store-bought ever again. So gather your ingredients, embrace the simple steps, and treat yourself to a scoop of this heavenly coffee delight—you deserve it.
Print
Homemade Coffee Ice Cream Recipe
- Prep Time: 15 minutes
- Cook Time: 15 minutes
- Total Time: 4 hours 30 minutes
- Yield: 6 servings
- Category: Dessert
- Method: Churning
- Cuisine: American
- Diet: Vegetarian
Description
This Homemade Coffee Ice Cream Recipe offers a rich, creamy treat infused with intense coffee flavor. Made from a custard base of egg yolks, cream, and milk, combined with instant coffee or espresso powder, it delivers a smooth, velvety texture that’s perfect for coffee lovers craving a refreshing dessert. Easy to prepare and customizable with mix-ins like chocolate bits or espresso beans, this ice cream is a delightful American dessert that’s sure to impress.
Ingredients
Ice Cream Base
- 2 cups heavy cream
- 1 cup whole milk
- 3/4 cup granulated sugar, divided
- 5 large egg yolks
- 2 tablespoons instant coffee granules or espresso powder
- 1 teaspoon vanilla extract
- Pinch of salt
Instructions
- Prepare Egg Yolks: In a bowl, whisk together the egg yolks and half of the sugar (about 3/8 cup) until the mixture becomes pale and thick, indicating it is well aerated and ready for tempering.
- Heat Dairy Mixture: In a saucepan over medium heat, combine heavy cream, whole milk, remaining sugar, pinch of salt, and instant coffee granules. Heat until the mixture is steaming and hot but not boiling, ensuring the coffee dissolves fully to infuse the flavor.
- Temper Egg Yolks: Slowly pour a small amount of the hot cream mixture into the whisked egg yolks while continuously whisking to gradually raise the temperature of the yolks and prevent curdling.
- Cook Custard: Return the tempered yolk mixture into the saucepan with the remaining hot cream mixture. Cook over low heat, stirring constantly with a wooden spoon or spatula, until the custard thickens and coats the back of a spoon, about 5-7 minutes. Do not let it boil.
- Strain & Cool: Remove from heat, stir in the vanilla extract, then pour the custard through a fine mesh strainer into a clean bowl to remove any cooked egg bits. Allow it to cool to room temperature.
- Chill: Cover the bowl with plastic wrap and refrigerate the custard for at least 4 hours or until fully chilled. This step is essential for proper churning consistency.
- Churn Ice Cream: Pour the chilled custard into an ice cream maker and churn according to the manufacturer’s instructions, usually for about 20-25 minutes, until the mixture reaches a soft-serve consistency.
- Freeze: Transfer the churned ice cream into a freezer-safe container, cover it, and freeze for at least 4 hours to firm up before serving.
Notes
- Increase the amount of espresso powder for a bolder coffee flavor.
- For added texture and flavor, fold in chopped chocolate or crushed chocolate-covered espresso beans after churning.
- If you don’t have an ice cream maker, freeze the custard mixture in a shallow dish and stir vigorously every 30 minutes until smooth and frozen to mimic churning.


