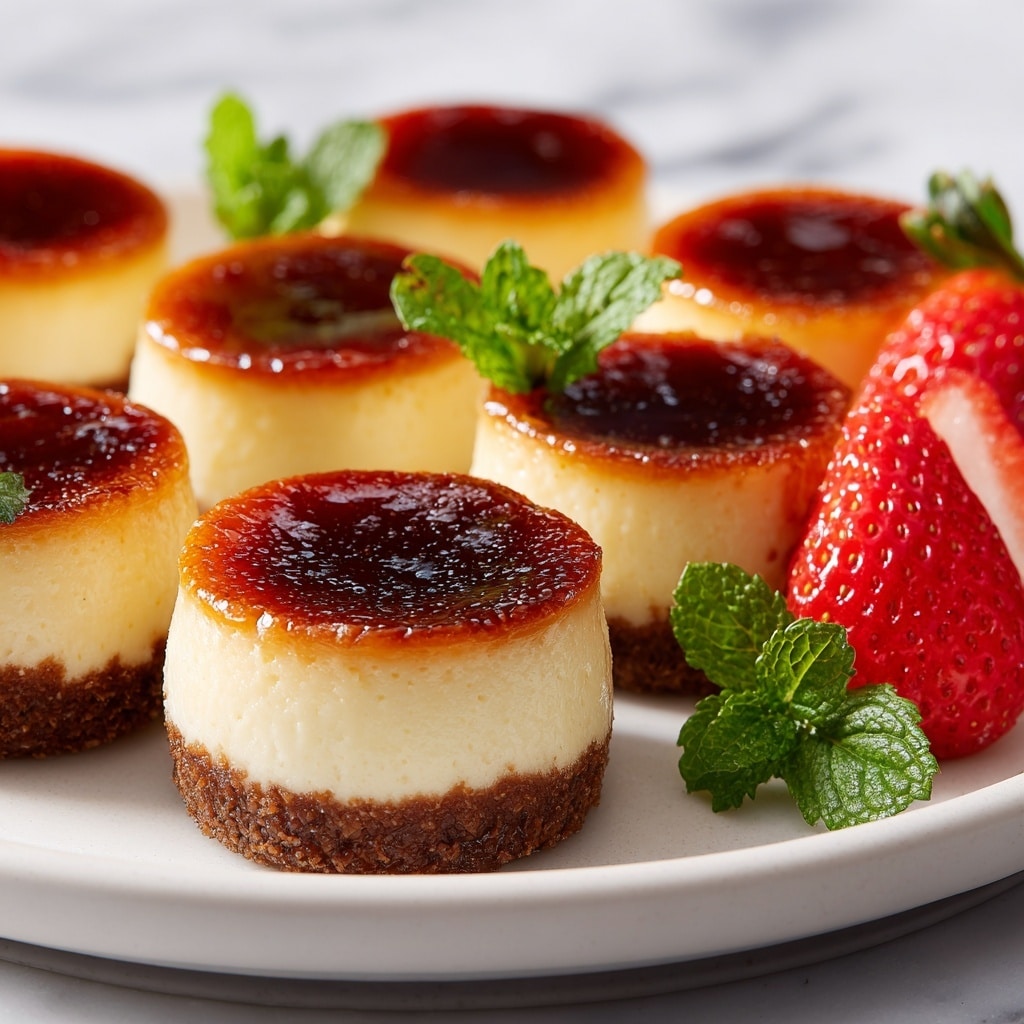
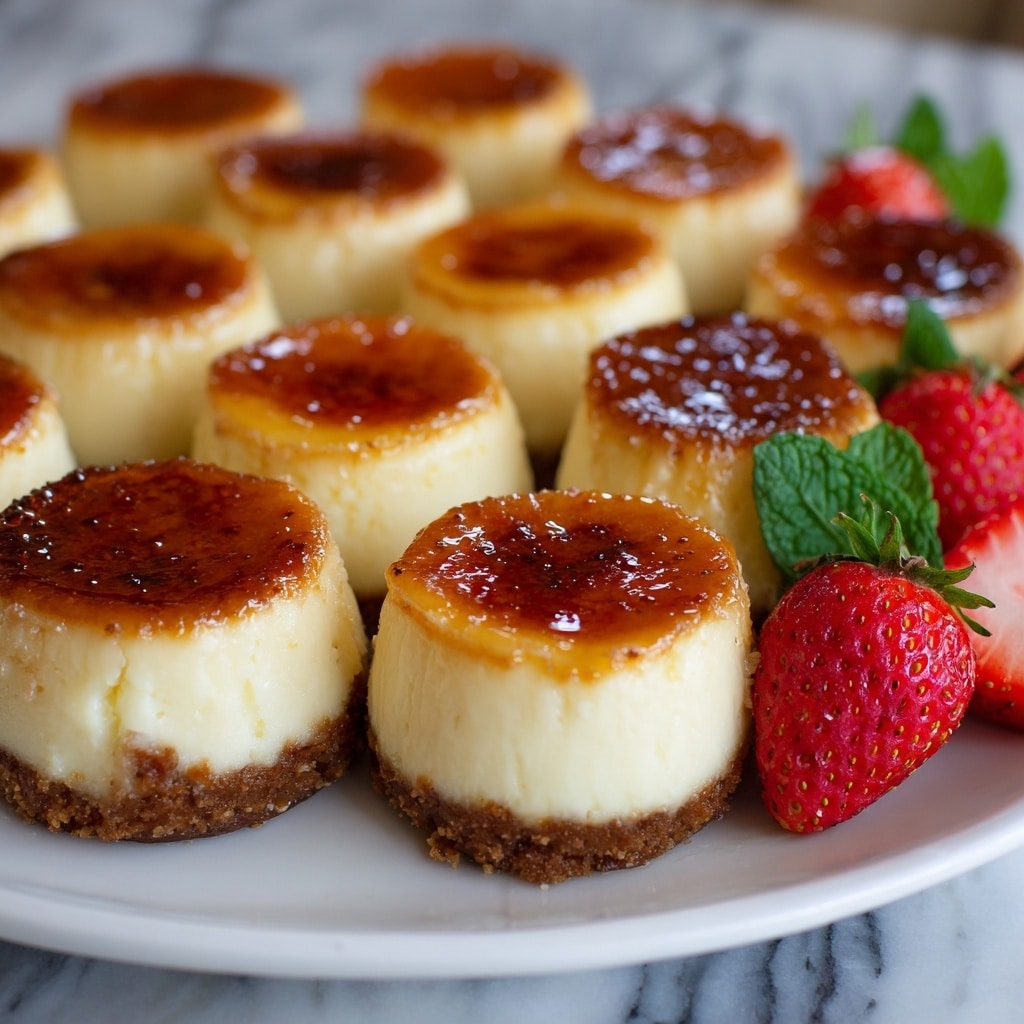
If you are looking for a deliciously indulgent treat that perfectly blends the smooth richness of cheesecake with the irresistible crunch of caramelized sugar, then you have to try this Mini Créme Brûlée Cheesecake Bites Recipe. These tiny delights offer all the luxurious charm of classic crème brûlée, paired with the creamy texture of cheesecake, wrapped in a buttery graham cracker crust. They are the perfect bite-sized dessert for parties, special occasions, or whenever you want to treat yourself to something extra special. Once you taste these, you’ll find it hard to stop at just one!
Ingredients You’ll Need
Creating these Mini Créme Brûlée Cheesecake Bites Recipe requires surprisingly simple ingredients that work harmoniously to build layers of flavor and texture. Each component is essential—from the buttery crust to the velvety filling and that magical caramelized sugar topping.
- Graham crackers crumbs: The base of the crust delivers a slightly sweet, crunchy foundation that complements the creamy filling.
- Unsalted butter (melted): Helps bind the crumbs together while adding richness to the crust.
- Granulated sugar: Used in both crust and filling for subtle sweetness and caramelizing for the brûlée top.
- Salt (a pinch): Balances the sweetness to enhance all gathered flavors beautifully.
- Cream cheese (room temperature): The creamy heart of the cheesecake, smooth and tangy for that classic taste.
- Egg yolks (large, room temperature): Provides structure and adds richness to the filling.
- Vanilla extract: Brightens the filling with a lovely aromatic layer.
- Whipping cream (chilled): Lightens the cheesecake batter for a luscious, silky texture.
- Fine granulated sugar for topping: The star for caramelizing into the crisp, golden brûlée layer on top.
How to Make Mini Créme Brûlée Cheesecake Bites Recipe
Step 1: Prepare the Graham Cracker Crust
Start by combining the graham cracker crumbs with sugar, salt, and melted butter in a bowl until you get a sandy texture. This mixture forms the perfect crisp and slightly sweet crust. Butter your mini cheesecake pan cavities as well, then press about one tablespoon of the crust mixture firmly into each cavity using a tamper or the back of a spoon. This ensures a solid and even base for each cheesecake bite.
Step 2: Make the Cheesecake Filling
In a large bowl fitted with an electric mixer paddle attachment, beat the cream cheese and sugar together until luxuriously smooth and creamy. Next, add the egg yolks one at a time, mixing gently after each addition to maintain a silky texture, then stir in the vanilla extract for a lovely fragrant note. Finally, pour in the chilled whipping cream and fold in until the filling is perfectly light and combined.
Step 3: Assemble and Bake
Using a small ice cream scoop, fill each crust-lined cavity with the cheesecake batter until heaping full. Give the pan a gentle shake to level out the tops. Pop them into a preheated oven at 150°C (300°F) and bake for about 15 minutes. Keep a close eye around the 12-minute mark to prevent any overflow from puffing batter. Once baked, remove them and let the cheesecakes reach room temperature before chilling in the refrigerator for at least 6 hours to set completely.
Step 4: Caramelize the Topping
After chilling, carefully remove the mini cheesecakes from the pan and place them on a serving plate. Sprinkle a teaspoon of fine granulated sugar onto each cheesecake top. Using a kitchen blow torch, move the flame evenly around the sugar until it melts and turns a beautiful golden brown, forming that iconic crème brûlée crunchy crust. Allow the caramelized topping to cool for a minute or two—this is when the magic happens, transforming each bite into a perfect crisp and creamy experience.
How to Serve Mini Créme Brûlée Cheesecake Bites Recipe
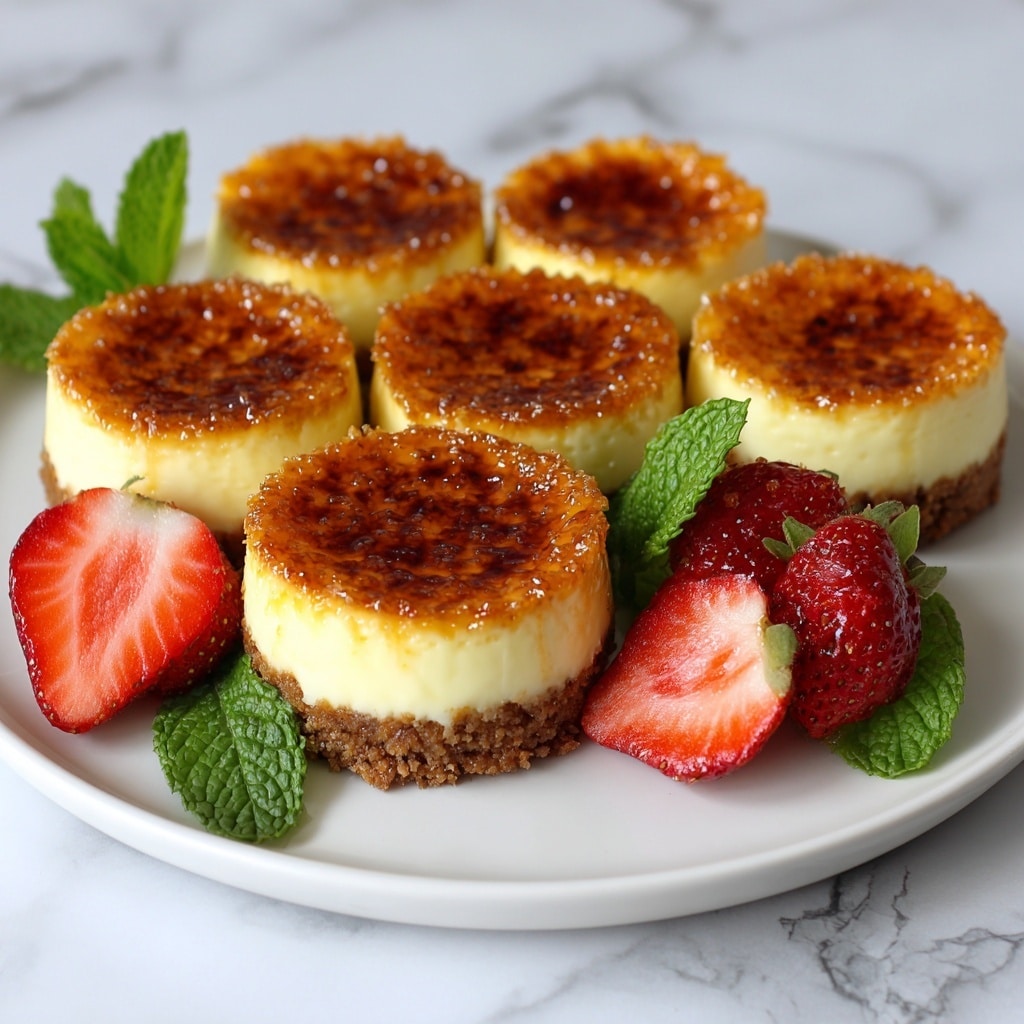
Garnishes
Add a personal touch by garnishing these cheesecake bites with a few fresh berries like raspberries or blueberries that offer a tart contrast, or a tiny mint leaf for a refreshing pop of green. A light dusting of powdered sugar can also create an elegant finish.
Side Dishes
These Mini Créme Brûlée Cheesecake Bites pair wonderfully with a cup of freshly brewed espresso or a glass of dessert wine such as Sauternes or Moscato. Their sweetness beautifully balances strong or fruity drinks, creating an irresistible dessert experience.
Creative Ways to Present
For a stunning presentation, arrange these cheesecake bites on a tiered dessert stand or create a charming platter lined with edible flowers. You could even serve them individually in delicate mini tartlet wrappers for bite-sized elegance at your next gathering.
Make Ahead and Storage
Storing Leftovers
Store any leftover Mini Créme Brûlée Cheesecake Bites in an airtight container in the refrigerator. They will keep well for up to 3 days while maintaining their creamy texture and crispy topping.
Freezing
If you want to prep ahead, you can freeze the cheesecake bites before caramelizing the tops. Wrap each bite individually in plastic wrap, then place them in a freezer-safe container. They can be frozen for up to one month. Thaw overnight in the fridge before torching the sugar topping.
Reheating
To revive the crisp brûlée top after refrigeration or freezing, use a kitchen blow torch to quickly caramelize the sugar again. Avoid microwaving as it may soften the crunchy topping and change the texture of the cheesecake itself.
FAQs
Can I use a different type of crust for this recipe?
Absolutely! While graham cracker crumbs provide a classic flavor and perfect texture, you can experiment with crushed digestive biscuits, shortbread, or even gingersnap cookies for a unique twist on the crust.
What can I substitute for fresh cream?
Whipping cream is ideal because it lightens the batter and contributes to a silky texture. However, if needed, you can substitute with half-and-half or whole milk, though the cheesecake may be slightly less rich and creamy.
Is there a way to make these gluten-free?
Yes, simply swap out the graham cracker crumbs for gluten-free cookie crumbs or finely chopped nuts. Just ensure the alternative crumbs are finely ground so they bind well with the melted butter.
How important is it to use the blow torch?
The blow torch is crucial for creating the signature brûlée crust—giving the dessert that irresistible crackle and caramel flavor. If you don’t have a torch, you could try broiling briefly in the oven but watch carefully to avoid melting the cheesecake filling.
Can I make these into larger cheesecakes?
You sure can! Just scale up the ingredients proportionally and bake in a standard cheesecake pan. The finishing step of caramelizing the sugar with a torch remains the same for that signature brûlée glaze.
Final Thoughts
There is something truly special about the combination of smooth cheesecake and crisp caramel topping in this Mini Créme Brûlée Cheesecake Bites Recipe. It strikes a perfect balance between rich, creamy indulgence and elegant presentation. These bites make any occasion feel festive and make a fantastic gift or party centerpiece. I cannot recommend trying this recipe enough—once you give it a go, it might just become one of your all-time favorite desserts to share with friends and family.
Print
Mini Créme Brûlée Cheesecake Bites Recipe
- Prep Time: 15 minutes
- Cook Time: 15 minutes
- Total Time: 6 hours 30 minutes
- Yield: 12 mini cheesecakes
- Category: Dessert
- Method: Baking
- Cuisine: American
- Diet: Vegetarian
Description
These Mini Crème Brûlée Cheesecakes combine the creamy richness of classic cheesecake with the signature caramelized sugar topping of crème brûlée. Featuring a buttery graham cracker crust and a smooth, velvety filling, these individual cheesecakes are baked to perfection and chilled before being topped with a crisp, golden sugar crust created with a blow torch. Perfect for elegant desserts or special occasions, these cheesecakes offer a delightful contrast of textures and flavors in every bite.
Ingredients
Graham Cracker Crust
- 2 cups (200 g) graham cracker crumbs
- ½ cup (125 g) unsalted butter, melted
- 2 tablespoons (30 g) granulated sugar
- 1 pinch salt
Cheesecake Filling
- 2 packages (500 g) cream cheese, room temperature
- ½ cup (100 g) granulated sugar
- 4 large egg yolks (70 g), room temperature
- 1½ teaspoon vanilla extract
- ½ cup (100 ml) whipping cream (35%), chilled
Caramelized Topping
- 12 teaspoons granulated sugar (fine)
Instructions
- Prepare Graham Cracker Crust: In a medium bowl, combine the graham cracker crumbs, granulated sugar, salt, and melted butter. Mix thoroughly until the texture resembles damp sand.
- Form Crust in Pan: Butter each cavity of the mini cheesecake pan. Scoop 1 tablespoon of the graham cracker mixture into each cavity and press down firmly using a tamper or the back of a spoon to create an even crust layer. Set aside.
- Make Cheesecake Filling: Using an electric mixer fitted with a paddle attachment, beat the cream cheese and sugar in a large bowl until the mixture is creamy and smooth.
- Add Egg Yolks and Flavoring: Add the egg yolks one at a time, mixing gently after each addition. Then add the vanilla extract and mix until just combined, being careful not to overmix.
- Incorporate Whipping Cream: Pour the chilled whipping cream into the cream cheese mixture and mix until well incorporated and smooth.
- Fill Cheesecake Cavities: Using an ice cream scoop, evenly portion the cheesecake filling into each crust-lined cavity, filling up to the top. Gently shake the pan to level and smooth the surfaces.
- Bake Cheesecakes: Preheat the oven to 150℃ (300℉). Bake the mini cheesecakes for about 15 minutes, closely monitoring around the 12-minute mark. If the batter puffs up and begins to overflow, remove the pan immediately to prevent spills.
- Cool and Chill: Remove the pan from the oven and allow the cheesecakes to cool to room temperature. Then transfer the pan to the refrigerator and chill for at least 6 hours to set properly.
- Caramelize Sugar Topping: Once chilled, carefully remove the mini cheesecakes from the pan cavities and place them on a plate. Sprinkle 1 teaspoon of fine granulated sugar evenly over each cheesecake. Using a kitchen blow torch, move the flame evenly over the sugar until it melts and turns a golden brown crust. Allow the caramelized topping to cool and harden for 1-2 minutes before serving.
Notes
- Ensure the cream cheese and egg yolks are at room temperature to prevent lumps and ensure smooth mixing.
- Be careful when caramelizing sugar with a blow torch to avoid burning the sugar or overheating the cheesecake below.
- The cheesecakes can be prepared a day ahead and refrigerated to develop flavors even more.
- If you don’t have a blow torch, you can briefly broil the cheesecakes’ sugar topping, watching closely to avoid burning.
- Use chilled whipping cream to help create a firmer texture in the filling.

