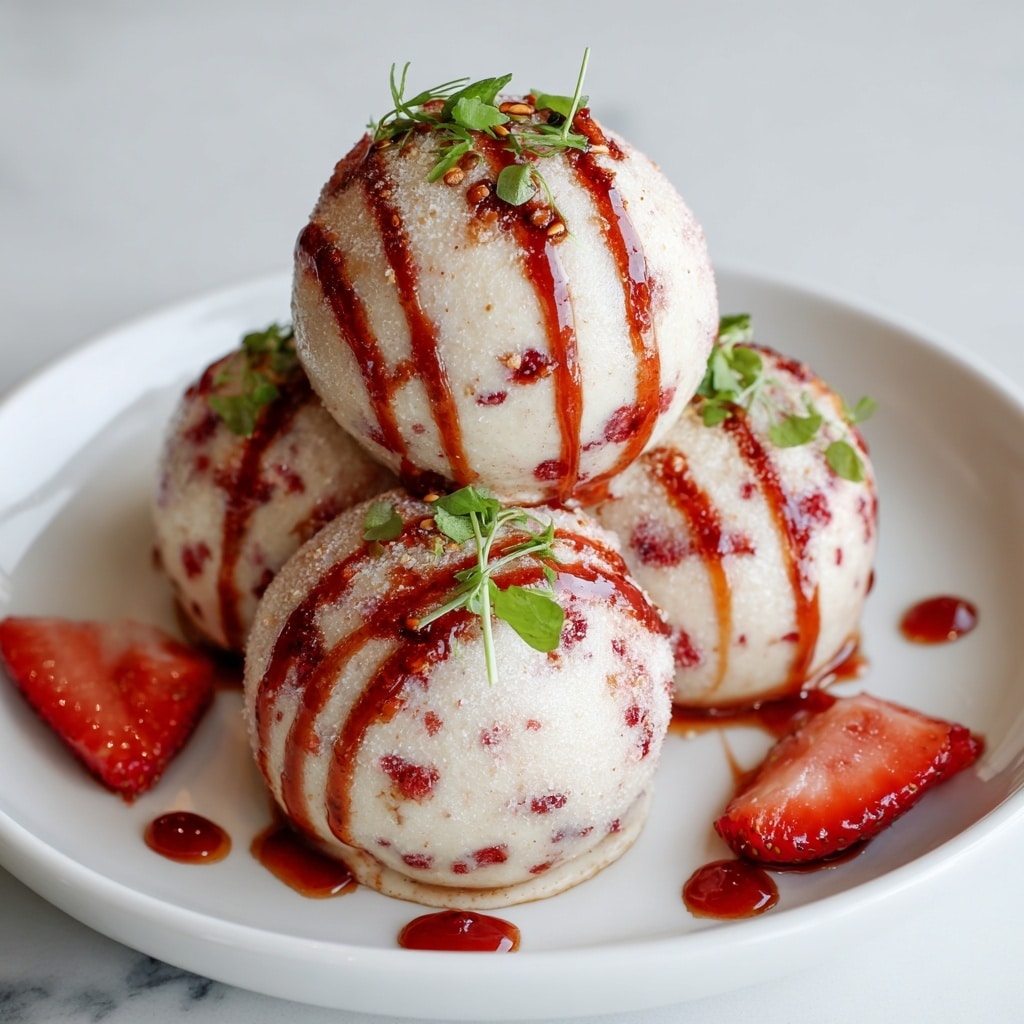
If you are craving a snack that perfectly balances indulgence and nutrition, look no further than Strawberry Cheesecake Protein Balls: The Ultimate Healthy Snack Recipe. These little bites deliver a creamy, fruity cheesecake flavor wrapped in a protein-packed, energy-boosting punch. They’re incredibly easy to whip up, have a beautiful pink hue from freeze-dried strawberries, and offer a delightful chewiness that makes them utterly addictive. Whether you need a post-workout bite, a midday pick-me-up, or just something sweet yet wholesome, this recipe checks all the boxes with pure joy and guilt-free satisfaction.
Ingredients You’ll Need
Gathering simple, wholesome ingredients is what makes these protein balls both delicious and nutritious. Each component adds its own magic, from texture to flavor, making every bite feel like a mini celebration.
- 1 cup rolled oats: Acts as a hearty base, providing texture and slow-release energy.
- 1/2 cup vanilla protein powder: Brings a sweet creaminess and muscle-repairing protein boost.
- 1/4 cup freeze-dried strawberries, crushed: Adds vibrant color and a natural fruity tang without extra moisture.
- 1/4 cup cream cheese, softened: Creates that luscious cheesecake flavor and creamy texture.
- 2 tablespoons honey or maple syrup: Provides natural sweetness and helps bind the mixture together.
- 1 tablespoon coconut oil, melted: Adds richness and helps give the balls a smooth, luscious mouthfeel.
- 1/4 cup unsweetened almond milk: Adjusts consistency while keeping the recipe dairy-light.
- 1/4 teaspoon vanilla extract: Intensifies sweetness and pairs beautifully with strawberry and cream cheese.
- Pinch of salt: Enhances all flavors and balances the sweetness.
- Optional: 1/4 cup shredded coconut for rolling: Adds a delightful texture layer and a tropical touch.
How to Make Strawberry Cheesecake Protein Balls: The Ultimate Healthy Snack Recipe
Step 1: Combine Dry Ingredients
Start by whisking together the rolled oats, vanilla protein powder, crushed freeze-dried strawberries, and a pinch of salt in a large mixing bowl. This dry mix is the foundation, blending wholesome grains with fruity bursts and a light savory note to balance the sweetness.
Step 2: Soften Cream Cheese
Make sure your cream cheese is softened for easy mixing. If needed, nuke it in the microwave for 15-20 seconds, just enough to soften without melting. This ensures it will incorporate smoothly with the dry ingredients, lending that signature cheesecake creaminess.
Step 3: Add Wet Ingredients
Next, add the softened cream cheese, honey or maple syrup, melted coconut oil, vanilla extract, and almond milk to your dry bowl. These wet ingredients bring moisture, sweetness, and richness, helping everything come together into a cohesive dough.
Step 4: Mix it All Together
Stir everything vigorously until well combined. You want a fairly uniform, slightly sticky mixture that holds together when pressed. This step is key in blending the flavors and achieving the perfect texture for rolling.
Step 5: Check Consistency
If the mixture feels too dry and crumbly, add almond milk one tablespoon at a time to soften it up. If it’s too wet and sticky to handle, sprinkle in a bit more rolled oats or protein powder, also in one-tablespoon increments, until it reaches that ideal, workable consistency.
Step 6: Chill the Dough
Pop the bowl into the fridge for about 15-20 minutes. Chilling firms up the dough, making it easier to form into perfect balls without sticking excessively to your hands.
Step 7: Prepare Work Station
If you’re opting for the shredded coconut coating, pour it into a shallow dish now. Line a plate or baking sheet with parchment paper where the balls will rest before chilling again.
Step 8: Roll the Balls
Using a tablespoon, scoop the mixture and roll it between your palms to create smooth, round balls. If your hands get sticky, dampen them slightly with water for effortless rolling.
Step 9: Coating (Optional)
Roll each ball thoroughly in shredded coconut to coat. The coconut adds a lovely texture contrast and a subtle tropical flavor, plus it creates a visually appealing finish.
Step 10: Place on Baking Sheet
Arrange the completed protein balls on your parchment-lined baking sheet, leaving a bit of space between them so they don’t stick together later.
Step 11: Final Chill
Refrigerate the protein balls for at least 30 minutes to firm up fully. This chilling step locks in the shape and solidifies that creamy texture we love.
Step 12: Storing
Once chilled, transfer the balls to an airtight container. They’ll keep wonderfully in the fridge for up to a week or can be frozen for up to a month—perfect for prepping healthy snacks in advance.
How to Serve Strawberry Cheesecake Protein Balls: The Ultimate Healthy Snack Recipe
Garnishes
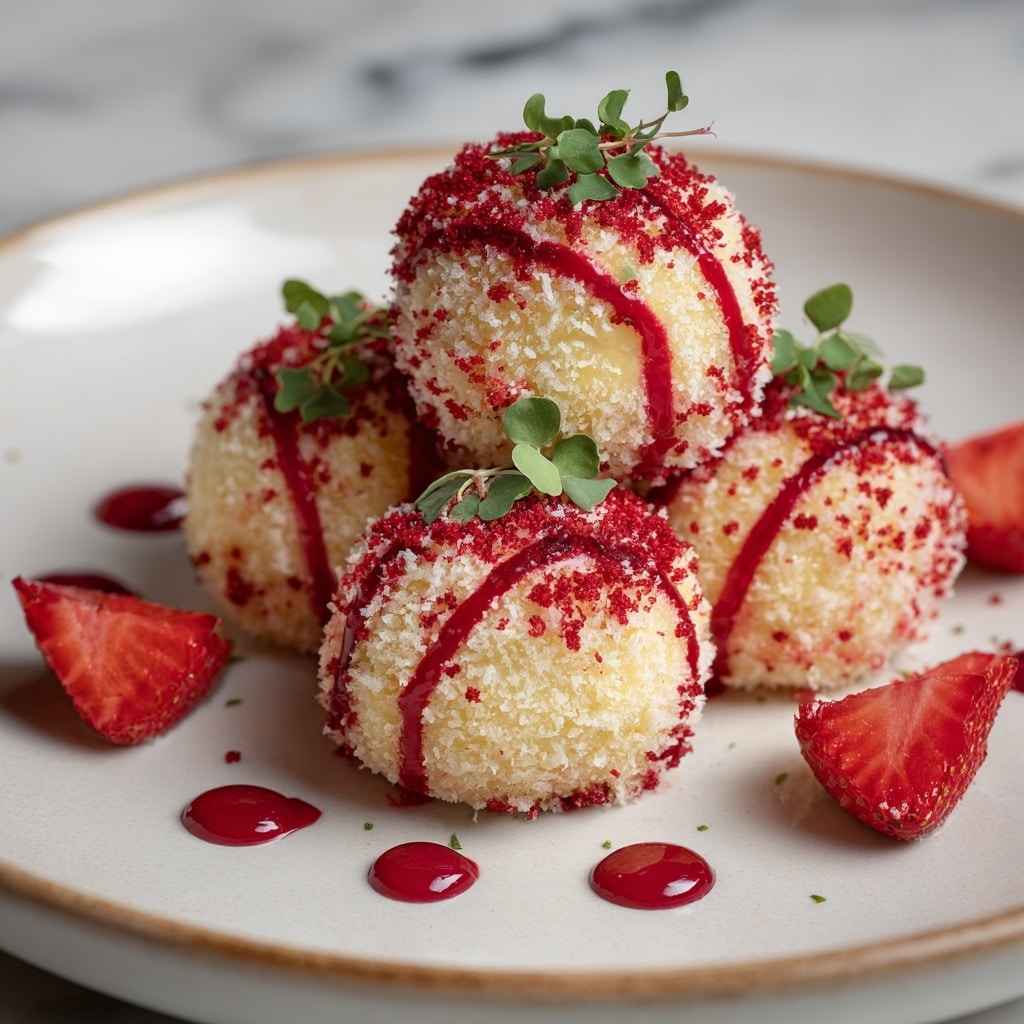
Enhance your snack experience by garnishing with a sprinkle of extra crushed freeze-dried strawberries, a dusting of cinnamon, or even a light drizzle of melted dark chocolate. These little touches take the Strawberry Cheesecake Protein Balls: The Ultimate Healthy Snack Recipe from yummy to absolutely irresistible.
Side Dishes
Pair these protein balls with a refreshing green smoothie or a cup of herbal tea for a balanced snack break. A small bowl of fresh berries or a handful of crunchy nuts also complements the creamy texture and fruity flavor perfectly.
Creative Ways to Present
Serve your Strawberry Cheesecake Protein Balls in mini cupcake liners or arrange them on a pretty tray with edible flowers for a charming party platter. You can also skewer a few on decorative toothpicks for quick grab-and-go bites that wow guests and family alike.
Make Ahead and Storage
Storing Leftovers
Keep any leftover protein balls in an airtight container in the refrigerator. They maintain their fresh flavor and ideal texture for up to a week, making them an excellent ready-to-eat snack anytime.
Freezing
These protein balls freeze beautifully, so if you want to stock up, place them in a single layer on a baking sheet first, freeze until firm, then transfer to a freezer-safe container or bag. They will stay fresh for as long as a month.
Reheating
No reheating needed here! Simply thaw frozen balls overnight in the fridge. Enjoy them chilled or at room temperature for that perfect creamy texture and strawberry cheesecake flavor burst.
FAQs
Can I use fresh strawberries instead of freeze-dried?
Fresh strawberries add too much moisture, which can make the mixture too wet to roll properly. Freeze-dried strawberries keep the taste concentrated without affecting texture.
Is it okay to substitute cream cheese with a vegan alternative?
Absolutely! Use a plant-based cream cheese to keep the recipe vegan-friendly without sacrificing that creamy, cheesecake vibe.
Can I use a different type of protein powder?
Yes, any vanilla-flavored protein powder works well, whether whey, pea, or soy-based. Just watch for sweetness levels to keep the flavor balanced.
What if I don’t have coconut oil?
You can substitute melted butter or another neutral oil like avocado oil, though coconut oil adds a lovely subtle flavor that complements the strawberries nicely.
How do I make these nut-free?
Simply use a nut-free milk like oat or rice milk, and choose a protein powder that doesn’t contain nuts to keep your snack allergy-friendly.
Final Thoughts
I can’t recommend these Strawberry Cheesecake Protein Balls: The Ultimate Healthy Snack Recipe enough. They blend the best of indulgence and nutrition into a single bite, perfect for anyone looking to treat themselves without guilt. Once you try these, they’ll quickly become a staple in your snack rotation—so grab your ingredients and get rolling into happy, healthy snacking!
Print
Strawberry Cheesecake Protein Balls: The Ultimate Healthy Snack Recipe
- Prep Time: 15 minutes
- Cook Time: 0 minutes
- Total Time: 45 minutes
- Yield: 15 servings
- Category: Snack
- Method: No-Cook
- Cuisine: American
- Diet: Vegetarian
Description
Strawberry Cheesecake Protein Balls are a delicious and nutritious snack combining the flavors of creamy cheesecake and fresh strawberries. These no-bake protein-packed bites are perfect for a quick energy boost or a healthy treat, made with wholesome ingredients like rolled oats, protein powder, freeze-dried strawberries, and cream cheese. They’re easy to prepare, requiring no baking, and can be customized with shredded coconut coating for extra texture and flavor.
Ingredients
Dry Ingredients
- 1 cup rolled oats
- 1/2 cup vanilla protein powder (whey or plant-based)
- 1/4 cup freeze-dried strawberries, crushed
- Pinch of salt
Wet Ingredients
- 1/4 cup cream cheese, softened
- 2 tablespoons honey or maple syrup
- 1 tablespoon coconut oil, melted
- 1/4 cup unsweetened almond milk (or any milk)
- 1/4 teaspoon vanilla extract
Optional
- 1/4 cup shredded coconut for rolling
Instructions
- Combine Dry Ingredients: In a large mixing bowl, add the rolled oats, vanilla protein powder, crushed freeze-dried strawberries, and a pinch of salt. Whisk to combine thoroughly.
- Soften Cream Cheese: Make sure the cream cheese is softened for easier mixing. Microwave for 15-20 seconds if needed, but avoid melting it.
- Add Wet Ingredients: Add the softened cream cheese, honey or maple syrup, melted coconut oil, vanilla extract, and almond milk to the bowl containing the dry ingredients.
- Mix it All Together: Stir all ingredients until well combined into a uniform, slightly sticky mixture.
- Check Consistency: If the mixture is too dry, add almond milk one tablespoon at a time. If it’s too wet, add rolled oats or protein powder one tablespoon at a time until the desired consistency is achieved.
- Chill the Dough: Refrigerate the mixture for 15-20 minutes to help it firm up and make rolling easier.
- Prepare Work Station: If using shredded coconut, pour it into a shallow dish. Line a plate or baking sheet with parchment paper for the shaped balls.
- Roll the Balls: Scoop out about a tablespoon of mixture at a time. Roll it between your palms to form smooth, round balls. Dampen your hands if the mixture sticks to them.
- Coating (Optional): Roll each protein ball in shredded coconut until fully coated, gently pressing the coconut to adhere.
- Place on Baking Sheet: Arrange the protein balls on the prepared parchment-lined baking sheet, spacing them evenly.
- Final Chill: Refrigerate the baking sheet with the protein balls for at least 30 minutes to set.
- Storing: Transfer the protein balls to an airtight container. Store in the refrigerator for up to one week or freeze for up to one month. Thaw in the refrigerator before serving.
Notes
- Use either whey or plant-based protein powder based on your dietary preference.
- Freeze-dried strawberries provide intense strawberry flavor without moisture; do not substitute with fresh strawberries.
- You can substitute honey with maple syrup to keep the recipe vegan-friendly.
- Adjust the almond milk amount closely to achieve the perfect dough consistency suitable for rolling.
- For added texture and flavor, roll the balls in crushed nuts or seeds instead of shredded coconut.
- These protein balls make a great pre- or post-workout snack and can be customized with other freeze-dried fruits or extracts.

