
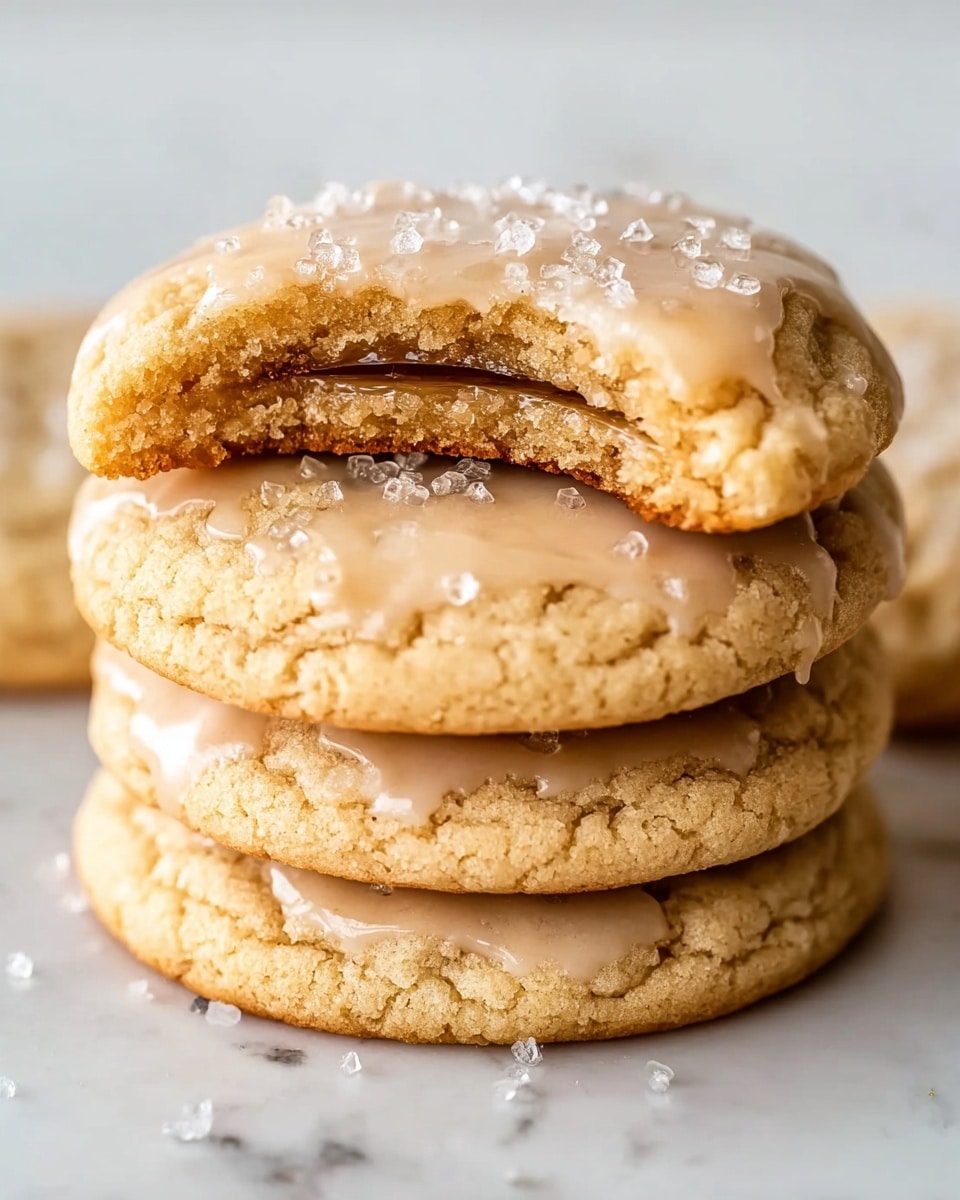
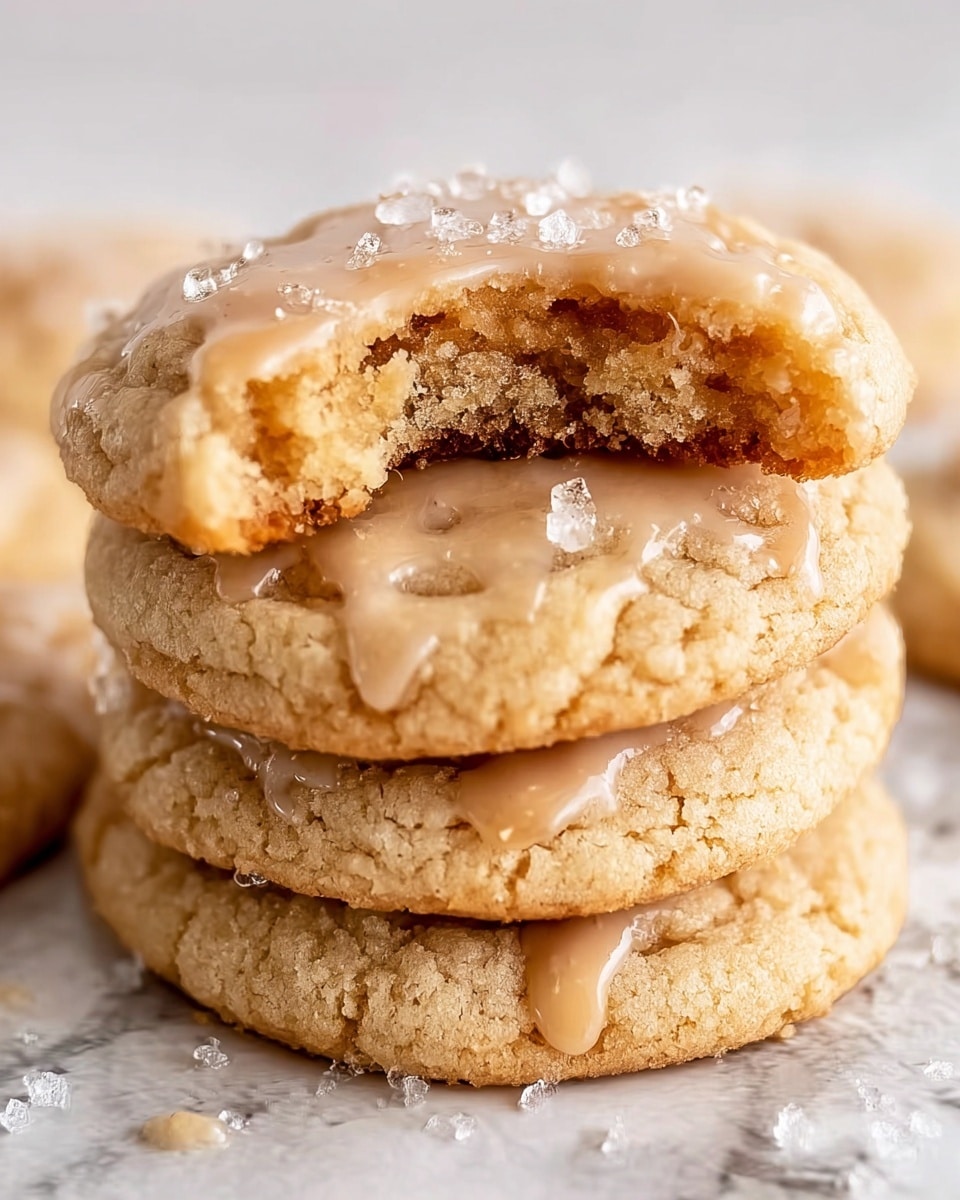
If you’re craving a cookie that perfectly blends the rich warmth of brown sugar with the deep, comforting notes of real maple syrup, then this Maple Brown Sugar Cookies Recipe is exactly what you need. These cookies strike a beautiful balance between soft and slightly crisp, with a luscious maple maple glaze that transforms every bite into a cozy celebration of fall flavors or year-round comfort. Trust me, making these cookies will quickly become a treasured tradition because they fill your kitchen with a heavenly aroma and your heart with guaranteed smiles.

Ingredients You’ll Need
Getting the ingredients right is essential for nailing the perfect texture and flavor of this Maple Brown Sugar Cookies Recipe. Each component plays a special role, whether it’s creating that tender crumb, adding a hint of warmth, or contributing the signature maple sweetness.
- Unsalted butter (¾ cup / 170g), melted: Provides richness and helps achieve a soft, tender cookie base.
- Light brown sugar (1 cup / 200g), packed: Adds moistness and a deep caramel-like flavor thanks to its molasses content.
- Pure maple syrup (¼ cup / 60ml): The star ingredient that infuses the dough with authentic maple goodness.
- Large egg (1): Binds ingredients together and adds a bit of lift to the cookies.
- Vanilla extract (1 teaspoon): Enhances sweetness and rounds out complex flavors.
- All-purpose flour (2 cups / 250g): The foundation for structure, giving the cookies just the right chewiness.
- Baking soda (½ teaspoon): Helps the cookies rise slightly and develop a light texture.
- Salt (½ teaspoon): Balances sweetness and intensifies flavor.
- Ground cinnamon (1 teaspoon): Adds warmth and a subtle spicy note.
- Confectioners’ sugar (1 cup / 120g): Used for the smooth maple glaze finishing touch.
- Pure maple syrup (2 tablespoons): Incorporated into the glaze to keep that maple theme consistent.
- Milk (1 tablespoon): Adjusts the glaze consistency for perfect drizzling.
How to Make Maple Brown Sugar Cookies Recipe
Step 1: Combine the Wet Ingredients
Start by whisking together the melted butter, light brown sugar, and maple syrup in a large bowl until nice and smooth. This trio sets the stage by ensuring your cookies will be incredibly moist and bursting with maple flavor.
Step 2: Add Egg and Vanilla
Next, crack in the egg and pour in the vanilla extract. Mix until everything is well incorporated. The egg lends structure while the vanilla adds a sweet aromatic backdrop that complements the maple perfectly.
Step 3: Mix Dry Ingredients Separately
In a different bowl, sift together the all-purpose flour, baking soda, salt, and ground cinnamon. This prevents clumps and evenly distributes the spices and leavening agents for balanced flavor and texture throughout the dough.
Step 4: Combine Wet and Dry Mixtures
Gradually add the dry ingredients into the wet mixture, stirring gently until just combined. Avoid overmixing to keep the cookies tender and soft once baked.
Step 5: Chill the Dough
Cover the dough and let it chill in the refrigerator for at least 2 hours, or better yet, overnight. This resting period allows the flavors to meld and firms up the dough for easy shaping.
Step 6: Prepare to Bake
Preheat your oven to 350°F (177°C) and line a baking sheet with parchment paper to prevent sticking and encourage even baking.
Step 7: Shape the Cookies
Roll the chilled dough into approximately 1.5-inch balls and space them about 2 inches apart on the baking sheet to allow for spreading without crowding.
Step 8: Bake Until Lightly Golden
Bake the cookies for 11 to 13 minutes, or until the edges turn a gentle golden color. This signals the perfect balance between chewy centers and lightly crisp edges.
Step 9: Cool Slightly
Let the cookies rest on the baking sheet for 5 minutes. This helps them set up before transferring them to a wire rack to cool completely and avoid breakage.
Step 10: Make the Maple Glaze
In a small bowl, whisk together confectioners’ sugar, maple syrup, and milk until silky smooth. This glaze will add an irresistible sweet sheen and extra maple punch.
Step 11: Drizzle and Set
Drizzle the glaze over the cooled cookies and allow it to firm up before serving. This final touch makes these treats look as good as they taste!
How to Serve Maple Brown Sugar Cookies Recipe
Garnishes
For a charming presentation, sprinkle a dash of cinnamon or finely chopped toasted pecans on top of the cookies after glazing. It adds an elegant touch of texture and warmth that brings out the best in this recipe.
Side Dishes
These cookies pair beautifully with a creamy latte or a cup of spiced chai tea. For an afternoon snack, serve alongside a scoop of vanilla ice cream for a dessert that feels both indulgent and cozy.
Creative Ways to Present
Stack a few cookies on a rustic wooden platter tied with twine for gifting or entertaining. Alternatively, arrange them around a bowl of whipped maple cream for a delightful build-your-own cookie sandwich experience that’s sure to wow any guests.
Make Ahead and Storage
Storing Leftovers
Keep any leftover cookies in an airtight container at room temperature for up to 4 days. Their soft texture and rich flavor will remain wonderfully intact, making them irresistible whenever you decide to snack again.
Freezing
You can freeze the unglazed cookie dough balls in a single layer on a baking sheet, then transfer them to a freezer-safe bag for up to 3 months. When ready to bake, thaw overnight in the refrigerator and proceed with baking as usual. This is perfect for planning ahead.
Reheating
To enjoy these cookies warm, gently heat them in the microwave for about 10 seconds or place in a low oven (around 300°F) for 5 minutes. The maple glaze will soften, and the cookies will feel freshly baked again.
FAQs
Can I use dark brown sugar instead of light brown sugar?
Yes! Using dark brown sugar will give the cookies a slightly richer, more molasses-heavy flavor and a deeper color, which can be a delicious twist on this recipe.
Is pure maple syrup necessary or can I use pancake syrup?
For the best authentic flavor, pure maple syrup is recommended. Pancake syrup often contains additives and artificial flavors that won’t replicate that true maple taste.
Can these cookies be made gluten-free?
Absolutely! Substitute the all-purpose flour with a gluten-free flour blend that can measure 1:1, and make sure your baking soda and other ingredients are gluten-free certified for safety.
What if I don’t have time to chill the dough?
While chilling helps develop flavor and texture, you can bake immediately, keeping in mind the cookies may spread more and be slightly less tender. Chilling is worth the wait though!
How thick should the cookies be when rolling the dough?
Rolling dough into 1.5-inch balls works best for even baking and a perfect balance between crisp edges and soft centers. Smaller balls will bake faster and can become crisper overall.
Final Thoughts
This Maple Brown Sugar Cookies Recipe is truly one of my all-time favorites to share with friends and family. The way the maple syrup enhances every bite with its sweet, cozy depth makes these cookies special beyond your usual treat. I can’t wait for you to try baking them yourself because once you do, I guarantee they’ll become a delicious staple in your cookie repertoire.
Print
Maple Brown Sugar Cookies Recipe
- Prep Time: 10 minutes
- Cook Time: 12 minutes
- Total Time: 2 hours 22 minutes
- Yield: 20 cookies
- Category: Dessert
- Method: Baking
- Cuisine: American
Description
These Maple Brown Sugar Cookies are a delightful treat combining the rich sweetness of brown sugar with the warm, natural flavor of pure maple syrup. Soft and chewy, these cookies are perfect for an autumn snack or any time you want a cozy homemade dessert with a unique maple-infused twist.
Ingredients
Cookie Dough
- ¾ cup (170g) unsalted butter, melted
- 1 cup (200g) light brown sugar, packed
- ¼ cup (60ml) pure maple syrup
- 1 large egg
- 1 teaspoon vanilla extract
- 2 cups (250g) all-purpose flour
- ½ teaspoon baking soda
- ½ teaspoon salt
- 1 teaspoon ground cinnamon
Maple Glaze
- 1 cup (120g) confectioners’ sugar
- 2 tablespoons pure maple syrup
- 1 tablespoon milk
Instructions
- Mix Wet Ingredients: In a large mixing bowl, whisk together melted butter, brown sugar, and maple syrup until the mixture is smooth and well combined.
- Add Egg and Vanilla: Add the egg and vanilla extract to the wet mixture, then mix until fully combined and slightly fluffy.
- Prepare Dry Ingredients: In a separate bowl, whisk together the all-purpose flour, baking soda, salt, and ground cinnamon to ensure even distribution of the leavening and spices.
- Combine Wet and Dry: Gradually add the dry ingredients into the wet ingredients, stirring gently until just combined to avoid overmixing and tough cookies.
- Chill Dough: Cover the cookie dough and refrigerate it for at least 2 hours or overnight to allow the flavors to meld and the dough to firm up for easier handling.
- Preheat Oven: Preheat your oven to 350°F (177°C) and line a baking sheet with parchment paper to prevent sticking and ensure even baking.
- Shape Cookies: Roll the chilled dough into 1.5-inch diameter balls and place them about 2 inches apart on the prepared baking sheet to allow for spreading.
- Bake Cookies: Bake the cookies for 11 to 13 minutes, or until the edges turn a light golden brown, indicating they are cooked through but still chewy inside.
- Cool Cookies: Remove from the oven and let the cookies cool on the baking sheet for 5 minutes before transferring them to a wire rack to cool completely.
- Prepare Maple Glaze: In a small bowl, whisk together the confectioners’ sugar, maple syrup, and milk until the glaze is smooth and pourable.
- Glaze Cookies: Drizzle the maple glaze over the cooled cookies and allow it to set before serving for a sweet finishing touch.
Notes
- Refrigerating the dough helps the cookies hold their shape and deepen in flavor.
- Use pure maple syrup for the best authentic flavor; imitation syrup won’t give the same rich taste.
- Cookies can be stored in an airtight container at room temperature for up to 5 days.
- For a stronger maple flavor, you can brush additional maple syrup on the cookies before glazing.
- Make sure not to overbake to keep the cookies soft and chewy.


