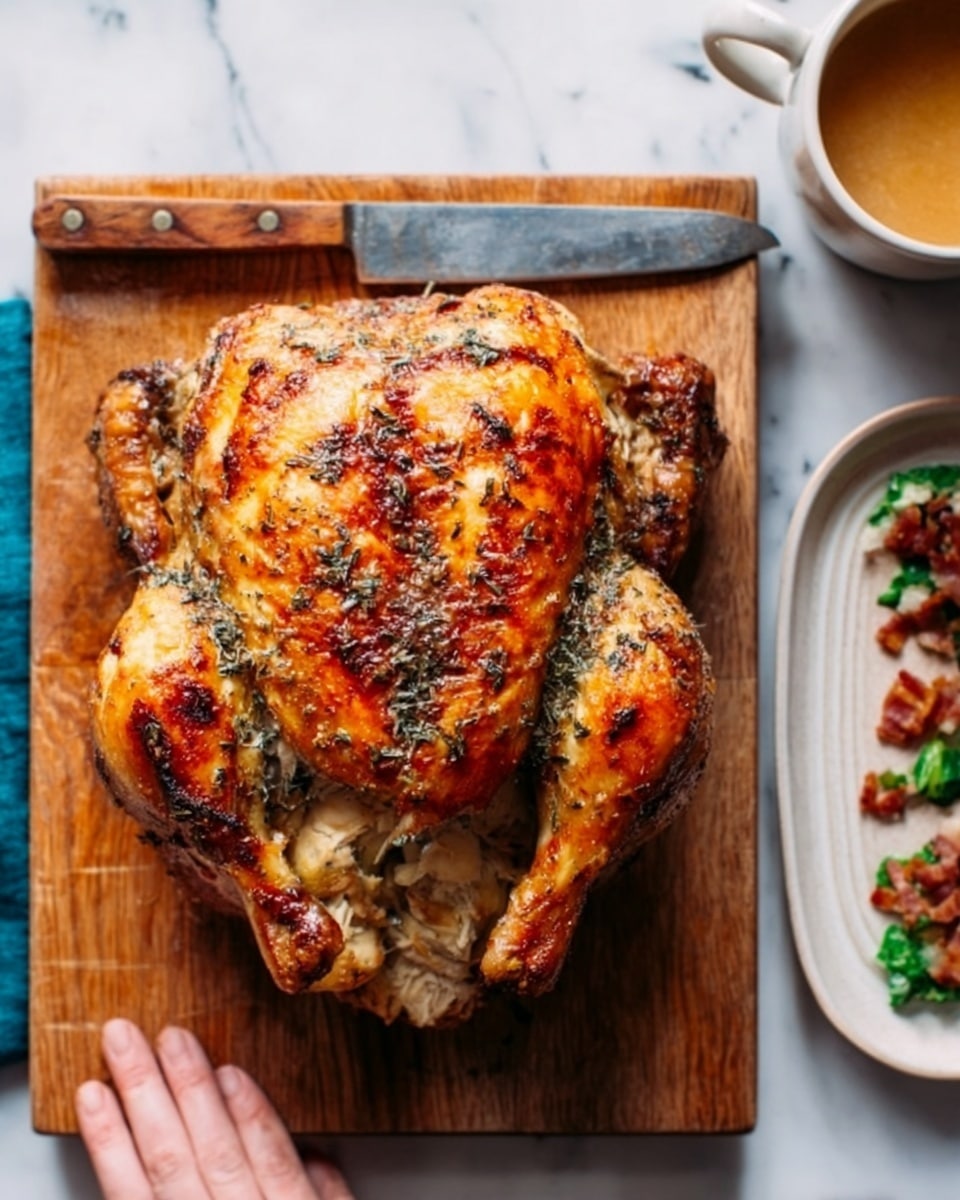
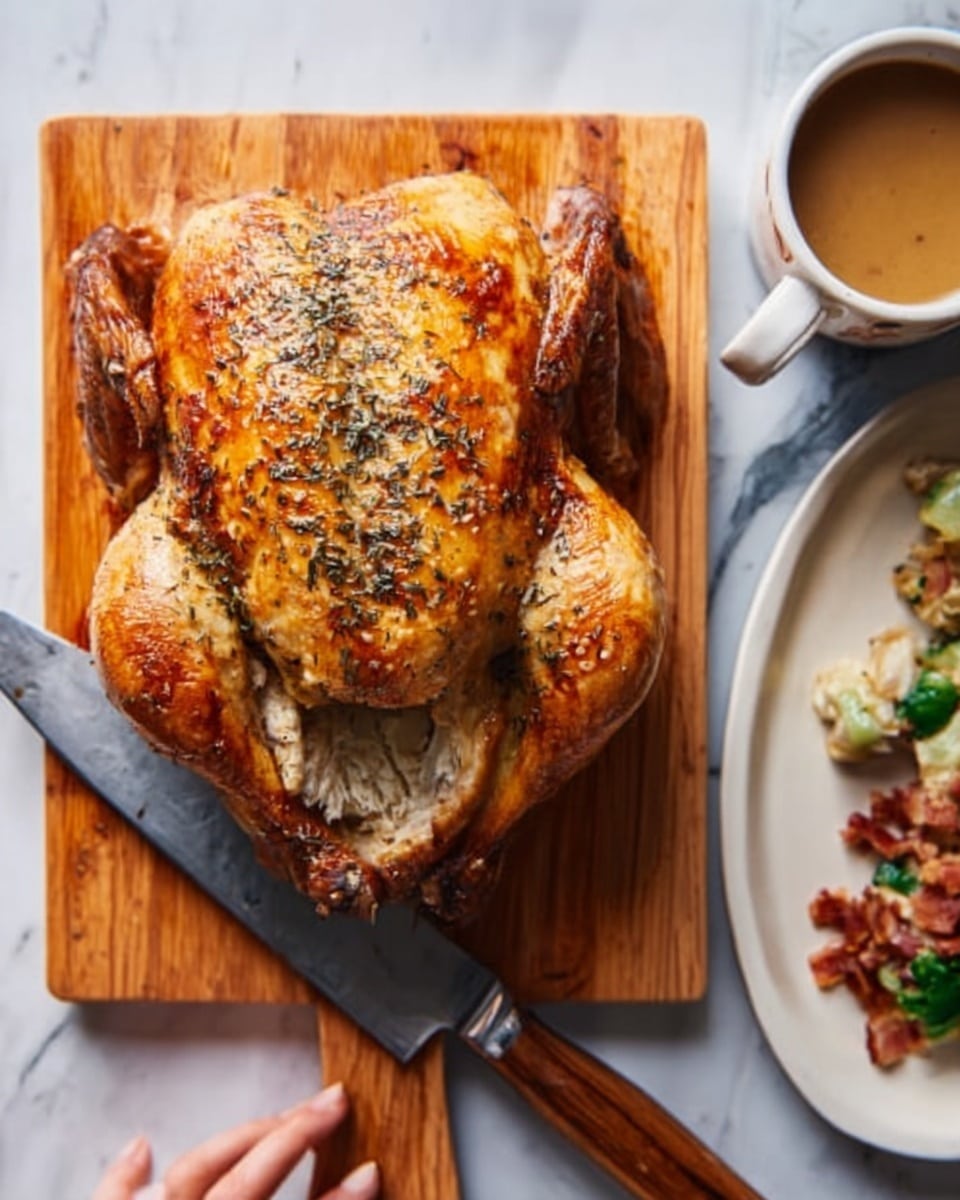
If you’ve ever dreamed of achieving a restaurant-worthy roast in your own kitchen, let me introduce you to the magic of the Crispy Spatchcock Turkey with Homemade Gravy Recipe. This brilliant technique unlocks perfectly even cooking and irresistibly crispy skin, while the homemade gravy made from the turkey’s own drippings brings a depth of flavor you won’t forget anytime soon. It’s a show-stopping centerpiece that feels both festive and approachable—ideal for a family feast, holiday gathering, or whenever you want to celebrate good food with loved ones.
Ingredients You’ll Need
The beauty of this recipe lies in its simplicity. Each ingredient plays an essential role in creating that mouthwatering blend of textures and flavors, from the savory aromatics to the golden, crisp turkey skin. Here’s what you’ll want to have ready before you get cooking:
- 3 large onions, roughly chopped: These provide a sweet, aromatic base that caramelizes beautifully under the turkey.
- 3 large carrots, peeled and roughly chopped: Adding a subtle earthiness and vibrant color to the roasting bed.
- 4 stalks celery, roughly chopped: Brings a fresh, green note to balance the root vegetables.
- 12 thyme sprigs: Fresh herbs infuse a lovely herbal aroma throughout the bird and gravy.
- 2 bay leaves: Essential for deepening the flavor of your homemade broth and gravy.
- 1 whole turkey (12 to 14 pounds), butterflied (spatchcocked): Removing the backbone allows the bird to lay flat, ensuring even cooking and crispier skin.
- 2 tablespoons vegetable oil, divided: Helps achieve that coveted crispy exterior without burning.
- Kosher salt and freshly ground black pepper: Fundamental for seasoning and enhancing all the natural flavors.
- 1 1/2 quarts low-sodium homemade or store-bought chicken or turkey broth: Forms the rich base of the gravy, balancing richness and savoriness.
- 3 tablespoons butter: Adds a silky smoothness and richness to the gravy.
- 4 tablespoons flour: Thickens the gravy to the perfect luscious consistency.
How to Make Crispy Spatchcock Turkey with Homemade Gravy Recipe
Step 1: Prepare Oven and Vegetables
First things first: preheat your oven to a scorching 450°F (230°C) and adjust the oven rack to the middle position to give your turkey room to breathe and crisp up beautifully. Line a rimmed baking sheet or broiler pan with aluminum foil for easy clean-up. Scatter two-thirds of the chopped onions, carrots, celery, and thyme sprigs evenly over the pan bottom. This makes a fragrant, flavorful bed for the turkey to roast on, also helping to keep it elevated and cooked evenly when you place a slotted broiler or wire rack on top.
Step 2: Prepare Turkey
Pat your spatchcocked turkey completely dry using paper towels—this step is key to achieving that prized crispy skin. Rub the bird all over with 1 tablespoon of vegetable oil, then season generously with kosher salt and freshly ground black pepper on every surface. Tuck those wing tips neatly behind the back to prevent burning during roasting. Place the turkey on the rack, pressing down gently on the breastbone to flatten the breasts slightly, which encourages even cooking between the legs and breast.
Step 3: Roast Turkey
Slip your turkey into the oven and roast it with confidence, rotating the pan occasionally for even browning. Use a meat thermometer to check for doneness: you’re aiming for 150°F (66°C) in the deepest part of the breast and at least 165°F (74°C) in the thighs. This precise temperature control guarantees juicy meat without drying out. It usually takes about 80 minutes, but keep an eye on your turkey’s progress because ovens vary.
Step 4: Make Gravy Base
While the turkey is achieving that perfect roast, chop the reserved neck, backbone, and giblets. Heat the remaining tablespoon of vegetable oil in a 3-quart saucepan on high heat until shimmering. Add the chopped turkey parts and cook until lightly browned, stirring occasionally—this builds intense, savory flavor for your gravy. Toss in the remaining onions, carrots, and celery next, cooking until they soften and develop some brown spots.
Step 5: Simmer Broth
Add your broth, the remaining thyme sprigs, and the bay leaves to the pan. Bring everything to a boil, then cut the heat back to a gentle simmer uncovered for about 45 minutes. This slow cooking extracts the deep flavors you want in a gravy. Once time is up, strain the broth through a fine-mesh sieve, discard the solids, and skim off any fat to keep your gravy smooth and refined.
Step 6: Prepare Gravy
In a separate 2-quart saucepan, melt butter over medium-high heat. Stir in flour and cook it constantly until it turns a golden brown, which builds a beautiful nutty flavor and smooth texture for your gravy. Gradually whisk in the strained broth in a thin, steady stream to avoid lumps. Bring the gravy to a boil; then reduce heat and simmer until it thickens and reduces to about 1 quart—usually about 20 minutes. Finish by seasoning with salt and pepper to taste, then keep it warm.
Step 7: Rest Turkey and Finish Gravy
After roasting, transfer your turkey to a fresh baking sheet and let it rest at room temperature for 20 minutes. Resting allows the juices to redistribute, keeping every bite moist. Meanwhile, strain the pan juices collected during roasting and skim off excess fat. Whisk these luscious juices into your prepared gravy to boost flavor and create a perfect harmony between turkey and sauce.
Step 8: Carve and Serve
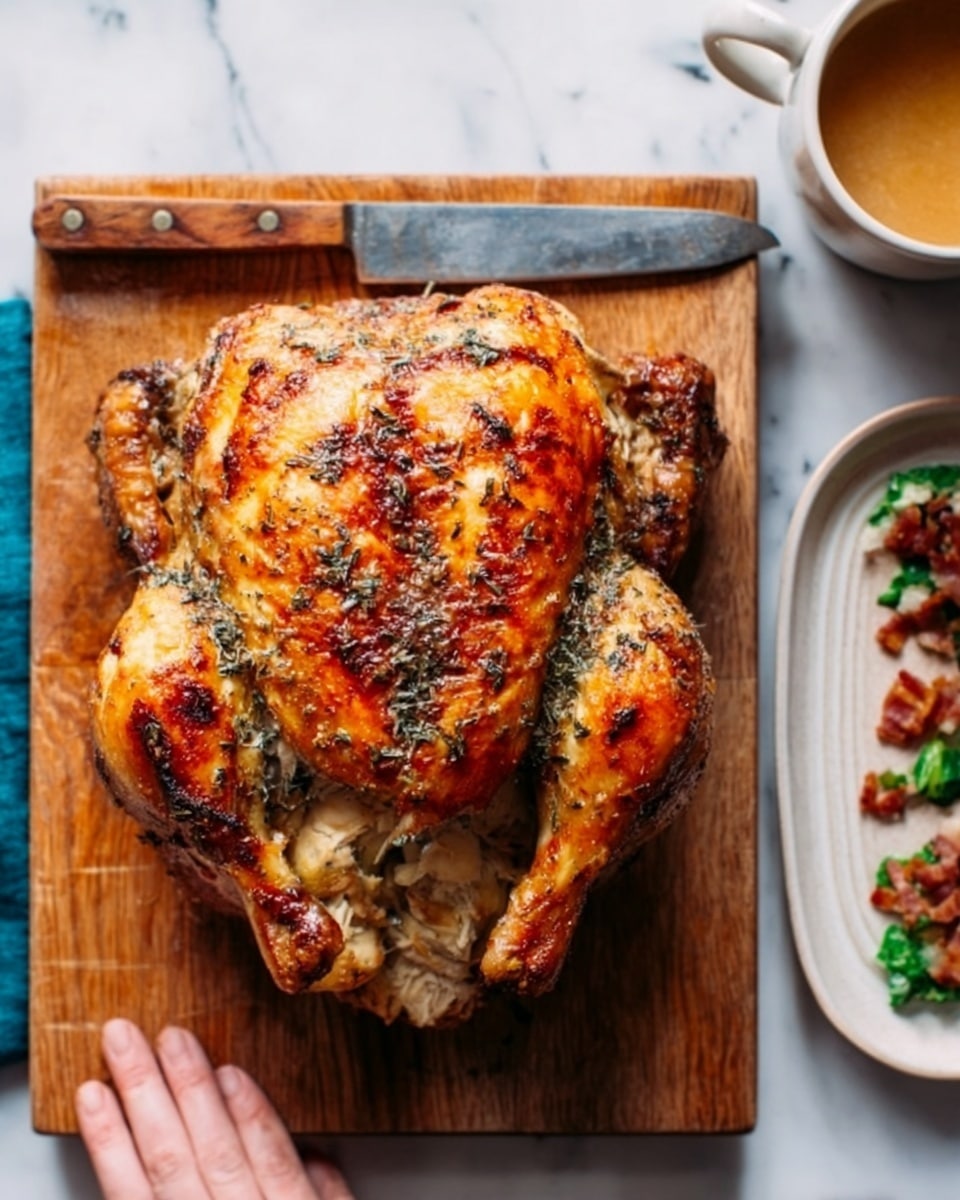
Now comes the rewarding part: carve your rested turkey and plate it alongside the rich homemade gravy you lovingly prepared. This Crispy Spatchcock Turkey with Homemade Gravy Recipe delivers a crisp golden skin, juicy tender meat, and gravy that’s the perfect complement—guaranteed to impress your guests and make any occasion extra special.
How to Serve Crispy Spatchcock Turkey with Homemade Gravy Recipe
Garnishes
Fresh herbs like sprigs of thyme or rosemary make stunning garnishes that echo the flavors infused during roasting. For a pop of color and nuance, scatter some finely chopped parsley or a few pomegranate seeds around the serving platter. A light squeeze of fresh lemon over the carved turkey just before serving can brighten the rich flavors and add a refreshing twist.
Side Dishes
This turkey pairs wonderfully with classic autumnal sides like roasted Brussels sprouts, creamy mashed potatoes, or herbed stuffing. For a lighter touch, try a crisp green salad tossed with toasted nuts and a tangy vinaigrette. Don’t forget crusty bread to soak up every bit of that amazing homemade gravy!
Creative Ways to Present
If you want to wow your guests visually, carve the bird at the table, letting them savor the anticipation of juicy turkey slices. Arrange the turkey pieces on a large wooden cutting board with bowls of gravy and sides artistically placed nearby. You can also create a rustic display with whole roasted root vegetables and fresh herbs strewn around the serving dish for a feast that’s as pleasing to the eye as it is to the palate.
Make Ahead and Storage
Storing Leftovers
After your feast, wrap leftover turkey tightly in aluminum foil or store in airtight containers to keep the meat moist. Refrigerate within two hours of cooking to ensure food safety and freshness. The homemade gravy should be stored separately in its own container to maintain its silky texture.
Freezing
If you want to save some for future meals, turkey meat freezes well for up to 3 months. Remove the meat from the bones and place in freezer-safe bags or containers with as little air as possible. Freeze your homemade gravy in ice cube trays for individual portions, then transfer cubes to a freezer bag for convenient thawing later.
Reheating
Reheat turkey gently in the oven at low heat (around 300°F or 150°C) covered with foil to prevent drying out. For gravy, warm it on the stovetop over low heat, stirring occasionally, adding a splash of broth or water if it thickens too much. This care will bring leftovers back to life without sacrificing flavor or texture.
FAQs
What is spatchcocking and why is it used for turkey?
Spatchcocking is a technique where the backbone of the turkey is removed so it can be flattened out. This allows the bird to cook more evenly and much faster than a traditional roast, while also creating more surface area for crispy skin.
Can I use this recipe with a smaller turkey or chicken?
Absolutely! The method and flavors translate beautifully to smaller birds like a 6- to 8-pound turkey or even a whole chicken. Just adjust roasting times accordingly and always rely on a meat thermometer to ensure safe cooking.
How do I know when the turkey is perfectly cooked?
The most reliable way is to use an instant-read thermometer—150°F in the breast and 165°F in the thigh indicate doneness. If you don’t have a thermometer, make sure juices run clear when piercing the thickest part of the thigh.
Can I make the homemade gravy ahead of time?
Yes! You can prepare the gravy base a day in advance and refrigerate it. When ready to serve, reheat and whisk it gently, adding any fresh pan drippings if you have them for extra richness.
What if I don’t have fresh herbs like thyme or bay leaves?
Dried herbs can be used in a pinch—just reduce the amount by half since dried herbs are more concentrated. While fresh herbs offer the brightest flavors, dried will still impart delicious depth to your gravy and turkey aroma.
Final Thoughts
There’s truly nothing like the satisfaction of carving into a golden, crispy spatchcock turkey paired with rich, silky homemade gravy. This Crispy Spatchcock Turkey with Homemade Gravy Recipe is not just a dish; it’s an experience that brings warmth and joy to the table. Whether for a special occasion or just a memorable weekend meal, I promise this recipe will become one you reach for again and again. Happy cooking and even happier feasting!
Print
Crispy Spatchcock Turkey with Homemade Gravy Recipe
- Prep Time: 20 minutes
- Cook Time: 1 hour 35 minutes
- Total Time: 1 hour 55 minutes
- Yield: 10 servings
- Category: Main Course
- Method: Roasting
- Cuisine: American
Description
This Crispy Spatchcock Turkey recipe delivers a perfectly roasted, golden-brown bird with tender and juicy meat. The turkey is butterflied for even cooking and served with rich homemade gravy made from the turkey’s neck, backbone, giblets, and fresh vegetables, creating a classic and flavorful meal ideal for holidays or special occasions.
Ingredients
Vegetables and Herbs
- 3 large onions, roughly chopped (about 1 1/2 quarts)
- 3 large carrots, peeled and roughly chopped (about 1 quart)
- 4 stalks celery, roughly chopped (about 1 quart)
- 12 thyme sprigs
- 2 bay leaves
Turkey
- 1 whole turkey (12 to 14 pounds total), butterflied (spatchcocked), backbone, neck, and giblets reserved
- Kosher salt, to taste
- Freshly ground black pepper, to taste
Cooking Fats and Broth
- 2 tablespoons vegetable oil, divided
- 1 1/2 quarts low-sodium homemade or store-bought chicken or turkey broth
- 3 tablespoons butter
- 4 tablespoons flour
Instructions
- Prepare Oven and Vegetables: Adjust the oven rack to the middle position and preheat the oven to 450°F (230°C). Line a rimmed baking sheet or broiler pan with aluminum foil. Scatter two-thirds of the chopped onions, carrots, celery, and thyme sprigs evenly across the bottom of the pan. Place a slotted broiler rack or wire rack directly on top of the vegetables to hold the turkey during roasting.
- Prepare Turkey: Pat the spatchcocked turkey dry thoroughly with paper towels to ensure crispy skin. Rub all surfaces of the turkey with 1 tablespoon of vegetable oil. Season generously with kosher salt and freshly ground black pepper on all sides. Tuck the wing tips behind the back to prevent burning. Place the turkey on the prepared rack, pressing down on the breastbone to flatten the breasts slightly, ensuring even cooking.
- Roast Turkey: Transfer the turkey to the oven and roast for approximately 80 minutes, rotating the pan occasionally for even heat exposure. Use a meat thermometer to check doneness: the breast should reach 150°F (66°C) and the thighs at least 165°F (74°C).
- Make Gravy Base: While the turkey roasts, roughly chop the reserved neck, backbone, and giblets. Heat the remaining 1 tablespoon of vegetable oil in a 3-quart saucepan over high heat until shimmering. Add the chopped turkey parts and cook, stirring occasionally, until lightly browned, about 5 minutes. Add the remaining onions, carrots, and celery; cook and stir occasionally until the vegetables soften and brown in spots, about 5 more minutes.
- Simmer Broth: Add the 1 1/2 quarts of chicken or turkey broth, remaining thyme sprigs, and bay leaves to the saucepan. Bring to a boil, then reduce heat to a bare simmer. Cook uncovered for 45 minutes to fully extract flavors. Strain the mixture through a fine-mesh strainer into a 2-quart measuring cup, discarding solids and skimming off any fat from the surface.
- Prepare Gravy: In a clean 2-quart saucepan, melt the butter over medium-high heat. Whisk in the flour and cook constantly until the roux turns golden brown, about 3 minutes. Gradually whisk in the strained broth in a thin, steady stream until fully combined. Bring to a boil, then reduce heat to a simmer. Cook until the gravy thickens and reduces to about 1 quart, approximately 20 minutes. Season the gravy with salt and pepper to taste, then cover and keep warm.
- Rest Turkey and Finish Gravy: When the turkey is cooked, remove it from the oven and transfer the rack to a new baking sheet. Let the turkey rest at room temperature for 20 minutes prior to carving. Carefully pour any collected pan juices through a fine-mesh strainer into a liquid measuring cup, skimming off excess fat. Whisk these juices into the prepared gravy to enhance the flavor and richness.
- Carve and Serve: Carve the rested turkey and serve slices with the warm homemade gravy for a delicious, elegant meal that highlights the crispy skin and juicy meat balanced with savory gravy.
Notes
- Spatchcocking the turkey helps it cook faster and more evenly while producing crispy skin.
- Use a meat thermometer to ensure the turkey is cooked safely and does not dry out.
- Reserve the neck, backbone, and giblets to create a flavorful homemade gravy.
- Resting the turkey after roasting allows juices to redistribute for moist meat.
- Adjust seasoning of gravy at the end to suit your taste preferences.
- If desired, add a splash of white wine or brandy to the gravy for additional depth of flavor.
- Leftover gravy can be refrigerated for up to 3 days or frozen for longer storage.

