

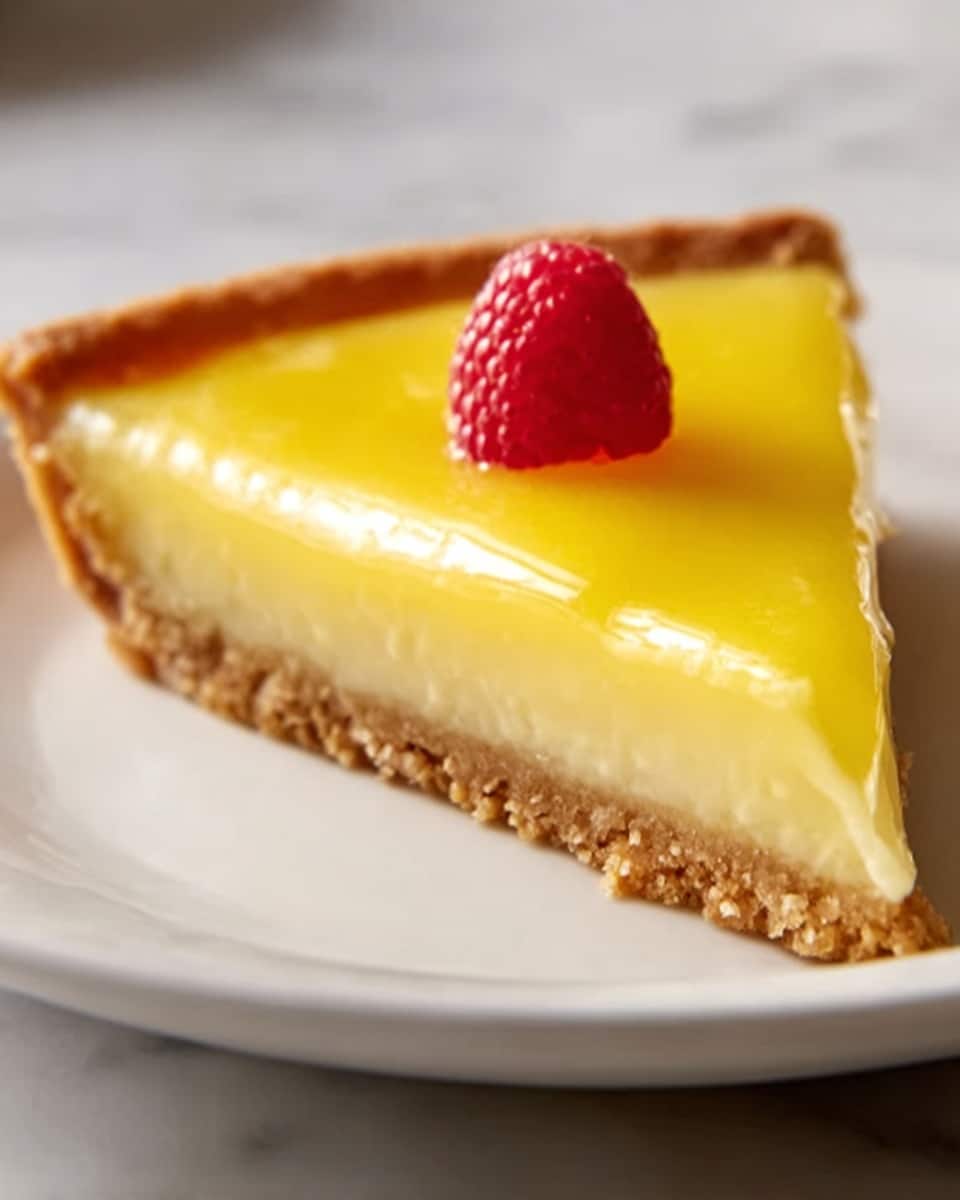
If you have a weakness for that perfect balance of tart and sweet, then you are about to fall head over heels for this Perfect Lemon Tart Recipe. It’s the ultimate dessert that pairs a crisp, buttery crust with a luxuriously smooth lemon filling that bursts with fresh citrus flavor. This tart isn’t just visually stunning with its vibrant yellow hue and delicate garnishes, it’s also incredibly satisfying with every silky bite melting in your mouth. Whether for a special occasion or as a well-deserved treat, this lemon tart will quickly become your go-to recipe for impressing friends and family.

Ingredients You’ll Need
The beauty of this recipe lies in its simplicity; these essential ingredients come together to create a complex blend of textures and flavors that make the Perfect Lemon Tart Recipe so memorable. Each component from buttery crust to tangy filling plays a vital role in delivering that signature taste.
- All-purpose flour: Provides structure and tenderness to the crust and filling thickening.
- Granulated sugar: Adds sweetness while balancing the tartness of the lemon.
- Salt: Enhances flavor and balances sweetness in both crust and filling.
- Cold unsalted butter: Gives the crust its flaky, rich texture.
- Large egg yolks: Offer richness and help thicken the lemon filling.
- Ice water: Helps bind the crust dough without warming the butter.
- Cornstarch: Key to thickening the luscious lemon filling smoothly.
- Fresh lemon juice: The star of the show, delivering vibrant and fresh citrus flavor.
- Lemon zest: Adds an intense, aromatic lemon essence.
- Heavy cream: Whipped to fluffy perfection to top the tart with creamy softness.
- Vanilla extract: Adds warmth and depth to the whipped cream topping.
- Fresh berries (optional): Add beautiful color and a burst of natural sweetness.
How to Make Perfect Lemon Tart Recipe
Step 1: Prepare the Crust
Start by whisking together your flour, sugar, and salt in a bowl. Then, add the cold butter pieces and use a pastry cutter or your fingertips to blend until the mixture looks like coarse breadcrumbs. This ensures you’ll get that perfect flaky texture. Next, stir in the egg yolk and ice water just until the dough forms a cohesive ball. Be careful not to overwork it to keep the crust tender. Wrap your dough with plastic wrap and pop it into the fridge for at least an hour; chilling is important to help prevent shrinking when baked.
Step 2: Bake the Crust
Preheat your oven to 375°F (190°C). Roll out the chilled dough on a lightly floured surface and gently press it into a 9-inch tart pan, trimming any excess dough from the edges. Place the filled pan back in the refrigerator for a brief 20 minutes to chill and firm up, which will help it hold its shape. Line the tart shell with parchment paper and fill it with pie weights or dried beans, then bake for 20 minutes. Remove the weights and bake for an additional 5 to 10 minutes until golden brown and firm. Set the crust aside to cool completely before adding the filling.
Step 3: Make the Filling
In a medium saucepan, whisk together the sugar, cornstarch, flour, and salt. Gradually pour in water, stirring continuously to avoid lumps, and cook over medium heat until the mixture thickens, approximately 3 to 5 minutes. Reduce the heat and whisk in the egg yolks, cooking another 2 minutes until perfectly creamy and smooth. Remove from heat and stir in the butter, fresh lemon juice, and lemon zest. This lemon filling is the heart of the Perfect Lemon Tart Recipe — tangy, silky, and bursting with citrus sunshine.
Step 4: Assemble the Tart
Carefully pour the warm lemon filling into the cooled crust, smoothing the top with a spatula for an even layer. Cover the tart and refrigerate for at least 4 hours, allowing the filling to fully set into that luxurious, custard-like texture. Patience here truly pays off—you’ll be rewarded with a slice that holds firm and feels incredibly indulgent on the palate.
Step 5: Prepare the Whipped Cream
While the tart chills, whip the heavy cream with sugar and vanilla extract until stiff peaks form. This luscious whipped cream adds a dreamy lightness to each bite and balances the zesty filling with a hint of sweetness and velvety texture.
Step 6: Serve
Just before serving, top your tart generously with the whipped cream and scatter fresh berries on top if you like for a pop of color and freshness. Slice and watch the smiles spread—this is comfort dessert elevated to an art form.
How to Serve Perfect Lemon Tart Recipe
Garnishes
Fresh berries such as raspberries, blueberries, or strawberries not only add vibrant hues but also provide a natural sweetness that complements the tart lemon perfectly. A light dusting of powdered sugar or thin lemon zest curls can further elevate the tart’s elegant appearance without stealing the spotlight from its bright flavor.
Side Dishes
Perfect with a cup of aromatic tea or a glass of crisp white wine, the Perfect Lemon Tart Recipe pairs beautifully with simple accompaniments that don’t overwhelm its delicate balance. Light salads or fresh fruit make wonderful sides for a spring or summer gathering, while coffee or espresso offers a lovely contrast for an after-dinner treat.
Creative Ways to Present
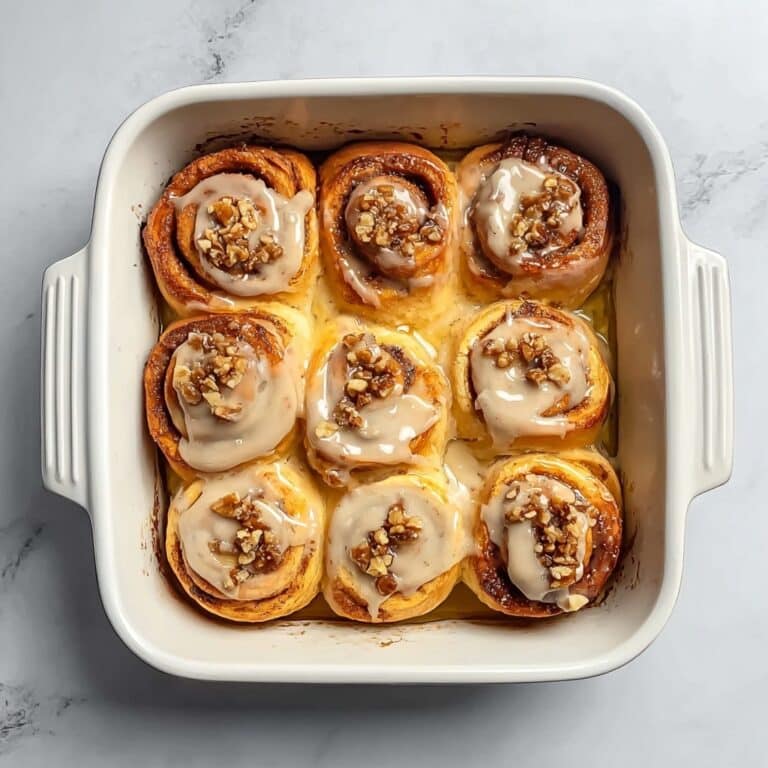
For an extra special touch, serve individual tartlets using mini tart pans, or arrange slices on a platter with edible flowers for a stunning centerpiece. You can also pipe whipped cream in decorative swirls or serve alongside lemon-infused meringue kisses for a playful complement.
Make Ahead and Storage
Storing Leftovers
Leftover lemon tart should be refrigerated in an airtight container for up to 3 days. Keep it chilled to maintain the filling’s firmness and the crust’s crispness, ensuring every bite stays fresh and delightful.
Freezing
You can freeze the crust baked separately if you want to save time later, wrapping it tightly in plastic wrap and foil for up to 1 month. However, the filled tart doesn’t freeze well due to its delicate custard texture, which can become watery upon thawing.
Reheating
The Perfect Lemon Tart Recipe is best enjoyed cold, so reheating is not recommended. Instead, take it out of the fridge about 10 minutes before serving to let the flavors mellow just slightly; this warming time enhances the citrus notes beautifully.
FAQs
Can I make the crust gluten-free?
Absolutely! Substitute the all-purpose flour with a gluten-free flour blend designed for baking. Keep in mind the texture may vary slightly, but it will still yield a delicious crust for your lemon tart.
What if I don’t have fresh lemons?
Fresh lemon juice and zest are key to achieving that vibrant tang in this recipe, so it’s best to use fresh lemons. Bottled lemon juice lacks the brightness and depth of flavor necessary for the perfect tart.
Can I use a store-bought pie crust instead?
You can, especially if short on time, but homemade crust really elevates this tart and gives a superior flaky texture that’s hard to beat. If using store-bought, opt for a high-quality brand and blind bake it before adding the filling.
Is it okay to substitute heavy cream for whipped topping?
Heavy cream is preferred for its rich mouthfeel and ability to whip into stiff peaks naturally. Whipped topping might work in a pinch but won’t provide the same fresh creaminess or hold up as well when piped or spread.
How do I prevent the crust from shrinking?
Chilling the dough before baking and again after pressing it into the tart pan is crucial. Also, using pie weights during blind baking helps keep the crust’s shape intact without shrinking or puffing up.
Final Thoughts
There truly is something magical about making the Perfect Lemon Tart Recipe from scratch. It brings that fresh, zesty burst of sunshine to your table and feels like a little celebration of simple, quality ingredients. Once you make it, you’ll want to share it with everyone you know—because some flavors are just too good to keep to yourself. Go ahead, give this recipe a try, and get ready for your new favorite go-to dessert!
Print
Perfect Lemon Tart Recipe
- Prep Time: 1 hour 15 minutes
- Cook Time: 35 minutes
- Total Time: 4 hours 50 minutes
- Yield: 8 servings
- Category: Dessert
- Method: Baking
- Cuisine: French
Description
This Perfect Lemon Tart recipe offers a deliciously tangy and creamy lemon filling nestled in a crisp, buttery tart crust. Topped with light whipped cream and fresh berries, it’s an elegant dessert that balances sweet and tart flavors beautifully, ideal for gatherings or special occasions.
Ingredients
Crust
- 1 cup all-purpose flour
- 2½ tbsp granulated sugar
- ¼ tsp salt
- 6 tbsp cold unsalted butter, cut into pieces
- 1 large egg yolk
- 4 tsp ice water
Filling
- 1¼ cups granulated sugar
- ⅓ cup cornstarch
- 2 tbsp all-purpose flour
- ½ tsp kosher salt
- 5 large egg yolks
- ¼ cup unsalted butter
- ¼ cup fresh lemon juice
- 1 tbsp lemon zest
Whipped Cream Topping
- 1¼ cups heavy cream
- 2 tbsp granulated sugar
- 1 tsp vanilla extract
Optional Garnish
- Fresh berries
Instructions
- Prepare the Crust: In a mixing bowl, whisk together the all-purpose flour, granulated sugar, and salt. Add the cold unsalted butter pieces, cutting them into the flour mixture with a pastry cutter or your fingers until the texture resembles coarse crumbs. Stir in the egg yolk and ice water, mixing gently until the dough starts to come together. Wrap the dough tightly in plastic wrap and chill it in the refrigerator for 1 hour to firm up.
- Bake the Crust: Preheat your oven to 375°F (190°C). On a lightly floured surface, roll out the chilled dough and press it evenly into a 9-inch tart pan. Trim any excess dough from the edges. Place the tart shell back in the fridge to chill for 20 minutes, which helps prevent shrinking during baking. Line the tart shell with parchment paper and fill with pie weights or dried beans to weigh it down. Bake for 20 minutes, then remove the weights and parchment and bake for an additional 5-10 minutes until the crust turns golden brown. Remove from the oven and let it cool completely.
- Make the Filling: In a medium saucepan, whisk together granulated sugar, cornstarch, all-purpose flour, and kosher salt. Slowly add water (approximately 1⅓ cups based on typical lemon curd recipes) while stirring continuously. Cook over medium heat, stirring often, until the mixture thickens, about 3-5 minutes. Reduce the heat to low and whisk in the five egg yolks, cooking and stirring continuously for another 2 minutes to thicken further without curdling. Remove from heat and immediately stir in the unsalted butter, fresh lemon juice, and lemon zest until the filling is smooth and glossy.
- Assemble the Tart: Pour the warm lemon filling into the cooled tart crust, spreading it evenly. Smooth the top with a spatula. Place the tart in the refrigerator and chill for at least 4 hours, preferably longer, to allow the filling to fully set and develop flavor.
- Prepare the Whipped Cream: Using a mixer, beat the heavy cream, granulated sugar, and vanilla extract until stiff peaks form, indicating the cream holds shape well without being broken down.
- Serve: Once the tart is set, top it with dollops or piped swirls of the whipped cream. Garnish with fresh berries for a pop of color and extra freshness. Slice carefully and serve chilled for a perfect balance of tart and sweet flavors.
Notes
- Chilling the crust dough before rolling helps prevent shrinking during baking.
- Pie weights or dried beans will keep the crust from puffing up during blind baking.
- Be attentive while cooking the filling to avoid scrambling the eggs; constant stirring is key.
- Use fresh lemon juice and zest for the brightest, most flavorful filling.
- The tart needs sufficient chilling time to set properly and develop the best texture.
- For a gluten-free version, substitute all-purpose flour in the crust and filling with a gluten-free flour blend.


